How to Install a Saniflo Toilet: Step-by-Step Guide for DIYers
To install a Saniflo toilet, start by understanding that it uses a macerator to grind waste and pump it through small pipes, making it perfect for areas without gravity drainage. Begin by measuring clearances and confirming access to electrical and water sources. Next, mount the unit, connect the toilet outlet, and route the discharge pipe with the right slope and fittings. After installation, test for leaks, prime the macerator, and adhere to the maintenance schedule. Additional guidance includes troubleshooting tips, model selection advice, and important safety and code information.
What a Saniflo Toilet Is and When to Choose One
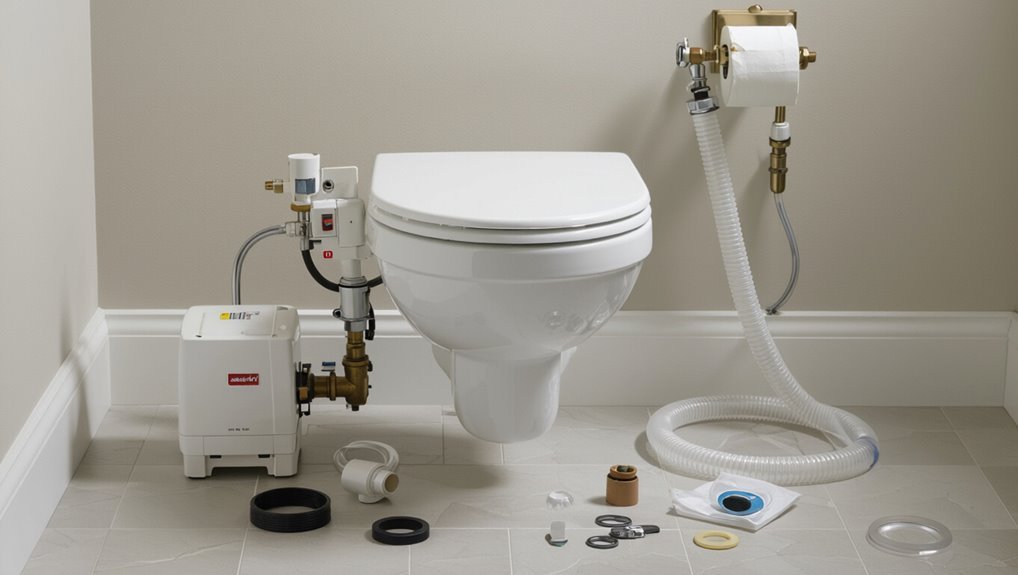
A Saniflo toilet is a macerating system that grinds waste and pumps it through small-diameter pipe, allowing fixtures to be located away from conventional soil stacks.
It is commonly chosen for basements, additions, or remote bathrooms where gravity drainage or extensive plumbing would be impractical.
Homeowners should weigh benefits like flexible placement and lower renovation cost against drawbacks such as mechanical parts, potential noise, and reliance on power.
How macerating toilets differ from standard toilets
Several key features distinguish macerating toilets from standard gravity-flush models: macerators grind waste into a slurry and pump it through small-diameter discharge lines, allowing installation away from soil stacks and below-stall fixtures.
They require electrical power, quieter units reduce noise, and maintenance centers on blade and pump care.
Readers following how to install a Saniflo toilet should note these operational and service differences.
Common use cases for Saniflo models (basements, additions, remote bathrooms)
When conventional plumbing is impractical or too costly, Saniflo macerating toilets enable bathrooms in basements, additions, and other remote locations by grinding waste and pumping it through small-diameter discharge lines to reach existing soil stacks.
Typical applications include finished basements, attic or garage conversions, guest suites, and detached workshops. They suit retrofit situations, tight layouts, and where trenching or major drain rework would be disruptive.
Pros and cons of installing a Saniflo toilet
Although compact and convenient for hard-to-plumb locations, a Saniflo toilet is a specialized macerating and pump-driven system whose advantages and trade-offs should be weighed against conventional gravity-flow fixtures.
Benefits include flexible placement, minimal invasive plumbing, and faster installation.
Drawbacks include reliance on electricity, potential for noise, higher maintenance or repair costs, and limited longevity compared with standard gravity toilets.
Tools, Materials, and Safety Preparations
Before beginning the installation, the installer should gather required tools (wrench, screwdriver, level, saw, drill) and consider recommended extras like sealant, slip couplings, and a wet/dry vac.
They should verify which parts and consumables come with the Saniflo kit—pump unit, fittings, gaskets, and mounting hardware—to avoid last-minute trips.
Finally, the installer must review local plumbing codes and basic safety precautions, including power isolation and proper PPE, to guarantee a compliant and safe job site.
Required tools and recommended extras
A clear set of tools, materials, and safety items guarantees the Saniflo toilet installation proceeds smoothly and without unnecessary delays.
Essential hand and power tools, sealants, and protective gear prepare any DIYer for efficient work. Recommended extras improve access and comfort during installation:
- Adjustable wrench, screwdriver set, drill
- Hole saw, PVC cutter, basin wrench
- Silicone sealant, plumber’s tape
- Safety glasses, gloves, knee pads
Parts and consumables included with most Saniflo kits
Most Saniflo kits arrive with a standardized selection of components and single-use consumables to guarantee a complete and watertight installation.
The kit typically includes essential mechanical parts, seals, and connectors, plus small consumables for immediate assembly.
- Macerator unit with mounting hardware
- Toilet bowl, seat, and gaskets
- Discharge pipe, elbows, and clamps
- Silicone sealant and spare O-rings
Safety precautions and plumbing codes to check before starting
With the kit laid out, attention shifts to safety and local plumbing requirements that govern installation.
The installer should confirm local codes, permitted discharge locations, and required permits.
Verify electrical grounding, GFCI protection, and proper venting.
Use PPE, isolate water and power, and follow manufacturer torque and sealing specs.
When unsure, consult a licensed plumber or inspector before proceeding.
Selecting the Right Saniflo Model and Accessories
Selecting the appropriate Saniflo model requires comparing capacity and noise ratings to the fixture location and expected usage.
Attention must also be paid to required fittings, discharge pipe diameter, and the presence of check valves to guarantee compatible plumbing connections.
Finally, the installer should weigh the trade-offs between an integrated macerator behind the toilet and a remote macerator regarding space, noise placement, and maintenance access.
Matching model capacity and noise levels to your needs
Because Saniflo models vary in discharge capacity and sound output, matching those specifications to the planned installation is essential: choose a unit whose pump size handles expected daily use and waste volume, and verify published noise ratings and available silencers when quiet operation is a priority.
Consider household size, fixture frequency, and water temperature; opt for higher-capacity units for multi-bath installations and quieter models near living spaces.
Required fittings, discharge pipe size, and check valves
After choosing a Saniflo model that meets capacity and noise requirements, attention turns to the plumbing components that will make the installation function reliably. Required fittings include solvent-weld adapters, flexible connectors and proper clamps. Discharge pipe is typically 22–32 mm or 1″–1¼” depending on model; a check valve prevents backflow. Choose parts rated for macerator pressure and local code.
| Component | Purpose |
|---|---|
| Solvent-weld adapter | Secure connection |
| Flexible connector | Vibration isolation |
| Check valve | Prevent backflow |
| Discharge pipe | Carry effluent |
| Clamps | Secure joints |
Choosing between macerator unit behind toilet vs. remote macerator
Which macerator placement best fits the bathroom’s layout and service needs depends on space, noise tolerance, and access for maintenance.
A unit directly behind the toilet saves piping and simplifies installation but can be louder and harder to service in tight enclosures.
A remote macerator reduces audible operation near fixtures, offers easier access, and requires longer discharge runs and careful mounting.
Pre-Installation Checklist and Site Preparation
Before beginning installation, the installer verifies clearances, floor strength, and access space for future maintenance.
They identify the water supply location and plan the discharge outlet route to guarantee proper connections.
Electrical needs, including GFCI placement, are confirmed to meet the Saniflo model’s specifications.
Measuring clearances, floor strength, and access for maintenance
A clear, accurate survey of the installation site is essential: measure toilet-to-wall and side clearances, confirm ceiling height for discharge piping runs, verify floor flatness and load capacity where the macerator will sit, and plan access space for routine maintenance and pump removal.
Check for nearby obstructions, guarantee service panels or removable covers fit, and mark mounting points and reinforcement needs before proceeding.
Locating water supply and discharge outlet routes
With mounting points and service clearances marked, attention shifts to mapping the water supply and discharge outlet routes that will feed and evacuate the Saniflo system.
Identify cold‑water shutoff proximity, pipe sizes, and routing to minimize bends.
Trace the macerator discharge path to the main soil stack or external drain, noting slope, access for cleaning, and any required wall or floor penetrations.
Confirming electrical requirements and GFCI placement
Several key electrical checks confirm the Saniflo unit will operate safely and reliably: verify the circuit voltage and amperage match the manufacturer’s requirements, confirm a dedicated branch circuit if specified, and identify the nearest GFCI-protected receptacle location that meets local code.
Inspect wiring condition, ascertain outlet placement allows unobstructed access, and plan conduit or wiring runs.
Consult a licensed electrician for compliance and permits.
Step-by-Step Installation Guide
The installation proceeds through a sequence of clear actions: shut off the water and drain existing fixtures, position the Saniflo toilet and mark anchor points, and install the macerator unit while connecting it to the toilet outlet.
Next, connect the waste discharge pipe to the drainage system.
Finally, hook up the water supply and install the filling valve to restore water to the unit.
Step 1 Turn off water and drain existing fixtures
Shut off the supply to the bathroom before removing any fixtures to prevent leaks and water damage.
The installer locates and closes the main or localized shutoff, then opens taps and flushes the toilet to empty lines.
A bucket and towels collect residual water.
If present, disconnect supply hose at shutoff valve and cap or plug lines to avoid drips during removal.
Step 2 Positioning the Saniflo toilet and marking anchor points
Center the Saniflo unit over the drain outlet and test-fit it in the designated orientation, ensuring the discharge elbow aligns with the soil pipe and the base sits flush on the floor.
Then, with the bowl correctly seated, mark the mounting hole locations and outline the perimeter to guide final placement.
Verify level front-to-back and side-to-side, confirm clearances for access panels, and note bolt and seal positions.
Step 3 Installing the macerator unit and connecting to the toilet outlet
Begin by positioning the macerator unit close to the marked toilet footprint so its inlet aligns with the toilet outlet and its discharge elbow faces the prepared soil pipe.
Confirm the unit sits level, the rubber inlet gasket is in place, and the mounting holes match the previously marked anchor points before proceeding to secure and seal the connections.
Fasten unit to floor anchors, attach toilet outlet to inlet with supplied coupling, tighten clamps, and apply sealant to visible joints.
Step 4 Connecting the waste discharge pipe to the drainage system
With the macerator secured and the toilet connected, the installer next prepares the discharge run by measuring the most direct route to the existing drainage line, confirming pipe diameter and slope requirements, and selecting compatible fittings and solvent or mechanical joints.
This guarantees the waste pipe will be properly aligned, adequately supported, and installed with the correct downwards gradient to prevent backflow or undue strain on the macerator discharge elbow.
The installer cuts, dry-fits, solvent-welds or tightens connections, secures piping with clips at proper spacing, checks slope with a level, and pressures tests the run for leaks before final insulation and concealment.
Step 5 Hooking up the water supply and filling valve
Installers now turn to the water supply and filling valve, a critical step that guarantees the toilet receives a reliable cold-water feed and the macerator’s internal cistern refills correctly after each flush.
They shut off the main, fit a compatible shutoff valve, connect a braided supply line to the filling valve, secure fittings with plumber’s tape, open supply, and check for steady, drip-free operation.
Step 6 Connecting electrical supply and testing the macerator
Power is connected and the macerator is tested to verify safe, reliable operation before finalizing installation. A grounded GFCI-protected outlet is used; wiring follows local code.
After plugging in, the unit is cycled with water and waste simulant to confirm pump activation, discharge flow, and absence of leaks or unusual noises.
Electrical connections are secured and inspected; any faults prompt troubleshooting or electrician consultation.
Step 7 Securing the toilet and sealing floor/wall penetrations
After confirming the macerator and electrical connections operate correctly, the installer proceeds to secure the toilet to its flange and to seal any floor or wall penetrations created by the discharge and vent lines.
Bolts are tightened evenly, wobble eliminated, and a suitable gasket or sealant applied.
Penetrations receive fire‑rated caulk or foam and a neat trim to prevent leaks, pests, and drafts.
Step 8 Final functional test and flushing sequence
Begin the final functional test by cycling the unit through its full flushing sequence and observing each stage for proper operation: macerator motor startup, pump activation, discharge flow, and automatic shutoff.
Verify water refill, bowl siphon, and absence of leaks at connections. Listen for unusual noises, confirm correct float/sensor function, and run multiple cycles to guarantee consistent performance and reliable discharge under normal load.
Common Problems During Installation and How to Fix Them
Installation can be complicated by a few recurring faults that installers should anticipate.
Common issues include poor macerator priming or no discharge, leaks at the toilet-to-macerator or pipe joints, and electrical or motor malfunctions.
Each problem has specific diagnostics and corrective steps to restore reliable operation.
Dealing with poor macerator priming or no discharge
Troubleshooting poor macerator priming or no discharge centers on verifying air, valve, and pump pathways to restore reliable flow:
Check for airlocks in the inlet or discharge lines, confirm the non-return (check) valve and gate valve position and integrity, and inspect the impeller and motor for blockages or mechanical failure.
Clear obstructions, bleed trapped air, replace faulty valves, and test electrical supply and motor function.
Fixing leaks at the toilet-to-macerator or pipe joints
Inspecting and repairing leaks at the toilet-to-macerator connection or along discharge piping requires a methodical approach that isolates the source, assesses the seal type, and applies the appropriate fix.
The technician tightens loose clamps, replaces degraded gaskets or O-rings, realigns misfitted joints, and uses recommended solvent-weld or silicone where specified.
After repair, pressure-test and observe for recurrence before finalizing installation.
Troubleshooting electrical and motor issues
When electrical or motor problems arise with a Saniflo unit, a systematic diagnostic routine isolates power, control, and mechanical causes quickly and safely.
Verify mains supply, fuse, and switch continuity; confirm correct wiring and secure connections.
Listen for motor hums or grinding; check for obstructions, seized impellers, or worn brushes.
Reset thermal cutouts and replace defective motors, controllers, or capacitors as needed.
Maintenance, Cleaning, and Long-Term Care
A clear maintenance plan helps keep a Saniflo toilet reliable and prevents costly repairs.
The article outlines a concise checklist with recommended intervals, specifies safe cleaning agents and chemicals to avoid, and explains when descaling or professional servicing of the macerator is required.
Following these guidelines preserves performance and extends the unit’s lifespan.
Routine maintenance checklist and intervals
Routine maintenance for a Saniflo toilet centers on a concise checklist of visual inspections, cleaning tasks, and functional tests performed at regular intervals to prevent buildup, odors, and mechanical wear.
Monthly and annual actions keep performance reliable.
- Inspect seals, hoses, and connections for leaks monthly.
- Test flush and macerator operation quarterly.
- Clear visible debris and vents monthly.
- Schedule professional service yearly for motor and valve checks.
Safe cleaning agents and what to avoid
After completing the monthly and annual checks, attention turns to cleaning agents that preserve Saniflo components without causing damage.
Mild, non-abrasive household cleaners, pH-neutral bathroom sprays, diluted vinegar solutions, and enzyme-based drain cleaners are acceptable.
Avoid bleach, concentrated acids, caustic drain unblockers, and abrasive pads that can corrode seals or damage plastics.
Rinse thoroughly after cleaning to prevent residue buildup.
When to descaling or service the macerator
How often should the macerator be descaled or serviced depends on water hardness, usage frequency, and the manufacturer’s recommendations.
Typical households usually require descaling every 6–12 months while inspections or professional servicing are advisable every 1–2 years or sooner if performance issues arise.
Routine checks for odors, reduced flush power, noises, or leaks signal earlier attention.
Use approved descalers and document service dates.
Cost Estimates, Time Investment, and When to Call a Pro
Typical DIY installation of a Saniflo toilet usually requires moderate plumbing skills and a few hours to a day, depending on site prep and familiarity with macerating units.
Parts and supplies commonly range from $300–$800, with professional labor adding $200–$800 or more based on complexity.
If the job involves old or corroded plumbing, persistent leaks, electrical complications, or local code concerns, a licensed plumber should be called.
Typical DIY time and skill level required
Estimating time, cost, and required skill helps determine whether a Saniflo toilet installation is a feasible DIY project or better left to a professional.
Typical DIYers with basic plumbing experience can complete a straightforward Saniflo install in 2–4 hours. Moderate tasks—cutting flooring, routing discharge lines—add time and require comfort with tools.
Call a pro for complex drains, electrical work, or uncertain permits.
Approximate parts and labor cost ranges
Budgeting for a Saniflo toilet installation hinges on parts, labor, and site-specific complexity. Typical DIY parts cost $300–$800; professional installs add labor. Estimated ranges:
| Item | Approximate Cost |
|---|---|
| Saniflo unit | $300–$800 |
| Fittings & hoses | $20–$100 |
| Miscellaneous materials | $10–$50 |
| Professional labor (per hour) | $75–$150 |
Red flags that mean you should hire a licensed plumber
Recognize situations where a Saniflo installation exceeds routine skill or risks property damage: complex plumbing layouts, lack of existing venting, buried or difficult-to-access discharge lines, signs of sewer line or structural issues, or local code requirements for licensed work.
Hire a licensed plumber when costs rise above basic parts, when expected labor exceeds a day, or when permits, diagnostic equipment, or guaranteed workmanship are needed.
Tips to Maximize Performance and Longevity
Proper routing and consistent slope of the discharge line, along with avoiding flushes of sanitary products and grease, are key to reliable Saniflo operation.
Regular user habits that exclude fibrous or non-biodegradable items reduce clog risk and strain on the macerator.
Securing mounts, using flexible connectors where recommended, and adding sound-damping materials can cut vibration and noise while extending component life.
Best practices for discharge line routing and slope
Several straightforward routing and slope practices greatly reduce clogs and wear in a Saniflo discharge line: maintain a consistent downward grade, minimize horizontal runs and bends, and keep fittings accessible for service.
Use a gentle slope of about 1–2% where possible, avoid sags and low spots, support pipe every 3–4 feet, and plan cleanouts at high points and before terminal connections for easier maintenance.
Habits and items to avoid flushing
When used as designed, a Saniflo system handles human waste and toilet paper reliably. However, performance and lifespan decline quickly if inappropriate substances enter the macerator.
Avoid flushing wipes (even “flushable”), feminine hygiene products, dental floss, cotton swabs, diapers, paper towels, grease, baby wipes, medications, and sanitary chemicals.
Regularly educate household members and post a brief do-not-flush reminder to prevent clogs and motor strain.
Noise reduction and vibration-minimizing tips
Reduce noise and vibration by isolating the Saniflo unit and securing all connections; mounting the macerator on a vibration-damping pad, using flexible couplings on discharge pipes, and tightening loose fittings will greatly cut resonance and rattle.
Regularly inspect mounts, replace hardened hoses, add foam or rubber blocks where pipes contact framing, and verify the unit sits level to prevent motor strain and intermittent buzzing.
Useful Reference Resources and Documentation
The article directs readers to manufacturer installation manuals and model-specific diagrams for step-by-step guidance and parts identification.
It notes official retailers and OEM parts catalogs as primary sources for replacement components.
It also points to local permitting, inspection offices, and building-code resources to confirm compliance and required approvals.
Where to find installation manuals, model-specific diagrams, and replacement parts
Where can installers and DIYers quickly locate official Saniflo installation manuals, model-specific diagrams, and genuine replacement parts?
The official Saniflo website hosts downloads and parts lists.
Authorized dealers supply OEM components and fit guides.
Third-party plumbing distributors and online marketplaces carry diagrams and cross-reference charts.
Local service centers offer technical sheets and cartridge replacements.
- Saniflo official site
- Authorized dealers
- Plumbing distributors
- Local service centers
Permitting, inspection, and local code resources
Although local rules vary widely, installers and DIYers should verify permit requirements, inspection schedules, and applicable plumbing codes before beginning a Saniflo toilet installation.
Consult municipal building departments, local plumbing authorities, and utility providers for specific guidance.
Obtain required permits, schedule inspections at recommended milestones, keep documentation on site, and reference national and local code texts to guarantee compliance and avoid fines or rework.
Conclusion
The Saniflo toilet, a compact engine in porcelain, becomes a hidden current that redirects household flow without rewriting walls. When installed with care it functions like a well-tended conduit, turning inconvenience into quiet order; when neglected, the same pump mutters warnings. Proper selection, cautious preparation, and routine attention are the oil that keeps its mechanism singing. In the end, the small macerator is both tool and symbol of practical adaptability.