How to Identify Orangeburg Pipe: 7 Simple Tests to Confirm Old Sewer Lines
To identify Orangeburg pipe in old sewer lines, look for its distinct tar-impregnated, fibrous texture with a dark brown to black color and soft, layered edges that may splinter. Inspect for features like wrapped seams, flattened cross-sections, sagging sections, and loose joints with tar residue. Key tests to confirm its presence include checking for flexibility, performing a gentle crush test, listening for sound differences, conducting moisture checks, and using a sewer camera to look for collapse patterns. For detailed step-by-step tests and recommended next actions, continue reading.
What Orangeburg Pipe Is and Why Identification Matters
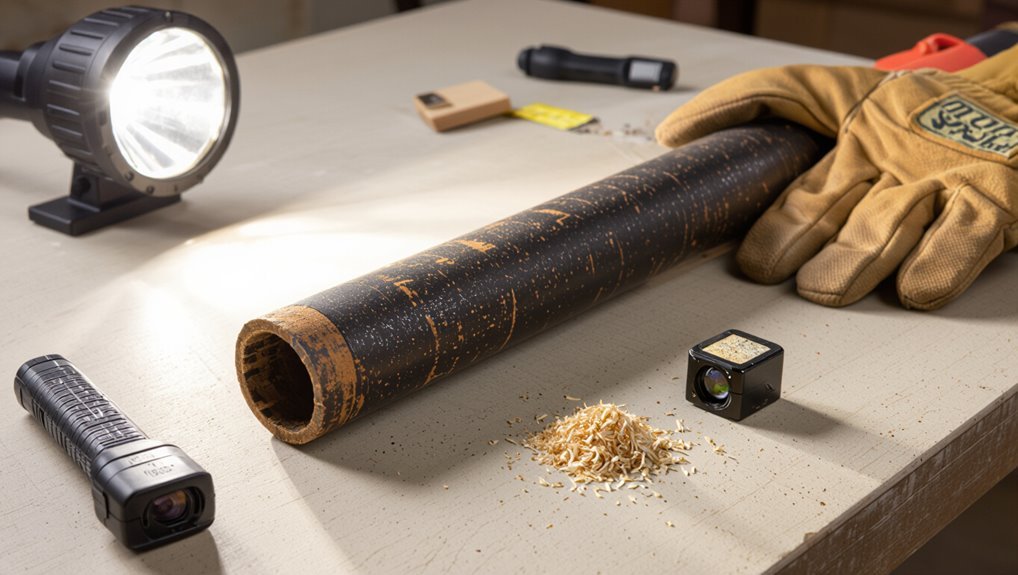
Orangeburg pipe is a bituminous-fiber drainage and sewer pipe made from wood fiber, tar, and felt, commonly referred to historically as bituminous fiber or pitch pipe.
It was widely installed from the 1920s through the 1970s and is prone to collapse, crushing, joint separation, and root intrusion as it ages.
Identifying Orangeburg is important for homeowners, inspectors, and contractors because its failure modes can cause leaks, backups, and costly repairs or replacements.
What orangeburg pipe is (materials, construction, common names)
A mid-20th-century utility material, orangeburg pipe consists of layers of wood pulp and tar-impregnated fiber wrapped around a mandrel and cured to form a cylindrical sewer or drain conduit.
Common names include fiber conduit, bituminous fiber pipe, and tarpaper pipe.
Lightweight and nonmetallic, it resists corrosion but crushes and deteriorates over time.
Guidance on how to identify orangeburg pipe focuses on texture, color, odor, and joint type.
Historic timeline and typical installation periods
Materials and identification cues lead naturally to the period when this product was most widely used.
Orangeburg pipe saw peak installation from the 1920s through the 1970s, especially postwar suburban expansion. Municipal and residential sewer systems, storm drains, and some building drains commonly used it.
Production declined after the 1970s as alternative materials and regulatory scrutiny increased, leaving many aging installations today.
Risks and common failure modes of orangeburg pipe
Pose a significant long-term liability, orangeburg pipe is a composite made from layers of tar-impregnated wood fibers wrapped around a cellulose core and sealed with pitch.
It deteriorates via crushing, collapse, root intrusion, joint separation, and softening from prolonged moisture.
Slow deformation and leakage cause blockages, sinkage, and contamination pathways.
Repairs often require excavation or full replacement.
Why homeowners, inspectors, and contractors should identify it
Recognizing orangeburg pipe matters because its slow failures and hidden leaks create long-term liabilities that affect property value, health, and repair costs.
Homeowners avoid unexpected collapse and contamination.
Inspectors document risk for accurate assessments and disclosure.
Contractors plan appropriate remediation, estimate costs, and choose correct replacement materials.
Clear identification prevents improper repairs, reduces liability, and supports informed transaction and maintenance decisions.
Quick visual signs to spot orangeburg pipe during a basic inspection
Inspectors can often recognize Orangeburg by its soft, fibrous surface texture, layered appearance, and tendency to show color fading or dark streaks.
Joints commonly appear as wrapped seams or banded couplings sealed with tar-like compounds rather than rigid metal fittings.
These pipes are frequently encountered in older basements, crawlspaces, and sewer lateral runs where visual clues and location together raise suspicion.
Surface appearance and texture to look for
When exposed sections of Orangeburg pipe are visible, their surface typically appears dark, fibrous, and slightly rough rather than smooth like modern vitrified clay or metal.
This mottled, tar-impregnated texture—often peeling or layered—serves as a quick visual cue during a basic inspection.
Edges may splinter, fibers show through worn areas, and dull, non-reflective patches contrast with surrounding materials.
Typical joint types and sealing methods
After noting the dark, fibrous surfaces of exposed Orangeburg, attention turns to how sections are joined and sealed—one of the quickest visual ways to identify the material.
Typical joints are bell-and-spigot or plain-end couplings bound with tar, leaded mastic, or metal bands.
Layered seams often show frayed fibers, compressed rings, and tar residue; mechanical clamps or deteriorated adhesives signal aged, nonmetallic construction.
Color variations and fading patterns
Coloration offers immediate clues: Orangeburg typically appears as a dark brown to black on freshly exposed surfaces, but exterior weathering and sunlight cause variable fading into reddish-brown, grayish tones, or patchy discoloration along seams and joints.
Inspectors should note uneven lightening, streaks from runoff, and contrast between cut edges and outer surfaces; consistent fiber texture helps distinguish faded Orangeburg from metal or PVC.
Locations in a property where orangeburg is most likely found
Pipes most commonly found in basements, crawlspaces, and older utility chases are where Orangeburg is likely to appear; inspectors should focus on main soil stacks, sanitary branch lines, and sewer exits near the foundation.
Look for flattened, soft sections, warped seams, and fibrous texture at joints.
Exterior runs near property lines, yard cleanouts, and connections to clay lines also warrant inspection for aging fiber pipe.
Seven practical tests to confirm orangeburg pipe
A concise set of practical tests helps confirm whether a pipe is Orangeburg when visual cues are inconclusive.
The following procedures combine safe hands-on checks and camera observations to distinguish tar-impregnated fiber construction from modern materials. Each test emphasizes non-destructive assessment and clear indicators to guide further action.
- Visual and tactile inspection procedure
- Flexibility and crush test (safe, non-destructive guidelines)
- Sound/knock test to assess pipe composition
- Moisture and delamination check for tar paper layers and camera inspection signs specific to Orangeburg
Test 1 Visual and tactile inspection procedure
When inspecting suspected Orangeburg sewer lines, the visual and tactile examination serves as the first practical test to detect characteristic signs of fiber-composition failure.
The inspector notes dark brown or black fibrous surfaces, longitudinal splitting, crushed or flattened sections, and soft, spongy texture.
Surface fraying, adhesive residue layers, and concentric delamination support identification; document findings with photos and clear location references.
Test 2 Flexibility and crush test (safe, non-destructive guidelines)
Following the visual and tactile assessment, the flexibility and crush test provides a controlled, non-destructive means to verify the fibrous construction and compromised rigidity typical of Orangeburg pipe.
The inspector applies gentle hand pressure or a padded clamp to a small exposed section, noting noticeable give or flattening compared to rigid clay or cast iron.
Record observations, avoid excessive force, and document locations photographed.
Test 3 Sound/knock test to assess pipe composition
Tap the exposed pipe gently with a gloved knuckle or a small non-metallic mallet and listen for differences in tone and decay that indicate material composition.
A dull, muffled thud with quick decay suggests fiber and tar layers typical of Orangeburg; a sharp, ringing sound with sustained resonance indicates metal or rigid plastic.
Record observations and compare against known references.
Test 4 Moisture and delamination check for tar paper layers
Moisture assessment and delamination inspection reveal the presence and condition of the tar-impregnated fiber layers characteristic of Orangeburg pipe.
Inspect cut ends or exposed sections for softening, spongy texture, and separation of fiber sheets.
Press with a gloved finger or probe; damp, darkened layers that peel or flake indicate water-saturated, delaminated tar paper.
Record locations and severity for repair planning.
Test 5 Camera inspection signs specific to orangeburg
How can a camera reveal features unique to Orangeburg pipe? A video inspection shows soft, fibrous walls with fraying, longitudinal grooves from compression, and flattened or oval cross-sections.
Joints may appear loose or separated with tar residue. Camera footage often captures sagging sections and debris embedded in fibrous layers, distinguishing Orangeburg from rigid clay, cast iron, or PVC.
Test 6 Sampling and simple lab/home chemical test precautions
Collect a small, representative fragment from the exposed pipe wall or joint for testing, taking care to minimize disturbance and avoid cutting into active lines. The following seven practical tests combine visual, tactile, simple chemical, and burn assessments that can be performed with basic tools or in a modest lab to help confirm Orangeburg (tar-paper) pipe while observing safety and contamination precautions.
Wear gloves, ventilate, label samples, avoid open flames near sewer gases, use dilute solvent swabs for bitumen, document results, and dispose residues per local rules.
Test 7 Expert confirmation: when to call a professional and what to request
When uncertainty remains after preliminary sampling and home tests, or when findings suggest extensive deterioration or potential health and structural risks, a qualified plumbing or materials professional should be engaged to provide definitive identification and guidance.
The expert will perform visual inspection, CCTV sewer scanning, laboratory fiber analysis if needed, and issue a written report with material identification, condition assessment, repair or replacement options, cost estimates, and safety recommendations.
How to use a sewer camera to diagnose orangeburg pipe
A sewer camera inspection can reveal telltale signs that distinguish Orangeburg from metal, clay, or PVC by showing texture, seam separation, and mode of failure. Recommended camera angles, stable lighting, and continuous recording help capture collapse, deformation, and patterns of root intrusion for later analysis. The inspector should note specific collapse geometries, layered delamination, and root entry points to compare with known Orangeburg signatures.
| Feature inspected | Diagnostic clue |
|---|---|
| Surface texture | Soft, fibrous appearance vs smooth PVC or brittle clay |
| Seams | Layer separation common in Orangeburg |
| Collapse pattern | Longitudinal sagging or flattened oval shapes |
| Roots | Penetration at seams and layered edges |
| Lighting/angle | Oblique light highlights delamination and fibers |
Camera indicators of orangeburg vs other materials
How can a sewer camera reveal whether a pipe is orangeburg rather than clay, cast iron, or PVC? The camera shows texture, seams, compressibility and rotting layers: fibrous, crushed or bellied sections point to orangeburg; smooth, rigid walls suggest clay, iron, or PVC.
| Indicator | Orangeburg vs Others |
|---|---|
| Surface | Fibrous/peeling vs smooth |
| Deformation | Collapses/bellies vs rigid |
Recommended camera angles, lighting, and recording best practices
Several precise camera angles, consistent lighting, and thorough recording protocols are essential for reliably diagnosing orangeburg pipe with a sewer camera.
Operators should capture axial, oblique, and transverse views at junctions and defects, maintain diffuse, flicker-free illumination to avoid glare, and record continuous timestamped video with periodic stills.
Additionally, they should note insertion depth, orientation, and probe speed, and store files with project metadata for review.
Interpreting collapse, deformation, and root intrusion patterns
Following consistent imaging and lighting protocols, operators can interpret collapse, deformation, and root intrusion by comparing observed patterns to known failure modes of orangeburg pipe.
Flattened or oval cross-sections, longitudinal delamination, fibrous material remnants, and soft collapse zones indicate creosote-impregnated fiberboard failure.
Radial cracks with fibrous edges and concentrated soil-root penetration suggest root intrusion exploiting delamination.
Document locations, severity, and flow impact for repair planning.
Common false positives and how to distinguish similar materials
The text compares key diagnostic traits of Orangeburg, clay, cast iron, PVC, and ABS to prevent misidentification.
It also flags common surface treatments and retrofit linings that can mimic Orangeburg’s appearance.
Practical side‑by‑side visual and tactile checks are proposed to quickly separate these materials in the field.
Differences between orangeburg, clay, cast iron, PVC, and ABS
Because orangeburg often sits alongside other common plumbing materials, distinguishing it requires focused inspection of texture, joint type, and wall thickness.
Orangeburg is fibrous, soft, and thin-walled with felted layers and tar.
Clay is brittle with socketed joints; cast iron is heavy, thick, and flanged; PVC is smooth, rigid, and white; ABS is black, rigid, and slightly glossy.
Misleading surface treatments and retrofit linings to watch for
Inspection of an older sewer run must account for surface treatments and retrofit linings that can obscure original materials.
Painted, tarred, or cementitious coatings and cured-in-place linings mimic Orangeburg’s appearance but differ in texture, rigidity, and seam patterns.
Inspectors should note uniform synthetic sheen, absence of fiber compression, and layer edges; probing at access points and reviewing installation records helps avoid false positives.
Quick side-by-side visual and tactile checks
A quick side-by-side comparison of suspect runs and known reference samples helps distinguish Orangeburg from similar materials using a few targeted visual and tactile cues.
Inspect fiber texture, layered appearance, and soft, compressible feel; contrast with rigid cast iron, brittle clay, or smooth PVC.
Note seam patterns, brown-black staining, and frayed edges.
Light pressure testing confirms compressibility versus hard piping.
Safety, legal, and financial considerations when orangeburg is found
If Orangeburg pipe is suspected, inspectors should limit disturbance, use proper PPE, and arrange noninvasive sampling or lab testing to prevent collapse or contaminant release.
Sellers and homeowners face specific disclosure duties and potential liability that vary by jurisdiction, while buyers should confirm any obligations during transactions.
Repair or replacement costs can range widely depending on length, access, and required permits, and both insurance coverage and lender approval may be affected.
Immediate safety precautions during inspection and sampling
Begin by securing the work area and establishing clear access controls to protect occupants and workers from potential hazards associated with Orangeburg pipe.
Wear appropriate PPE (respirator, gloves, eye protection).
Ventilate confined spaces and monitor air quality for gases.
Avoid disturbing pipe fragments; use hand tools gently.
Bag and label samples for lab analysis.
Document conditions and restrict unauthorized access until clearance.
Disclosure obligations for sellers and liabilities for homeowners
When Orangeburg pipe is discovered on a property, sellers typically face specific disclosure obligations and homeowners can incur legal and financial liabilities tied to repair, replacement, and potential health or environmental concerns.
Disclosure laws vary by jurisdiction; sellers should report known defects.
Homeowners may be responsible for remediation, regulatory compliance, and claims if nondisclosure caused buyer damages, making prompt professional assessment and documentation essential.
Typical repair and replacement cost ranges and influencing factors
Cost estimates for repairing or replacing Orangeburg pipe vary widely, typically ranging from several thousand dollars for localized repairs to $20,000–$50,000 or more for full sewer-line replacement on an average single-family property.
Factors that drive costs include pipe length and depth, accessibility, soil conditions, required permits, utility relocations, and whether trenchless methods or full excavation are used.
Additional cost drivers: obstruction extent, required lining, disposal, labor rates, and regional market.
Insurance and lender issues to anticipate
Discovering Orangeburg pipe on a property can trigger a cascade of insurance and lending complications that affect safety, liability, and financing options.
Insurers may deny coverage, raise premiums, or require repairs; mortgage lenders often mandate disclosure, inspections, or replacement prior to closing.
Homeowners should obtain contractor estimates, document remediation plans, and consult insurers and lenders early to avoid delays, unexpected costs, or loan refusals.
Practical next steps after identifying orangeburg pipe
After Orangeburg pipe is confirmed, immediate actions should focus on short-term mitigation to reduce leaks and health risks while the owner plans a permanent fix.
The planning phase should compare trenching and trenchless replacement methods, obtain accurate, itemized quotes, and carefully vet contractors’ references and licenses.
All findings and communications should be documented for disclosure, insurance claims, and permits.
Short-term mitigation options to reduce risk
Begin by evaluating immediate hazards and documenting pipe locations, condition, and any signs of leakage or collapse to prioritize interventions.
Implement temporary measures: restrict heavy vehicle access, reduce water usage, and cap unused lines.
Place secondary containment for active leaks, schedule regular inspections, and install temporary bypass or pump-around systems if feasible.
Notify occupants and arrange expedited professional assessment.
Planning a replacement: trenching vs trenchless options
With immediate hazards addressed and temporary controls in place, planning the permanent replacement of Orangeburg pipe requires weighing open trenching against trenchless methods based on site conditions, budget, and long-term performance.
Open trenching offers direct access, lower material cost, and easier grade correction but more disruption.
Trenchless techniques minimize surface impact and landscaping damage, suit constrained sites, and often reduce restoration time though may raise equipment and inspection complexity.
How to get accurate quotes and vet contractors
Several clear steps help guarantee accurate quotes and reliable contractors when replacing Orangeburg pipe.
Homeowners should obtain at least three written estimates detailing scope, materials, permits, disposal, and warranties.
Verify licenses, insurance, and local references; check reviews and past work photos.
Request itemized timelines and change-order policies.
Compare bids on apples-to-apples terms and favor contractors offering transparent contracts and clear communication.
Documenting findings for disclosure, insurance, or permit purposes
Document findings promptly and systematically so they can be used for disclosures, insurance claims, or permit applications.
Photographs, videos, inspection reports, probe readings, and contractor estimates should be timestamped and labeled by location.
Retain originals and provide certified copies when required.
Note observed defects, recommended repairs, and chain of custody for samples.
Store records securely and share only with authorized parties.
Tips to prevent misidentification and ensure reliable results
Clear guidance helps prevent misidentification and directs homeowners and professionals to reliable confirmation methods. Practical checklists, appropriate detection tools, and targeted questions for contractors or labs reduce errors and costly delays.
The following points summarize essential steps to improve confidence in material identification.
- Use a pre-inspection checklist covering age, pipe location, visual signs, and any prior repairs.
- Favor detection tools and equipment with proven accuracy—video inspection, non-destructive testing, and sample cutters.
- Ask contractors or labs for their identification methods, certification, sample handling, and reporting formats.
- Request written estimates, photographed evidence, and a clear chain of custody for any removed samples.
Checklists for homeowners and inspectors before calling a pro
Before contacting a professional, homeowners and inspectors should run through a concise checklist to reduce misidentification and improve the chances of an accurate assessment.
Verify pipe exposure points, note color, texture, and joint type, record nearby renovations or repairs, take clear photos, document symptoms (slow drains, odors, backups), confirm building age and original plans, and avoid invasive testing until a pro evaluates findings.
Tools and equipment that improve detection accuracy
Several essential tools greatly improve the accuracy of identifying Orangeburg pipe and reducing misidentification.
A bore camera inspects seam patterns and fiber texture; a magnet confirms nonferrous composition; a moisture meter detects saturation typical of deteriorated bitumen; calipers measure wall thickness; sample cutters retrieve small sections for lab analysis.
Proper PPE and labeled photographic records guarantee reliable, reproducible results.
Questions to ask a contractor or lab when confirming material
How should a contractor or lab document and verify their identification process to minimize misclassification?
The professional should provide a written protocol, chain-of-custody for samples, test methods used (visual, solvent, microscopy), calibration records, and technician qualifications.
Request photos, raw data, and a definitive report with uncertainty estimates.
Ask for third-party confirmation or lab accreditation (ISO/ASTM) when results affect remediation decisions.
Visual reference guide and sample photos to compare during inspection
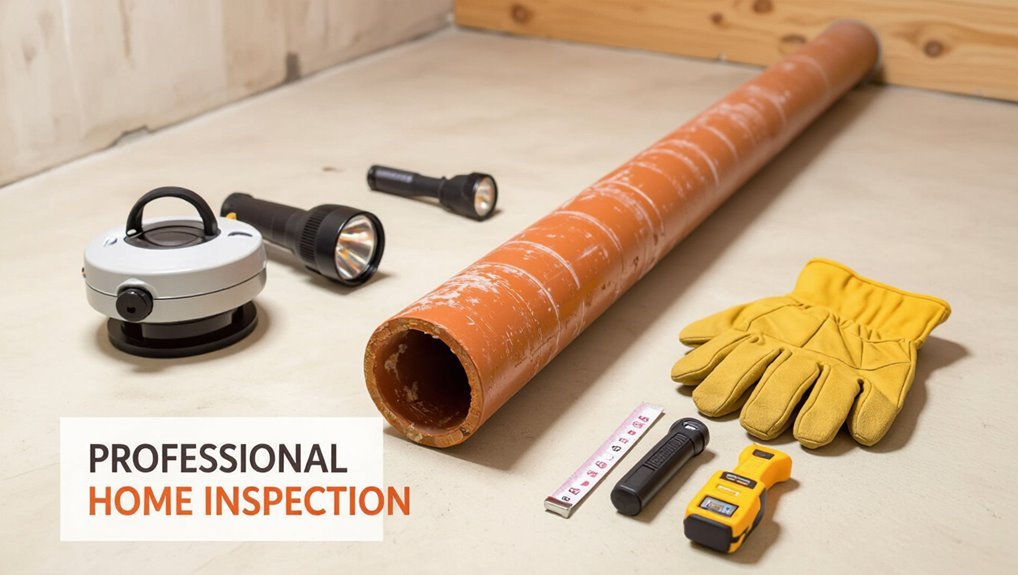
A concise visual reference guide presents photo examples of intact, degraded, and failed Orangeburg pipe to help inspectors recognize characteristic textures, layering, and collapse patterns.
Side‑by‑side comparative photos of common sewer materials (cast iron, clay, PVC, and clay-lined cast) highlight distinguishing features to prevent misidentification.
These sample images are designed as quick visual checks to confirm field observations before further testing.
Photo examples of intact, degraded, and failed orangeburg pipe
Photographic examples provide a practical visual reference for distinguishing intact, degraded, and failed Orangeburg pipe during inspections.
Intact pipe shows smooth, continuous fibrous surfaces with original orange-brown color.
Degraded examples reveal delamination, surface fraying, flattening and dark staining.
Failed pipes display collapsed sections, longitudinal splits, large voids and root intrusions.
Captions note scale, context, and likely causes for each condition.
Comparative photos of other common sewer materials
Comparative photos of common sewer materials help inspectors quickly differentiate Orangeburg from alternatives by highlighting distinct textures, joint types, and failure modes.
Side-by-side images show cast iron’s heavy flanges and corrosion, clay’s smooth rigid sections and glazed interiors, PVC’s uniform plastic appearance and solvent-welded joints, and concrete’s coarse aggregate and cracking patterns.
Captions note age, typical defects, and inspection cues.
Conclusion
When a homeowner happens upon fibrous, dark-orange pipe remnants while planning a remodel, coincidence often threads through discovery and decision: the same brittle smell that alerted a neighbor, the identical jagged seam seen in an archived photo, the timely inspection before a rainy season. Recognizing Orangeburg through these tests sharpens choices about repair, liability, and safety. Armed with clear identification, property stewards can move from uncertainty to informed action with confidence.