
How Do Clawfoot Tubs Drain? A Simple Guide to Drain Types, Mechanisms, and Troubleshooting
Clawfoot tubs drain through a decorative drain flange and tailpiece into a P- or S-trap, connecting to the home’s waste-and-vent system. This system relies on gravity and ventilation to prevent siphonage. Various stopper styles, including pop-up, lift-and-turn, removable strainers, and cable-operated units, are available. Some tubs may also connect to a floor or wall drain based on the rough-in location. To avoid clogs and leaks, regular cleaning and seal checks are essential. Continue reading for detailed information on drain types, installation scenarios, troubleshooting, and replacement guidance.
What a Clawfoot Tub Is and Why Drain Type Matters
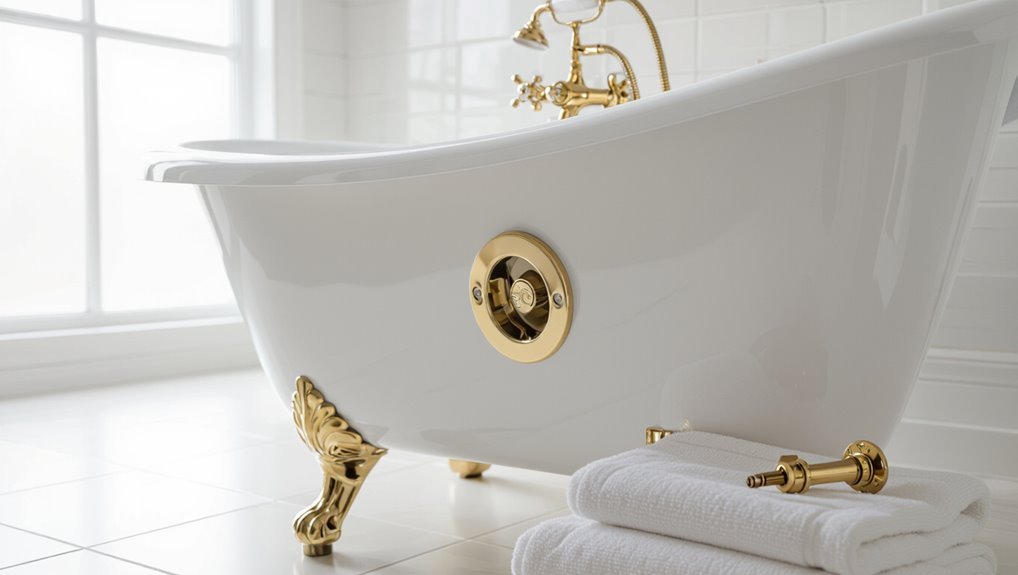
A clawfoot tub is a freestanding bathtub typically made from cast iron coated with porcelain, enameled steel, or modern acrylics, valued for its classic silhouette and sturdy construction.
The choice of drain—pop-up, threaded plug, or cable-operated—directly influences water flow, sealing reliability, and ease of repair.
Drain style also contributes to the tub’s visual character and dictates routine maintenance needs and longevity.
Definition and common materials of clawfoot tubs
Clawfoot tubs are freestanding bathing fixtures characterized by an exposed rim and ornately shaped feet, typically set apart from surrounding walls.
Historically cast iron with porcelain enamel, modern versions use acrylic, copper, or steel. Weight, heat retention, and finish influence choice.
Owners often ask how do clawfoot tubs drain; drainage fittings adapt to tub material and mounting, affecting installation complexity and durability.
How drain design affects function, aesthetics, and maintenance
Few design elements influence a clawfoot tub’s performance and appearance as directly as the drain; its size, style, and mechanism determine water evacuation speed, compatibility with overflow and waste systems, and the visual line of the tub.
Functional choices affect flow rate and sealing reliability. Aesthetic finishes set period or modern tone.
Maintenance needs vary: exposed pop-ups require simple cleaning, hidden wastes demand periodic access panels.
Direct Answer: How Clawfoot Tubs Drain
Water from a clawfoot tub typically flows from the drain fitting through a tailpiece into a trap and then into the home’s waste line.
Common drain mechanisms include a simple pop-up or lift-and-turn stopper, an overflow-connected waste-and-overflow assembly, or a removable strainer plug.
Each arrangement routes wastewater into the same trap-and-waste system, with differences only in stopper type and overflow connection.
Overview of typical drainage path from tub to waste line
A typical clawfoot tub drains through a short tailpiece beneath the drain assembly into a P-trap or directly into a floor-level trap.
It then connects to the home’s horizontal waste line that leads to the main soil stack; exposed or concealed drain fittings and a possible floor-mounted connector adapt the tub’s elevated outlet to the house plumbing.
Water flows by gravity, venting ties prevent siphonage, and access points allow maintenance.
Summary of common drain mechanisms in one sentence
Building on the typical path from tub tailpiece to the soil stack, clawfoot tubs generally drain by gravity through a short tailpiece into either an exposed or floor-level P-trap (or straight into a floor trap).
Then, they flow into the home’s horizontal waste line and soil stack with venting to prevent siphonage.
Common mechanisms include simple gravity drains, pop-up or lift-and-turn stoppers, and removable strainer baskets.
Common Clawfoot Tub Drain Types
Clawfoot tubs use several distinct drain configurations that affect installation, maintenance, and aesthetics.
Common types include exposed tailpiece with a floor drain, pop-up lift-and-turn assemblies, trip lever wastes with overflow tubes, slotted overflow with cable-operated drains, and quick-connect or modular drain systems.
Each design presents different sealing methods, access needs, and replacement considerations.
Exposed tailpiece and floor drain setup
Several common installations pair an exposed tailpiece with a dedicated floor drain to handle overflow and regular waste flow from a freestanding tub.
The visible tailpiece runs directly to the floor drain or connects via a short trap, simplifying maintenance and leak inspection.
This arrangement requires proper sealing, slope, and trap placement to prevent sewer gas, guarantee reliable drainage, and meet local plumbing codes.
Pop-up drain assembly (lift-and-turn)
While some tubs route an exposed tailpiece straight to a floor drain, others use a pop-up (lift-and-turn) drain assembly that integrates a rotating stopper into the tailpiece for on/off control.
The stopper turns to seal or release water, relying on a threaded post and rubber gasket.
Maintenance involves cleaning the stopper, replacing worn gaskets, and ensuring the threaded mechanism turns freely to prevent leaks and binding.
Trip lever waste with overflow tube
One common setup pairs a trip lever waste with an overflow tube to control tub drainage and prevent overfilling.
A lever on the tub wall activates an internal plunger, opening or closing the drain via linkage. The overflow tube redirects excess water to the waste when water reaches its inlet.
Routine checks guarantee the lever, seals, and tube alignment prevent leaks and blockages.
Slotted overflow and cable-operated drains
A slotted overflow paired with a cable-operated drain offers a compact, serviceable alternative for many clawfoot tubs.
The slotted overflow prevents overfilling while concealing a slim actuator slot.
The cable-operated mechanism uses an internal cable to lift or close the stopper, enabling a cleaner exterior appearance.
Maintenance involves accessing the cable and linkage for adjustment, lubrication, or replacement to restore smooth operation.
Quick-connect and modular drain assemblies
After outlining slotted overflows and cable-operated stoppers, attention shifts to quick-connect and modular drain assemblies for clawfoot tubs.
These systems simplify installation and maintenance: modular units snap or thread together, allowing component replacement without disturbing the tub.
They often include pop-up or lift-and-turn options, durable seals, and standardized fittings, reducing leak risk and enabling easier upgrades or repairs by homeowners or professionals.
Anatomy of a Clawfoot Tub Drain
The anatomy of a clawfoot tub drain is outlined by its visible components—the drain flange, strainer, and stopper—which control flow at the tub floor.
Beneath the tub, the tailpiece connects to a trap and then to a waste line that can run to the floor or wall depending on installation.
Many clawfoot tubs also include distinct overflow pieces and fittings specific to their freestanding design.
Drain flange, strainer, and stopper components
Precision matters when examining the drain flange, strainer, and stopper of a clawfoot tub, as each piece performs a distinct role in water retention, flow control, and debris prevention.
The flange secures the assembly to the tub shell, the strainer catches hair and grit, and the stopper—plunger, lift-and-turn, or rubber plug—regulates drainage and seals against leaks.
Tailpiece, trap, and waste connection to floor or wall
Once the flange, strainer, and stopper are accounted for, attention turns to the tailpiece, trap, and the waste connection that routes water to the floor or wall plumbing.
The tailpiece links the drain to a P- or S-trap, which prevents sewer gas. The trap then connects to the waste line—often a floor-mounted or wall stub—requiring proper alignment, seals, and slope for reliable drainage.
Overflow pieces unique to clawfoot tubs
Because clawfoot tubs sit higher and often lack integrated overflow channels, their overflow assemblies use distinct components—visible faceplates, vertical overflow tubes, and deck- or wall-mounted grates—that must align with the tub’s rim and drainage system.
These pieces channel unwanted water safely to the main drain, require correct length and sealing, and often necessitate adapters or custom fittings for vintage tubs to prevent leaks and guarantee proper flow.
Installation Scenarios and Configurations
The section compares floor-drained and wall-drained clawfoot tubs, outlining how each affects trap placement and waste routing.
It also covers converting exposed drains to concealed systems and mounting requirements for freestanding tubs.
Required clearances and common plumbing rough-in dimensions are summarized to guide installation planning.
Floor-drained clawfoot tubs vs wall-drained tubs
When choosing between floor-drained and wall-drained clawfoot tubs, installers must weigh plumbing layout, floor structure, and aesthetic goals to determine which configuration fits a given bathroom.
Floor drains suit original homes with subfloor access and central waste placement; wall drains align with nearby wall stacks, saving floor work but requiring precise tub positioning and potential decorative overflow alignment to maintain visual balance and function.
Converting from exposed to concealed drain
Convert exposed plumbing to a concealed drain by planning around access points, structural constraints, and finish choices to ascertain function without compromising the tub’s appearance.
Retrofit options include routing waste through floor or wall cavities, extending tailpieces, and installing removable access panels.
Confirm trap alignment, venting, and slope meet code.
Use flexible connectors and corrosion-resistant fittings to simplify future maintenance while preserving period aesthetics.
Mounting considerations for freestanding tubs
How should a freestanding clawfoot tub be supported and oriented for different installation scenarios?
Mounting depends on floor structure, weight when filled, and access to drains. Support options include reinforced subfloor framing, pedestals, or concealed support frames.
Orientation aligns drain and overflow with existing plumbing while allowing service access.
Consider load distribution, anti-slip footing, and level adjustment during placement.
Required clearances and plumbing rough-in dimensions
Clearances and rough-in dimensions establish the spatial and plumbing requirements for safe, serviceable clawfoot tub installations across different floor types and layouts. Required clearance around the tub, drain centerline offsets, and trap placement vary by model and access needs. Follow local codes; allow service access and slope for drainage. Reference table:
| Item | Typical Dimension |
|---|---|
| Side clearance | 18–24 in |
| Drain center | 18–22 in |
| Trap offset | 6–8 in |
Step-by-Step: How to Install or Replace a Clawfoot Tub Drain
A concise, ordered procedure guides the reader through the complete drain replacement, beginning with a tools-and-materials checklist.
It then covers removal of the old drain and flange preparation, installation of the new flange and tailpiece, and connection of the trap and waste line to either the floor or wall.
The sequence concludes with testing for leaks and adjusting the stopper mechanism to guarantee reliable operation.
Tools and materials checklist
Before beginning the drain installation or replacement, assemble a concise set of tools and materials so the job proceeds without interruption.
The checklist guarantees readiness and avoids delays. Recommended items include:
- Adjustable wrench and basin wrench
- Plumber’s putty and silicone sealant
- Replacement drain assembly and gaskets
- Pipe thread seal tape (Teflon)
- Clean rags and bucket for debris and water
Removing the old drain and preparing the flange
Loosen and remove the visible components of the old drain assembly, then access the underside of the tub to detach the flange and tailpiece; work methodically to prevent dropping parts into the waste opening.
Inspect the flange seating area for corrosion, old putty, and gasket remnants. Clean with a scraper and solvent, remove mineral deposits, dry thoroughly, and verify the flange face is smooth and free of damage before proceeding.
Installing a new drain flange and tailpiece
Begin by dry-fitting the new flange and tailpiece to confirm correct sizing and alignment with the tub’s waste opening and the existing trap arm.
Apply plumber’s putty or a rubber gasket under the flange, insert and hand-tighten mounting screws.
Thread the tailpiece into the flange, use a wrench to snug fittings without overtightening, and wipe away excess sealant before testing for leaks.
Connecting trap and waste line (floor or wall)
Proceed to align the trap arm with the tailpiece and the home’s waste outlet, checking orientation for either a floor or wall connection; verify the trap’s inlet matches the tailpiece diameter and the outlet reaches the drain stub without forcing joints.
Install appropriate slip nuts and washers, hand-tighten then snug with wrench.
Confirm proper slope, support the trap to prevent strain, and cut or adapt piping as needed.
Testing for leaks and adjusting stopper mechanism
With the trap and waste line secured, testing for leaks and adjusting the stopper mechanism follows as the final verification step.
Fill the tub, observe connections for drips, inspect underside of trap and flange, and tighten fittings if needed.
Operate the stopper repeatedly, confirm smooth travel and seal, adjust linkage or set screw, then retest for drainage and watertight integrity.
Troubleshooting Common Drain Problems
Common causes of slow drainage, including hair clogs and venting faults, can be diagnosed with simple flow and inspection tests.
Attention should be paid to leaks at the flange, tailpiece, and trap, and to whether the stopper seals or is stuck.
Gurgling noises often point to vent issues or partial blockages and should be checked alongside mechanical stopper repairs.
Slow drainage causes and diagnostic steps
Several factors can cause a clawfoot tub to drain slowly, ranging from surface-level blockages to deeper venting or sewer line issues.
Inspect and remove visible hair and soap buildup from the strainer. Test flow with a bucket to isolate trap versus line restriction. Run a snake through the drain.
Check vent performance by observing multiple fixtures, and call a plumber if blockages persist or multiple drains are affected.
Leaks at flange, tailpiece, or trap where to look
Leaks around the flange, tailpiece, or trap are frequent sources of moisture beneath a clawfoot tub and can stem from worn seals, loose fittings, or misaligned components.
Inspect the flange seal at the tub bottom, check the tailpiece for cracks or loose nuts, and examine trap joints and slip nuts for corrosion or hand-tightness.
Dye or tissue tests reveal slow weeps.
Stopper not sealing or stuck fixes
Diagnose a stopper that won’t seal or is stuck by first determining its type—lift-and-turn, plunger-style, toe-touch, or pop-up—and whether the issue is mechanical obstruction, worn seals, or corrosion.
Clean debris, remove and inspect linkage, replace deteriorated rubber gaskets or O-rings, lubricate moving parts with plumber’s grease, and clear mineral buildup with vinegar.
Reassemble and test for a watertight seal.
Gurgling noises and venting issues
After addressing sealing and movement issues with the stopper, attention should turn to sounds that indicate airborne problems in the drainage system.
Gurgling often signals blocked vents or partial blockages causing air pockets and slow flow. Inspect vent stacks, clear roof obstructions, and check trap configuration.
Professional plumbing evaluation is advisable if symptoms persist, as improper venting can affect multiple fixtures and water seals.
Maintenance and Care Tips
Routine maintenance extends the lifespan and function of clawfoot tub drains through simple tasks like regular cleaning to prevent clogs and periodic lubrication and adjustment of mechanical stoppers.
Inspecting and timely replacement of gaskets, seals, or the entire assembly prevents leaks and water damage.
Careful cleaning products and methods that protect finishes and avoid corrosive cleaners preserve appearance and metal integrity.
Regular cleaning to prevent clogs
Regular cleaning prevents hair, soap scum, and mineral buildup from forming blockages in a clawfoot tub drain; simple weekly maintenance and monthly deeper cleaning keep water flowing and reduce the need for repairs.
Routine tasks include removing visible debris, using a drain snake or brush, flushing with hot water, and applying a mild descaling solution. Inspect strainers and replace when worn.
Lubrication and adjustment of mechanical stoppers
Maintain smooth operation of a clawfoot tub’s mechanical stopper by keeping its moving parts clean, lightly lubricated, and correctly aligned.
Periodic inspection guarantees linkage, pivot pins, and threads move freely; apply a plumber-approved silicone or lithium grease sparingly.
Adjust set screws or linkage length to prevent binding or leaks.
Test operation after adjustment, and re-lubricate only as needed to avoid buildup.
When to replace gaskets, seals, or the entire assembly
Many owners will need to replace gaskets, seals, or the entire drain assembly when signs of deterioration appear—such as persistent leaks, visible cracks, hardened or flattened rubber, or recurring corrosion around fittings.
Replacement is warranted when repairs fail, parts deform, or odors persist despite cleaning.
Choose compatible materials, inspect surrounding plumbing for damage, and consider full assembly replacement if multiple components show wear.
Protecting finishes and avoiding corrosive cleaners
Protect finishes by using gentle, nonabrasive cleaners and soft cloths, avoiding steel wool, scouring pads, and acidic or caustic chemicals that can dull, pit, or strip plated and painted surfaces.
Rinse thoroughly after cleaning to remove residues, dry to prevent water spots and mineral buildup, and test any new product on a hidden area.
For persistent stains, consult manufacturer recommendations or a professional restorer.
When to Call a Professional
Persistent blockages, recurring leaks, or visible corrosion indicate a plumber is needed rather than a DIY approach.
Typical repair and replacement costs vary by issue and region, so citing a range and asking for estimates helps set expectations.
Before hiring, confirm licensing, warranties, and a clear written quote plus a timeline for the work.
Signs you need a plumber instead of a DIY fix
When should a homeowner stop troubleshooting and call a professional?
Persistent or recurrent clogs after standard clearing, sewage odors, slow drainage linked to multiple fixtures, visible leaks under the tub, damaged or corroded drain components, malfunctioning pop-up or overflow mechanisms, and any sign of water damage in floors or walls warrant a licensed plumber.
Complex pipe access or unsure diagnosis also merits professional help.
Cost ranges for common drain repairs and replacements
After recognizing signs that require a professional, homeowners will also want a clear sense of likely costs before authorizing repairs. Typical ranges: simple stopper or gasket replacement $50–$150, drain assembly replacement $150–$400, pipe repair or rerouting $200–$800. Estimates vary by region and tub age; always obtain written quotes.
| Repair | Typical Cost | Notes |
|---|---|---|
| Stopper/gasket | $50–$150 | Quick fix |
| Drain assembly | $150–$400 | Medium complexity |
| Pipe repair | $200–$800 | May require access cuts |
Questions to ask a plumber before hiring
Why ask specific questions before hiring a plumber? A homeowner should verify licensing, insurance, and experience with clawfoot tub drains.
Ask for an estimate, warranty details, timeline, and permit handling.
Request references and examples of similar work.
Clarify emergency availability, disposal of old parts, and payment terms.
Confirm communication protocol and any subcontracting plans before engagement.
Comparison: Best Drain Types by Use Case
A practical comparison highlights which drain types suit specific needs: brass or antique-finished drains for vintage authenticity, simple pop-up or lift-and-turn styles for easy maintenance, and compact or flexible fittings for tight spaces or unusual plumbing locations.
Each option balances aesthetics, serviceability, and installation constraints differently. The following section outlines trade-offs and typical scenarios for each choice.
Best for vintage authenticity
When preserving period character is the priority, drain choices should reinforce the tub’s original appearance and operation.
Traditional pop-up or flange drains in brass, nickel, or bronze finishes match historic aesthetics. Exposed tailpieces and chain-and-plug setups maintain authenticity.
Choose hardware with period-accurate profiles and patina options; retain original geometry to preserve water flow behavior and visual integrity.
Best for easy maintenance
Several common drain styles stand out for low-maintenance care: simple flange drains with large, removable strainers; modern lift-and-turn units that avoid separate plugs and chains; and direct-thread pop-up assemblies designed for easy disassembly.
These options minimize crevices, simplify cleaning, and reduce corrosion-prone components.
Recommend durable materials (brass or stainless steel) and straightforward access for periodic inspection and replacement.
Best for tight spaces or unusual plumbing locations
Because clawfoot tubs are often installed where standard plumbing layouts won’t fit, drains suited for tight or unusual locations prioritize compact profiles, flexible connections, and adaptable mounting. Options like swivel tailpieces, low-profile pop-ups, and remote overflow systems allow routing around obstacles. Select fittings that permit angled joints and compression connections to minimize cutting and guarantee reliable seals.
| Feature | Advantage | Best use |
|---|---|---|
| Swivel tailpiece | Angled routing | Corner installations |
| Low-profile pop-up | Minimal space | Shallow crawlspaces |
| Remote overflow | Flexible placement | Offset drain locations |
Accessories and Upgrades
The section examines accessories and upgrades that enhance both appearance and function of clawfoot tub drains.
Topics include decorative drain covers and finishes, water-saving or anti-clog attachments, and options for converting to modern stopper systems.
Practical considerations such as compatibility, installation complexity, and cost are highlighted.
Decorative drain covers and finishes
A decorative drain cover transforms a functional fixture into a finishing detail that complements a clawfoot tub’s style and finish. Options include classic brass, polished chrome, oil-rubbed bronze, and vintage-style perforated plates.
Choices affect corrosion resistance, maintenance, and period authenticity. Properly matched finishes unify fixtures; secure mounting prevents rattling.
Replacement is simple but should respect existing drain dimensions and overflow compatibility.
Water-saving and anti-clog add-ons
Often overlooked, water-saving and anti-clog add-ons optimize a clawfoot tub’s performance by reducing water use and preventing blockages without altering its classic appearance.
Low-flow aerators, flow restrictors for filler faucets, and retrofit diverter inserts cut consumption.
Strainer baskets, hair traps, and magnetic catchers protect drains.
These noninvasive accessories install easily, require minimal maintenance, and preserve original hardware while improving functionality and longevity.
Converting to modern stopper systems
Convert a vintage clawfoot tub’s drain to a modern stopper system to combine period aesthetics with improved sealing, convenience, and reliability.
Installation options include lift-and-turn, push-and-seal, and plunger-style pop-ups compatible with existing tailpieces or adapters.
Choose corrosion-resistant materials, guarantee overflow alignment, and verify flange fit.
Professional installation prevents leaks and preserves finish while enabling easier maintenance and better water retention.
Quick Reference: Parts Checklist and Measurements
The guide lists common part names alongside clear photos to help identify drain assemblies, stoppers, overflow plates, tailpieces, and slip nuts.
It also summarizes standard measurements and thread sizes used in clawfoot tub replacements, such as 1 1/4″ and 1 1/2″ tailpiece diameters and typical pipe thread standards.
Readers can use this checklist and size table to verify parts before purchasing or ordering replacements.
Common part names and pictures to identify
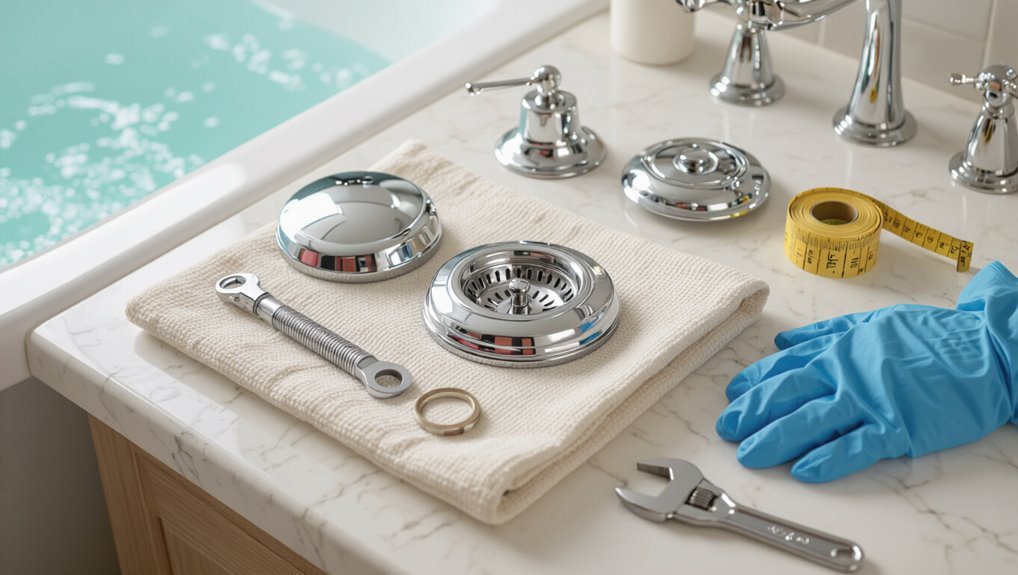
A clear visual inventory helps owners and technicians quickly identify clawfoot tub drain components. Labeled photos and a concise checklist reduce errors when ordering parts or taking measurements.
Common items pictured: overflowing flange, drain flange, lift rod, plunger or stopper, linkage arms, pivot rod, tailpiece, trap adapter, gasket set, mounting screws.
Each photo should include part name and orientation.
Standard measurements and thread sizes for replacement parts
Several key dimensions and common thread types determine compatibility when replacing clawfoot tub drain components. Measurements include tailpiece length, flange diameter, waste opening, and overflow distance. Threads are typically 1-1/4″ or 1-1/2″ NPSM/NPT or 11.5 TPI. Use exact sizing from the tub before ordering parts to guarantee fit.
| Part | Typical Size |
|---|---|
| Tailpiece | 1-1/4″ or 1-1/2″ |
| Flange | 2.5–3.5″ |
| Waste | 1-1/2″ |
| Overflow | 4–6″ |
Conclusion
To sum up, the clawfoot tub’s drainage is a blend of simple mechanics and varied options, tied together like gears in a clock. The tub drains either through pop-up, trip lever, or external waste-and-overflow systems, each suiting different installations and maintenance needs. Choosing the right type depends on vintage authenticity, ease of use, and plumbing layout; minor troubleshooting can be DIY, but complex leaks or reroutes warrant professional intervention for reliable, safe performance.

