How to Remove a Backflow Preventer Safely: Step-by-Step Guide for Homeowners
To safely remove a backflow preventer, homeowners must follow a precise, code-sensitive process. Begin by shutting off and locking the water supply, relieving system pressure, and draining the lines. Always wear appropriate personal protective equipment (PPE). Carefully use wrenches to detach test cocks and fasteners, ensuring to support the unit to prevent drops. Adhere to proper techniques for soldered, glued, or threaded connections. Once the unit is removed, cap the pipes, pressure-test the system, document your findings, and inform relevant authorities as necessary. For a comprehensive step-by-step guide and compliance tips, continue reading.
What a Backflow Preventer Is and Why Removal May Be Needed
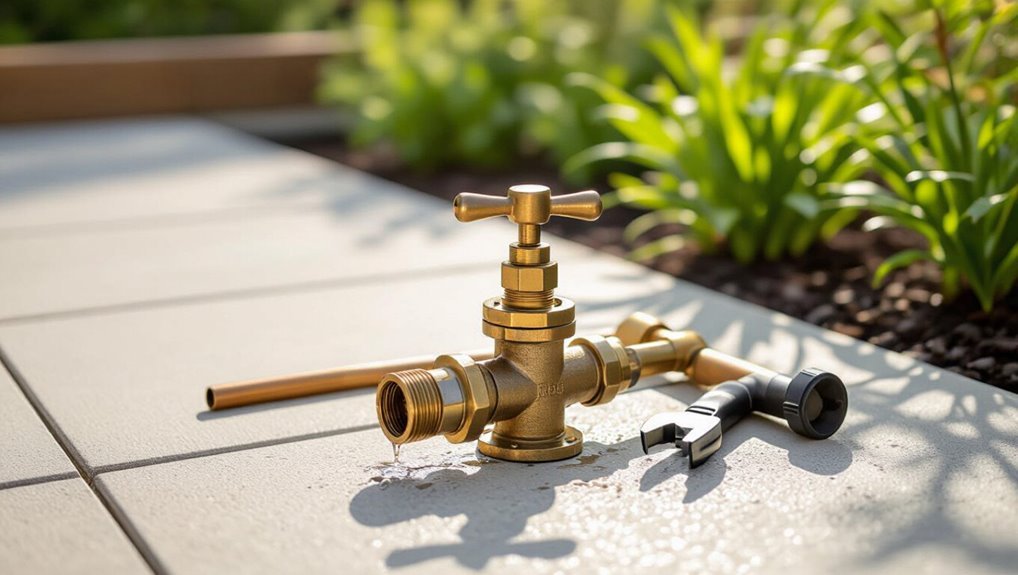
A backflow preventer is a valve assembly—commonly spring-loaded check valves, vacuum breakers, or reduced-pressure zone devices—installed on residential water lines to stop contaminated water from flowing back into the potable supply.
Homeowners may remove or replace these devices when they fail, corrode, obstruct repairs, or when upgrading to a model that meets performance or accessibility needs.
Before any removal, applicable plumbing codes, local utility requirements, and permit or testing obligations must be confirmed to avoid violations and protect system safety.
Definition and common types of residential backflow preventers
Backflow preventers are mechanical devices installed on residential water lines to stop contaminated water from flowing backward into the household supply. They become necessary when plumbing modifications, repairs, or failed inspections reveal risks of cross-connection or pressure reversals.
Common residential types include double-check valves, reduced-pressure zone (RPZ) assemblies, and vacuum breakers.
Guidance on how to remove backflow preventer should reference model-specific steps and safety.
Reasons homeowners remove or replace backflow preventers
Homeowners may decide to remove or replace a backflow preventer for several practical reasons: device failure or leaking that compromises protection, upgrades to meet updated local codes or inspection requirements, changes in landscaping or irrigation that alter cross‑connection risks, persistent maintenance problems, or the need to install a different model better suited to water pressure and usage.
Other reasons include aging components, corrosion, or recurring test failures.
Legal and code considerations before removal
Given the practical reasons for removing or replacing a backflow preventer, the legal and code framework governing such work must be reviewed before any action.
Local plumbing codes, utility regulations, and permit requirements often dictate approved procedures, certification, and inspection. Unauthorized removal can incur fines, liability, or service disconnection.
Homeowners should consult authorities, obtain permits, and hire certified technicians when required.
Safety, Tools, and Preparations Before You Begin
Before starting work on a backflow preventer, a clear checklist of required PPE and all tools and materials should be assembled.
The operator should confirm local permit requirements, locate shutoff valves, and plan notification of household members.
The work area must be isolated and secured to prevent accidental water flow or unauthorized access.
Required personal protective equipment (PPE)
Personal protective equipment (PPE) is essential to protect against chemical exposure, pressurized water, and sharp components when removing a backflow preventer.
Recommended items include chemical-resistant gloves, splash-proof safety goggles, a face shield for added protection, and durable work gloves for handling metal parts.
Slip-resistant footwear and long sleeves protect against cuts and hot surfaces.
Confirm proper fit and inspect PPE before use.
Tools and materials checklist
With PPE confirmed and inspected, the next step is assembling the specific tools and materials required for a safe removal.
The homeowner should gather quality, tested items and verify compatibility with the backflow device. Prepare containment for minor spills and workspace lighting.
Essential items include:
- Adjustable wrenches, pipe wrench, and pliers
- Replacement seals, thread tape, and gaskets
- Buckets, rags, and a flashlight
How to verify local permits and shutoff locations
How can a homeowner confirm the legal and physical prerequisites for removing a backflow preventer?
They should contact the local water authority or building department to check permit requirements, inspection rules, and approved contractors.
Next, locate and label main shutoff valves, branch shutoffs, and any isolation points on-site.
Document valve positions and obtain any required permits or written approvals before proceeding.
How to notify household members and isolate the work area
Begin by informing everyone in the household about the planned work, its schedule, and the temporary limits on water use so occupants can avoid running faucets, using appliances, or entering the work area during shutoff and removal.
Post visible signs, close and lock nearby doors, cordon off the area with tape, and relocate pets.
Designate one contact person for updates and enforce the isolation until work concludes.
How to Assess the Installed Unit Before Removal
Before removal, the technician should identify the backflow preventer’s type, orientation, and connection method to plan correct disassembly.
A close inspection for corrosion, visible pressure ratings, and any label information will reveal serviceability and safety concerns.
It is also necessary to determine which valves or test cocks require handling or isolation during the procedure.
Identifying unit type, orientation, and connection method
One clear step in preparing for removal is to identify the backflow preventer’s model, orientation, and how it is connected to the piping, since these factors determine required tools, isolation points, and potential complications.
The assessor notes valve type (double-check, RPZ, etc.), flow direction, inlet/outlet sizes, union/flange/ threaded joints, and nearby shutoffs to plan disconnect sequence and tool selection.
Inspecting for corrosion, pressure ratings, and label information
Inspect the unit for visible corrosion, pressure-rating stamps, and any manufacturer labels to determine its condition and compatibility with replacement or repair parts.
Note pitting, flaking, or greenish deposits on metal, and check stamped PSI or bar values against system requirements.
Record model and serial numbers, warranty markings, and date codes.
Photograph findings for reference and for professional consultation if needed.
Determining if valves or test cocks must be handled
How should the installer determine whether valves or test cocks need attention before removing the backflow preventer? The installer inspects valve positions, test cock accessibility, and sealing condition. If stuck, corroded, or leaking, plan replacement or capped isolation. Note pressure taps and clearance requirements to avoid damage during removal.
| Component | Condition to check |
|---|---|
| Valve | Position, leaks |
| Test cock | Accessibility, corrosion |
Step-by-Step Guide to Safely Remove a Backflow Preventer
The procedure begins by shutting off the main water supply and relieving system pressure to prevent water flow during removal.
Next, affected lines are drained, downstream faucets opened, and isolation valves closed with lockout/tagout applied before removing test cocks, caps, and ancillary fittings.
Finally, the unit is unbolted or unscrewed from its flanges or unions for safe extraction.
Step 1 Shut off main water supply and relieve system pressure
Turn off the main water supply and relieve pressure before any removal work begins.
The homeowner locates the shutoff valve, closes it fully, then opens a nearby faucet briefly to confirm pressure drop.
They wear gloves and eye protection, check pressure gauges if present, and wait several minutes to verify residual pressure dissipates before proceeding with removal tasks.
Step 2 Drain affected lines and open downstream faucets
Drain the lines connected to the backflow preventer and open downstream faucets to remove trapped water and reduce the chance of spills during removal.
Allow water to run until flow stops, then collect residual water with a bucket or absorbent cloth.
Check low points and drain plugs.
Verify lines feel empty by gently tilting or tapping pipes before proceeding to disassembly.
Step 3 Close isolation valves and lockout/tagout procedure
Close the isolation valves on both the supply and downstream sides to isolate the backflow preventer from system pressure before any further work. Then apply a lockout/tagout: place locks, attach tags stating reason and date, and verify zero pressure. Communicate with household occupants. Confirm valves remain secure and document actions for safety and future restoration.
| Action | Purpose |
|---|---|
| Lock valves | Prevent accidental reopening |
| Tag valves | Inform others |
Step 4 Remove test cocks, caps, and ancillary fittings
Begin by removing all test cocks, caps, and ancillary fittings in a systematic sequence to prevent damage and contamination.
Use appropriate tools, keep parts organized and labeled, and place removed items on a clean surface or tray.
Inspect threads and seals for wear, collect small components in a sealed container, and note any parts requiring replacement before reassembly or disposal.
Step 5 Unbolt or unscrew the unit from flanges or unions
Loosen the flange bolts or union nuts methodically, working in a crisscross pattern to relieve stress evenly and prevent warping.
Support the backflow preventer to avoid sudden drops as fasteners are removed.
Use appropriate wrenches, keeping hands clear of pinch points.
Inspect threads and flange faces for damage.
Collect hardware in a labeled container for reassembly or replacement.
Step 6 Disconnect piping (soldered, threaded, or glued) with methods for each connection type
With the unit freed from its mounts, attention turns to disconnecting the inlet and outlet connections; each joint type—soldered, threaded, or glued—requires a specific procedure and tools to avoid damaging piping or the backflow assembly.
For soldered copper, cut and deburr with a tubing cutter.
For threaded fittings, apply two wrenches and counterhold.
For glued PVC, score and pry joints or cut through and remove remaining socket.
Step 7 Cap or temporarily seal the exposed pipes safely
Seal the exposed pipe ends immediately to prevent contamination, debris entry, and accidental water flow.
The operator should select appropriate caps or blanking plugs for pipe material and size, apply thread sealant or plumber’s tape where needed, and tighten securely with proper tools.
For temporary closure, use test caps or rubber expansion plugs rated for system pressure and inspect for leaks before restoring service.
Step 8 Clean the area and prepare for replacement or permanent removal
Begin by removing tools, debris, and any temporary caps from the immediate work area while keeping pipe ends covered; clear space allows unobstructed access for inspection and minimizes contamination risk.
Wipe surfaces, collect residues, and dispose of waste per local regulations.
Inspect fittings and surrounding material for damage, record measurements, and stage replacement parts or sealants.
Document the condition for future reference before finalizing removal.
Replacing vs Temporarily Removing: Options and Steps
The section compares three practical approaches for handling a removed backflow preventer: fitting a temporary bypass to maintain service, replacing the unit immediately with a new device, or permanently removing it and reconfiguring the piping.
It outlines the primary steps and required fittings for installing a bypass, the verification and testing needed when installing a replacement, and the plumbing modifications and code considerations for permanent removal.
Each option’s advantages, limitations, and safety checks are summarized to guide decision-making.
Installing a temporary bypass
When temporarily removing a backflow preventer for maintenance or replacement, installing a temporary bypass provides uninterrupted water service while isolating the device. This involves routing flow around the assembly using appropriately sized pipe, shutoff valves, and a relief mechanism to preserve pressure and prevent backflow.
A competent installer isolates, pressure-tests, and secures fittings before work begins.
- Use compatible, rated materials.
- Install shutoffs on both sides.
- Include a pressure relief or air release.
Installing a new backflow preventer after removal
Installers should decide whether a full replacement or a temporary removal with reinstallation best suits the situation based on device condition, downtime tolerance, and regulatory requirements.
For replacement, select a compliant model, verify sizing and orientation, install per manufacturer torque and sealing specs, pressure-test and certify.
For reinstallation, clean connections, replace worn seals, align properly, test operation, and document maintenance and certification.
Permanent removal and pipe reconfiguration steps
Choosing between replacing a backflow preventer and permanently removing it requires evaluating long-term system needs, regulatory mandates, and plumbing layout constraints.
If permanent removal is approved, cap or re-route supply lines, install approved bypasses, and maintain accessible shutoffs.
Update plumbing plans, secure permits, and schedule inspections.
Verify remaining piping preserves hydraulic integrity, prevents cross-connections, and complies with local codes.
Common Problems and Troubleshooting During Removal
Common issues encountered during backflow preventer removal include stuck fittings, seized bolts, and rusted unions that resist standard tools.
Technicians should be prepared to manage minor leaks during disconnection and follow specific precautions when work involves lead or other older piping materials.
If removal results in unexpected water damage, immediate containment, documentation, and consultation with a licensed plumber or restoration specialist are recommended.
Stuck fittings, seized bolts, and rusted unions
Encountering stuck fittings, seized bolts, or rusted unions is a frequent obstacle when removing a backflow preventer and requires methodical, safety-focused troubleshooting to avoid damage.
Apply penetrating oil, allow dwell time, use correct-size wrenches, and heat moderately if metal permits.
Protect adjacent components, avoid excessive force that can crack pipes, and replace badly corroded parts rather than attempting risky extraction.
Handling minor leaks during disconnection
After addressing stuck fittings and corroded unions, attention shifts to small leaks that often appear once seals are disturbed.
The technician isolates the zone, depressurizes, and places absorbent pads beneath joints.
Tightening packing nuts or replacing O‑rings usually stops drips; thread sealant or new compression rings may be fitted.
Verify dryness before full repressurization and retest for leaks.
What to do if using lead or old piping materials
When working with lead or other aged piping materials, proceed with caution due to brittle joints, hidden corrosion, and potential health hazards from disturbed lead.
Wear appropriate respiratory protection and gloves, contain debris, and wet-clean surfaces to limit dust.
Use non‑impact tools, support pipes before loosening, and replace any suspect sections.
Consult a licensed plumber and follow local lead‑handling regulations.
When removal causes unexpected water damage
Stop work immediately if unexpected water appears; swift containment limits damage and simplifies repairs.
The homeowner should shut the main, isolate affected zones, and deploy towels, buckets, or a wet vacuum.
Photograph damage, note leak source, and call a licensed plumber and insurer if flooding or structural risk exists.
Preserve removed parts for inspection and avoid restoring water until repairs are confirmed.
Post-Removal Tasks and Compliance
After removal, the system should undergo pressure testing and thorough leak checks to confirm integrity.
The professional arranges any required inspections, obtains certification, notifies authorities if regulations demand it, and handles proper disposal or recycling of the removed device.
Complete records and clear homeowner documentation are maintained to satisfy compliance and future reference.
Pressure testing and leak checks
Although the backflow preventer has been removed, pressure testing and leak checks remain essential to confirm system integrity and regulatory compliance.
Technicians restore pressurization, monitor for pressure drops, and inspect joints, valves, and fittings for visible leaks.
Use calibrated gauges and timed tests per local standards.
Document test results and corrective actions; repeat tests after repairs until stable readings and no leaks are confirmed.
Inspection, certification, and notifying authorities
Begin the inspection by verifying that the system operates within required parameters and that all work conforms to local codes and manufacturer specifications.
Document test results, repairs, and component replacements.
Obtain certification from a licensed tester when mandated.
Complete and submit any required forms or online notifications to municipal authorities or water utilities.
Retain records for required retention periods and future audits.
Disposal or recycling of removed backflow devices
Dispose of or recycle removed backflow devices in accordance with local regulations and environmental guidelines to prevent contamination and guarantee proper handling of materials.
Determine if components qualify as hazardous waste (lead, asbestos, contaminated water), consult municipal waste services, and use certified recycling centers for metal and plastic parts.
Securely cap or drain residual fluids, label items, and obtain disposal receipts when required for compliance.
Recordkeeping and homeowner documentation
Proper documentation preserves proof of compliance and provides a clear record of actions taken during and after backflow preventer removal. The homeowner should file permits, receipts, inspection reports, and photographs. Digital and physical copies must be retained for local code verification and future transfers of ownership.
| Item | Stored Where | Retention Period |
|---|---|---|
| Permit | File/Cloud | As required |
| Report | File/Cloud | As required |
When to Call a Professional and Hiring Tips
If the removal involves complex piping, confined spaces, active contamination risks, or local code requirements beyond homeowner permits, a professional should be engaged.
When hiring, verify plumbers’ backflow certification, ask for references and proof of insurance, and confirm familiarity with local testing and permit procedures.
Expect quoted costs to include labor, parts, permit fees and testing, and request written warranties on work and replacement parts.
Signs the job exceeds DIY safety or code limits
Judgment is required when a backflow preventer removal moves beyond basic hand tools and routine permit checks.
Indicators include complex plumbing materials, confined or hazardous locations, visible corrosion or active leaks, multi-valve systems tied to irrigation or potable lines, required pressure testing or certification, and local code mandates.
If any apply, homeowners should stop and engage licensed professionals to guarantee safety and compliance.
How to vet plumbers for backflow work
When should a homeowner escalate a backflow preventer job from DIY to professional care?
A homeowner should hire a licensed plumber when permits, testing, complex piping, or contamination risk arise.
Verify certifications, backflow tester authorization, local license, insurance, and references.
Request written scope, timeline, and compliance with codes.
Prefer contractors with relevant experience and clear communication.
Expected costs and warranty considerations
After confirming that a licensed plumber is required for permits, testing, or complex repairs, homeowners should understand the likely costs and warranty terms before hiring.
Obtain written estimates, compare scope and warranty length, and verify licensing and insurance. Clarify parts vs. labor, testing fees, and defect coverage to avoid surprises.
- Request itemized bids
- Confirm warranty duration
- Check permit and test fees
Preventive Advice to Avoid Future Backflow Issues
A clear preventive plan reduces the risk of future backflow problems and prolongs device life.
Recommended measures include a routine maintenance schedule, winterization and freeze protection steps, and simple visual or operational checks homeowners can perform between professional inspections.
Implementing these practices helps detect issues early and keeps the system compliant and functional.
Routine maintenance schedule for backflow devices
Consistency guarantees backflow preventers remain reliable and compliant, so a clear, documented maintenance schedule should be established and followed.
Inspections every six months, annual certification testing by a licensed tester, immediate checks after repairs, prompt replacement of worn parts, and recordkeeping of dates, outcomes, and corrective actions minimize risk.
Notifications for missed tests and reminders guarantee adherence and regulatory compliance.
Winterization and freeze protection tips
Several simple preventive steps protect backflow preventers from freeze damage and costly downtime during cold months.
Insulate exposed piping with foam sleeves, heat tape, and insulated covers rated for outdoor use.
Drain and winterize any sections that can be isolated.
Maintain a minimum ambient temperature in utility areas and consider installing a thermostatic heater or enclosure.
Secure all insulation against wind and moisture.
Simple checks homeowners can perform between professional inspections
How often should routine visual checks be done to catch early signs of trouble? Homeowners should inspect monthly for leaks, corrosion, loose fittings, and debris. Record observations and report abnormalities to a licensed tester. Simple checks reduce emergency repairs and prolong device life.
| Check | Frequency | Action |
|---|---|---|
| Leaks | Monthly | Tighten/notify |
| Corrosion | Monthly | Clean/replace |
| Debris | Monthly | Clear/filter |
Conclusion
Removing a backflow preventer requires caution, planning, and knowledge of local codes. Homeowners should note that CDC estimates roughly 20% of reported water contamination incidents involve cross-connections—highlighting why proper handling matters. After confirming isolation, depressurization, and following the step-by-step removal and replacement guidance, most issues are avoidable. If uncertainty, persistent leaks, or permit requirements arise, hiring a licensed plumber guarantees safety, compliance, and restored water-system integrity.