How to Install Pipe Insulation: Step-by-Step Guide for DIY and Pros
Installing pipe insulation is essential for reducing heat loss, preventing freezing, and minimizing noise in your plumbing system. To get started, choose the right insulation material based on your needs—slit foam tubing is ideal for most indoor pipes, fiberglass works best for high-temperature applications, and elastomeric rubber is suitable for damp areas.
Here’s a step-by-step guide to ensure you install it correctly:
- Measure the pipe diameter and length.
- Clean and dry the pipe surfaces thoroughly.
- Cut and fit the insulation snugly around the pipes and fittings.
- Seal seams and joints using tape or adhesive.
- Install removable covers for any valves.
- Inspect the insulation periodically for any damage.
Follow these steps for effective pipe insulation installation.
Why Insulate Pipes and When It’s Necessary

Pipe insulation reduces heat loss and energy costs, protects against freezing, and can lessen water flow noise.
Indicators that insulation is missing or failing include visible condensation, frost, unusual energy bills, or noticeable pipe noise.
Cold-climate exterior lines, unheated basements and attics, and hot-water distribution systems are among the pipe types and environments that typically require insulation.
Benefits of Pipe Insulation (energy savings, freeze protection, noise reduction)
Insulating plumbing reduces heat loss, prevents freezing, and minimizes sound transmission, producing measurable energy savings, fewer winter ruptures, and quieter operation.
Proper insulation lowers heating bills, protects supply lines in cold climates, and dampens water hammer and flow noise.
Installers and homeowners referencing how to install a pipe insulation gain long-term cost avoidance, improved system reliability, and enhanced occupant comfort with modest upfront expense.
Signs You Need New or Additional Insulation
When is existing insulation no longer adequate?
Visible damage, compressed or missing sections, persistent condensation, or frost buildup indicate failure.
Increased energy bills, frequent pipe freezes, or noticeable thermal loss along runs signal insufficient coverage.
Aging materials that crumble or emit odors merit replacement.
Add insulation where gaps, fittings, valves, or recently exposed pipes create thermal bridges or permit heat transfer.
Types of Pipes and Environments That Require Insulation
Assess different pipe materials and locations to determine insulation needs: metal, PVC, CPVC, and PEX each present distinct thermal and condensation risks, while hot-water, chilled-water, steam, and drain lines have varied goals—heat retention, freeze prevention, condensation control, or noise reduction.
Insulate exterior, unheated, and poorly ventilated spaces, basements, attics, crawlspaces, and exposed roof lines; use appropriate R-value and vapor barriers for each application.
Types of Pipe Insulation Materials and Their Uses
The section outlines common pipe insulation materials and when each is appropriate, focusing on performance and installation considerations.
It compares foam tubing, fiberglass wrap, foam board and pre-formed sections, and specialty options to help match material to application. Key metrics such as R-value, operating temperature range, and moisture resistance are summarized for direct comparison.
- Foam tubing (PE, elastomeric): flexible, easy to install, best for indoor plumbing and HVAC lines.
- Fiberglass wrap: high-temperature use, good R-value, requires vapor barrier on cold lines.
- Foam board and pre-formed sections: rigid support for larger pipes, used in utility rooms and exterior enclosures.
- Specialty insulation (rubber, aerogel, pipe jackets): chosen for extreme temperatures, tight spaces, or where thin profiles and high performance are needed.
- Comparative summary: side-by-side of R-values, temperature limits, and moisture resistance to guide selection.
Foam Tubing (PE, elastomeric) features and best uses
Foam tubing, available in polyethylene (PE) and closed-cell elastomeric forms, provides lightweight, flexible insulation suited to a wide range of plumbing and HVAC applications.
It resists moisture, reduces condensation, and offers good thermal performance for moderate temperatures.
PE is economical for residential use; elastomeric excels where vapor permeability and longer-term durability are needed.
Installation is simple with slit tubes and adhesive or tape.
Fiberglass Wrap features and best uses
Installers commonly choose fiberglass wrap for high-temperature piping and industrial applications because it offers excellent thermal resistance, fire tolerance, and a wide temperature range.
It resists moisture when paired with vapor barriers, accommodates irregular shapes and large diameters, and is cost-effective for retrofits.
Proper installation requires protective jacketing, secure fastenings, and attention to seam sealing to prevent performance loss.
Foam Board and Pre-formed Sections features and best uses
Several rigid board types and pre-formed pipe sections provide lightweight, dimensionally stable insulation suited to low- and medium-temperature piping systems.
Foam board offers easy cutting, good compressive strength, and vapor resistance for straight runs and flat surfaces.
Pre-formed sections (EPS, XPS, or polyethylene) simplify installation around pipes, reduce seams, and suit domestic plumbing, HVAC, and chilled-water lines where mechanical protection and consistent R-value are required.
Specialty Insulation (rubber, aerogel, pipe jackets) when to choose
When is specialty insulation the right choice for a piping system?
Specialty materials suit demanding conditions: rubber for flexibility and vibration-prone runs, aerogel where minimal thickness and high thermal performance are essential, and pipe jackets for mechanical protection and weather exposure.
Select based on space constraints, movement, chemical compatibility, and service environment rather than routine residential applications.
Comparative Summary of R-Values, temperature ranges, and moisture resistance
Having chosen a specialty material for particular operating or environmental demands, a concise comparison of thermal resistance, usable temperature range, and susceptibility to moisture provides the basis for final selection and thickness decisions. Below is a quick reference to contrast common options.
| Property | Summary |
|---|---|
| R-value | Aerogel highest; rubber moderate; fiberglass variable |
| Temp range | Aerogel broadest; rubber moderate; fiberglass high |
| Moisture | Rubber least absorbent; fiberglass needs vapor barrier; aerogel hydrophobic options |
Tools and Materials Needed Before You Start
Before beginning pipe insulation, a clear inventory of tools, materials, and safety gear guarantees efficient, safe work.
Required items include cutting and measuring tools, suitable insulation and adhesives, tapes and supports, and appropriate personal protective equipment. Verifying these needs beforehand reduces delays and prevents common installation errors.
- Sharp utility knife or insulation knife
- Tape measure and utility scissors
- Heat gun (for specialty materials)
- Insulation, adhesive, sealing tape, and pipe supports
- Gloves, safety glasses, and a respirator when required
Essential Tools (knife, tape measure, utility scissors, heat gun)
Gathering the right tools secures a smooth, safe pipe insulation install. A sharp utility knife enables precise cuts; a tape measure guarantees accurate lengths and fit.
Utility scissors handle softer materials and trimming. A heat gun provides controlled seam sealing and shaping for foam or wrap-style insulation.
Proper tool selection reduces waste, speeds installation, and enhances finished appearance and durability.
Materials and Accessories (insulation, adhesive, tape, pipe supports)
With the right tools in place, attention turns to the materials and accessories that complete a professional pipe insulation job.
Choose closed-cell foam or fiberglass sleeves sized to pipe diameter; select compatible adhesive and vapor-barrier tape for seams.
Include sealant for joints, stainless-steel or plastic pipe supports, and insulation hangers.
Stock replacement bands, elbows, and corner pieces for clean, durable installations.
Personal Protective Equipment and Safety Considerations
Don protective gloves, eye protection, and a respirator rated for fine particulates and fibers before handling insulation materials to minimize skin contact and inhalation risks.
Also wear long sleeves, pants, and sturdy footwear.
Guarantee adequate ventilation, use drop cloths, and control dust with wet methods or HEPA vacuums.
Keep a first aid kit, fire extinguisher, and material safety data sheets available during work.
Preparing Pipes for Insulation
Before insulating, the pipes should be inspected for damage, leaks, and corrosion to guarantee a sound base for the work.
Any surface contaminants must be cleaned away and the pipes thoroughly dried to promote adhesion and prevent trapped moisture.
Accurate measurements of pipe diameter, length, and fittings are then taken to select and cut insulation to proper fit.
Inspecting Pipes for Damage, Leaks, and Corrosion
A thorough inspection of pipes for damage, leaks, and corrosion is essential before applying insulation to guarantee effectiveness and safety.
The inspector checks joints, fittings, and visible runs for cracks, pinholes, rust, scale, and moisture stains.
Pressure-test indicators and listening for hisses help locate active leaks.
Any compromised sections must be repaired or replaced to prevent concealed deterioration under insulation.
Cleaning and Drying Pipes
Begin by removing all loose debris, scale, and residue from the pipe surfaces using a wire brush, scraper, or appropriate abrasive pad to secure full contact of the insulation.
Wipe with a clean cloth, then degrease with a solvent if oils remain.
Confirm pipes are completely dry—use compressed air or heat lamps for enclosed areas—before fitting insulation to prevent trapped moisture and mold.
Measuring Pipe Diameter, Length, and Fittings
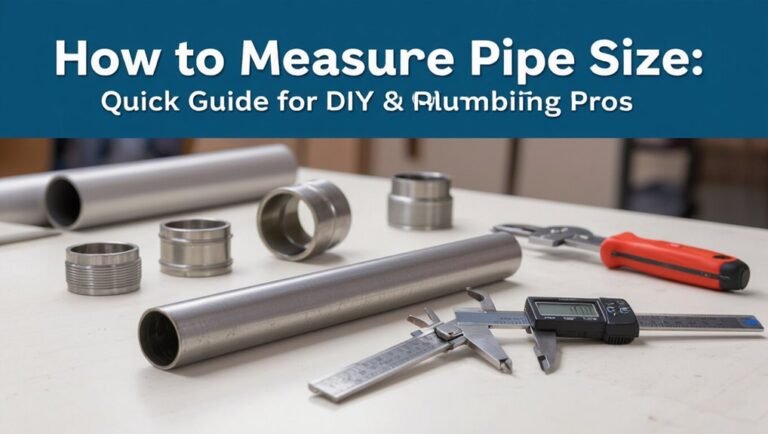
Measure each pipe’s outside diameter and total run length accurately, noting changes for elbows, tees, valves, and flanges so insulation pieces can be cut and mated without gaps.
Record dimensions, including insulation wall thickness, and mark locations of fittings. Allow extra length for joints and seams.
For irregular or insulated fittings, measure circumferences and angles to template cuts, ensuring tight seals and minimal thermal bridging.
Step-by-Step Installation for Slit Foam Tubing (DIY Primary Method)
The procedure for installing slit foam tubing begins with measuring and cutting sections to fit straight runs and around fixtures, ensuring clean, square ends for snug joints.
The tubing is opened along its slit, fitted over the pipe, and the slit is sealed using compatible adhesive, specialized tape, or the tubing’s self-sealing seam.
Careful attention is then given to joints, couplings, and attachment—using adhesive, straps, or clamps as needed—to maintain continuous coverage and secure the insulation in place.
Cutting and Fitting Tubing to Length
Cut tubing to length so each foam sleeve fits snugly along the pipe run without gaps or excessive overlap. Measure between fittings and allowances, mark tubing, then cut squarely with a utility knife or fine-tooth saw.
Trial-fit sections, trim small amounts for tight joints, and stagger seams where possible. Label lengths for repeats. Confirm clean edges for adhesive or tape closure.
Installing Over Straight Runs
Begin by positioning the slit foam sleeve along the straight pipe run with the open seam facing upward so alignment and access are clear.
Press the foam gently around the pipe, ensuring full contact without gaps. Smooth seams and adjust length at fittings.
Continue along the run, overlapping short sections as needed, and trim excess at ends for a neat, consistent insulating layer.
Sealing the Slit: Glue, Tape, or Self-sealing Seams
After the slit foam sleeve is positioned and smoothed along the straight run, attention turns to sealing the open seam to prevent heat loss, condensation, and insect entry.
Options include adhesive designed for EVA/PVC foam applied sparingly along the seam, foil or HVAC tape wrapped smoothly for long runs, or using pre-equipped self-sealing seams pressed firmly.
Guarantee continuous contact and wipe excess adhesive immediately.
Handling Joints and Couplings
Address joints and couplings methodically to maintain insulation continuity and prevent thermal bridging at pipe intersections and fittings.
Measure each fitting, cut foam sections to fit over elbows, tees, and unions, and miter or notch ends for snug contact.
Overlap seams slightly and use short pre-cut pieces for complex shapes.
Guarantee minimal gaps; compress foam gently to form tight, even coverage.
Securing Insulation to Pipes (fasteners, adhesive, clamps)
Secure the slit foam tubing to the pipe using a consistent sequence of fasteners, adhesive, and clamps to guarantee a tight, gap-free fit that resists movement and moisture intrusion.
Position tubing, apply compatible adhesive along the seam, then fasten with corrosion-resistant staples or zip ties at 12–18 inch intervals.
Finish with adjustable metal or plastic clamps at supports and junctions to maintain compression and alignment.
Inspecting the Installed Run
Begin a systematic inspection of the installed run by working from one end to the other, visually and manually checking seams, joints, fasteners, and supports to confirm a continuous, snug fit without gaps, loose adhesive, or displaced clamps.
Note areas needing adjustment, reapply adhesive or reposition clamps where seams separate, and guarantee insulation contacts fittings and valves.
Record corrections and recheck after repairs.
Step-by-Step Installation for Fiberglass Wrap and Jackets
The following section outlines the procedural steps for fitting fiberglass wrap and jackets to pipes, beginning with accurate cutting and snug wrapping around the pipe circumference.
It then covers the correct placement of vapor barriers and outer jacketing, with instructions for sealing seams and overlapping layers to maintain continuous protection.
Special attention is given to best practices when insulating high-temperature pipes, including selecting appropriate jacket materials and maintaining required clearances.
Cutting and Wrapping Around Pipes
Cutting and wrapping around pipes requires careful measurement and clean, precise cuts to guarantee a snug fit of fiberglass wrap or pre-formed jackets. Installers mark lengths and seam locations, slice insulation to follow pipe contours, and overlap or seal seams so vapor barriers remain continuous and thermal performance is maintained.
They trim at fittings, miter elbows, and use short pieces for offsets, securing edges with mechanical fasteners or tape.
Installing Vapor Barriers and Jacketing
Installers apply vapor barriers and jacketing to guarantee long-term moisture protection and preserve insulation R‑value.
They cut barrier material to length, wrap over fiberglass insulation, and secure with recommended tape or bands.
Jacketing is fitted smoothly, aligned with seams and fasteners, then mechanically anchored at supports.
Final inspection confirms continuous coverage, proper adhesion, and damage-free surfaces before system commissioning.
Sealing Seams and Overlapping Layers
Begin by aligning adjacent jacket edges and wrap layers so seams sit flat and parallel, ensuring consistent overlap per manufacturer specifications (typically 1–2 inches for vapor barriers, 2–4 inches for jacket laps).
Secure seams with appropriate tape or metal banding, staggering joints on successive layers.
Smooth surfaces to eliminate gaps, apply sealant where required, and inspect seams for continuity and tight adherence.
Best Practices for High-Temperature Pipes
For high-temperature pipes, a methodical approach to fiberglass wrap and jacket installation minimizes heat loss and prevents sheath degradation:
Inspect pipe surfaces, remove contaminants, and apply high-temperature adhesive where specified.
Wrap fiberglass with 50% overlap, secure with stainless steel bands, and add vapor barrier tape.
Install outer jacket with sealed seams and expansion joints.
Test for continuity and recheck fastenings after thermal cycling.
Insulating Around Fittings, Valves, and Flanges
Proper insulation of fittings, valves, and flanges requires tailored techniques for elbows, tees, and reducers to maintain continuity and thermal performance.
Removable covers and split or hinged assemblies are recommended for valves and access points to allow maintenance without compromising insulation.
Custom-cut pieces and flexible materials are used to address irregular shapes and guarantee tight seals at joints.
Techniques for Elbows, Tees, and Reducers
Fitting insulation around elbows, tees, reducers, valves, and flanges demands careful measurement, cutting, and sealing to preserve thermal continuity and prevent moisture intrusion.
Techniques include mitered or saddle cuts for elbows, segmented rings for large diameters, and tapered pieces for reducers.
Secure joints with adhesive, foil tape, or stainless straps and seal seams with vapor barrier material.
Guarantee snug fit without compressing insulation.
Removable Covers for Valves and Access Points
Many maintenance programs rely on removable insulation covers to balance thermal performance with accessibility. These tailored blankets allow quick access to valves, flanges, and other service points without damaging fixed insulation.
Removable covers use high-temperature cores, weatherproof jackets, and secure fastenings. They are sized for snug fit, labeled for location, and designed for repeated removal, minimizing downtime while maintaining energy efficiency and personnel safety.
Custom Solutions for Irregular Shapes
Insulating irregular components such as elbows, tees, valves, and flanges requires tailored approaches that combine custom-cut insulation, segmented jackets, and precise sealing to maintain thermal continuity and allow service access.
Prefabricated and site-fabricated pieces are measured, cut, and bonded or clamped; flexible materials and removable covers accommodate maintenance.
Seams are sealed with tapes or mastics, and insulation thickness matches adjacent runs to prevent thermal bridges.
Insulating Exterior and Buried Pipes
When insulating exterior and buried pipes, attention must be paid to weatherproofing and UV-resistant jacketing for exposed runs.
Requirements for insulation type and thickness differ for underground and crawlspace installations and must meet local codes to prevent heat loss and moisture intrusion.
In cold climates, strategies such as increased insulation R-value, heat tape, and proper burial depth are used to reduce freeze risk.
Weatherproofing and UV Protection for Outdoor Runs
Outdoor pipe runs require weatherproofing and UV protection to maintain insulation performance and prevent material degradation.
Protective jacketing, UV-stable elastomeric foam, or PVC cladding shields insulation from sunlight, rain, and temperature swings. Seal seams with compatible tape or mastic and secure fittings with stainless clamps.
For exposed metal, apply corrosion-resistant coatings. Regular inspections guarantee integrity and prompt repairs to extend service life.
Insulation Requirements for Underground and Crawlspace Pipes
Protecting pipes in crawlspaces and buried runs requires materials and installation practices suited to damp, confined, and variable-soil environments.
Use closed-cell foam or polyethylene insulation with appropriate thickness and durable vapor barriers.
Guarantee tight joints, sealed seams, and corrosion-resistant tape or mastic.
Maintain clearance from soil, provide protective conduit for shallow burial, and follow local codes for depth, groundwater, and access for inspection.
Freeze Protection Strategies for Cold Climates
Because water expands as it freezes, insulating exterior and buried pipes in cold climates requires a layered strategy that combines appropriate materials, installation techniques, and site-specific measures to prevent freezing and pipe damage.
Use closed-cell foam, heat tape where code allows, high-R-value wrap, and protective jacketing.
Bury to frost depth, slope drains, seal gaps, and provide accessible inspection points for maintenance and emergency heating.
Common Mistakes and How to Avoid Them
Common installation errors can undermine insulation performance and lead to heat loss, frozen pipes, or moisture problems. The most frequent issues include gaps and compression errors, selecting materials unsuited for the pipe’s temperature or wet environment, and poor sealing that permits condensation and mold growth. Addressing these problems early prevents damage and extends system life.
- Gaps or crushed insulation that reduce R-value and create thermal bridges
- Choosing materials not rated for high temperatures or outdoor/moist environments
- Inadequate seals at joints and fittings that allow moisture ingress
- Failing to protect insulation from UV or physical damage on exterior runs
- Ignoring manufacturer’s installation guidelines and warranty requirements
Gaps and Compression Errors
Gaps and over-compression in pipe insulation undermine thermal performance and can lead to condensation, corrosion, or energy loss if not corrected.
Inspect joints, bends, and penetrations for voids; cut pieces to fit snugly without squashing.
Use proper seam alignment and secure fasteners or tape to maintain shape.
Recheck after system vibration or settling to prevent thermal bridging and moisture entry.
Using the Wrong Material for Temperature or Moisture Conditions
When insulation is selected without regard to operating temperature ranges or moisture exposure, the result is accelerated degradation, reduced R-value, and potential system failure.
Choosing indoor-grade foam for outdoor or high-temperature lines, or non-vapor-retardant products for damp environments, shortens service life.
Match material specifications to temperature, condensation risk, and UV or chemical exposure; confirm ratings and manufacturer limits before installation.
Improper Sealing Leading to Condensation or Mold
If seals and joints are not installed and maintained to the system’s specifications, moisture can penetrate the insulation, condense on cold surfaces, and create conditions conducive to mold growth and corrosion.
Inspect seams, use compatible vapor barriers, apply approved sealants, and guarantee continuous coverage.
Address damage promptly, maintain drainage and ventilation, and follow manufacturer and code requirements to prevent moisture intrusion and microbial development.
Maintenance, Inspection, and Replacement Guidelines
Routine inspections should be scheduled at least annually and after any unusual weather events or system work.
Indicators such as moisture, compressed or crumbling material, gaps at seams, or reduced thermal performance warrant repair or replacement.
Small tears or loose seams can often be fixed with appropriate tapes or patch sections, while widespread deterioration requires full replacement.
How Often to Inspect Insulation
How often pipe insulation should be inspected depends on the material, operating conditions, and exposure to damage; a baseline schedule is quarterly visual checks with more frequent inspections for high-temperature, outdoor, or vibration-prone systems.
Inspectors should log findings, note moisture, compression, UV exposure, and fastening integrity. They should also adjust intervals based on system criticality and past degradation rates to prioritize preventive maintenance.
Signs Insulation Needs Repair or Replacement
Several clear indicators signal when pipe insulation requires repair or replacement.
Visible deterioration—cracks, compression, separation, or missing sections—reduces effectiveness.
Moisture, mold, or mildew on or around insulation indicates water intrusion and compromised material.
Frequent condensation, unusual energy bills, or persistent pipe sweating suggest thermal loss.
Rodent damage, crushing from impacts, or degraded vapor barriers also warrant timely replacement.
Simple Repair Methods for Damaged Sections
After identifying signs that insulation has deteriorated—such as cracks, moisture staining, or compression—the next step is to address damaged sections promptly to restore thermal performance and prevent further deterioration.
Cut out compromised material, dry the area, and measure replacement pieces.
Use matching insulation, secure seams with adhesive or foil tape, and seal joints with vapor barrier.
Inspect repairs regularly for recurrence.
Cost Estimates and Time Requirements
Typical material costs for foam, fiberglass, and rubber insulation are summarized to help compare budget options.
Estimated labor time is contrasted between DIY projects and professional installation to set realistic schedules.
Guidance is provided on circumstances—complex piping, high temperatures, or code requirements—when hiring a professional is recommended.
Typical Material Costs by Insulation Type
Most common pipe insulation types—fiberglass, foam, rubber, and mineral wool—vary considerably in material cost, installation speed, and required tools.
Foam sleeves: low cost, simple cuts, adhesive or slit design.
Rubber: mid to high cost, flexible for irregular runs.
Fiberglass: moderate cost, needs jackets and tape.
Mineral wool: higher cost, dense, requires protective gear and cladding.
Labor Time: DIY vs. Professional Installation
Material choice affects not only product costs but also the time and skill required to install pipe insulation, so comparisons between DIY and professional labor hinge on both factors.
DIY projects typically take longer—allowing for measurement, cutting, and fitting—while pros work faster due to experience and tools.
Expect variable hourly rates, travel time, and complexity increases for tight spaces or multi-run systems.
When to Hire a Professional
When should a homeowner call in a professional rather than tackle pipe insulation as a DIY job?
Professionals are advised for complex layouts, inaccessible pipes, or when work affects heating, plumbing, or code compliance.
Expect higher hourly rates but faster completion—often one to a few hours for typical jobs.
Obtain written cost estimates, timelines, and warranty details before hiring.
Energy Savings and Performance Calculations
The relationship between insulation thickness and pipe heat loss is summarized by predictable thermal-resistance principles, with thicker insulation reducing heat transfer and surface temperature.
A simple calculation comparing pre- and post-insulation heat loss rates can quantify annual energy savings.
Dividing the installation cost by those annual savings yields a quick payback period estimate.
How Insulation Thickness Affects Heat Loss
Because heat loss through a pipe is governed by conduction and convection, increasing insulation thickness reduces thermal transfer by adding resistance to heat flow.
This relationship can be quantified to show diminishing returns as thickness grows. Calculations use thermal resistance (R) and overall U-value; initial thickness greatly cuts losses, while further increments yield smaller marginal savings.
Ideal thickness balances cost, space, and target energy reduction.
Quick Method to Estimate Payback Period
A simple rule-of-thumb helps estimate payback by comparing annual energy cost savings from reduced heat loss to the installation expense.
Calculate annual savings: saved energy (kWh or therms) × unit cost.
Divide installation cost by annual savings to get years to payback.
Include maintenance and replacement intervals for longer-term accuracy.
Use conservative estimates to avoid overstating benefits.
Safety and Code Considerations
The discussion shifts to safety and code considerations that affect selection and installation decisions.
It notes when local building codes and permit requirements apply, specifies fire resistance and maximum service temperatures for insulation materials, and highlights environmental handling and disposal obligations.
Compliance with these rules is presented as essential to guarantee lawful, safe, and durable installations.
Local Building Codes and Permit Triggers
When undertaking pipe insulation, homeowners and contractors must consult local building codes to determine required materials, insulation R-values, and any permit triggers that apply to plumbing or mechanical work.
Codes dictate minimum insulation thickness, vapor barriers, and installation methods; permit triggers often include alterations to covered systems or insulation affecting access, energy compliance, or retrofit scope.
Verify jurisdictional requirements and document approvals before work begins.
Fire Safety and Temperature Limits for Materials
Because insulation encounters a range of temperatures and potential ignition sources, materials must meet specified fire ratings and maximum continuous-use temperatures to confirm safety and code compliance.
Selection should prioritize noncombustible or fire-rated products for high-temperature or exposed installations.
Installers must verify manufacturer limits, confirm clearances from heat sources, and follow local fire codes and testing standards to prevent degradation, ignition, or code violations.
Environmental and Disposal Considerations
Following verification of fire ratings and temperature limits, attention should shift to environmental and disposal considerations that affect material choice, installation, and end-of-life handling.
Inspect for hazardous components (asbestos, lead, PVC additives). Prefer recycled or low-VOC insulation where possible.
Label materials for proper municipal disposal or recycling. Comply with local regulations, hazardous-waste protocols, and contractor documentation to minimize environmental impact and liability.
Quick Troubleshooting Reference
A brief troubleshooting reference helps identify common issues that undermine pipe insulation performance and longevity.
It summarizes typical causes and quick checks for problems like moisture, freezing, and physical damage so corrective steps can be prioritized. The guide is designed for rapid assessment before scheduling repairs or upgrades.
- Check for condensation under insulation and verify vapor barriers are intact.
- Inspect areas where pipes still freeze despite insulation and confirm proper thickness and coverage.
- Look for cuts, compression, or displaced insulation after renovation work.
- Watch for signs of rodent or insect damage and seal entry points promptly.
- Verify joints, seams, and exposed fittings for gaps or deteriorated adhesive.
Condensation Under Insulation
When moisture collects beneath pipe insulation, it signals a breakdown in vapor control or insulation integrity that can lead to corrosion, mold, and thermal loss.
Swift diagnosis focuses on identifying vapor drive sources, breaches in the jacket or seams, and insufficient insulation thickness relative to surface temperature and ambient conditions.
Recommend repairing damaged jacketing, adding a proper vapor barrier, increasing insulation R‑value, and sealing penetrations; dry and monitor.
Persistent Freezing Despite Insulation
Diagnose persistent freezing by quickly isolating probable causes: verify insulation continuity and thickness against design temperatures, confirm heat trace functionality and correct installation, check for gaps at fittings, valves, or supports, and evaluate environmental factors such as wind exposure, drafts, or unusually low ambient temperatures.
If issues persist, measure pipe surface temperatures, inspect joint seals, consider increased R-value or added enclosure, and document findings.
Damaged Insulation After Renovation or Pest Activity
Inspect damaged insulation promptly after renovations or pest activity to prevent heat loss, moisture intrusion, and further degradation.
Assess extent, noting tears, compressions, nests, droppings, or moisture stains.
Remove contaminated sections; sanitize surrounding areas if biological contamination is present.
Replace with appropriate material and seal joints.
Consider pest-proofing measures and document repairs for future inspections and warranty purposes.
Ready-to-Use Installation Checklist
A concise, ready-to-use checklist guides installers from measurements through final inspection to guarantee consistent, code-compliant results.
It highlights pre-installation measurements and materials, the step sequence for a typical installation, and key post-installation inspection points.
This checklist serves as a practical reference to reduce errors and save time on the job.
- Verify pipe dimensions, insulation type, and required accessories before starting
- Follow a clear step sequence: surface prep, fitting, sealing, and securing
- Check joints, seams, and vapor barriers for continuity and proper adhesion
- Confirm fastening spacing, support placement, and clearance to equipment
- Perform a final inspection for gaps, compression, and thermal/waterproof integrity
Pre-installation Measurements and Materials
Before any adhesive or fastener is applied, the installer must record accurate pipe dimensions, ambient conditions, and required materials to guarantee a smooth installation.
Measurements include pipe diameter, length, wall thickness, and bend/tee locations. Note surface temperature, humidity, and exposure.
List insulation type, thickness, fittings, sealant, tape, supports, and PPE.
Confirm quantities, compatibility, and delivery timeline before work begins.
Step sequence for a typical installation
Begin the installation by following a clear, linear checklist that sequences tasks from staging materials to final inspection, ensuring each step is completed and documented before proceeding to the next.
Next: isolate and drain lines, clean and measure pipe runs, cut insulation to fit, dry-fit sections, apply adhesive or seal, secure seams and supports, label runs, restore service and record completion.
Post-installation inspection points
Inspect the completed installation systematically using a concise checklist that verifies material integrity, seam and joint continuity, support spacing, labeling accuracy, and absence of gaps or compression that could compromise thermal performance.
Confirm vapor barrier seals, adhesive bonds, and weatherproofing where exposed. Measure insulation thickness at representative points, guarantee expansion clearance at fittings, verify hangers meet spacing standards, and record findings for maintenance.
Conclusion
Insulating pipes protects systems and saves energy, so one should act before small issues become big—“a stitch in time saves nine.” Proper material choice, careful preparation, and correct installation yield long-term performance and reduced bills. Professionals follow codes; DIYers follow instructions and safety precautions. When doubts arise, consult a pro. With routine inspection and timely repairs, insulated piping remains efficient, safe, and reliable for years to come.