How to Install a Corner Shower: Step-by-Step Guide for DIYers and Pros
To install a corner shower, start by measuring your space and selecting a compatible base and enclosure. After shutting off utilities and removing any old fixtures, you’ll need to rough in plumbing and set the drain. Next, either create a mortar bed or use the support recommended by the manufacturer, ensuring the base is level. Secure the wall backing or install a prefabricated surround, then fit the door and seal all joints with mildew-resistant caulk. Finally, test for leaks and make any necessary adjustments. For detailed instructions, troubleshooting tips, and cost estimates, continue reading.
Overview of Corner Shower Installation
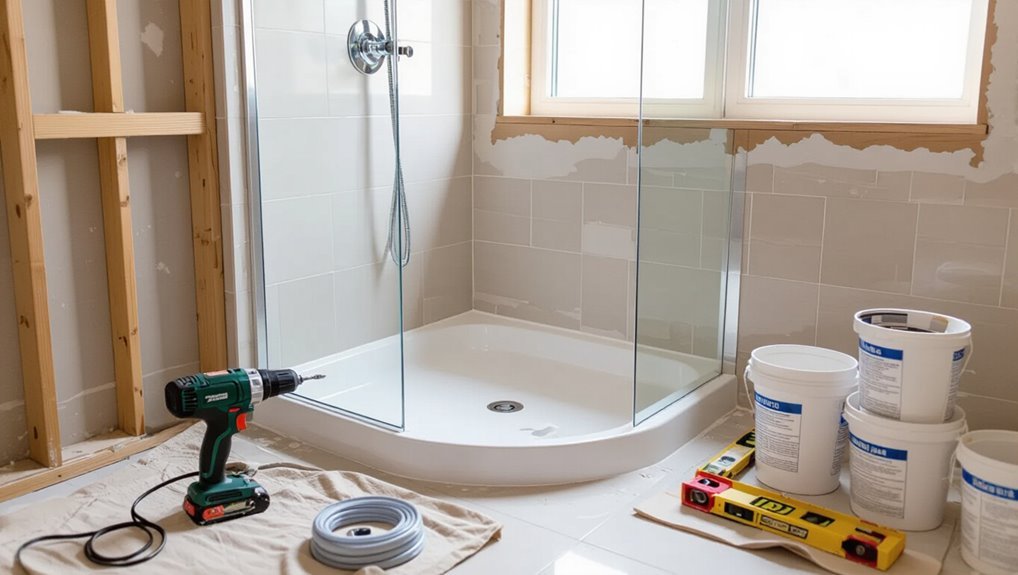
A corner shower is a space-saving unit installed into a bathroom corner and commonly comes as quadrant, neo-angle, or square models in prefabricated or custom-built styles.
Installing one can free floor space, improve traffic flow, and update the room’s aesthetic while accommodating varied budgets and layouts.
Typical projects range from a few hours for a simple replacement to several days for custom work, with costs spanning low hundreds for basic kits to several thousand dollars for high-end or structural installations.
What a corner shower is and common types
Corner showers occupy the triangular space where two bathroom walls meet, offering a compact bathing solution suited to small or oddly shaped bathrooms.
They range from neo-angle and quadrant units to alcove and prefabricated corner stalls. Materials include acrylic, fiberglass, tile, and stone.
Knowledge of how to install a corner shower helps determine required framing, base type, drain placement, and enclosure style.
Benefits of installing a corner shower in your bathroom
Why choose a corner shower? A corner shower maximizes floor space, freeing room for storage or fixtures while fitting small or irregular layouts.
It enhances traffic flow, offers versatile styling with curved or neo-angle units, and can improve perceived bathroom size.
Installation often requires fewer materials and can simplify plumbing placement, making it practical for renovations and new builds.
Typical project scope, time, and cost estimates
Estimate project scope, time, and cost by breaking the installation into clear phases—demolition, plumbing and electrical adjustments, substrate and waterproofing preparation, enclosure and fixture installation, and finishing work—each influencing overall duration and budget.
Typical DIY timelines span 2–7 days; professional installs 1–3 days.
Materials range $300–$2,500; labor adds $600–$3,000 depending on complexity, permits, and finishes.
Tools, Materials, and Safety Preparations
A concise list of essential tools—measuring tape, level, drill, tile saw, wrenches, and sealant gun—frames the work ahead.
Choices of base, enclosure, door style, and valve type are summarized to match space, budget, and water-handling needs, while electrical and plumbing requirements and any local permits are noted.
Required safety gear and clear safe-work practices are outlined to minimize hazards during installation.
Essential tools list
Before beginning work on a corner shower, gather the essential tools, materials, and safety gear to guarantee efficient, safe progress. This list focuses on items that will be used repeatedly and those required for critical steps like measuring, cutting, waterproofing, and plumbing.
Essential tools include:
- Tape measure, level, square, pencil.
- Wet saw or circular saw with diamond blade, utility knife.
- Drill/driver, adjustable wrench, plumber’s tools, caulking gun, safety gear (gloves, goggles).
Materials and fixture options (base, enclosure, doors, valve)
Several core material categories determine a corner shower’s performance and longevity: the base, enclosure, door type, and valve assembly. Choices affect durability, maintenance, and aesthetics.
Consider acrylic or stone resin bases, framed or frameless glass enclosures, sliding or pivot doors, and pressure-balanced or thermostatic valves.
Evaluate warranty, slip resistance, and compatibility with existing framing.
- Base materials
- Enclosure types
- Valve options
Electrical and plumbing considerations and permits
Moving from material and fixture selection to the technical side, attention turns to the electrical and plumbing requirements that dictate installation feasibility and safety.
Inspect existing supply lines, drain location, and venting; confirm water pressure and hot-water capacity.
Identify electrical needs for lighting, exhaust fans, and heated floors.
Verify local code, obtain permits, and schedule inspections; consult licensed trades for complex reroutes.
Safety gear and safe-work practices
A concise set of personal protective equipment and clear safe-work procedures reduces injury risk during a corner shower installation.
Workers should wear safety glasses, gloves, hearing protection, dust masks or respirators, and slip-resistant footwear. Use knee pads for prolonged kneeling.
Guarantee proper ventilation, secure ladders, isolate electrical circuits, and follow lockout/tagout when needed.
Keep a first-aid kit and fire extinguisher nearby.
Pre-Installation Assessment and Measurements
Before any demolition or assembly, measurements of the corner space and verification of wall studs and existing plumbing locations are taken to guarantee proper fit.
The subfloor condition and bathroom ventilation are inspected to confirm structural integrity and moisture control.
Based on these findings, the correct shower base and enclosure are selected, the layout is planned, and rough‑in plumbing is verified.
Measuring the space and checking wall studs and plumbing locations
Careful measurement and verification of wall studs and existing plumbing guarantee the corner shower will fit and connect correctly.
Measure floor-to-ceiling height, corner width, and diagonal clearances.
Locate studs with a detector and mark centers for anchoring.
Identify drain, supply lines, and access panels; note distances from proposed shower walls.
Record measurements and component positions on a scaled sketch for installer reference.
Inspecting subfloor condition and bathroom ventilation
Several quick checks determine whether the subfloor and ventilation meet requirements for a corner shower installation.
Inspect for rot, soft spots, levelness, and secure joist support; measure floor thickness and confirm subfloor material compatibility with waterproofing.
Verify exhaust fan capacity, duct routing, and vent termination to prevent moisture buildup.
Address deficiencies before ordering shower components to guarantee durable, code-compliant results.
Choosing the correct shower base and enclosure for your corner dimensions
Selecting the correct shower base and enclosure begins with precise corner measurements and an understanding of available standard sizes and custom options.
Measure both wall-to-wall distances, diagonals, and ceiling height; note obstructions and floor slope. Match measurements to quadrant, neo-angle, or square bases and glass or acrylic enclosures.
Verify threshold type, drain location, and weight limits before ordering.
Layout planning and rough-in plumbing verification
Before any components are set, the layout and rough-in plumbing must be verified against the measured corner dimensions to confirm drain location, water supply lines, and valve placement align with the chosen base and enclosure.
Inspect floor joists, substrate height, and access panels.
Mark centerlines, test drain slope, measure clearances for door swing, and adjust plumbing offsets or framing before installing the base.
Removing Old Fixtures and Preparing the Site
The old tub or shower is removed methodically, with water and power shut off and plumbing capped to prevent leaks.
The exposed area is then cleaned, leveled, and any damaged subfloor or wall studs are repaired or replaced to provide a stable base.
Finally, the plumbing rough‑in is installed or adjusted to the new corner shower’s drain and valve locations before proceeding.
How to remove existing tub or shower safely
Begin by cutting power to any nearby outlets and shutting off water to the bathroom to eliminate electrical and plumbing hazards.
Remove shower doors, trim, and fixtures. Detach plumbing connections and cap lines.
Score and break the tub or surround into manageable sections using a reciprocating saw and pry bar, avoiding wall studs.
Contain debris, ventilate space, and dispose of materials per local regulations.
Cleaning, leveling, and repairing subfloor and walls
Clear surfaces and assess damage to establish a reliable foundation for the new corner shower.
Remove debris, adhesive, and loose flooring; vacuum and dry the area.
Inspect subfloor for rot, soft spots, and levelness; replace or sister joists as needed.
Repair wall studs and sheathing, patch holes, and install moisture-resistant backerboard.
Verify flat, stable surfaces before proceeding.
Installing or adjusting plumbing rough-in for new shower
Disconnect existing fixtures and cap water supply lines before removing old hardware to prevent leaks and water damage.
The installer assesses pipe locations, measures for new valve and drain placement, and opens access panels.
Old piping is removed or adapted, new rough-in valves and drain assemblies positioned to manufacturer specs, then secured and pressure-tested.
Walls and floor openings are prepared for final shower assembly.
Installing the Shower Base
The installer first dry-fits the shower base to check alignment and marks anchor points on the subfloor.
Next, mortar or the chosen support system is applied and the base is set into position to guarantee full contact.
Finally, the base flange is secured, leveled, and sealed to create a waterproof connection to the surrounding walls and drain.
Dry-fitting the base and marking anchor points
Position the shower base in the corner to verify fit and alignment before any permanent fastening; this dry-fit step guarantees the flange sits flush against both walls, the drain lines align, and the floor is level.
Once positioned, mark wall studs, flange screw locations, and the drain center. Record any gaps or irregularities.
Remove the base and transfer anchor marks to the substrate for accurate installation.
Applying mortar or support system and setting the base
Begin by spreading a uniform bed of thin-set mortar or a preformed support system on the subfloor where the drain and footprint were marked, ensuring coverage is slightly larger than the base to allow full support.
Place the shower base into position, aligning drain opening with plumbing.
Press evenly, seat the base into the mortar, and confirm full contact without rocking before curing.
Securing, leveling, and waterproofing the base flange
Once the base is set and mortar has cured, attention shifts to securing and leveling the flange to create a watertight perimeter.
The flange is fastened to studs with corrosion-resistant screws. Shims correct gaps, and a level confirms even slope toward the drain.
Sealant or waterproof membrane is applied over the flange and wall interface, and fastener heads are sealed to prevent leaks.
Building or Installing Shower Walls
Next, the focus shifts to the shower walls and the main choices between a prefabricated surround and traditional tiled walls.
For a surround, the sequence of measuring, trimming, securing panels, and sealing seams is outlined step-by-step.
For tile, the discussion covers backer board installation, waterproofing membrane, tile layout, and the required grouting, sealing, and curing times.
Options: prefabricated surround vs. tiled walls
When choosing shower walls, homeowners must weigh prefabricated surrounds against tiled installations, balancing cost, durability, maintenance, and appearance.
Prefabricated units offer faster installation, lower upfront cost, and minimal grout upkeep but limited customization and repair options.
Tile provides design flexibility, superior longevity, and easier localized repairs at higher material, labor, and waterproofing complexity.
Selection depends on budget, skill, timeline, and desired aesthetics.
Installing a prefabricated surround step-by-step
Begin by preparing the shower opening and verifying that the subfloor, studs, and plumbing are square, level, and securely fastened; this guarantees the prefabricated surround will seat properly and the drain and fittings will align.
Measure and dry-fit panels, trim edges as needed, apply recommended adhesive or sealant, fasten panels to studs per manufacturer instructions, install trim and hardware, test drain and seal joints.
Tiling walls: backer board installation, waterproofing membrane, and tile layout
After a prefabricated surround is removed or when framing is prepared for a custom tile installation, the wall substrate must be properly assembled before tiling.
Cement backer board is screwed to studs with proper seam treatment; seams are taped and thinset applied.
A waterproofing membrane (sheet or liquid) covers the substrate, sealed at corners and penetrations.
Tile layout is planned from focal points for balanced cuts.
Grouting, sealing, and curing times
Although grout application is a finishing step, it demands careful timing and technique to guarantee waterproof joints and long-term durability.
Clean joints, mix grout to manufacturer consistency, and apply fully packed. Wipe excess before skin forms.
Allow grout to cure per instructions (typically 24–72 hours).
Seal porous grout with a penetrating sealer after full cure; reapply as recommended for maintenance.
Installing Shower Doors and Enclosure
The installer first selects the appropriate corner door style—sliding, pivot, or neo-angle—based on space and user preference.
Precise measurements are taken and the custom or pre-fabricated unit is ordered to match opening dimensions.
Installation proceeds with frame and glass placement, careful sealing, and final adjustments and hardware tightening to guarantee proper operation and watertightness.
Types of corner shower doors (sliding, pivot, neo-angle)
Homeowners commonly choose among three main corner shower door styles—sliding, pivot, and neo-angle—each offering distinct space, clearance, and installation considerations.
- Sliding: tracks conserve swing space; good for tight bathrooms but needs smooth alignment.
- Pivot: single or double door swing; simpler hardware but requires clearance.
- Neo-angle: angled glass fits shallow corners; visually compact though framing is more complex.
Measuring and ordering the right door
Accurate measurements form the foundation for ordering a corner shower door that fits and functions correctly.
Measure opening width at top, middle and bottom; note plumb and level of walls.
Record diagonal distances for neo-angle units and threshold-to-threshold clearances.
Confirm door swing or track dimensions per chosen type.
Provide precise measurements, wall substrate notes and preferred hardware finish when ordering to guarantee compatibility.
Step-by-step door/enclosure installation and sealing
Begin installation by preparing the opening and laying out all components to guarantee fast, accurate assembly.
Fit and level fixed panels, secure frames to jambs with provided anchors, then install sliding or hinged doors per manufacturer templates.
Apply continuous silicone sealant along exterior seams and between frame and wall.
Install threshold and drip rails, remove excess sealant, allow full cure before use.
Adjustments and hardware tightening
Check and fine-tune all moving parts before finalizing the installation to guarantee smooth operation and watertight seals.
Inspect alignment of doors, adjust rollers and hinges for even gaps, and tighten screws incrementally to avoid distortion.
Verify magnetic strips and sweep seals engage fully.
Recheck caulk lines after adjustments.
Test operation and water containment; retorque fasteners if movement or leaks appear.
Plumbing Connections and Fixtures
Next, attention turns to the plumbing connections and fixtures required for a functioning corner shower.
The installer fits the valve, mounts the showerhead and trim kit, and connects the drain while ensuring the trap and drain slope meet code.
After connections are complete, the system is pressure-tested for leaks and adjusted for proper water pressure and temperature before finalizing the installation.
Installing the valve, showerhead, and trim kit
Install the valve, showerhead, and trim kit after confirming water supply lines are secure and pressure-tested; the valve body must be positioned at the correct depth relative to the finished wall, with hot and cold lines properly aligned and threaded connections sealed with appropriate tape or compound.
Mount the valve, attach escutcheon and handle, install shower arm, handpiece or fixed head, and fasten trim per manufacturer instructions.
Testing for leaks and adjusting water pressure/temperature
Begin by restoring water to the shower supply and operating the valve briefly to flush air and reveal any immediate leaks at joints or the valve body.
Inspect all visible fittings, use tissue or dry cloth to detect drips, and tighten connections as needed.
Verify consistent hot/cold balance, adjust pressure limiter or diverter, and retest until temperature and flow are stable and leak-free.
Connecting drain and ensuring proper slope
With the shower valve checked and water flow confirmed, attention shifts to the drain and floor pitch to guarantee rapid, complete drainage.
The installer verifies trap alignment, secures the drain flange with proper sealant, and connects to waste lines per code.
The pan mortar is sloped 1/4 inch per foot toward the drain, tested with water to confirm no pooling before final tile and trim.
Waterproofing, Sealing, and Finishing Touches
A final inspection should verify continuous waterproofing at seams, corners, and any penetrations to prevent leaks.
Appropriate caulks and sealants—silicone for nonpainted joints, hybrid or polyurethane where paintability or adhesion is required—are applied and tooled for a smooth, durable seal.
Once seals cure, accessories such as shelves, grab bars, and towel hooks are installed to manufacturer specifications and with corrosion-resistant anchors to maintain watertight integrity.
Final waterproofing checks around seams and penetrations
Inspect the shower’s seams and penetrations methodically to confirm continuous waterproof protection where panels meet and fixtures pass through the assembly.
Verify membrane integrity at joints, corners, and screw holes, confirming laps overlap correctly and tape or reinforcing patches are fully adhered.
Check around valves, drains, and showerheads for pinholes, uncured areas, or gaps, and plan targeted repairs before final finishes are applied.
Caulking, sealants, and recommended products
Several types of caulks and sealants are essential for sealing joints, corners, and penetrations in a corner shower: silicone for non-porous surfaces and flexibility, polyurethane for high-strength bonds where movement is expected, and specialized hybrid MS polymers for paintability and adhesion to diverse materials.
Use mildew-resistant silicone for glass and tile, polyurethane at curb and floor junctions, and hybrids where paint or varied substrates require reliable adhesion.
Installing accessories: shelves, grab bars, towel hooks
Plan accessory placement with waterproofing and load requirements in mind: mount shelves, grab bars, and towel hooks only after verifying backing or installing appropriate anchors, and seal every fastener penetration with the recommended sealant to maintain the shower’s continuous waterproof plane.
Use stainless or corrosion-resistant fixtures, position grab bars to meet accessibility codes, apply silicone to trim and flange interfaces, and test stability before final use.
Common Problems and How to Fix Them
Common issues that arise after installing a corner shower include leaks and poor drainage, an uneven base or tile lippage, and door misalignment causing unwanted water spray.
Each problem has specific diagnostic steps and targeted fixes, from resealing joints and adjusting slopes to releveling substrates and realigning hardware.
Addressing these problems promptly prevents water damage and extends the life of the shower.
Handling leaks and poor drainage
Leaks and poor drainage in a corner shower can stem from a handful of predictable issues—worn seals, improper slope in the shower pan, cracked grout or tile, and loose plumbing connections—and each requires a targeted approach to diagnose and repair.
Inspect seals and replace or recaulk, clear or replace clogged drains and traps, tighten or reseal pipe joints, and repair damaged grout or tiles to restore watertight performance.
Dealing with uneven base or tile lippage
Once water-tightness is restored, attention often shifts to the feel and safety of the shower floor—uneven bases or tile lippage create tripping hazards, ponding, and grout failure if left unaddressed.
Assess with a straightedge; shim or reslope substrate where possible. For localized lippage, grind high edges or replace tiles.
Regrout and seal joints, then retest slope to drain to guarantee longevity and safety.
Fixing door misalignment and water spray issues
Addressing door misalignment and intrusive water spray is essential for a functional corner shower; misaligned doors compromise sealing and cause errant splashes, while poorly directed spray leads to wet floors and mold risk.
Inspect hinges, adjust tracks, tighten screws, and shim frames for even gaps. Install sweep seals or replace warped panels.
Redirect spray with angled nozzles, splash guards, or a low-profile threshold to contain water.
Maintenance and Care After Installation
Routine cleaning protocols, like daily squeegeeing and weekly nonabrasive scrubbing, help prevent mold and soap scum buildup.
Over the long term, scheduled inspections and timely re-caulking or grout repair preserve watertight seals and finish.
Professional assessment should be sought for persistent leaks, structural concerns, or recurring mold despite proper maintenance.
Daily and weekly cleaning tips to prevent mold and soap scum
Keep the corner shower dry and ventilated after each use to minimize mold and soap scum buildup.
Wipe walls, glass, and fixtures with a squeegee or microfiber cloth daily.
Weekly, apply a mild, nonabrasive cleaner to grout and corners, scrub with a soft brush, rinse thoroughly, and dry.
Clean drain covers and replace shower mats regularly to prevent residue and odors.
Long-term maintenance: re-caulking and grout repair schedule
After daily drying and weekly scrubbing, attention should turn to periodic re-caulking and grout repair to preserve waterproofing and prevent leaks.
Inspect caulk and grout every six months; replace cracked or detached caulk and reseal grout joints showing wear.
Use mildew-resistant silicone for corners and epoxy grout for durability.
Complete full re-caulking and grout touch-ups every two years or sooner if deterioration appears.
When to call a professional for repairs
Recognize signs that exceed basic homeowner maintenance and warrant professional attention: persistent leaks, mold behind tiles, structural movement, recurrent drainage blockages, or failing waterproof membranes.
If inspections reveal compromised subflooring, extensive tile detachment, or uncertain plumbing connections, hire a licensed contractor or plumber.
Timely professional intervention prevents larger damage, guarantees code compliance, and preserves warranty coverage.
Schedule repairs promptly.
Cost Breakdown, Timeframe, and DIY vs. Professional Decision
Typical material costs for a corner shower range from basic prefabricated kits to high-end tile and fixtures, while labor can vary widely depending on region and complexity.
Time estimates commonly include demolition (a few hours), installation of the base and enclosure (1–2 days), and finishing work such as tiling and sealing (2–5 days).
Hiring a professional is advisable when plumbing or structural modifications are required, when waterproofing and tile work exceed the homeowner’s skills, or when local codes and permits must be navigated.
Typical material and labor cost ranges
Costs for installing a corner shower vary widely based on materials, labor rates, and project complexity. Typical material ranges: basic prefab units $200–$600, mid-range $600–$1,500, high-end $1,500+. Labor: DIY minimal; pro installation $500–$3,000 depending on plumbing, tiling, and demolition.
| Item | Typical Cost |
|---|---|
| Prefab base | $200–$600 |
| Tile kit | $600–$1,500 |
| Fixtures | $100–$800 |
| Labor (pro) | $500–$3,000 |
Time estimates for each phase of the project
A clear timeline helps homeowners and contractors plan a corner shower installation by breaking the project into distinct phases—demolition and prep, plumbing rough‑in, base and enclosure installation, tiling and grout, fixture installation, and final inspections—each with predictable duration ranges depending on complexity and whether work is DIY or performed by professionals.
Typical durations:
- demolition 0.5–1 day;
- rough‑in 1–2 days;
- base/enclosure 0.5–1 day;
- tiling 2–4 days plus cure;
- fixtures 0.5–1 day;
- inspections 0–2 days.
Factors that make hiring a pro advisable
Because corner shower projects vary in scope and risk, homeowners should weigh cost, schedule, and skill requirements when deciding whether to hire a professional.
Complex plumbing, structural modifications, waterproofing, tile work, and fixture integration increase labor and permit costs but reduce failure risk.
Pros shorten timelines, guarantee code compliance, and offer warranties; DIY suits simple prefab installs with sufficient skill and time.
Project Checklist and Quick Reference
A concise pre-installation checklist outlines materials, tools, permits, and site preparations to verify before work begins.
A step-by-step quick reference timeline summarizes the installation sequence and realistic time allocations for each stage.
This section provides a practical one-page guide to guarantee the project stays organized and on schedule.
Pre-installation checklist
One clear checklist helps guarantee the corner shower installation proceeds without costly delays or safety issues.
The checklist verifies site readiness, materials, and permits before work begins. Essentials include measurements, structural and plumbing checks, and safety gear.
Confirm delivery windows and inspection schedules.
Sample quick items:
- Verify dimensions, studs, and floor level.
- Confirm plumbing rough-in and water shutoff.
- Gather tools, sealants, and permits.
Step-by-step quick reference timeline
Begin the installation with a concise timeline that sequences major tasks and estimated durations, allowing installers to track progress and coordinate inspections, deliveries, and trades.
A compact checklist follows, clarifying order, responsible parties, and buffer times.
- Day 1–2: Demolition, plumbing rough-in, inspect.
- Day 3–4: Shower base, waterproofing, cure.
- Day 5–7: Tile, fixtures, final inspection.
Conclusion
A successful corner shower installation rewards patience and planning: measure twice, cut once, and proceed methodically. Whether tackling demolition, leveling a base, or sealing joints, attention to detail prevents leaks and costly rework. Regular maintenance keeps the unit watertight and attractive for years. For those unsure, professional help can save time and guarantee results. Remember, “haste makes waste”—taking time upfront guarantees a durable, functional shower that enhances any bathroom.