How to Install a Toilet in a Camper: Step-by-Step RV Toilet Replacement Guide
To replace a toilet in your camper, start by shutting off the water and power, then empty the holding tank. Next, disconnect the water and electrical lines, and remove the old unit by unscrewing the mounting bolts. Inspect the flange and subfloor for any needed repairs. Test-fit the new toilet, seal it with an appropriate gasket or wax ring, and secure it with bolts. Reconnect the water and venting lines, then conduct final leak and flush tests to ensure everything operates correctly. Additional guidance is available for troubleshooting, maintenance, and upgrade options.
Overview of Replacing a Toilet in a Camper
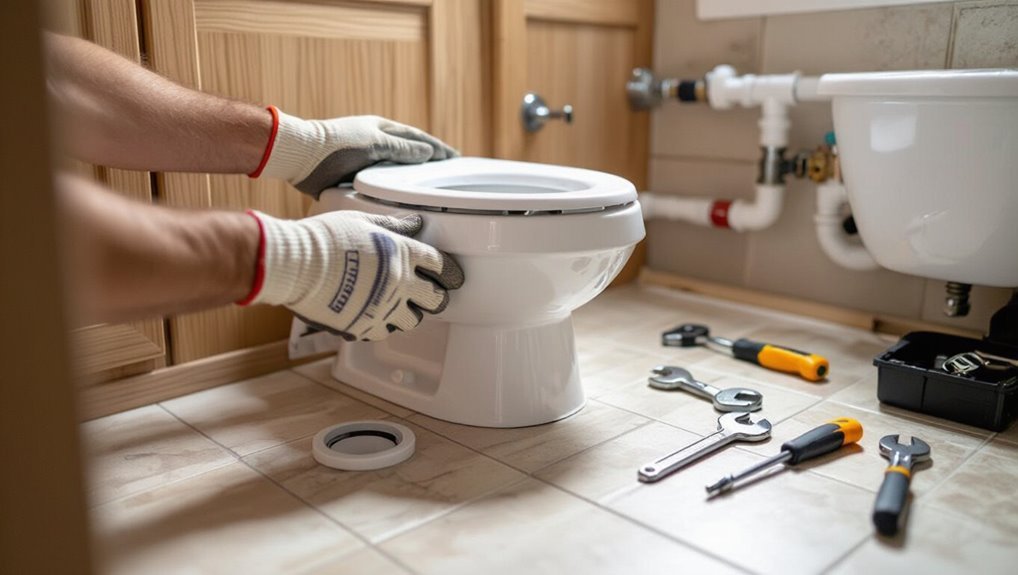
Replacing a camper toilet begins with identifying signs that replacement is necessary, such as persistent leaks, odor, or damage.
The discussion contrasts common types—cassette, composting, and portable toilets—and highlights how installation and maintenance differ.
A brief list of essential tools and materials prepares the reader for the task ahead.
When to Replace an RV or Camper Toilet
When should an RV or camper toilet be replaced? Indicators include chronic leaks, persistent odors, cracked bowl or flange, frequent clogs despite maintenance, and worn seals or mounting hardware.
If repairs are recurring or compatibility with upgrades is needed, replacement becomes practical.
Assess damage, age, and cost compared to installation effort when learning how to install toilet in camper to decide replacement timing.
Types of Camper Toilets and How They Differ
Deciding whether to replace an RV or camper toilet naturally leads to understanding the different toilet types available, since choice affects installation complexity, waste handling, and onboard space use.
Common options include gravity-flush, cassette, composting, and macerating units. Each varies in water use, odor control, maintenance frequency, venting needs, and required plumbing or mounting modifications for proper integration into the camper.
Tools and Materials Needed for the Job
A clear inventory of tools and materials streamlines swapping a camper toilet and helps prevent mid-job delays.
Essential items include wrenches, screwdriver set, sealant, and replacement flange or gasket.
Protective gear, bucket, towel, and solvent assist cleanup.
Confirm toilet model, new mounting bolts, and supply hose before starting.
- Wrenches and screwdrivers
- Sealant and gaskets
- Bucket and towels
- Protective gloves and solvent
Preparing the Camper and Workspace
Before beginning work, the camper’s water system should be shut off and power to any nearby electrical components disconnected to prevent accidents.
The holding tank and existing toilet must be emptied and cleaned to provide a sanitary, obstruction-free workspace.
Finally, precise measurements of the installation area and inspection of floor and mounting surfaces are required to confirm fit and structural soundness.
Safety Precautions and Turning Off Water Systems
Shut off the camper’s main water supply and relieve pressure by opening nearby faucets and flushing the toilet to drain remaining water.
Disconnect electrical power to the bathroom circuit.
Wear gloves and eye protection.
Place absorbent towels and a small bucket beneath connections.
Keep tools organized and a flashlight handy.
Verify no water flows before loosening fittings to prevent leaks or accidental flooding.
Emptying and Cleaning the Holding Tank and Toilet
With water and power secured and fittings verified dry, attention turns to the holding tank and toilet to prevent spills and odors during removal.
The tank is fully drained via the exterior dump valve; a short flush guarantees waste clears lines.
Protective gloves and eye protection are worn.
The bowl and seals are cleaned with RV-safe cleaners, rinsed, and dried before detachment.
Measuring the Space and Checking Mounting Conditions
A clear, level work area is established around the toilet footprint before any measurements are taken: the camper is stabilized, storage nearby is cleared, and adequate lighting is positioned to reveal contours and fasteners.
Measurements of flange offset, bolt spacing, and clearance to walls are recorded.
Floor flatness and rot are inspected; fasteners and seal surfaces are evaluated for corrosion or damage requiring repair or reinforcement.
Removing the Old Toilet
Before removing the old toilet, the technician shuts off and disconnects any water lines, valves, and electrical connections if present.
Next, the toilet is unbolted from its mounting flange and lifted clear of the base.
Finally, seals, gaskets, and remnants of wax or sealant are scraped away and the flange area is cleaned for the new installation.
Disconnecting Water Lines, Valves, and Power (if applicable)
Shut off the camper’s fresh-water supply and any electrical feeds to the toilet system. Then relieve pressure by opening a nearby faucet or flushing the toilet until the tank is empty.
Close inline shutoff valves, disconnect flexible supply lines with a wrench, and cap or plug fittings to prevent drips.
Disconnect low-voltage wiring at quick-connects, noting polarity and securing loose wires with tape for reinstallation.
Detaching Toilet from Mounting Flange or Bolts
Loosen the mounting nuts or remove the flange bolts that secure the toilet to the floor, taking care to support the fixture so it does not tip once fasteners are released.
With an assistant if needed, lift the bowl straight up to disengage it from the flange.
Maneuver slowly to avoid stressing water lines or surrounding cabinetry, then set the toilet on a protective surface for disposal or inspection.
Removing Seals, Gaskets, and Old Wax/Sealant
With the bowl removed, inspect and remove any remaining seals, gaskets, and old wax or sealant from the flange and toilet base using a putty knife, scraper, and appropriate solvent; wear gloves and eye protection to prevent contact with debris and chemicals.
Clean surfaces until smooth, decontaminate with recommended cleaner, dry thoroughly, and assess flange integrity.
Dispose of waste per local regulations.
Inspecting and Repairing the Toilet Flange and Surrounding Plumbing
The area beneath the toilet should be inspected for rot, loose fasteners, and correct drain orientation to guarantee a secure, watertight installation.
Any compromised subfloor or mounting surface must be repaired or reinforced before reinstalling the fixture.
Worn or mismatched flanges, seals, and adapters should be replaced or upgraded to match the camper’s drain configuration.
Checking the Floor, Flange, and Drain Orientation for Damage
Before installing the new toilet, inspect the floor, flange, and drain orientation for signs of rot, cracks, misalignment, or corrosion that could compromise the seal or support.
Verify flange level and secure attachment, confirm drain pipe alignment and slope, and check surrounding decking for soft spots or water stains.
Note any damage and mark areas requiring repair or replacement before proceeding.
Repairing or Reinforcing Subfloor and Mounting Area
Start by evaluating the flange and surrounding subfloor for structural integrity and plumbing soundness, noting any loose fasteners, cracked or corroded flange material, and signs of water damage or rot in the decking.
Remove deteriorated decking and clean the area.
Install solid blocking or plywood patching to restore thickness and create a flat, level mounting surface.
Verify flange sits flush and secure.
Replacing or Upgrading Flange, Seals, and Adapters
With the mounting surface restored and the flange inspected for fit, attention shifts to replacing or upgrading the flange, seals, and adapters to guarantee a watertight, gas-tight connection to the camper’s waste system.
- Remove corroded flange, note pipe alignment.
- Dry-fit new flange or adjustable adapter.
- Install new rubber or wax seal, torque bolts evenly.
- Pressure-test for leaks and odors.
Selecting the Right Replacement Toilet
Selecting a replacement toilet begins with accurate measurements of the rough-in and surrounding clearances to guarantee fit and access.
The decision should weigh toilet types—composting, cassette, porcelain, and flush—against space, weight, waste handling, and maintenance needs.
Finally, the choice of manual, electric, or gravity-flush operation will determine installation complexity, power requirements, and user convenience.
Measuring Rough-In and Clearance Requirements
Measuring the toilet rough-in and available clearance is a critical step when choosing a replacement for a camper bathroom; it guarantees the new unit will align with the waste outlet and fit within confined spaces.
Measure from the wall to the center of the waste flange, record height to seat and surrounding clearances, note door swing and ventilation obstructions, and confirm bolt pattern compatibility.
Comparing Composting, Cassette, Porcelain, and Flush Toilets
Having confirmed rough-in dimensions and clearance constraints, the next decision is choosing the toilet type that matches space, plumbing, and user preferences. Each option balances weight, odor control, waste storage, and installation complexity; compact campers favor cassette or composting units, while larger rigs can accommodate porcelain or residential-style flush toilets.
| Type | Strength |
|---|---|
| Composting | Low water, odor control |
| Cassette | Compact, easy emptying |
| Porcelain | Durability, comfort |
| Flush | Familiar use, plumbing integration |
Choosing Between Manual, Electric, and Gravity-Flush Models
When choosing between manual, electric, and gravity-flush models, a camper owner should weigh water usage, power availability, maintenance needs, and user convenience.
Manual units minimize electrical demand but require more effort. Electric models offer hands-off operation at the cost of power and increased complexity. Gravity-flush systems provide simple, low-maintenance flushing where plumbing and tank placement permit.
Consider weight, installation space, and spare-part availability.
Step-by-Step Installation of the New Toilet
The installer begins by dry-fitting the new toilet to confirm flange alignment and bolt placement.
Next, an appropriate seal—wax ring, rubber gasket, or flange adapter—is installed before the toilet is lowered, leveled, and secured to the floor or mounting plate.
Finally, water lines, valves, and any electrical connections are reattached and the system is tested for leaks, proper flushing, and venting.
Dry-Fitting the Toilet and Aligning the Flange
Begin by placing the toilet over the camper flange to check fit and alignment before making any seals permanent; this dry-fit confirms that bolt holes, clearance for the tank or base, and the waste outlet line up correctly.
Rotate and shift the bowl as needed, ensuring level orientation and unobstructed bolt access. Note any flange damage or obstructions requiring repair before final installation.
Installing New Seal (Wax Ring, Rubber Gasket, or Flange Adapter)
Installers should choose and seat the appropriate seal—wax ring, rubber gasket, or flange adapter—matching the camper flange height and toilet outlet before lowering the bowl.
Center the seal on the flange or bowl horn, ensuring an even contact surface. For wax rings, warm slightly for malleability; for rubber gaskets or adapters, verify snug fit and orientation.
Inspect for gaps before final placement.
Securing the Toilet to the Floor or Mounting Plate
Carefully lower the toilet onto the flange or mounting plate, aligning the bowl’s horn with the seal and the bolt holes with the floor anchors or mounting studs.
Once seated, press down evenly to compress the seal and guarantee a watertight connection without shifting the alignment.
Install washers and nuts, hand-tighten, then torque alternately to manufacturer specs.
Trim or cover bolts and check for wobble, adjusting shims as needed.
Reconnecting Water Supply, Valves, and Electrical Components
With the toilet secured and checked for wobble, attention turns to reconnecting the water supply, shutoff valve, and any electrical connections for bidet or macerator functions.
Reattach the flexible hose to the inlet, tighten fittings without overtightening, reopen the shutoff valve slowly, and inspect.
Connect ground and power leads to designated terminals, secure wiring away from moisture, and fasten strain reliefs.
Testing for Leaks, Proper Flush, and Venting
Begin by cycling the water and power systems to verify seals, flush operation, and vent performance under normal conditions.
Inspect for drips at connections and base while flushed repeatedly. Confirm full bowl evacuation and intake vent airflow; listen for gurgles indicating blockage.
Tighten fittings, replace seals if needed, and retest.
Monitor electrical controls and holding-tank valves for proper timing and leak-free operation.
Finishing Touches and Cosmetic Work
Once the toilet is secured, attention turns to sealing the base and installing trim or a closet flange cover for a finished look.
Any damaged flooring or edge trim should be replaced or repaired to guarantee a watertight, attractive installation.
A final cleaning and odor-prevention routine completes the job and helps maintain camper comfort.
Sealing the Base and Applying Trim or Closet Flange Covers
Seal the toilet base carefully to prevent leaks and finish the installation with trim or a closet flange cover that matches the camper’s interior.
Apply a bead of marine-grade silicone around the base, smooth evenly, and allow proper cure time.
Install a low-profile trim ring or decorative flange cover, secure per manufacturer instructions, and verify a neat, watertight seal with no visible gaps.
Replacing Flooring or Edge Trim If Needed
After confirming the silicone around the toilet base has cured and the trim ring sits flush, attention can shift to replacing any damaged flooring or edge trim to restore a finished look.
Measure damaged areas, cut replacement pieces to fit, and secure them with appropriate adhesive or fasteners for the camper substrate.
Match trim profile and finish, seal seams, and allow adhesives to cure before reassembling accessories.
Final Cleaning and Odor-Prevention Steps
While the adhesive and sealants cure, attention turns to a final cleaning and odor-prevention routine that guarantees the installation looks professional and remains sanitary.
Surfaces are wiped with a mild, camper-safe cleaner, connection points are inspected for leaks, and any debris from cutting or trimming is removed from beneath and around the toilet.
Vent hoses are checked, vent filters replaced, a deodorizer added, and caulk smoothed.
Common Problems After Installation and How to Fix Them
Common post-installation issues include leaks at the base or water connections, poor flush performance or blockages, and persistent odors or venting problems.
Each problem requires targeted diagnosis—checking seals and fittings for leaks, inspecting trap and waste lines for obstructions, and verifying vent integrity and seals for odor sources.
Practical fixes range from tightening or replacing seals and hoses to clearing blockages and servicing the venting system.
Leaks at Base or Water Connections Diagnosis and Fixes
Inspecting leaks at the toilet base and water connections requires a systematic approach to identify the source quickly and prevent water damage.
Check seals, bolts, and flange for looseness or cracked wax/rubber gaskets. Tighten fittings, replace deteriorated seals, and test supply line fittings with gentle pressure.
Inspect condensation, tank cracks, and floor for moisture; reroute or replace components as needed.
Poor Flush Performance or Blockages Troubleshooting Steps
Troubleshoot poor flush performance and blockages by isolating causes step-by-step, starting with simple checks and progressing to component replacement.
Inspect for debris in the bowl, trapway, and macerator; clear with plumbing snake or gentle water jet.
Verify water supply valve and flush mechanism operation.
Examine seals and gaskets for distortion restricting flow.
Replace clogged or damaged cartridges, flappers, or macerator impeller as needed.
Odors and Venting Issues Solutions and Maintenance
Address odors and venting problems promptly to maintain hygiene and comfort in a camper toilet system; persistent smells usually indicate venting failures, seal leaks, or sewage buildup.
Inspect roof vents, replace cracked vent caps, and clear blockages with a flexible snake.
Check and reseat seals, tighten fittings, and sanitize holding tanks with enzyme treatments.
Schedule routine inspections to prevent recurrence.
Maintenance Tips to Prolong Toilet Life in a Camper
Routine care preserves function and prevents odors, so regular cleaning and proper holding tank treatment are essential.
Seasonal steps like winterizing the toilet and tank protect plumbing from freeze damage.
Clear guidelines on when to attempt DIY fixes versus calling a professional help avoid costly mistakes.
Regular Cleaning and Tank Care Routine
Maintaining a consistent cleaning and tank-care schedule prevents odors, clogs, and premature wear in a camper toilet.
A routine extends service life: clean bowl with RV-safe cleaner, flush additives to break down waste, inspect seals and fittings, and empty holding tanks before full.
Visualize steps:
- Scrub bowl gently
- Add enzyme treatment
- Check seals visually
- Pump and rinse tank
Winterizing the Toilet and Holding Tank
When temperatures drop below freezing, the camper toilet and holding tank require specific winterizing steps to prevent cracked plumbing, damaged seals, and costly repairs.
Drain fresh, gray, and black water systems completely.
Flush non-toxic RV antifreeze through bowl and trap.
Clean and inspect seals.
Remove and store portable components.
Insulate exposed lines and vents.
Check for leaks before storage.
When to Call a Professional vs. DIY
How should a camper owner decide between tackling toilet issues themselves or hiring a professional? The owner assesses skill, tools, time, and warranty status.
Simple tasks—seal replacement, minor clogs, and routine maintenance—suit DIY.
Complex problems—structural damage, sewer line repairs, persistent leaks, or electrical/conversion work—require a licensed technician.
Safety, odor control, and code compliance also favor professional service.
Cost Estimates and Timeframe
Typical parts and labor costs vary by toilet type, ranging from inexpensive portable units to higher-priced macerating or composting systems with professional installation.
A clear breakdown of component prices and expected labor rates helps set realistic budget expectations.
Estimated time for a DIY replacement is generally one to four hours depending on system complexity and familiarity with camper plumbing.
Typical Parts and Labor Costs for Different Toilet Types
A clear breakdown of parts and labor helps owners compare options and budget accurately for a camper toilet installation. Typical ranges: basic RV gravity toilets $50–$200 parts, labor $75–$150; cassette toilets $200–$700 parts, labor $100–$200; composting/toilet upgrades $500–$1,200 parts, labor $150–$300.
| Type | Parts | Labor |
|---|---|---|
| Gravity | $50–$200 | $75–$150 |
| Cassette | $200–$700 | $100–$200 |
Estimated Time Required for a DIY Replacement
Although familiarity with basic plumbing can shorten the task, replacing a camper toilet typically requires 1–4 hours for a straightforward swap and up to a full day for more complex systems.
This estimate covers removing the old unit, preparing the flange or mounting surface, fitting the replacement, sealing connections, and testing for leaks.
Additional time may be needed for corroded fasteners, awkward access, or new plumbing adaptations.
Helpful Accessories and Upgrades
Practical accessories and upgrades can improve comfort, conserve water, and reduce maintenance when installing a camper toilet. Options include low-profile and water-saving toilet models, odor-control solutions such as vent fans and compost additives, and extensive upgrade packages for RV plumbing systems.
Considering these choices early helps match equipment to space, usage patterns, and long-term operating costs.
Water-Saving and Low-Profile Toilet Options
When space and freshwater are limited, choosing water-saving and low-profile toilet options can markedly improve comfort and efficiency in a camper.
Compact macerating, cassette, and composting models reduce footprint and freshwater demand. Dual-flush and low-flow valve features conserve water.
Low-profile seats and slimline bowls increase legroom and sightlines. Selection should balance installation complexity, waste-handling method, and weight constraints.
Odor Control, Vent Fans, and Compost Additives
Addressing odors and moisture is essential for comfort and hygiene in a camper. A combination of vent fans, activated carbon filters, and compost additives provides the most effective results.
Install a low-noise roof or inline vent fan for airflow. Pair with carbon or charcoal filters for odor adsorption, and use enzymatic or carbon-based compost additives to accelerate decomposition, reduce smells, and control moisture without harming seals.
Upgrade Packages for RV Plumbing Systems
Although space and weight are limited in many RVs, a well-chosen upgrade package can dramatically improve reliability, convenience, and water efficiency.
Packages often bundle compact macerating pumps, low-flow fixtures, reinforced fittings, water-pressure regulators, and freshwater/gray tank monitoring sensors. Selecting matched components simplifies installation, reduces leaks, and conserves water.
Prioritize corrosion-resistant materials, easy-access maintenance points, and compatibility with existing waste lines and electrical systems.
Step-by-Step Checklist for Quick Reference
Begin by gathering tools and materials—toilet unit, seal/flange, mounting bolts, flexible waste hose, sealant, wrench set, and safety gear—so the installation proceeds without interruptions.
The checklist that follows condenses the full procedure into clear, ordered steps for quick reference.
- Remove old toilet and clean flange.
- Inspect and replace seal.
- Position toilet, secure bolts, connect hose.
- Test for leaks, tighten, and secure finishes.
Conclusion
Replacing a camper toilet restores comfort and function, concluding the project like tightening a final bolt on a ship: small, decisive work that keeps the whole vessel steady. With proper prep, the right replacement, and attention to flange and seals, the job prevents leaks and odors. Regular maintenance and thoughtful upgrades extend service life and save money. Following the checklist guarantees a safe, efficient installation and reliable performance for future travels.