How to Empty a Composting Toilet Safely: Step-by-Step Guide for Home and RV
To safely empty a composting toilet, follow these essential steps: Check local regulations, ensure proper ventilation, and equip yourself with nitrile gloves, eye protection, and a respirator. Scoop solids into lined, sealable containers for storage or treatment according to local guidelines. Collect liquids in labeled, sealed jugs. After emptying, clean and disinfect the chamber, inspect seals, add bulking material, and monitor moisture and temperature. Detailed instructions and additional tips are provided below.
What a Composting Toilet Is and Why Safe Emptying Matters
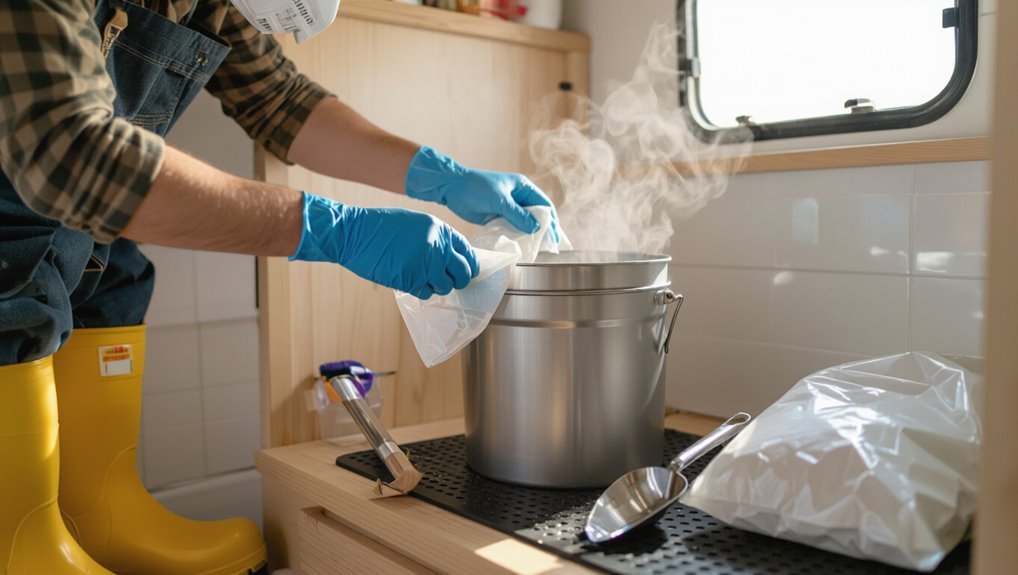
A composting toilet transforms human waste into stabilized compost through aerobic decomposition, moisture control, and occasional mechanical mixing.
Improper emptying can expose users and the environment to pathogens, nuisance odors, and contamination of soil or water.
Before emptying, local health and waste-management regulations should be checked to verify legal and safe disposal.
How composting toilets work (basic biological and mechanical processes)
Because composting toilets rely on controlled decomposition rather than water flushing, they combine biological activity and simple mechanical design to convert human waste into a stable, reduced-risk material.
Microbes and invertebrates break down solids while ventilation and moisture control regulate aerobic conditions.
Rotating drums, separation systems, and composting chambers facilitate processing and storage.
Understanding these mechanisms aids proper maintenance and how to empty a composting toilet safely.
Health, odor, and environmental risks of improper emptying
Improper emptying of a composting toilet can release pathogens, odors, and nutrient loads that pose health and environmental hazards.
Aerosolized bacteria and viruses risk respiratory or gastrointestinal illness; contact spreads infection. Strong odors signal incomplete composting and attract pests.
Excess nutrients or leachate contaminate soil and waterways, causing eutrophication. Proper handling, containment, and treatment reduce these public‑health and ecological threats.
Legal and local regulations to check before emptying
Before emptying a composting toilet, users should verify applicable laws, permits, and local codes that govern onsite wastewater, biosolids handling, and land‑application of composted human waste.
They must check municipal ordinances, health‑department rules, RV dump station requirements, and property‑use restrictions.
Record permit conditions, transport limits, and allowed disposal methods.
Noncompliance risks fines, remediation orders, and public‑health liability.
Types of Composting Toilets and How They Affect Emptying
Different composting toilet designs change how and when waste must be handled.
Self-contained units, central systems, batch and continuous composters, and urine-diverting models each have distinct emptying schedules and access points.
Choices of materials and mechanisms—electric vs. passive systems or sawdust- and peat-based setups—affect odor control, moisture management, and the protective gear and procedures required for safe emptying.
Self-contained units vs. central systems
When choosing between self-contained units and central systems, users must consider how each design alters emptying frequency, handling procedures, and safety precautions.
Self-contained toilets require more frequent, smaller emptying directly at the toilet, increasing personal handling but simplifying transport.
Central systems consolidate waste in a remote chamber, reducing visits but necessitating bulk removal, tools, and often more rigorous containment and protective measures.
Batch composters, continuous composters, and urine-diverting models
Although the basic goal—safe, aerobic decomposition—remains the same, the choice between batch composters, continuous composters, and urine-diverting models materially changes emptying routines:
Batch systems require periodic, full-chamber removal after complete decomposition; continuous systems allow frequent, smaller cleanouts of finished compost while active material moves through; and urine-diverting designs cut liquid volume and pathogen risk but demand separate handling and disposal of concentrated urine or its treated effluent.
Batch units need staging time; continuous units favor routine skimming; urine-diverting setups require separate storage maintenance and periodic treatment or disposal of liquid fractions.
Materials used (electric, passive, sawdust/peat systems) and implications for handling
Because design and input materials determine decomposition rate and moisture control, composting toilets are commonly categorized as electric (active), passive (aerobic, non-powered), and dry-cover systems using sawdust or peat—each category demands distinct emptying practices.
Electric units yield drier, more stabilized compost needing less curing; passive units require moisture checks and longer maturation.
Sawdust/peat systems produce odour-controlled, bulkier material needing aeration and bagged transport.
When to Empty a Composting Toilet
Signs that a composting toilet needs emptying include persistent odors, visible accumulation of solids, or excess moisture.
Routine schedules—monthly to quarterly for many home units and more frequent checks for RV systems—help prevent problems.
Monitoring moisture level, internal temperature, and the degree of decomposition provides objective confirmation before emptying.
Visual and olfactory signs it’s time to empty
Monitor the compost pile regularly for clear visual and olfactory cues that indicate it needs emptying.
Browning, compacted material with little visible decomposition or an excess of wet, slimy layers signals imbalance.
Persistent, strong ammonia or rotten odors, fruit fly swarms, or visible urine pooling indicate the system is overloaded or too wet and requires immediate attention and emptying.
Time-based schedules for home and RV systems
How often a composting toilet should be emptied depends on system size, user load, and whether it’s stationary or mobile.
For single-family homes, many systems require emptying every 6–12 months; for RVs or tiny cabins with higher turnover, 1–3 months is common.
Maintain a written schedule, adjust for seasonal use, and log observations to refine timing without relying solely on routine.
Using moisture, temperature, and decomposition indicators
Interpret moisture, temperature, and decomposition cues as objective indicators of readiness rather than arbitrary milestones.
The operator monitors moisture (crumbly, not soggy), core temperature (elevated during active thermophilic breakdown, then falling), and visual/olfactory signs (stable texture, earthy smell, no visible fresh waste).
Emptying occurs when indicators show mature, pathogen-reduced compost, adjusted for system type and local regulations.
Tools, PPE, and Materials Needed for Safe Emptying
Before beginning, a clear checklist of tools and personal protective equipment is essential: nitrile or heavy-duty gloves, a respirator or mask, and eye protection.
Necessary implements include shovels, scoops, buckets, liners, and sealed transport or storage containers, along with disinfectants, a compost thermometer, and odor-control supplies.
These items should be organized and inspected to guarantee safe, hygienic handling and transport of extracted compost.
Personal protective equipment checklist (gloves, masks, eye protection)
Select appropriate personal protective equipment (PPE) to minimize exposure to pathogens and aerosols when emptying a composting toilet.
Recommended items:
- nitrile or heavy-duty waterproof gloves
- a well-fitted N95 or equivalent respirator
- sealed eye protection or face shield
Disposable coveralls or washable outerwear and closed-toe shoes protect skin.
Confirm proper fit, donning/doffing technique, and hand hygiene after removal.
Cleaning and handling tools (shovels, scoops, buckets, liners)
A few basic, dedicated tools—sturdy shovels or scoops, rigid buckets, and heavy-duty liners—are essential for moving and containing compost without cross-contamination; each item should be durable, easy to clean, and reserved for toilet maintenance only.
Tools should have smooth, nonporous surfaces, long handles for reach, and secure-fitting lids.
Store separately, label clearly, and replace liners promptly when damaged.
Disinfectants, compost thermometer, and odor control supplies
Gather disinfectants, a compost thermometer, and odor-control supplies to protect handlers and maintain safe, sanitary conditions during emptying.
Use EPA-registered disinfectant or bleach solution for surfaces and tools; keep alcohol wipes for quick hand/tool swabs.
Include a reliable probe thermometer to verify thermophilic temperatures.
Carry baking soda, activated charcoal, or odor-neutralizing granules to control smells during and after removal.
Transport and storage containers for extracted compost
Properly sized, durable containers are essential for transporting and storing extracted compost to prevent leaks, odors, and contamination.
Rigid, lockable plastic bins or heavy-duty, sealable buckets with gasketed lids are recommended. Use food-safe, UV-resistant materials if possible.
Clearly label containers, secure lids during transport, line with compostable bags for easier handling, and store in a ventilated, pest-proof area away from living spaces.
Step-by-Step Emptying Procedure for Home Composting Toilets
The procedure begins with preparing the work area and ensuring adequate ventilation while shutting down any electrical or water connections to the unit.
Personnel then remove solids using safe scooping and transfer methods, and address liquids or separated urine with appropriate storage or disposal measures.
Finally, the chamber and surrounding surfaces are cleaned and disinfected before normal operation resumes.
Preparing the area and securing ventilation
A clear, well-ventilated workspace reduces odors and health risks before emptying the composting toilet. The operator should position tarps or disposable liners around the pit, open any service panels, and guarantee intake and exhaust vents are unobstructed.
Nearby windows and fans should be activated, mechanical ventilation checked for proper flow, and lighting arranged. A clear access path, labeled tools, and a waste container complete preparation.
Shutting down toilet functions and disconnecting power/water if applicable
With the workspace secured and ventilation confirmed, attention turns to powering down and isolating systems that serve the composting toilet.
Disconnect electrical supply to fans, heaters, and control units at the breaker or unplug point.
Shut off water feed valves and cap lines where present.
Lock or tag switches to prevent accidental reactivation.
Verify all power and water are fully isolated before proceeding.
Removing solids: safe scooping and transfer techniques
Begin by donning PPE—gloves, mask or respirator, and eye protection—and confirming that the workspace remains ventilated and isolated.
Use a sturdy scoop or trowel and a rigid, sealable container lined with a biodegradable bag.
Work methodically from top layers inward, avoiding splashes. Compact gently to remove air pockets, seal container promptly, label contents, and transfer to designated composting storage without contaminating surfaces.
Handling liquids and separated urine (storage and disposal)
After solids are removed, attention turns to liquids and any urine-diverted fraction.
Collected urine should be transferred to marked, sealable containers using a funnel to avoid spills.
Store in a cool, ventilated area for short-term reuse as fertilizer or for safe disposal per local regulations.
Avoid mixing with composting solids; label and log storage duration for compliance and odor control.
Post-emptying cleaning and disinfecting of the toilet chamber
Once solids and liquids have been removed, the chamber must be cleaned and disinfected to eliminate residual pathogens, control odors, and prepare the unit for safe reuse.
Remove loose debris, brush surfaces, and vacuum remaining particles.
Wash with biodegradable detergent, rinse, then apply a suitable disinfectant (bleach solution or commercial product) per label instructions.
Air-dry thoroughly and inspect seals and vents.
Restarting the system and adding starter/bulking materials
Prepare the chamber for reuse by restoring ventilation, checking seals and moving parts, then adding an appropriate mix of starter and bulking materials to reestablish aerobic conditions.
The operator layers finished compost or mature humus, sawdust or coconut coir, and a handful of lime-free garden soil.
Distribute evenly, compact lightly, resume aeration mechanism, and monitor moisture and temperature for proper microbial activity.
Step-by-Step Emptying Procedure for RV and Mobile Composting Toilets
Before travel, the operator should confirm pre-trip checks and identify a legal disposal site.
Procedures differ between emptying at RV parks and handling waste in remote locations, with emphasis on minimizing odors and preventing spills during transit.
Secure transport and temporary storage require sealed containers and clear handling steps to reduce contamination risk.
Pre-trip checks and choosing a legal disposal site
Inspect the composting toilet and surrounding systems for leaks, damage, and secure latches, and verify that containment bags or storage tanks are properly sealed.
Confirm required permits, local regulations, and acceptable waste types for planned disposal sites.
Plan route and timing to licensed dump stations or municipal facilities, note site hours, and prepare PPE, spare seals, and cleanup supplies to guarantee compliant, safe transport and transfer.
On-site emptying in RV parks vs. remote locations
Having confirmed permits, seals, and supplies, the operator next chooses an emptying method suited to on-site conditions.
RV park facilities with designated dump stations allow use of fixed hoses and gravity draining into approved sewer connections, while remote locations demand portable containment, gradual moisture separation, and minimizing runoff.
In parks, follow site rules, secure fittings, and flush lines; in remote sites, bag solids, transport to approved disposal, and sanitize equipment.
Minimizing odors and spills while traveling
When traveling with an RV or mobile composting toilet, the operator should follow a compact, systematic emptying routine that minimizes odors and prevents spills.
Empty at low-traffic stops, use absorbent cover material, seal containers tightly, and wear gloves.
Rinse and sanitize exterior surfaces promptly.
Ventilate the toilet area during and after servicing, and deploy odor-neutralizing pellets or sprays sparingly to avoid masking maintenance needs.
Secure transport of waste and temporary storage best practices
Begin by securing a dedicated, leakproof containment plan before any transfer: choose sturdy, sealable containers sized to the expected volume, line vehicle cargo with impervious material or secondary containment, and position containers upright and restrained to prevent tipping or shifting during transit.
Label containers with contents and date, ventilate temporary storage, maintain cool dry conditions, restrict access, inspect seals regularly, and follow local disposal regulations.
Safe Disposal and Reuse Options for Compost Material
Guidance begins with criteria for when compost from a toilet is considered safe for non-food landscaping use, emphasizing extended curing to reduce pathogens to acceptable levels.
Practical disposal routes include municipal composting programs, landfill acceptance, or transfer via licensed haulers when on-site reuse is not appropriate.
Legal restrictions and local regulations governing human-derived compost must be checked before any reuse or disposal action.
When compost is safe for non-food landscaping use
Several clear indicators signal that compost from a composting toilet is appropriate for non-food landscaping use:
it is fully decomposed into a crumbly, soil-like material;
it emits an earthy scent rather than ammonia or sewage odors;
it has reached consistent high temperatures during active composting and then cooled for a prolonged curing period;
and no recognizable waste particles remain.
Additional checks include absence of persistent odor, uniform texture, and normal soil fauna presence.
Extended curing methods to eliminate pathogens
To guarantee pathogenic organisms are reliably reduced before any reuse or disposal, extended curing combines time, controlled moisture, and periodic turning to maintain conditions that are unfavorable to survival of bacteria, viruses, and helminth eggs.
Typical protocols call for at least six to twelve months of curing, keeping moisture around 40–60%, occasional aeration, temperature monitoring, and segregated storage to prevent cross-contamination.
Local disposal options: municipal composting, landfill, licensed haulers
After extended curing has reduced pathogen risks to acceptable levels, users must choose an appropriate final destination for the compost material based on local regulations and public health considerations.
Options include municipal composting facilities that accept human-derived biosolids, municipal landfill disposal where composting is prohibited, or removal by licensed haulers who transport material to approved treatment sites.
Confirm permits, transport rules, and facility acceptance beforehand.
Legal constraints on using human-derived compost
Legal frameworks determine whether and how human-derived compost may be used, specifying permitted uses, required treatment standards, and site restrictions to protect public health and the environment.
Regulations often prohibit use on food crops, mandate pathogen reduction (time, temperature, testing), restrict application distances from water and residences, and require recordkeeping or permits.
Compliance varies by jurisdiction; users must consult local authorities before reuse.
Common Problems and How to Avoid Them
Common problems with composting toilets include persistent odors, improper moisture balance, pest incursions, and mechanical failures.
Each issue has clear preventive measures—correct carbon-to-nitrogen ratios and moisture control for odors and texture, exclusion and sanitation tactics for pests, and routine inspection and maintenance of fans, heaters, and vents.
Addressing these areas early reduces health risks and extends system longevity.
Odor control failures and fixes
Addressing odor control failures begins with recognizing the main causes—poor ventilation, excess moisture, imbalanced carbon-to-nitrogen ratios, and insufficient agitation or mixing—and understanding how each factor undermines the composting process.
Remedies include restoring airflow with fans or vents, removing wet pockets, adding dry carbon sources, turning or aerating the pile, sealing entry points for odors, and monitoring temperature and moisture to prevent anaerobic conditions.
Excess moisture or dryness: balancing carbon and nitrogen
After fixing ventilation and odor leaks, attention should turn to moisture and feedstock balance, since both excess wetness and extreme dryness disrupt microbial activity.
Operators should monitor moisture—aiming for damp-sponge feel—and add dry carbon (sawdust, shredded paper) to soak liquids.
If too dry, introduce small amounts of urine or water and fresh nitrogen-rich material.
Maintain layering and occasional mixing for steady decomposition.
Pest infestations and prevention strategies
When pests invade a composting toilet, they compromise sanitation, accelerate breakdown of the carbon layer, and create additional odors that signal improper management.
Regularly inspect seals, screens, and lids; maintain dry, well-covered compost with adequate carbon; remove attractants like food waste; use fine-mesh vent screens and tight-fitting access ports; promptly repair gaps; and consider natural deterrents (bay leaves, diatomaceous earth) to discourage insects and rodents.
Mechanical failures: troubleshooting fans, heating, and vents
Pest prevention measures help reveal another layer of composting-toilet upkeep: mechanical systems that move air and regulate temperature.
Inspect fans for debris, worn bearings, and loose wiring; test airflow and replace failed units.
Verify heater elements and thermostats with a multimeter; clear and secure vents to prevent blockages.
Schedule routine checks, keep spare parts, and follow manufacturer maintenance intervals to avoid failures.
Maintenance Schedule and Best Practices to Reduce Emptying Frequency
A clear maintenance schedule can greatly extend time between emptying by combining regular mixing with the addition of bulking agents and, when appropriate, compost accelerators.
Consistent monitoring of moisture, temperature, and biomass levels helps maintain efficient decomposition and signals when adjustments are needed.
Seasonal factors—such as slower microbial activity in cold months and space constraints in RVs—should inform frequency and methods for both home and mobile systems.
Regular mixing, bulking agents, and compost accelerators
Regular mixing, use of bulking agents, and targeted accelerators form the core of a maintenance routine that slows fill-up and improves compost stability.
Routine turning redistributes moisture and heat, reducing odors and hotspots.
Adding dry bulking materials—sawdust, coconut coir, or straw—maintains porosity.
Enzyme or microbial accelerators can speed decomposition when used sparingly.
Schedule adjustments depend on load and system type.
Monitoring moisture, temperature, and biomass levels
Building on routine mixing and the use of bulking agents, monitoring moisture, temperature, and biomass levels gives objective indicators for when intervention is needed and how to extend time between empties.
Moisture should be damp, not wet; adjust with dry bulking or moisture additions. Temperature probes track thermophilic activity.
Periodic volume checks and visual inspection of decomposition stages inform turning frequency and bulking replenishment to slow fill rates.
Seasonal considerations for home and RV systems
How do seasonal shifts alter composting-toilet maintenance rhythms for homes and RVs?
Cooler months slow microbial activity, increasing emptying frequency and requiring insulation or supplemental heat.
Warmer months accelerate decomposition, allowing longer intervals if moisture is controlled.
Adjust ventilation, cover material, and monitoring cadence seasonally.
For RVs, winterize to prevent freezing; in summer, increase aeration and bulking agents to reduce odors and emptying.
Safety Checklist and Quick Reference for Emergency Situations
A concise emergency checklist should list immediate actions for spills or exposure, clear first-aid and decontamination steps, and key contacts to call.
It should specify: contain and isolate the area, use PPE and absorbent materials, and promptly wash and seek medical care if needed.
Contact information for the local health department, licensed waste handlers, and RV park managers should be included and kept accessible.
Immediate steps for spills or exposure incidents
Respond immediately to contain contamination and protect people: isolate the area, prevent further access, and, if safe to do so, stop the source of the spill.
Notify others nearby, don appropriate PPE, and ventilate the space if feasible.
Block drainage and collect solids with disposable tools.
Bag waste securely, label biohazard if required, and arrange waste removal per local regulations.
First-aid and decontamination procedures
Refer to this checklist immediately after any spill or exposure to prioritize care and limit contamination:
Administer basic first aid—stop bleeding, rinse affected skin with soap and water for at least 20 seconds, flush eyes with water, and remove contaminated clothing.
Apply sterile dressing to wounds. Seek medical attention for significant exposure.
Disinfect surfaces with bleach solution (1:10) and launder clothing separately in hot water.
Contacts: local health department, licensed waste handlers, and RV park managers
Several key contacts should be identified and documented before any composting-toilet maintenance or emergency.
A concise list includes the local health department for guidance and reporting, licensed waste handlers for safe transport and disposal, and RV park managers for on-site support and access protocols.
Contact names, phone numbers, email addresses, and preferred emergency procedures should be stored with the safety checklist.
Comparison of Emptying Methods and Costs
The comparison of manual emptying, professional pump-out, and municipal services clarifies trade-offs in cost, time, and safety to guide appropriate choices for different users. Below is a concise emotional prompt to frame the practical differences and best-use scenarios. Consider personal priorities—budget, speed, and risk tolerance—when choosing a method.
| Method | Feeling evoked |
|---|---|
| Manual emptying | Hands-on responsibility, modest cost |
| Professional pump-out | Relief and security, higher fee |
| Municipal services | Routine convenience, variable access |
| Cost/Time/Safety | Practical balance, decisive choice |
Manual emptying vs. professional pump-out vs. municipal services
When choosing how to empty a composting toilet, three main options present distinct trade-offs in cost, labor, and regulatory requirements: manual emptying, hiring a professional pump-out service, or using municipal waste collection where available.
Manual emptying offers control and low immediate expense but requires PPE and proper handling.
Professional pump-outs reduce user labor and guarantee compliant disposal.
Municipal services vary by jurisdiction and often require specific packaging or permits.
Cost, time, safety level, and best-use scenarios
A straightforward comparison of cost, time, and safety helps determine which emptying method suits a given composting toilet situation.
Manual emptying: low direct cost, moderate time, higher personal exposure—best for small home or RV owners comfortable with PPE.
Professional pump-out: higher cost, fast, safer—ideal for larger systems or those avoiding contact.
Municipal services: variable cost, regulated safety, suitable where available.
Practical Tips, Hacks, and Products Recommended by Experts
Experts routinely recommend practical products and simple hacks to make emptying composting toilets cleaner and faster.
Key suggestions include:
- odor-neutralizing additives and eco-friendly disinfectants
- compact tools and accessories for tight spaces
- travel-friendly solutions for RV owners
These focused recommendations aim to reduce odor, simplify handling, and suit mobile setups.
Odor-neutralizing additives and eco-friendly disinfectants
Although composting toilets are designed to break down waste naturally, targeted odor-neutralizing additives and eco-friendly disinfectants can greatly improve sanitation and user comfort without harming microbial activity.
Experts recommend zeolite, biochar, or citrus-based powders to absorb odors and balance moisture.
For cleaning, dilute hydrogen peroxide or vinegar solutions and plant-based enzymatic sprays sanitize surfaces while preserving compost biology; avoid bleach and harsh soaps.
Tools and accessories that simplify emptying in tight spaces
Several compact tools and cleverly designed accessories make emptying a composting toilet in confined spaces faster, cleaner, and less physically demanding.
Recommended items include collapsible scoops, long-handled spatulas with detachable heads, sealable liners, odor-tight transfer buckets, compact wet/dry vacs with HEPA filters, glove systems with wrist seals, and magnetic or clip-on flashlight mounts for hands-free illumination during removal and inspection.
Travel-friendly solutions for RV owners
When space is limited and road time is long, RV owners benefit from travel-ready composting solutions that prioritize compactness, odor control, and ease of emptying.
Experts recommend lightweight self-contained units, sealed liners, and biochar or coconut coir for odor suppression.
Carry a compact hand pump, folding funnel, and nitrile gloves.
Empty at approved dump stations and store waste in vented, sealed containers between stops.
Checklist to Follow Before You Empty (Printable/Step Sequence)
A concise checklist helps guarantee safety and efficiency before emptying a composting toilet.
- Pre-work checklist
- Step-by-step action checklist
- Post-emptying verification checklist
Each item should be followed in order to minimize exposure, prevent contamination, and confirm proper system function afterward.
Pre-work checklist
One concise checklist guarantees the task begins safely and efficiently: confirm personal protective equipment (gloves, mask, eye protection), gather necessary tools and containers, verify the compost batch is mature and odor-minimized, check weather and ventilation, and position a clean area for temporary storage or transport.
Add clear labels, make certain a phone or helper is available, secure pets and children, and review local disposal regulations.
Step-by-step action checklist
Begin by reviewing the printable step sequence to guarantee each stage is understood and all items are ready: PPE fitted, tools and containers positioned, labels prepared, and a helper or phone accessible.
Follow numbered actions: isolate unit, ventilate area, remove cover, transfer solids with designated scoop, seal waste container, clean tools into waste stream, replace liners, sanitize contact surfaces, record time and initials.
Post-emptying verification checklist
Having completed the emptying sequence, the operator should run a concise post-emptying verification checklist to confirm safety, containment, and readiness for reuse.
Inspect seals and fasteners, confirm lid and vent closures, verify odor control media and drying trays replaced, check for residual liquids or spillage, sanitize contact surfaces, restock consumables (cover material, filters), log maintenance time, and guarantee airflow and composting mechanism function before returning to service.
Conclusion
Emptying a composting toilet is a routine that, done correctly, keeps odor and pathogens at bay while returning nutrients to the soil. Following the outlined steps, using proper PPE, and choosing the right method for the toilet type guarantees safety and efficiency. Like a well-conducted orchestra, each precaution and action harmonizes to protect people and the environment, transforming waste into a useful resource with minimal risk and maximum stewardship.