How to Remove Pressure Relief Valve on RV Water Heater Safely: Step-by-Step Guide
To safely remove the pressure relief valve from your RV water heater, follow these steps: First, ensure that power and gas are turned off, and shut off the water supply. Open the heater and hot taps to relieve pressure, then drain the tank. Wear eye and hand protection, and use an adjustable wrench to turn the relief valve counterclockwise while supporting the heater fitting. If the valve is seized, apply penetrating oil, gently tap it, or use cautious heat. Finally, install a matched replacement valve with approved thread sealant and torque it to the manufacturer’s specifications. Follow these procedures carefully for safe and effective maintenance.
Overview of Removing a Pressure Relief Valve from an RV Water Heater
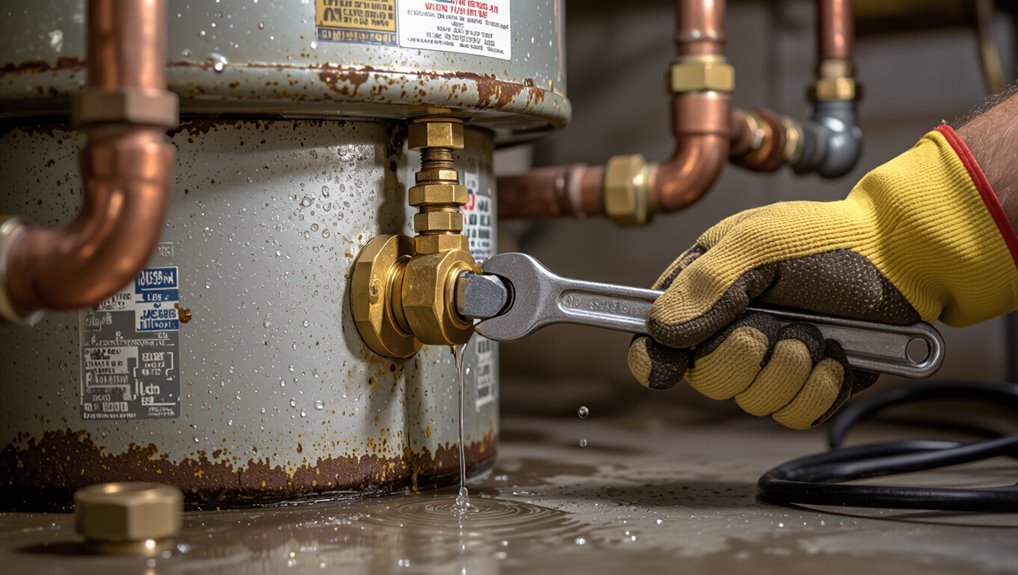
Removal of the pressure relief valve on an RV water heater is typically undertaken to replace a faulty valve, address persistent leaks, or perform maintenance after winterization.
Before starting, the technician should follow a brief safety checklist: isolate power and gas, relieve tank pressure, and wear protective gear.
It is also important to take into account legal and warranty implications, since improper replacement can void warranties or violate local codes.
When and why you might remove the pressure relief valve
Begins with evaluating safety and service needs: the pressure relief valve on an RV water heater should be removed only when it is defective, leaking, or requires replacement during scheduled maintenance.
Typical reasons include visible corrosion, persistent drips, or failure to actuate.
Technicians replacing components will follow procedures for how to remove pressure relief valve on rv water heater to restore safe operation.
Quick safety summary and legal/ warranty considerations
Safety concerns govern any work on an RV water heater’s pressure relief valve: only trained individuals should proceed, with the system depressurized, power and propane isolated, and hot water allowed to cool to prevent scalding or injury.
Additionally, altering or replacing the valve may void warranties or violate codes; consult manufacturer guidance, retain receipts, and document professional service to preserve warranty and legal compliance.
Tools and Materials Needed
A concise list of required tools and replacement parts frames the task: adjustable wrench, pipe wrench or pliers, replacement pressure relief valve, Teflon tape, and a bucket or rags.
Optional items that can simplify the job include penetrating oil, a strap wrench, cordless impact or swivel socket, and safety gloves.
The following section will specify sizes, materials compatibility, and tips for selecting the correct replacement valve.
Required tools and replacement parts
For the task of removing and replacing an RV water heater pressure relief valve, a concise set of tools and parts guarantees the job is efficient and leak-free.
Essential items focus on safe removal and proper sealing to prevent leaks or damage.
- Adjustable wrench, pipe wrench, or appropriate-sized spanner for valve removal.
- Replacement pressure relief valve rated for the water heater model.
- Plumber’s tape (PTFE) and thread sealant compatible with potable water.
Optional tools to make the job easier
Having listed the basic tools and parts, optional items can streamline removal and reduce effort. A few add-ons save time, protect components, and improve safety during pressure relief valve replacement.
Consider compact, RV-specific accessories that fit limited spaces and fragile fittings.
- Torque-limiting wrench for accurate tightening
- Flexible basin wrench for confined access
- Thread sealant tape with PTFE film for leak-free joints
Preparing the RV and Water Heater for Safe Work
Before starting, the operator must isolate all power sources by shutting off propane, shore power, and battery connections.
They should then stop the water supply, relieve system pressure, and drain the water heater and hot lines to prevent scalding or leaks.
Adequate ventilation and appropriate personal protective equipment (gloves, eye protection) are required while working.
Shutting off propane, shore power, and battery power
Shut off propane, shore power, and the coach battery to isolate all energy sources before any work begins on the water heater; this eliminates ignition, electrical shock, and accidental heater operation risks.
Verify propane valve closure at the tank and onboard regulator, disconnect shore power at the pedestal and breaker, and remove or switch off the coach battery.
Confirm power absence with appropriate voltage testers.
Turning off water supply and relieving system pressure
Turn off the RV’s freshwater source at the city water inlet or the main tank valve.
Then, open a hot faucet to relieve residual pressure in the lines.
Verify fittings and outdoor spigots are closed.
Check the pressure gauge, if present, until it reads zero.
Wear gloves and eye protection.
Confirm no water flow from the opened faucet before proceeding to valve removal.
Draining the water heater and hot water lines
Drain the water heater and hot lines completely to prevent scalding and minimize mess: open the hot water taps, attach a garden hose to the water heater’s drain or drain petcock, and direct the hose to an appropriate gray-water outlet or safe discharge area.
After draining the tank, open low-point drains and fixtures to clear remaining water. Then close drains once flow stops to prepare for valve removal.
Ventilation and personal protective equipment precautions
Guarantee adequate ventilation and use appropriate personal protective equipment before beginning work on the RV water heater: open windows and vents or run the roof vent fan to clear any combustion or chemical fumes, and put on safety glasses, work gloves, and a respirator rated for dust and vapors if old seals or corrosion may release particles.
- Assess airflow and eliminate ignition sources.
- Select PPE for chemical and particulate exposure.
- Maintain clear escape and communication paths.
Step-by-Step Procedure to Remove the Pressure Relief Valve
The procedure begins by locating the pressure relief valve on the specific RV water heater model and noting its orientation and indicated flow direction.
Next, the technician follows step-by-step actions to loosen and remove the valve, using appropriate tools and techniques for seized or corroded fittings.
After removal, the valve port and surrounding fittings are inspected for damage, corrosion, and proper sealing surfaces before installing a replacement.
Locating the pressure relief valve on common RV water heater models
Locating the pressure relief valve on an RV water heater typically begins by identifying the service access panel or exterior hatch where the heater’s plumbing and fittings are exposed.
Common models place the valve near the top or side of the tank, attached to a short discharge pipe.
Reference the heater’s label or manual for exact placement and check for a lever or threaded cap to confirm location.
Confirming valve orientation and flow direction
Before loosening any fittings, a technician should verify the relief valve’s orientation and flow direction by inspecting the valve body for an arrow or stamped marking and tracing the connected discharge pipe to guarantee it leads away from the camper’s interior.
This confirms whether the valve vents outward and that the relief path is unobstructed.
Confirm inlet/outlet ports align with system piping and note any adapters.
Loosening and removing the valve step-by-step actions
Begin by shutting off the RV’s water supply and relieving system pressure—open a hot faucet and, if present, drain the water heater per manufacturer instructions—so the technician can work dry and safe.
Use a wrench to grip the valve body, turn counterclockwise while supporting the heater fitting, catch residual water in a pan, remove the valve, inspect the seat and threads, and prepare the replacement.
Dealing with seized or corroded valves
When a pressure relief valve is seized or corroded, a technician should proceed methodically to avoid damaging the heater or surrounding fittings.
Apply penetrating oil, allow soak time, then tap gently to break corrosion. Use correct-sized wrench and steady pressure; avoid excessive force.
If still stuck, heat the valve body cautiously or use a valve puller.
Replace with a new valve and proper sealant.
Inspecting the valve port and surrounding fittings after removal
After freeing and removing a seized or corroded pressure relief valve, the technician should immediately inspect the valve port and adjacent fittings for damage, corrosion, or debris that could compromise the new valve’s seal.
Using a flashlight and pick, remove deposits, check threads for stripping, and verify mating surfaces are flat.
Replace damaged fittings, apply appropriate thread sealant, and confirm a clean, dry installation site.
Installing a Replacement Valve or Temporary Closure
When replacing the pressure relief valve, the technician selects a part that matches the original specifications for pressure rating, temperature rating, and thread type.
Proper thread sealing—using approved tape or compound—and correct torque are applied to guarantee a secure, leak-free connection, followed by a pressure test to confirm no leaks.
Temporary closures are mentioned only as an emergency measure and are discouraged because they bypass a critical safety device.
Choosing the correct replacement pressure relief valve (specs to match)
Because maintaining system safety depends on correct specifications, selecting a replacement pressure relief valve requires matching the original valve’s pressure rating, temperature rating, thread size and type, and discharge orientation.
Additionally, verify material compatibility (brass or stainless), certification (UL/ASME), and RV-specific ratings for potable water.
Keep OEM part numbers or service manual references to guarantee exact fit and performance.
Proper thread sealing methods and torque guidance
Begin by preparing the valve threads and mating surface to guarantee a reliable, leak-free joint: clean away old sealant and debris, inspect threads for damage, and choose a sealing method—PTFE (Teflon) tape wrapped clockwise for tapered pipe threads, or an appropriate pipe thread compound rated for potable water and high temperature for both tapered and straight threads when specified.
Hand-start, then tighten with wrench to manufacturer torque or snug plus 1–2 turns.
Testing for leaks after installation
A careful pressure and leak test confirms the integrity of the newly installed pressure relief valve or temporary closure before returning the RV to service.
After reassembly, pressurize the system at normal operating pressure, inspect all joints and the valve for drips or weeps, monitor pressure for ten minutes, and recheck after heating.
Tighten or reseal any leak source and retest until dry.
Temporary closures and why they are not recommended
Technicians may be tempted to fit a temporary closure when a replacement pressure relief valve is unavailable, but these stop-gap measures bypass a safety component designed to prevent tank overpressure and thermal expansion issues.
Temporary plugs, caps, or makeshift seals eliminate controlled pressure release, risking rupture, scalding, fire, or structural damage.
Only install a certified replacement valve and restore proper relief functionality immediately.
Troubleshooting Common Issues
After reinstalling the pressure relief valve, common problems can include persistent water leaks, a new valve that still drips, stripped threads or a damaged housing, and no water flow after reassembly.
The following section identifies likely causes for each symptom and recommends straightforward checks and fixes. Readers are advised to verify seals, thread integrity, and valve seating before considering replacement parts or professional repair.
Water leaks after reinstallation
Inspecting for water leaks after reinstalling a pressure relief valve is critical because even small seepage can indicate improper seating, damaged threads, or a compromised gasket.
The technician should dry the area, pressurize the system, and observe for drips. If leakage appears, tighten to manufacturer torque, replace a damaged gasket or apply appropriate thread sealant, then retest until dry and secure.
Valve still leaking when new valve installed
When a newly installed pressure relief valve continues to leak, the issue often lies beyond the valve itself—improper seat alignment, residual debris in the fitting, an incompatible valve type, or excessive system pressure can all cause persistent leakage.
Inspect mating surfaces, clean the port, verify valve specifications match heater requirements, and measure system pressure.
Replace or adjust upstream components if pressure exceeds rated limits to resolve persistent leaks.
Stripped threads or damaged housing
Stripped threads or a damaged housing prevent a pressure relief valve from seating securely and can lead to persistent leaks or an inability to tighten the valve safely.
Inspect threads and housing for wear, cross-threading, corrosion, or cracking. If damage exists, replace the housing section or consult a professional.
Temporary seals are not recommended; proper repair guarantees safe pressure containment and long-term reliability.
No water flow after reassembly
If threads or the housing were repaired or replaced, a common post-reassembly problem is no water flow from the heater despite the valve appearing secure.
Check for trapped debris, misaligned valve components, or an obstructed inlet/outlet.
Verify upstream water supply, isolation valves, and tank drain position.
Confirm the valve was fully opened and seals or O-rings seated correctly before pressurizing the system.
Safety Risks, Codes, and Warranty Implications
Removing or disabling a pressure relief valve introduces significant safety hazards, including risk of overpressure and scalding.
RV manufacturers and safety codes typically require intact relief valves and specify installation and maintenance standards.
Altering or removing the valve can void warranties and complicate insurance coverage if a related failure occurs.
Risks of removing or disabling a pressure relief valve
Disabling the pressure relief valve on an RV water heater creates serious hazards: it allows excessive pressure or temperature buildup that can rupture the tank or plumbing, leading to scalding, explosion, or fire.
Additionally, loss of this safeguard increases risk of catastrophic failure, endangers occupants and nearby property, and typically voids warranties and insurance coverage, reducing legal protections and financial recourse.
RV manufacturer and safety code requirements
Because pressure relief valves are a primary safety device on RV water heaters, manufacturers and building codes mandate specific installation, testing, and maintenance requirements to prevent pressure- and temperature-related failures.
RV makers specify approved valve types, mounting positions, and replacement intervals; codes (e.g., ASME, RVIA) require pressure ratings, discharge routing, and periodic inspection.
Compliance guarantees occupant safety and legal adherence.
How removal can affect warranties and insurance
After outlining manufacturer and code requirements for pressure relief valves, attention shifts to the downstream consequences when that device is taken out of service.
Removal typically voids manufacturer warranties and may breach RV insurer terms, leaving owners financially liable for damage.
Insurers can deny claims citing noncompliance with safety standards; documented approvals or certified replacements are required to preserve coverage and warranty validity.
Maintenance Tips to Prevent Future Valve Problems
Regular inspection and testing on a set schedule helps detect valve weakness before it fails.
Periodic flushing and use of corrosion inhibitors or anode rod checks protect the water heater and its relief valve from buildup and rust.
Guidance on when replacement is safer than repair completes a proactive maintenance plan.
Regular inspection and testing schedule
Establish a consistent inspection and testing schedule to catch valve wear or malfunction before it becomes a safety issue.
Inspect visually monthly for leaks, corrosion, and proper seating.
Test the relief action every six months, documenting results and any replacement.
Replace the valve per manufacturer interval or immediately if the test fails.
- Monthly visual check
- Semiannual functional test
- Document and replace when needed
How to flush and protect the water heater from corrosion
Flush and treat the RV water heater routinely to remove scale and minimize corrosion, which preserves valve function and extends tank life.
Drain and flush the tank completely, using a descaling solution if hard water deposits persist.
Inspect anode rods and replace when depleted.
Apply corrosion-inhibiting treatments and use sacrificial anodes to protect internal surfaces, reducing future pressure relief valve issues.
When to replace instead of repair
Determine whether replacement is warranted when a pressure relief valve shows persistent leakage, fails to reset, is visibly corroded, or has reached its rated service life; in these cases replacement is safer and more cost-effective than repeated repairs.
A technician should also replace valves after overheating events, material degradation, or when compatibility with updated heater specifications is required to guarantee reliable pressure protection.
When to Call a Professional
If a pressure relief valve leaks persistently, emits corrosion, or the water heater shows pressure-related malfunction, a professional plumber or RV technician should be contacted.
The service visit typically includes inspection, pressure testing, valve replacement if needed, and verification of system safety.
Expect a diagnostic fee plus parts and labor, with total costs varying by region and whether the unit is inside an RV or a stationary system.
Signs a professional plumber or RV technician is needed
Recognize when a pressure relief valve issue exceeds routine DIY scope: persistent leaking after replacement, signs of corrosion or cracking on the valve body, recurring pressure build-up despite thermostat or anode checks, or active water spraying under pressure.
Additional indicators include unusual banging or hissing, visible tank deformation, electrical component faults, inability to isolate water supply, or lack of confidence in safe repair procedures.
What to expect from a service visit and typical costs
Schedule a service visit to have a qualified technician diagnose and resolve pressure relief valve problems. Expect a focused inspection, basic testing, and clear recommendations.
Typical visit includes labor, minor parts replacement, and safety verification. Costs vary by region and complexity; anticipate $80–$250 for diagnosis and simple repair, more for replacements.
- Inspection and testing
- Parts and labor
- Safety certification
Quick Reference Checklist
A concise checklist summarizes the essential pre-removal safety steps, including power and water shutoff, pressure release, and protective gear.
It also lists the sequential removal and reinstallation tasks, such as draining the tank, loosening fittings, replacing the valve, and pressure-testing the system.
This quick reference serves as a practical on-site guide to reduce errors and speed the job.
Pre-removal safety checklist
Before beginning work on the pressure relief valve, verify the water heater is cool, the RV’s water and power supplies are shut off, and the system is depressurized.
Inspect for leaks, corrosion, and accessible drain points. Confirm tools and replacement valve match specifications.
- Wear protective gloves and eye protection.
- Vent residual pressure slowly and safely.
- Tag power and water sources as out of service.
Removal and reinstallation checklist
With safety checks complete and the system depressurized, proceed to the removal and reinstallation checklist outlining the steps, tools, and torque/spec requirements needed for a safe valve swap.
A concise, third-person quick reference lists essential actions, required tools, torque values, sealant type, and verification steps to guarantee leak-free operation and compliant pressure relief performance.
- Drain, isolate, remove; inspect threads.
- Use correct wrench, new PTFE, torque 20–25 ft·lb.
- Refill, pressurize, leak test, document.
Conclusion
Like a mariner easing a stubborn hatch, the technician methodically unseats the relic valve, mindful of pressure and protocol. Each careful turn, drain and seal echoes a practiced litany—safety first, codes observed, warranties considered—so the heart of the vessel remains sound. When uncertainties arise, a wiser hand is summoned, ensuring that repair becomes stewardship rather than gamble, and the water heater returns to quiet service with measured respect for craft and caution.