How to Install a Toilet Flange: Step-by-Step Guide for DIYers
To install a toilet flange, start by shutting off the water supply, draining, and removing the toilet. Inspect the flange and subfloor for any damage. Remove the old flange and wax ring, then fit a new PVC or cast-iron-compatible flange (or extender) to match the floor height. Secure it to the drain and subfloor using corrosion-resistant screws, and seal the joints. Finally, reinstall the toilet with the appropriate wax or rubber seal, ensuring the bolts are evenly torqued. For more detailed tips and troubleshooting, refer to the full guide.
Overview of Installing a Toilet Flange
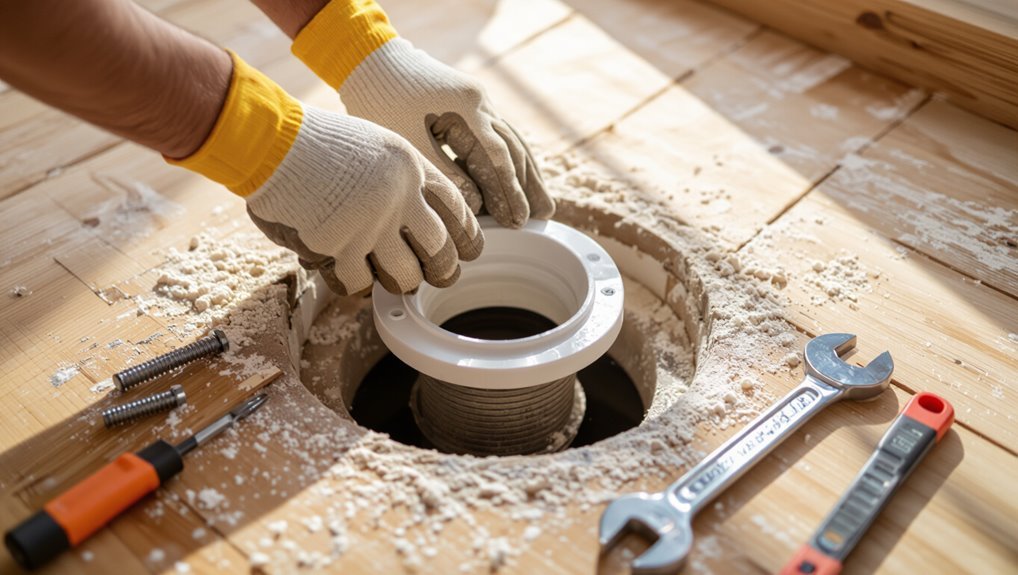
A toilet flange is the fitting that secures the toilet to the drain pipe and maintains a watertight seal, making it essential for proper function and preventing leaks.
Replacement or installation is required when the flange is cracked, corroded, misaligned, or sitting below floor level.
Before beginning, a concise checklist of tools and materials—such as a new flange, wax ring or gasket, bolts, sealant, wrench, and saw or scraper—should be assembled.
What a toilet flange is and why it matters
Toilet flanges serve as the essential connection between the toilet and the drainpipe, securing the fixture to the floor while sealing the waste line to prevent leaks and sewer gas from entering the home.
Proper understanding of how to install a toilet flange guarantees alignment, a reliable wax or gasket seal, and stable bolting.
Correct flange selection affects plumbing integrity and long-term performance.
When to replace or install a new flange
Inspect the flange whenever a toilet rocks, leaks appear at the base, persistent sewer odor is detected, or during floor renovations, because these signs commonly indicate corrosion, cracks, bolts failure, or improper elevation that require repair or replacement.
Replacement is also prudent for cast‑iron or plastic flanges showing severe rust, breakage, warped alignment, damaged bolt slots, or repeated wax ring failures compromising seal integrity and drain alignment.
Tools and materials checklist
Several basic and specialized items are required to install or replace a toilet flange efficiently and securely.
A concise checklist guarantees readiness and prevents delays. Essential tools, sealants, fasteners, and safety gear should be gathered before beginning.
- Adjustable wrench, socket set, screwdriver
- Wax ring or rubber seal, flange extender
- Silicone sealant, plumber’s putty
- Safety glasses, gloves, rags
Preparing the Toilet and Work Area
Before starting, the water supply should be shut off and the toilet flushed and drained to minimize leaks.
The toilet is then unbolted and lifted clear following safe, step-by-step removal procedures.
Once removed, the flange area and surrounding subfloor are cleaned and inspected for damage or rot before proceeding.
Shutting off water and draining the toilet
Turn off the toilet’s water supply at the shutoff valve and flush to empty the tank. Then hold the handle down or sponge out remaining water so the bowl and tank are as dry as possible.
Close nearby shutoffs if present, disconnect flexible supply line at the base if needed, and place a bucket and towels to catch residual water.
Wear gloves and eye protection.
Removing the toilet safely step-by-step
With the tank drained and the supply line disconnected or capped, attention shifts to preparing the toilet and surrounding area for removal.
Protective gloves and eyewear are donned. Remaining water is blotted from bowl and tank.
Bolts are covered to catch rust. Nuts are loosened, bolts removed, and the toilet rocked gently to break the wax seal.
The fixture is lifted and set aside carefully.
Cleaning the flange area and inspecting the subfloor
After the toilet is removed, the flange and surrounding floor should be cleared of wax, debris, and old sealant to expose the full circumference of the fitting.
The area is scrubbed, scraped, and vacuumed. The flange is examined for cracks or corrosion; the subfloor is checked for rot, soft spots, or water damage.
Damaged sections are marked for repair before flange installation.
Assessing the Existing Flange and Drain Pipe
The existing flange and drain pipe should be inspected to identify material and type—common options include PVC, cast iron, brass, and stainless.
Measurements of flange height relative to the finished floor and the pipe diameter must be taken to guarantee a proper seal and fit.
Based on condition and dimensions, a decision can be made whether a repair, full replacement, or an adapter is required.
Identifying flange types and materials (PVC, cast iron, brass, stainless)
A quick visual and tactile inspection helps determine whether a flange is PVC, cast iron, brass, or stainless: PVC appears smooth, lightweight, and white; cast iron is heavy, dark, and rust-prone; brass shows a yellowish patina; stainless resists corrosion and shines.
- PVC: plastic, often glued
- Cast iron: thick, corroded edges
- Brass: malleable, greenish spots
- Stainless: bright, nonmagnetic
Measuring flange height and pipe diameter
Measure flange height and pipe diameter before removing the toilet to guarantee the replacement flange will sit flush and seal correctly.
Measure from finished floor to flange top; note if flange is recessed, flush, or above floor.
Determine pipe inner diameter with calipers or a tape measure and confirm pipe material to match fittings.
Record both dimensions for accurate replacement flange selection.
Determining whether repair, replacement, or adapter is needed
How can one tell if a flange needs repair, full replacement, or an adapter? Inspect for cracks, corrosion, warped or missing bolt slots, flange height relative to finished floor, and secure connection to the drainpipe.
If damage is minor and pipe matches flange, repair or new screws suffice. If flange is broken, misaligned, or pipe size differs, replace or use the correct-sized adapter for a proper seal.
Step-by-Step Toilet Flange Replacement
The procedure begins with removing the old flange and wax ring and inspecting the subfloor and drain for damage.
The person considers repair options or pipe-specific methods—installing a new flange on PVC/ABS, or cutting and using hub adapters for cast iron.
Finally, the flange is secured to the floor and all joints are properly sealed before reinstalling the toilet.
Removing the old flange and old wax ring
Begin by turning off the water supply and flushing the toilet to empty the bowl; then disconnect the supply line and remove any remaining water with a sponge or wet vacuum.
Remove toilet bolts and lift the fixture, setting it aside.
Scrape away the old wax ring, pry up the old flange using a screwdriver or reciprocating saw as needed, and clean the flange seating area thoroughly.
Repair options for damaged subfloor or pipe
With the old flange and wax removed, attention shifts to evaluating the subfloor and drainpipe for damage that will affect a secure, watertight flange installation.
Minor rot can be repaired with plywood or shims; replace severely compromised joists.
Cracked cast iron requires a sleeve or professional replacement.
Offset or corroded pipe ends may need cutting back and clean, square preparation before flange attachment.
Installing a new flange on PVC or ABS pipe
Prepare to fit the new flange precisely to the PVC or ABS drain, ensuring a straight, clean connection and proper seating for the wax ring or gasket.
Cut pipe square, deburr, and dry-fit flange.
Apply primer and PVC/ABS cement per manufacturer instructions, push flange fully onto pipe, align bolt slots to toilet drain, and secure flange to subfloor with corrosion-resistant screws.
Test alignment before final seating.
Installing a new flange on cast iron pipe (cutting and hub adapters)
Cut the cast iron pipe squarely and remove any remaining hub material so the new flange or adapter seats fully and evenly.
Use a reciprocating saw with a carbide blade or a pipe cutter suitable for cast iron.
Deburr edges and clean the area.
Select a hub adapter or no-hub coupling sized to the pipe, slide it in place, and tighten per manufacturer torque specifications.
Securing flange to the floor and sealing joints
Seat the flange so its bolt slots align with the toilet’s mounting holes and the flange rim sits flush on the finished floor; confirm the flange is centered over the waste opening and level to prevent leaks and wobble.
Fasten with corrosion-resistant screws into subfloor or blocking, evenly spaced.
Apply a bead of RTV silicone or plumber’s putty around the joint where flange meets floor to seal and wipe excess clean.
Using flange extenders or spacers for raised floors or tile
When tile or a new finished floor raises the toilet flange above the drainpipe, flange extenders or spacers bridge the gap to restore the proper seal and bolt alignment.
They stack or nest onto the existing flange, sealed with caulk or gasket and secured by screws.
Choose material thickness to match floor height, align bolts, test fit the toilet, and guarantee a watertight connection before final tightening.
Reinstalling the Toilet
Reinstalling the toilet begins with selecting the appropriate wax ring or wax-free seal to match the flange height and pan design.
The bowl must be set squarely, bolt nuts torqued evenly, and the water supply reconnected to check for leaks.
Final details include installing bolt caps, applying a discreet bead of caulk, and trimming any excess for a finished appearance.
Choosing the right wax ring or wax-free seal
Selecting the correct wax ring or wax-free seal is essential to guarantee a watertight connection between the toilet and flange while preventing sewer gas leaks and future wobbling.
Choose wax rings sized for flange height and horn type; use thicker or stacked rings for recessed flanges.
Consider wax-free seals for easier installation, reusability, and better performance on uneven surfaces.
Match bolt clearance and flange condition.
Setting the toilet and torquing bolts correctly
Lower the toilet straight down onto the flange, aligning the bowl’s keyhole slots or bolt holes with the closet bolts and seating the base evenly on the wax ring or seal.
Once seated, hand-thread washers and nuts, then alternate tightening each side incrementally.
Torque gently to compress the seal without cracking porcelain.
Trim bolt ends and install caps.
Check for wobble and retighten evenly if needed.
Reconnecting water supply and testing for leaks
After the bowl is seated and bolts are evenly torqued, attention turns to reconnecting the water supply and checking for leaks.
Attach the supply line to the fill valve, hand-tighten then quarter-turn with a wrench.
Open the shutoff slowly, observe the connection and base for drips.
Flush several times, watch for slow leaks, and retighten fittings if any seepage appears.
Finishing touches: bolt caps, caulk, and trim
Finish the job by installing the cosmetic elements that protect fasteners and seal the base: snap on the decorative bolt caps, apply a thin bead of bathroom-grade caulk around the toilet perimeter, and reinstall any trim or baseboards removed earlier.
Wipe excess caulk, smooth joints for a neat appearance, and allow recommended curing time.
Verify bolts remain tight and check for any gaps needing touch-up.
Common Problems and How to Fix Them
Common issues that follow flange installation include persistent leaks at the toilet base, a toilet that rocks after reinstallation, flanges sitting below the finished floor, and corroded cast iron flanges.
Each problem has targeted fixes—seal and torque checks for leaks, shims or flange spacers for wobble, flange extension or risers for low flanges, and replacement or repair sleeves for corroded cast iron.
The following section outlines practical steps and materials for each situation.
Persistent leaks at base of toilet
Persistent leaks at the base of a toilet often signal a failed wax ring, loose flange bolts, or a compromised flange itself. They require prompt diagnosis to prevent water damage and mold.
Inspect for moisture, tighten or replace corroded bolts, and test flange integrity. Replace the wax ring and realign the toilet if seals remain wet.
Verify a solid, level flange.
Wobbly toilet after installation
A wobbly toilet after installation usually indicates an issue with the flange, uneven flooring, or improperly tightened bolts. If left unaddressed, the movement can stress the wax seal and cause leaks.
The remedy: retighten bolts evenly with protective washers, shim gaps with noncompressible plastic shims, and verify flange integrity and level.
Recheck stability and caulk base after confirming secure fit.
Flange sits below finished floor best fixes
When the toilet flange sits below the finished floor, the bowl cannot seal or anchor properly, increasing leak and wobble risk; addressing this requires raising the flange, using a flange extender or spacer kit, or rebuilding the floor around it so the flange rests at or slightly above the finished surface.
Common fixes: insert stacked extenders or a neoprene spacer, shim and secure flange to plywood, or replace short flange with an adjustable one.
Corroded cast iron flange solutions
Addressing a corroded cast iron toilet flange requires evaluating the extent of rust and structural loss before choosing a repair method.
If corrosion is superficial, clean, apply rust converter, and reinforce with stainless steel repair band or epoxy.
For significant degradation, remove and replace flange with a cast iron or PVC flange adapter, ensuring proper seal, alignment, and secure anchoring to subfloor and drain.
Tips to Ensure a Long-Lasting Flange Installation
Proper tightening torque, correct seal selection, and precise flange alignment are emphasized to prevent leaks and uneven stress.
Stainless or other corrosion-resistant hardware is recommended in damp or coastal environments to extend service life.
Persistent wobble, repeated leaks, or damaged pipe connections are signs that a professional plumber should be consulted.
Best practices for torque, seal selection, and alignment
Begin by selecting materials and techniques that prioritize a leak-free, durable connection: torque limits should match the flange and fastener specifications, seals must suit the pipe type and anticipated movement, and alignment must center the toilet over the outlet to prevent stress on the wax ring or mechanical gasket.
Tighten bolts incrementally to specified torque, inspect seal compression, verify level and concentricity, and retest for leaks.
When to use stainless hardware and corrosion-resistant parts
After verifying torque, seal compression, and alignment, attention should turn to material selection for fasteners and ancillary parts: stainless steel and other corrosion-resistant components greatly extend service life in wet, chemically treated, or coastal environments.
Use stainless bolts, washers, and screws where moisture, chlorides, or cleaning chemicals are present.
Consider brass or coated options for compatibility with existing metals and to prevent galvanic corrosion.
Signs to call a professional plumber
When unusual movement, persistent leaks, or damaged flange material is observed, a professional plumber should be contacted promptly.
A technician is warranted for cracks in the drainpipe, severe corrosion, misaligned waste outlets, repeated seal failures, or subfloor rot.
Experienced assessment prevents hidden leaks, guarantees proper flange elevation, and addresses structural repairs or code compliance that exceed typical DIY skills, preserving long-term performance.
Cost, Time, and Safety Considerations
Typical costs for a toilet flange replacement vary widely, with DIY repairs usually limited to parts and tools while professional work includes labor and potential disposal fees.
Time estimates depend on the scenario: a simple bolt-and-wax-ring swap can take under an hour, while flange replacement or subfloor repair can require several hours to a day.
Basic safety precautions—gloves, eye protection, proper lifting—and correct disposal of old wax rings and damaged materials should be addressed before work begins.
Typical costs for DIY vs. professional replacement
Replacing a toilet flange can range from a quick, low-cost DIY job to a more expensive professional service, depending on materials, damage extent, and local labor rates. Typical DIY parts cost $10–$60; professionals add labor. The choice balances skill, risk, and warranty.
| Scenario | Parts | Typical Total |
|---|---|---|
| DIY minor | $10–$30 | $10–$30 |
| DIY replace | $20–$60 | $20–$60 |
| Pro service | $50–$300 | $150–$500 |
Estimated time for each repair scenario
A quick flange repair can often be completed in under an hour, while more involved replacements or repairs that require drain access, subfloor work, or adhesive cure time may take several hours to a full day.
Simple gasket or bolt replacement: 30–60 minutes.
Partial flange replacement with minor subfloor patching: 2–4 hours.
Full flange and subfloor rebuild: 6–8+ hours, possibly split across days.
Safety precautions and disposal of old materials
Wear appropriate PPE—gloves, eye protection, and a dust mask—before removing an old toilet flange, since corroded metal, mold, and sewer gases can pose health and injury risks.
Ventilate the area, shut off water, and disconnect the toilet carefully.
Bag and seal contaminated materials, label for disposal, and follow local regulations for plumbing waste.
Clean and disinfect the work zone thoroughly afterward.
Additional Resources and Parts Reference
A concise list of common replacement parts—flanges, wax rings, bolts, and gaskets—and typical retail sources will be provided for quick reference.
Recommended online tutorials and manufacturer guides will be cited to support proper installation techniques.
A brief glossary will define key terms used throughout the article to guarantee clear communication.
Common replacement parts and where to buy
While replacing a toilet flange often requires only a few basics, having the right parts on hand prevents delays and guarantees a waterproof, stable installation.
Common replacement parts and typical retail sources include:
- Wax or wax-free toilet seals — hardware stores, home centers, online retailers
- Flange repair rings — plumbing supply, big-box stores
- Stainless steel flange bolts and caps — hardware/home stores
- PVC or ABS flange assemblies — plumbing suppliers, online marketplaces
Useful online tutorials and manufacturer guides
Consult online tutorials and manufacturer guides to bridge practical steps with product-specific details, ensuring correct parts, torque values, and seal types are used.
Reliable sources clarify model compatibility, provide torque specs, and show sealing techniques. Prioritize OEM sheets and vetted how-to videos; compare instructions before starting.
- Manufacturer installation manuals
- Official product datasheets
- Tutorial videos from reputable channels
- Community forum threads
Glossary of terms for toilet flange installation
Terminology clarifies installation steps and helps match parts, tools, and procedures to the specific toilet and drain system.
A concise glossary aids identification, selection, and communication during flange replacement and plumbing repairs.
- Flange: connects toilet to drain and anchors it to the floor
- Wax ring: seals toilet base to flange
- Closet bolt: secures toilet to flange
- Spigot: pipe end that inserts into flange
Conclusion
A final thought: like a ship anchored securely to its mooring, a well-installed toilet flange keeps the whole bathroom steady. One homeowner recalled a wobbly toilet that leaked for months until a new flange stopped the drift—after installation, water damage repairs dropped by 80% in that neighborhood’s renovations. By following the steps and checks outlined, the DIYer can guarantee a durable, leak-free anchor for the toilet and avoid costly, recurring problems.