How to Clean an Expansion Tank: Step-by-Step Guide for Boilers and HVAC Systems
To clean an expansion tank effectively, follow these steps: First, isolate, depressurize, and remove the tank. Inspect the exterior before opening it to check the bladder, diaphragm, and internal surfaces. For bladder tanks, flush, wipe, disinfect if necessary, and allow to dry. For steel tanks, drain and thoroughly clean to remove scale and rust, then rinse, dry, and inspect for any coating loss or damage. Reassemble by pressurizing the air side and conducting a leak test. This guide provides a complete step-by-step process along with troubleshooting tips.
What an Expansion Tank Is and Why Cleaning Matters
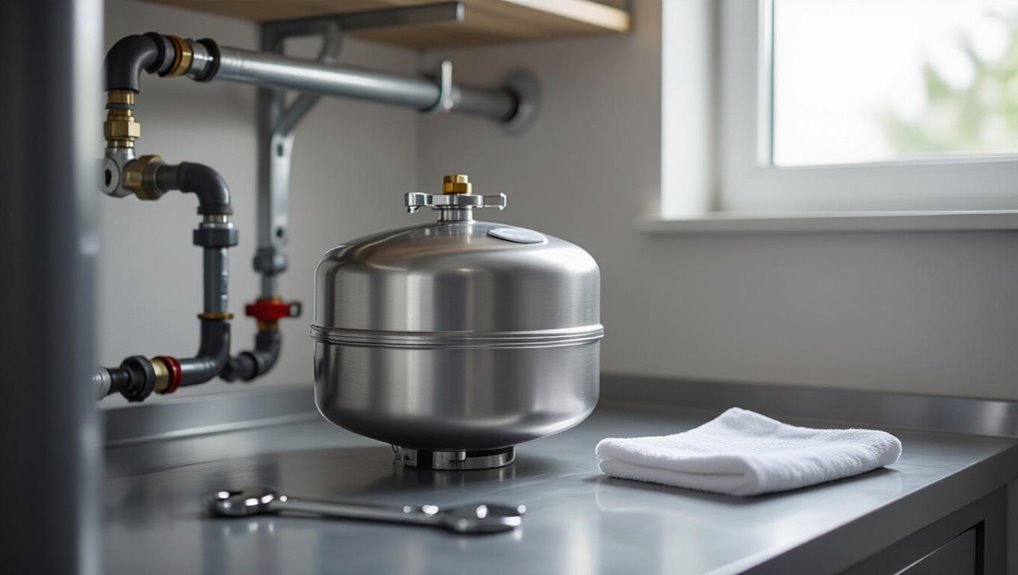
An expansion tank absorbs excess pressure in boilers and HVAC systems to protect piping and maintain stable operation.
When neglected, sediment, corrosion, and air build-up can impair the tank’s diaphragm or bladder and lead to leaks or pressure issues.
Reduced system performance, frequent pressure fluctuations, visible corrosion, or waterlogged behavior indicate the tank needs cleaning or service.
Purpose of expansion tanks in boilers and HVAC systems
A small, pressurized vessel installed near a boiler or HVAC system, the expansion tank absorbs excess water volume created when the system heats and prevents pressure spikes that can damage pipes, valves, and the heat source.
It stabilizes system pressure, reduces cycling, and extends equipment life. Understanding this purpose informs maintenance routines and explains why learning how to clean an expansion tank matters.
Common contaminants and failure modes caused by neglect
With the expansion tank’s role in controlling pressure and preserving system components established, attention turns to the consequences of neglect: contaminants and failure modes that compromise performance.
Sediment, rust, mineral scale, and microbial growth reduce volume and impair bladder function. Corrosion weakens metal, causing leaks.
Bladder rupture or valve failure leads to pressure cycling, waterlogging, reduced system efficiency, and premature component wear.
Signs your expansion tank needs cleaning or service
Several clear indicators signal that an expansion tank requires cleaning or service: fluctuating system pressure, frequent boiler short-cycling, spitting or sputtering radiators, visible rust or sediment around fittings, and a waterlogged feel when tapping the tank.
Additional signs include foul odors, reduced heating efficiency, recurring low-pressure warnings, or leaked coolant.
Prompt inspection prevents corrosion, preserves diaphragm integrity, and avoids costly system failures.
Safety Precautions and Tools Needed
Before beginning, a clear safety checklist should be followed: shut power, depressurize the system, and don appropriate PPE.
The required tools and materials — basic hand tools, a bucket, cleaning solution, rags, and replacement parts — should be gathered and inspected.
If signs of corrosion, tank failure, or unfamiliar plumbing configurations are present, a qualified professional should be contacted rather than attempting a DIY repair.
Safety checklist before starting (power off, depressurize, PPE)
A clear safety checklist guarantees the cleaning proceeds without injury or equipment damage.
Before beginning, power to the boiler or HVAC system must be isolated and locked out. The system must be depressurized and cooled; verify pressure gauges read zero.
Personnel should don appropriate PPE—gloves, eye protection, and respiratory protection if needed—and confirm emergency shutoffs and ventilation are accessible.
Tools and materials required
Essential tools and materials for cleaning an expansion tank include a set of hand tools (adjustable wrenches, pliers, screwdrivers), a pressure gauge or manometer for verification, a pump or vacuum for draining, hose and bucket, replacement seals or O-rings, a soft brush and non-abrasive rags, a mild descaling solution or manufacturer-approved cleaner, and PPE (gloves, eye protection, and, if needed, a respirator).
- Inspect tools for compatibility and condition.
- Prepare containment and disposal supplies.
- Keep manufacturer documentation and replacement parts handy.
When to call a professional instead of DIY
When should a homeowner defer to a professional for expansion tank work?
A professional should be called if the system is under pressure, piping or fittings leak, corrosion or tank rupture is suspected, the tank is difficult to access, or diagnostic tests (pressure, bladder integrity) are inconclusive.
Also seek help if local codes, warranties, or lack of tools and experience limit safe DIY repairs.
Preparing the System for Cleaning
Before cleaning, the boiler or HVAC should be shut down and the expansion tank isolated from the system to prevent flow or heat transfer.
Next, the system must be drained and depressurized following manufacturer guidelines to allow safe access to the tank.
Finally, all valves, controls, and operating settings should be tagged and documented to guarantee correct restoration after maintenance.
Shutting down boiler/HVAC and isolating the tank
Power down the boiler or HVAC system and lock out its electrical supply to guarantee no accidental startups during tank work.
Next, close isolation valves on supply and return lines serving the expansion tank. Tag valves as out of service and verify isolation visually.
Release any adjacent zone controls that could energize circulation. Confirm system remains inert before proceeding to tank maintenance.
Draining and depressurizing the system step overview
With the boiler/HVAC secured and isolation valves confirmed closed, the next step is to drain and depressurize the system to allow safe access to the expansion tank.
Technicians should open drain valves and bleed air from high points until pressure gauges read zero.
Capture discharged fluid in appropriate containers, monitor flow for contaminants, and verify no residual pressure before unbolting or disconnecting the tank.
Tagging and documenting system settings
One clear set of tags and a concise record of system settings should be created and affixed before any cleaning begins so technicians can restore the system exactly as found.
Document pressures, temperatures, valve positions, control setpoints, and electrical disconnect states.
Use durable tags, a dated checklist, and photos.
Store records with work orders and communicate changes to facility managers prior to reassembly.
Step-by-Step Cleaning Procedure for Diaphragm/Bladder Expansion Tanks
The procedure begins with safely isolating and removing the expansion tank for examination of the exterior, fittings, and mounting hardware.
Once disconnected, the tank is opened for a visual inspection of the bladder or diaphragm, followed by controlled cleaning—flushing, wiping, and disinfecting internal surfaces as required.
Finally, the tank is reassembled, reinstalled, and pressure-tested to confirm proper operation and leak-free service.
Removing the expansion tank safely
Begin by shutting off the boiler or hot-water system and isolating the expansion tank from supply lines to prevent pressure or fluid escape during removal.
Depressurize the system via drain or relief valve.
Support the tank, loosen mounting and disconnect piping or fittings. Cap lines to prevent contamination.
Remove tank carefully, avoiding sudden movements, then place it on a stable, protected surface for cleaning.
Inspecting the tank exterior and fittings
Before any cleaning steps are started, inspect the tank exterior and all fittings for signs of corrosion, leaks, dents, or loose connections that could indicate failure or contamination.
Check threaded connections, valves, mounting brackets, and pressure port for tightness and integrity.
Note paint blistering, rust streaks, or wetness.
Photograph damage, tag compromised parts, and plan repairs or replacements before proceeding.
Opening the tank and visual inspection of internal components
After exterior issues and fittings have been documented and any compromised parts tagged for repair, proceed to open the expansion tank for internal inspection.
Depressurize and isolate the tank, then remove access fittings.
Inspect the bladder or diaphragm for pinholes, bulging, brittleness, or detachment.
Check interior surfaces for corrosion, sediment, or scale.
Photograph findings and note measurements for replacement decisions.
Cleaning process for bladder/diaphragm tanks (flushing, wiping, disinfecting)
With the tank opened and inspected, the cleaning sequence for diaphragm/bladder expansion tanks proceeds in defined stages:
First, flush stagnant water and debris through the drain until clear.
Gently wipe internal surfaces and the bladder with a soft, nonabrasive cloth.
Rinse thoroughly.
If biological growth is present, apply a mild disinfectant compatible with tank materials, then rinse fully and allow to dry before next steps.
Reassembling and pressure-testing the bladder/diaphragm tank
Reinstall the bladder or diaphragm carefully, ensuring the seal and mounting surfaces are clean and properly aligned to prevent leaks.
Reattach clamps or fasteners to specified torque.
Pressurize the air side to manufacturer’s recommended precharge using a calibrated gauge and pump.
Submerge or apply leak detection to joints.
Observe for pressure stability and absence of bubbles; correct any leaks before moving on.
Reinstalling the tank and restoring system pressure
Having confirmed the bladder or diaphragm is seated correctly and the air-side precharge holds steady, the tank can be mounted back onto its connection points and integrated into the system.
Tighten fittings to manufacturer torque, reopen isolation valves slowly, and bleed trapped air.
Repressurize the system to specified operating pressure, monitor for leaks, verify expansion tank acceptance during thermal cycles, and document final readings.
Step-by-Step Cleaning Procedure for Steel (Non-Bladder) Expansion Tanks
The procedure for steel (non-bladder) expansion tanks begins with safe removal and preparation, including depressurization, draining, and securing the tank for access.
Sediment and sludge are then eliminated by mechanical scraping or flushing and, where needed, compatible chemical cleaners followed by corrosion, scale, and rust remediation.
Final steps cover thorough rinsing and drying, inspection for internal coating or recoating, and careful reinstallation with pressure verification.
Removing and preparing steel tanks for cleaning
Begin by shutting down the heating system and isolating the expansion tank from pressure and water sources to guarantee a safe removal.
Drain remaining fluid, vent trapped air, and depressurize per manufacturer instructions.
Disconnect fittings and support brackets, then remove the tank carefully.
Inspect for corrosion, leaks, and defective welds.
Label components and prepare a clean, well-lit workstation for subsequent cleaning steps.
Removing sediments and sludge from steel tanks (mechanical and chemical options)
Remove loose deposits first, then tackle adherent sludge with progressively aggressive methods tailored to the tank’s condition and local disposal rules.
Mechanical scraping, wire brushing, and pressured water flushing remove bulk material.
For persistent residues, circulate approved chemical descalers or neutralized cleaners per manufacturer guidance, then flush thoroughly.
Collect and dispose of solids and spent solutions per regulations; verify cleanliness before reassembly and system refill.
Handling corrosion, scale, and rust remediation
Addressing corrosion, scale, and rust in a steel (non‑bladder) expansion tank requires a methodical sequence that balances effective metal restoration with safety and regulatory disposal.
Inspect and document affected areas, isolate the tank, and select appropriate chemical rust removers or mild acids.
Use mechanical abrasive methods for stubborn deposits.
Neutralize chemicals, collect waste for compliant disposal, and assess metal loss to determine repair or replacement.
Rinsing, drying, and internal coating considerations
With corrosion, scale, and chemical residues managed and waste contained, the next phase focuses on thorough rinsing, controlled drying, and selecting an appropriate internal coating to protect the repaired steel surface.
Flush repeatedly with clean water until clear, then use compressed air and desiccant drying to eliminate moisture.
Choose a compatible, corrosion-inhibiting lining rated for system temperature and fluid chemistry; apply per manufacturer instructions.
Reinstallation and pressure verification for steel tanks
Begin by confirming the tank interior is fully dry, the lining is cured per manufacturer specifications, and all fittings, gaskets, and mounting hardware are clean and undamaged.
Reinstall the tank using proper flange bolts or brackets, torque to spec, and reconnect supply and drain lines.
Pressurize to the system’s static precharge, check for leaks, verify operating pressure with system running, and adjust as needed.
Flushing the System and Balancing Pressure After Cleaning
After cleaning, the system is flushed to purge dislodged debris and sediment from pipes and the boiler until the return water runs clear.
The technician then repressurizes the system and verifies the expansion tank pre-charge matches manufacturer specifications, adjusting as needed.
Finally, all fittings are inspected for leaks and the system is monitored during initial operation to confirm stable pressure and proper function.
System flushing steps to remove dislodged debris
When the expansion tank has been cleaned, the system requires a controlled flush to carry out loosened sediment and trapped air. This process guarantees debris does not circulate and clog valves or the heat exchanger.
Close isolation valves, open drain points and low-side bleeds, circulate water through a filter or hose until clear. Then close drains and slowly restore normal flow while monitoring for residual particulates.
Repressurizing the system and checking expansion tank pre-charge
Repressurize the system slowly while verifying the expansion tank’s pre-charge pressure matches the closed-loop setpoint, ensuring the vessel accepts water without spiking system pressure.
Close isolation valves gradually, monitor gauge readings, and adjust the tank’s air charge with a calibrated gauge as needed.
Confirm equilibrium between system pressure at operating temperature and pre-charge; document final settings for future maintenance.
Leak checks and monitoring initial system operation
Begin by conducting a systematic leak inspection and controlled startup to verify system integrity and stable operation.
Observe joints, valves, and fittings for drips while pressurizing slowly. Monitor pressure gauges and temperature differentials, noting any rapid loss or irregular swings.
Run the system through cycles, bleed trapped air, and recheck pressures. Document findings and address faults before normal operation resumes.
Common Problems Encountered During Cleaning and Troubleshooting
Common issues that may arise after cleaning include a tank failing to hold pressure or losing its air charge, persistent noises such as water hammer or short cycling, and visible signs that the diaphragm or bladder is damaged beyond repair.
Technicians should inspect for corrosion, cracks, or compromised welds that indicate structural failure. Recommended actions range from recharging or replacing the air bladder to repairing or replacing the tank when corrosion or irreparable damage is present.
Tank not holding pressure or losing air charge
Several factors can cause an expansion tank to lose its air charge or fail to hold pressure, most often a ruptured internal bladder, a leaking Schrader valve, or corrosion at welded seams.
Technicians check for visible leaks, test precharge with a gauge, isolate and depressurize the system, and replace faulty valves or tanks.
Properly matched replacement restores system balance and prevents frequent loss.
Persistent noise, water hammer, or short cycling after cleaning
After addressing air loss and replacing a faulty bladder or valve, technicians may still encounter operational symptoms such as persistent noise, water hammer, or short cycling following cleaning.
These issues often stem from trapped air pockets, improper tank precharge, pipe support deficiencies, or pump and system pressure imbalances.
Inspect piping for air vents, verify precharge, check shock arrestors, and assess pump cycling settings.
Signs of irreparable diaphragm/bladder damage
Inspectors should look for clear, repeatable indicators that a diaphragm or bladder is beyond repair: persistent leaks between the shell and chamber, visible ruptures or tears in the material, severe deformation or detachment from the tank fittings, and continual loss of precharge that cannot be corrected by recharging.
Additional signs include abnormal swelling, trapped water in the air side, and inconsistent pressure response under normal system cycling.
What to do if corrosion or structural damage is found
Address any corrosion or structural damage promptly to prevent system failure and safety risks.
The technician should isolate the tank, depressurize the system, and inspect the extent of damage.
Minor surface corrosion may be cleaned and treated with appropriate coatings; significant pitting, cracks, or compromised welds require replacement.
Document findings, notify the owner, and follow manufacturer and local code procedures for repair or disposal.
Maintenance Schedule and Preventive Measures
A clear maintenance schedule outlines recommended cleaning and inspection frequencies based on system type and usage.
Water quality monitoring and corrosion-control measures—such as corrosion inhibitors, proper pH, and filtration—are emphasized to extend tank life.
Routine checks for pressure, visible leaks, and accumulator bladder integrity are advised for both homeowners and technicians.
Recommended cleaning and inspection frequency
Routine maintenance intervals for expansion tanks should be standardized based on system type, operating conditions, and manufacturer guidance:
Quarterly visual checks for pressure, diaphragm condition, and external leaks; semiannual functional tests under load; and annual internal inspection and cleaning where accessible.
Recommended frequencies:
- Quarterly: visual and pressure checks
- Semiannual: operational testing
- Annual: internal inspection and cleaning
Water quality management and corrosion control strategies
Because water chemistry directly influences tank longevity and system reliability, a proactive water quality management and corrosion control program should be integrated into the maintenance schedule, specifying sampling intervals, treatment actions, and monitoring limits.
It should define target pH, conductivity, oxygen levels, and inhibitor concentrations; prescribe corrective treatments, filtration, and deaeration; document results and adjust frequency based on corrosion trends and system age.
Simple ongoing checks for homeowners and technicians
Following a defined water quality and corrosion control program, simple, regular checks help homeowners and technicians spot problems early and verify that treatments remain effective.
Inspect tank pressure monthly, confirm precharge against system pressure, check for visible corrosion or leaks, and test diaphragm integrity periodically.
Record readings, schedule professional inspection annually, and replace tanks or components when performance or safety margins decline.
Cost Considerations and When Replacement Is More Economical
Typical costs for parts, labor, and cleaning supplies should be weighed against the expected lifespan and condition of the existing tank.
Clear replacement indicators—such as a ruptured bladder, persistent pressure loss, or corrosion—help define repair thresholds where replacement becomes more economical.
When replacement is chosen, selecting the correct capacity, connection type, and certification guarantees long-term performance and avoids repeat expense.
Typical costs: parts, labor, and cleaning supplies
Several factors influence the cost of addressing an expansion tank issue, including the tank type, extent of contamination or damage, parts availability, and local labor rates. Typical ranges: parts $30–$250, labor $75–$300, cleaning supplies $5–$30; total varies. Assess whether cleaning or replacement yields better value.
| Item | Typical cost range |
|---|---|
| Parts | $30–$250 |
| Labor | $75–$300 |
| Supplies | $5–$30 |
| Total | $110–$580 |
Replacement indicators vs. repair thresholds
When an expansion tank shows signs of internal bladder failure, persistent leaks, severe corrosion, or repeated pressure loss despite proper system maintenance, replacement is generally the most cost-effective option.
Minor surface rust, a slow leak at fittings, or isolated bladder issues may justify repair if labor and parts are inexpensive.
Evaluate age, warranty, and projected service life before choosing repair over replacement.
Choosing the right replacement expansion tank
Choosing the right replacement expansion tank requires balancing upfront cost, expected lifespan, and compatibility with the heating system; a higher initial price can be justified by a longer warranty or thicker steel that reduces long-term replacement frequency.
Consider tank sizing, precharge compatibility, and local labor costs.
Compare lifecycle cost versus repair frequency: frequent repairs or corrosion-prone tanks favor full replacement for overall savings.
Additional Resources and Reference Checklist
The article provides a printable step checklist to guide each stage of cleaning an expansion tank.
It also points to manufacturer resources and applicable standards for specifications and safety requirements.
A concise glossary identifies key terms and components for clear communication during maintenance.
Printable step checklist for cleaning an expansion tank
Prepare a concise, printable checklist that guides a technician through cleaning an expansion tank, including safety steps, tools and materials, step-by-step procedures, inspection points, and post-cleaning verification.
The checklist should be clear, numbered, and compact for field use, emphasizing checkpoints, measurements, and signatures for accountability.
- Safety, tools, isolation
- Drain, inspect, clean
- Refill, test, document
Manufacturer resources and standards to consult
After completing the checklist steps—safety isolation, draining, inspection, cleaning, refill, and testing—consulting manufacturer resources and industry standards guarantees the procedure aligns with equipment-specific requirements and regulatory expectations.
Review the tank and boiler/HVAC manuals, warranty terms, OEM cleaning recommendations, and replacement part specifications.
Cross-check relevant ASME, NFPA, and local codes. Document referenced sources and obtain manufacturer approval for nonstandard procedures.
Glossary of key terms and component identification
A concise glossary and clear component identification chart help technicians and inspectors accurately interpret procedures, identify parts, and communicate findings during expansion tank maintenance.
Include definitions for diaphragm, bladder, air valve, auto-fill, pressure relief, isolation valve, tapping point, and static/operating pressure.
Provide labeled diagrams showing tank orientation, connection points, gauge locations, and common failure indicators to streamline inspection and repair decisions.
Conclusion
To conclude, the guide emphasizes cleaning expansion tanks to maintain system efficiency and prevent failures. Technicians should follow safety protocols, use appropriate tools, and distinguish diaphragm/bladder from steel tanks for correct procedures. Regular inspection, flushing, and pressure checks reduce costly repairs; replacement may be wiser for badly corroded units. Follow the checklist, and—like a Victorian engineer consulting a pocket watch—schedule routine care to keep boilers and HVAC systems running smoothly.