How to Install a Dual Flush Toilet Kit: Step-by-Step DIY Guide for Beginners
To install a dual-flush toilet kit, follow these straightforward steps to enhance water efficiency and reduce bills. Start by gathering basic tools, then shut off and drain the tank. Remove the old mechanism and clean the tank thoroughly. Next, fit the new dual actuator and install the adjusted flush and fill valves. Fine-tune the linkages and water level, followed by conducting multiple flush tests to ensure proper performance and check for leaks. If you encounter issues like sticking buttons, weak flushes, or running water, follow the troubleshooting steps for adjustments and product selections. This DIY guide makes the process simple for beginners.
Overview of Dual Flush Toilet Kits and Benefits
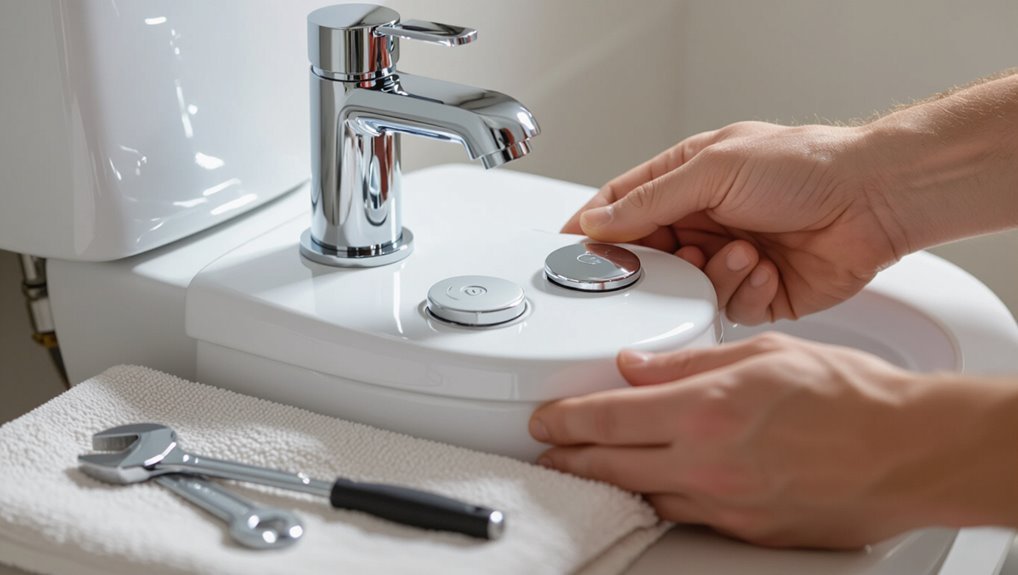
A dual flush kit replaces a toilet’s single-flush mechanism with two flush options—typically a reduced-volume flush for liquid waste and a full flush for solids—operating by a simple two-button or two-lever control.
These kits can substantially reduce household water use, lower utility bills, and decrease environmental impact by conserving water and reducing energy used for treatment.
Compatibility varies by model and toilet design, so checking manufacturer specifications confirms the selected kit fits the existing tank and valve type.
What a dual flush kit is and how it works
Dual flush kits convert standard toilets into fixtures with two flush options—one for liquid waste that uses less water and one for solid waste that uses a larger volume—allowing users to control water use with a single mechanism.
A kit typically includes a dual-button or lever actuator, a modified flush valve, and fittings.
Instructions on how to install a dual flush toilet kit guide placement, seals, and testing.
Water savings, cost benefits, and environmental impact
Water savings from dual-flush kits come primarily from replacing single, full-volume flushes with an option for a reduced-volume flush for liquid waste.
Typically, this cuts per-flush water use by 20–60% depending on the original toilet and the kit’s settings.
Reduced consumption lowers utility bills, shortens payback periods, and decreases municipal water demand and wastewater volumes, yielding measurable economic and environmental benefits.
Compatibility: which toilets can accept a dual flush kit
Which toilets can accept a dual-flush kit depends mainly on the tank type, flush valve size, and existing hardware layout.
Generally, most two-piece and many one-piece toilets with removable flush valves accept conversion kits; gravity-fed tanks are easier than pressure-assisted models.
Confirm flush valve diameter, tank depth, and lever configuration.
Older or proprietary systems and wall-mounted units often require manufacturer-specific solutions or full cistern replacement.
Tools, Materials, and Preparation
A concise list of tools and the common parts supplied in a dual flush kit helps guarantee a smooth installation.
The installer should follow basic safety precautions, perform pre-installation checks (shut off water, drain tank), and verify that the kit’s dimensions and mounting style match the toilet model.
Accurate measurements of the tank opening, bolt spacing, and flush valve size confirm compatibility before beginning work.
Tools required for the installation
Before beginning the installation, gather the specific tools and materials required to confirm the process proceeds smoothly and safely. Necessary items include basic hand tools, safety gear, and plumbing supplies.
Verify quality and compatibility before starting.
- Adjustable wrench, screwdriver set, and pliers
- Safety gloves, goggles, and towel or bucket
- Tape measure, level, and plumber’s tape
Common parts included in a dual flush kit
Dual-flush kits typically include a compact set of components designed to replace or retrofit a standard flush assembly: a dual-button actuator (or paddle), an adjustable fill valve, a two-mode flush valve or cartridge, and a refill tube with necessary seals and gaskets.
Additional items often supplied:
- Mounting hardware and bolts
- Overflow and refill connectors
- Rubber flappers or seals and spare washers
Safety precautions and pre-installation checks
Several basic safety checks and preparations should be completed before beginning installation: shut off the toilet’s water supply, drain the tank by flushing, and place absorbent towels or a small bucket to catch residual water.
Inspect tools and kit components for damage, wear gloves and eye protection, guarantee stable workspace lighting, clear the area of obstructions, and keep a towel and pliers nearby for quick adjustments.
How to measure and confirm compatibility with your toilet model
Measure the tank and bowl dimensions, flange and bolt locations, and overflow tube height to confirm that the dual-flush kit matches the toilet’s physical layout and mounting points.
Then verify fill valve clearance, flush valve diameter, and handle or push-button access.
Compare measurements to the kit specifications and manufacturer compatibility list.
Note tank shape (round/elongated) and mounting hole spacing before purchase.
Step-by-Step Installation Guide
The installation proceeds through a clear sequence of tasks beginning with shutting off the water and emptying the tank.
Next, remove the existing flush mechanism and components.
The tank interior should be inspected and cleaned before fitting the dual flush actuator or button assembly.
Finally, the new flush valve and fill valve are installed and adjusted to guarantee proper operation.
Step 1 Shut off water and empty the tank
Before beginning the kit installation, shut off the water supply to the toilet and fully drain the tank to prevent spills and make component access safe.
Close the shutoff valve at the wall, flush until water stops, and hold the handle down to expel residual water.
Use a sponge or towel to remove remaining moisture and place a basin beneath the tank for any drips.
Step 2 Remove existing flush mechanism and components
Disconnecting the old system begins by removing the tank lid and setting it aside on a soft, stable surface to prevent chips or cracks.
The supply valve should already be closed and the tank drained.
Disconnect the water line, loosen and remove retaining nuts securing the flush valve and fill valve, lift out old components, and discard worn gaskets and corroded parts before installing the new kit.
Step 3 Inspect and clean the tank interior
Inspect the tank interior carefully for mineral buildup, sediment, and damaged or disintegrating parts that could compromise a new dual-flush mechanism.
Remove debris, scrub surfaces with a nonabrasive brush and diluted vinegar or descaler, rinse thoroughly, and dry.
Check seals, bolts, overflow tube, and refill valve for cracks or corrosion; replace any compromised components before proceeding to installation.
Step 4 Install the dual flush actuator/button assembly
With the tank clean and any worn parts replaced, the installer can fit the dual-flush actuator assembly into the tank lid and connect it to the internal mechanism.
Position the buttons, secure the assembly with its retaining nut or clips, route the actuator rods or cables to the flush valve, and test button movement.
Tighten fasteners snugly and confirm smooth, uninhibited operation before replacing the lid.
Step 5 Install and adjust the new flush valve and fill valve
Begin by removing the old flush and fill valves and preparing the tank for the new components: drain and sponge out remaining water, loosen and remove the locknut(s) securing the old valves, then lift them clear along with any obsolete seals or gaskets.
Install the new flush valve per manufacturer torque specs, seat its gasket, hand-tighten locknut, fit the fill valve, adjust height and float to set correct water level, and check for leaks.
Step 6 Connect linkages and test button operation
Attach the push-button assembly and linkage clips, then verify smooth movement before replacing the tank lid.
Confirm each linkage connects to its corresponding flush valve arm without binding; trim or reposition rods for correct free travel.
Depress each button multiple times to confirm reliable actuation and full valve closure.
Tighten retaining nuts gently and recheck operation to prevent leaks or incomplete flushes.
Step 7 Adjust water level and flush volumes
After verifying smooth button action and correct linkage travel, attention turns to setting the tank water level and calibrating flush volumes.
The fill valve height is adjusted to match the recommended mark; float adjustments reduce or raise water.
Test both partial and full flushes, fine-tune float or valve stop for desired bowl evacuation and water conservation, then retest until consistent, efficient flushes occur.
Step 8 Final leak checks and re-secure tank lid
Carefully inspect all connections and fittings for leaks, then replace the tank lid to complete the installation.
Verify no drips around the fill valve, flush valve, or supply line during several test flushes.
Tighten any loose nuts or clips, but avoid overtightening.
Confirm the lid sits flush and stable.
Clean up tools and debris, and monitor for leaks over the next 24 hours.
Troubleshooting Common Problems
Common installation issues can cause a weak or incomplete flush, a button that sticks or fails to return, continuous running or water leaking into the bowl, or incompatibility with tank geometry or bolts.
Each problem has specific checks and simple fixes, from adjusting valve height and seal position to replacing springs or gaskets.
The following troubleshooting steps guide the reader through targeted diagnostics and repairs.
Weak or incomplete flush and how to fix it
Diagnose a weak or incomplete flush by observing symptoms and isolating probable causes: partial bowl clearance, slow siphon action, or persistent residue after flushing.
Check water level in tank, adjust fill valve to recommended height.
Inspect and clear rim and siphon jet holes with a brush or wire.
Verify flush valve flapper or seal seats correctly and that trapway isn’t partially blocked.
Button sticks or fails to return
After verifying flush performance and ruling out water-level or jet obstructions, attention should turn to the actuator mechanism when a button sticks or fails to return.
Inspect the button, linkage, and seal for debris, calcium buildup, or misalignment. Clean or replace corroded parts, adjust linkage length, and guarantee springs or return clips are seated.
Test for smooth, immediate return before reassembling.
Continuous running or water leaking into the bowl
If water continuously runs or slowly leaks into the bowl, the problem usually lies with the fill-valve, flapper/seal, or the overflow/transfer pathway allowing siphoning.
Inspect the flapper or seal for wear and proper seating; replace if warped.
Check the fill valve for improper float height or slow leak and adjust or replace.
Clear transfer holes and confirm correct gasket alignment to stop siphoning.
Compatibility issues with tank geometry or bolts
When continuous running or siphoning has been ruled out, attention often shifts to how the dual flush kit physically fits the tank.
Mismatched bolt spacing, irregular tank wall thickness, or nonstandard overflow tube positions can prevent secure installation. Adapters, different flange kits, or drilling alternative mounting holes may be needed.
Verify measurements and use manufacturer-recommended parts to guarantee a watertight, stable fit.
Optimization and Fine-Tuning
The next step focuses on optimizing flush performance by adjusting both the small and large flush volumes to match usage and conserve water.
Attention is given to balancing fill valve pressure and float settings to guarantee reliable tank refill and correct flush strength.
If a low-power flush persists, techniques to enhance bowl siphon action are considered to restore effective waste removal.
Adjusting small and large flush volumes for efficiency
Begin by identifying the current small and large flush volumes using the toilet’s adjustment mechanisms and a measured water container to establish a baseline for tuning.
Then incrementally reduce or increase each volume, testing waste removal and avoiding siphon failure.
Record settings that conserve water while ensuring reliable clearing.
Verify multiple cycles and finalize adjustments for maximum efficiency and consistent performance.
Balancing fill valve pressure and float settings
After confirming ideal flush volumes, attention shifts to balancing the fill valve pressure and float settings to guarantee consistent tank refill and stable flush performance.
Technicians inspect fill valve flow, adjust inlet pressure or shims if needed, and set float height to stop fill at specified waterline.
Test multiple cycles, fine-tune valve sensitivity and float position until refills stop promptly without spitting or slow recovery.
Enhancing bowl siphon performance if low-power flush persists
Diagnose remaining low-power flushes by evaluating siphon-related factors: inspect trapway and rim jets for partial clogs, verify bowl water level and refill tube positioning, and confirm that the trapway glaze or damage isn’t restricting water flow.
If issues persist, clear obstructions with appropriate cleaners or a flexible brush, adjust water surface height, consider replacing a worn flapper or rim jets, or consult a plumber for trapway repair or replacement.
Maintenance and Long-Term Care
A clear routine inspection checklist helps guarantee the dual flush kit continues to operate reliably and efficiently.
Guidance on safely cleaning and descaling components prevents buildup without damaging seals or valves.
Practical criteria for when individual parts should be replaced versus when a full kit swap is warranted complete the maintenance overview.
Routine inspection checklist
Because regular checks catch small problems before they become major repairs, a concise routine inspection checklist helps owners maintain a dual-flush toilet’s performance and water efficiency.
Inspect externally for leaks, loose buttons, or cracks. Open the tank to verify fill valve, flapper seal, and float operation. Note wear, water level, and response time; schedule repairs as needed.
- Check seals and connections
- Test both flush modes
- Monitor refill timing
How to clean and descale kit components safely
Begin by shutting off the water supply and flushing to empty the tank.
Then remove the cistern lid and any detachable buttons or trim to access the fill valve, flush valve, and inlet components.
Use a soft brush and mild vinegar solution to remove limescale; avoid steel wool or abrasive cleaners.
Rinse thoroughly, reassemble seals and gaskets, and restore water.
Test for leaks and proper dual-flush function.
When to replace parts versus full kit replacement
When should individual components be replaced instead of installing a complete dual‑flush kit?
Routine failures (worn seals, leaky valves, or jammed buttons) merit component replacement if parts are available and compatible.
Full kit replacement suits pervasive corrosion, mismatched legacy fittings, repeated failures, or when upgrading performance and water savings.
Consider age, cost, and warranty: choose the option yielding reliable function and cost-effective longevity.
Cost Considerations and Product Selection
Typical price ranges and expected return-on-investment are outlined to help readers weigh upfront costs against water savings.
Comparison of kit features, warranty terms, and ease of installation provides a practical basis for selection.
A short list of recommended beginner-friendly brands and models completes the guidance.
Typical price ranges and return-on-investment
Price and performance vary widely for dual-flush toilet kits, with basic retrofit units available for as little as $30–$60 and higher-end models—featuring durable materials, adjustable flush volumes, and warranty coverage—ranging from $100 to $250 or more.
Typical payback depends on household size and water rates; estimated savings often recoup costs within 1–4 years, making midrange options practical for many homeowners.
How to compare kit features and warranty
Selecting a dual-flush kit requires weighing core features—flush volume options, actuator type (push-button vs. lever), compatibility with the existing toilet tank, and adjustability of low- and full-flush settings—alongside warranty terms that define coverage length, parts, and labor. Evaluate durability, ease of installation, and serviceability; prefer longer parts coverage and clear labor policies.
| Feature | Benefit | Warranty implication |
|---|---|---|
| Adjustability | Water savings | Parts coverage |
| Actuator type | User preference | Labor coverage |
Recommended brands and models for beginners
When beginners shop for dual-flush kits, they should prioritize brands known for straightforward installation, reliable parts, and clear documentation.
Budget-friendly options from Fluidmaster, Korky, and Kohler often balance cost and compatibility, while premium lines from Toto and American Standard provide longer warranties and refined mechanisms that reduce tweak time during setup.
- Fluidmaster 540A: economical, easy fit
- Korky 146: straightforward repairability
- Toto Carlyle: premium reliability
DIY vs Professional Installation
The article outlines when a homeowner can reasonably tackle a dual flush toilet kit—simple flange alignment and straightforward valve swaps—and when a licensed plumber is advisable, such as with complex plumbing, corroded fittings, or bathroom remodeling.
It notes expected time and difficulty for a first-time installer, typically one to three hours for a basic swap with common pitfalls to watch for.
It also suggests practical questions to ask a plumber if hiring one: licensing and insurance, warranty and parts coverage, and an itemized estimate with anticipated timeline.
When DIY is appropriate and when to hire a plumber
Although a dual-flush kit is a manageable upgrade for many homeowners, the decision to DIY should hinge on skill level, existing toilet condition, and local plumbing code requirements.
DIY suits those comfortable with basic tools, shutoff valves, and minor adjustments.
Hire a plumber if leaks, corroded fittings, unusual flush mechanisms, nonstandard installations, or code permits are involved, or if confident troubleshooting is unlikely.
Expected time and difficulty for a first-time installer
Deciding whether to DIY or hire influences time and difficulty expectations for a first-time installer.
A cautious DIYer should allot 2–4 hours for a straightforward replacement, more if unexpected complications arise. Moderate handiness and basic tools suffice; plumbing knowledge reduces delays.
Professional installation typically takes 1–2 hours, with higher cost but predictable timing and warranty-backed workmanship.
Questions to ask a plumber if you decide to hire one
What should be asked before hiring a plumber for a dual-flush conversion?
The homeowner should request licensing, insurance, and references; ask about past dual-flush installations, estimated time, and a written quote including parts and labor.
Inquire about warranty on work and parts, permit handling, disposal of old fixtures, potential complications, and payment terms.
Clarify follow-up service and guarantees.
Common Mistakes to Avoid
Common installation errors include incorrect measurements and using parts that do not fit the existing toilet.
Over-tightening hardware can crack or strip tank threads, leading to leaks.
Failing to set and test the water level and flush performance may result in poor operation or wasted water.
Incorrect measurements and incompatible parts
Because toilet models and plumbing setups vary, inaccurate measurements and mismatched components are among the most frequent causes of failed dual-flush installations.
Installers should verify tank bolt spacing, flush valve diameter, and trapway clearance before purchasing. Using adapter kits or manufacturer-compatible parts prevents leaks and malfunction.
Measure twice, confirm compatibility with the tank and handle orientation, and avoid assuming universal fit.
Over-tightening and damaging tank threads
Over-tightening tank bolts or the flush valve nut can crack porcelain or strip threads, leading to leaks and costly repairs.
The installer should hand-tighten bolts, use appropriate washers and a torque-limited wrench if available, and follow manufacturer torque specs.
Inspect threads and clean debris before assembly; replace damaged nuts or bolts rather than forcing fittings, preventing hidden hairline cracks and future failures.
Neglecting to check water level and flush performance
After securing tank fittings without over-stressing the porcelain or threads, attention should turn to the water level and how the new mechanism actually flushes.
Failure to verify fill height and adjust the float can cause weak or incomplete flushes, wasted water, and repeated clogs.
Test both full and partial modes, observe refill behavior, and fine-tune adjustments until consistent, efficient performance is achieved.
Quick Reference Checklist Before You Start
A brief checklist guarantees the installation proceeds safely and without delays: verify the new dual-flush kit matches the toilet model, confirm all parts and tools are on hand (valve assembly, seals, screws, screwdriver, adjustable wrench, sponge), shut off and test the water supply, clear the work area, and read the manufacturer’s instructions for any model-specific notes.
- Confirm parts and tool condition.
- Test water shutoff and drain.
- Review model-specific steps.
Conclusion
Many households can install a dual flush toilet kit themselves, cutting water use by up to 67% per flush cycle compared with standard toilets—a striking stat that underscores real savings. With proper tools, patience, and attention to seal integrity and float adjustments, DIY installation yields reliable performance and lower bills. When complexity or leaking persists, consult a professional to guarantee longevity and peak water efficiency.