
How to Remove a Pipe Connector Quickly and Safely: Step-by-Step Guide
To quickly and safely remove a pipe connector, follow these steps: first, shut off the water supply and drain the pipes to relieve pressure. Identify the type of connector you’re dealing with. For threaded joints, use opposing wrenches; for compression fittings, back off the nut and pull the ferrule; for push-fit types, depress the collar or use a release tool; and for soldered joints, apply heat evenly. After removal, inspect and clean the pipe ends, replacing any damaged seals or ferrules as needed. For detailed techniques and troubleshooting tips, continue reading.
Quick solution overview for removing a pipe connector safely
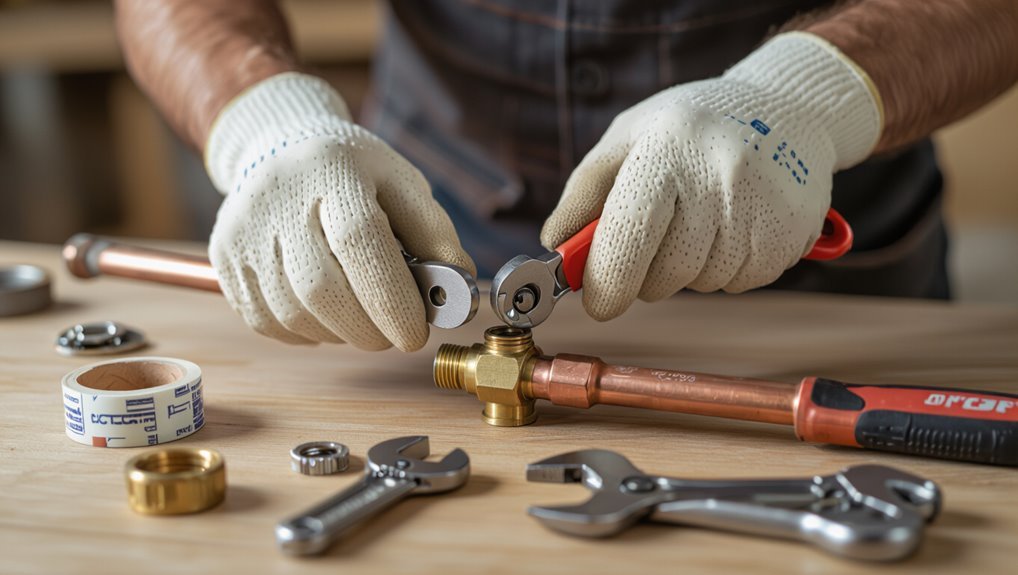
A concise two-sentence method is provided for removing common connectors: loosen the nut and pull the ferrule for compression fittings, unscrew threaded joints with opposing wrenches, and release the collar or twist-and-pull for push-fit types.
The overview emphasizes shutting off water, draining the line, and using proper tools to avoid damage.
If fittings are seized, leaking heavily, or connected to gas lines, the procedure stops and a qualified professional must be contacted immediately.
Two-sentence rapid procedure for common connectors (compression, threaded, push-fit)
Begin by shutting off the water and relieving pressure; for compression fittings, loosen the compression nut and slide the ferrule back.
For threaded fittings, hold the body with a wrench while turning the pipe or coupling counterclockwise.
For push-fit connectors, depress the collar or use a release tool to pull the pipe free.
The concise how to remove pipe connector steps prevent damage and limit leaks when executed calmly.
When to stop and call a professional immediately
When should work stop and a professional be called? A professional should be contacted if there is active flooding, gas odor, corrosion beyond simple fittings, electrical proximity, or unclear joint types. Stop immediately for visible pipe failure, inaccessible shutoff, or health hazards. Below is a quick risk checklist:
| Risk | Action |
|---|---|
| Flooding | Call plumber |
| Gas smell | Evacuate, call gas utility |
| Corrosion | Call pro |
| No shutoff | Call plumber |
| Electrical nearby | Call licensed electrician |
Tools and materials needed before you begin
Before starting, the writer lists what is required to remove a pipe connector safely and efficiently.
- Essential tools for all connector types.
- Optional tools for stubborn or corroded connectors.
- Safety gear and materials to protect surfaces.
A brief explanation of each item follows so the reader can prepare.
Essential tools for all connector types
A small set of reliable tools simplifies removing virtually any pipe connector and reduces the risk of damage to fittings or surrounding plumbing.
Essential items include adjustable wrenches in two sizes, slip-joint pliers, a pipe wrench, flat and Phillips screwdrivers, a utility knife, thread seal tape, a small hammer, and work gloves.
A bucket and rags catch water and debris.
Optional tools for stubborn or corroded connectors
Tackle seized or corroded connectors with a few specialized tools that make removal safer and more efficient:
- Penetrating oil to loosen rusted threads,
- A heat source (propane torch or heat gun) for stubborn joints,
- Bolt extractors and vise grips for rounded nuts,
- A reciprocating saw or tubing cutter for cutting through damaged sections,
- A wire brush or abrasive pad to clean mating surfaces.
Use thread chaser or small picks to remove debris.
Safety gear and materials to protect surfaces
Gather proper personal protective equipment and surface-protection materials to minimize injury and prevent damage to fixtures and finishes.
The person should wear safety glasses, gloves, and a dust mask. Use knee pads for floor work.
Lay down drop cloths, cardboard, or plastic sheeting, and apply painter’s tape to edges.
Keep a bucket and absorbent rags handy for spills and debris cleanup.
Basic plumbing principles that affect connector removal
Water must be isolated and pressure relieved before connector removal, since open supply valves or residual pressure can complicate disassembly.
Different connector types—compression, threaded, soldered, push-fit, and flared—require distinct removal techniques and tools.
Identifying the pipe material (copper, PEX, PVC, CPVC, or galvanized) determines which methods and precautions are appropriate.
How water pressure and supply valves impact the process
Understanding how water pressure and the position of supply valves affect connector removal is essential for a safe and efficient procedure. The technician guarantees main or local valves are fully closed, relieves residual pressure, and checks for leaks before loosening connectors. Proper valve control prevents sudden water flow, reduces spray risk, and protects fittings and surrounding areas.
| Valve position | Effect |
|---|---|
| Closed | Isolates flow |
| Open | Maintains pressure |
Differences between connector types: compression, threaded, soldered, push-fit, flared
With valves secured and pressure relieved, the technician next evaluates the connector type—compression, threaded, soldered, push-fit, or flared—because each uses different seals and fastening methods that dictate removal steps and tool choice.
Compression nuts loosen; threaded joints require backing and sealant cleanup; soldered joints need heat and desoldering; push-fit disengages with a release tool; flared fittings demand careful unflaring or replacement.
Identifying the pipe material: copper, PEX, PVC, CPVC, galvanized
When identifying pipe material—copper, PEX, PVC, CPVC, or galvanized—the technician inspects color, flexibility, fittings, and markings to determine compatibility with specific connector removal techniques.
Copper is rigid, metallic, often soldered;
PEX is flexible, plastic, secured with crimp or push-fit;
PVC and CPVC are rigid plastics with solvent-welded or threaded joints;
galvanized steel is heavy, threaded, and may require penetrating lubricant and pipe wrenches.
Preparing the workspace and shutting off water
Before removing a pipe connector, the technician locates and operates the appropriate main and branch shutoff valves to stop water flow.
The line is then drained and pressure relieved using nearby fixtures or a drain valve to prevent spills.
Surrounding fixtures, floors, and cabinetry are protected with towels, buckets, and drop cloths to contain any residual water.
Locating and operating main and branch shutoff valves
Although often overlooked, locating and operating the main and branch shutoff valves is the essential first step in preparing a plumbing workspace. Proper identification prevents accidental flooding and limits the scope of required repairs.
Inspect the house meter, basement, crawlspace and appliance supply lines for valve locations. Confirm valves turn fully off, note type (gate, ball, stop), and label or photograph positions before proceeding.
Draining the line and relieving pressure safely
Start by opening the lowest drain and a nearby faucet to create a clear path for water to exit and air to enter, allowing the line to empty efficiently.
After shutoff, bleed remaining pressure by opening other faucets and valves sequentially.
Collect residual water with a bucket or hose, monitor flow until it stops, and verify gauges or fixtures show no pressure before disconnecting the connector.
Protecting surrounding fixtures, floors, and cabinetry
With the line drained and pressure relieved, attention should shift to protecting nearby fixtures, floors, and cabinetry to prevent water damage and stains during connector removal.
Lay down absorbent towels, waterproof drop cloths, and plastic sheeting.
Cover valves, electronics, and decorative surfaces with tape-secured plastic.
Place a shallow pan under joints to catch residual drips.
Keep a bucket and mop nearby.
Step-by-step removal methods by connector type
The following section explains removal techniques for common connector types, presented in clear, task-focused steps.
- Compression fittings
- Threaded and push-fit connectors
- Soldered (sweat) and flare fittings
Each type receives concise, step-by-step instructions and safety notes to guide proper removal.
Removing a compression fitting
Remove compression fittings carefully to avoid damaging the pipe, ferrule, or surrounding hardware; method choice depends on connector type, pipe material, and whether the fitting is reusable.
First, shut off water and relieve pressure. Hold fitting body with one wrench, back off nut with another. If seized, apply penetrating oil and tap nut lightly.
Inspect ferrule; replace if deformed before reinstalling.
Removing a threaded connector (female and male)
After handling compression fittings, attention shifts to threaded connectors, which require different tools and techniques because they rely on mating threads rather than ferrules.
For female threads, apply penetrating oil, secure the mating pipe with a wrench, and turn the connector counterclockwise.
For male threads, hold the fitting and unscrew the male component.
Clean threads and inspect seals before reassembly.
Removing a push-fit (quick-connect) fitting
Begin by identifying the push-fit connector type—plastic, brass, or specialty quick-connect—since each uses a different release mechanism and may require specific tools or precautions.
Depress the collar or sleeve toward the fitting body, hold it, and pull the pipe straight out. For stubborn fittings, use a release tool or cut behind the collar and replace the fitting.
Inspect O-rings and clean before reassembly.
Removing a soldered (sweat) joint
When dealing with soldered (sweat) joints, the key is to separate the fitting from the pipe without damaging either component so that reuse or replacement is possible. Heat the joint evenly, protect nearby components, apply gentle twisting and pull once solder liquefies, or cut and replace if necessary.
| Action | Purpose |
|---|---|
| Heat | Melt solder |
| Twist | Break bond |
| Pull | Remove fitting |
| Cut | Replace pipe |
Removing a flare fitting
Removing soldered joints often requires heat and careful separation; removing a flare fitting uses different tools and technique because the connection relies on mechanical compression rather than melted metal.
To remove, secure the tubing, hold the flare nut with a proper wrench, and back it off counterclockwise while preventing tube rotation with a second wrench.
Inspect flares and replace damaged components before reassembly.
Removing a glued PVC/CPVC fitting
Gently cutting away a glued PVC or CPVC fitting requires different tactics depending on the connector’s style, material thickness, and accessibility.
Assess socket versus spigot joints, measure insertion depth, then score around the pipe with a utility knife or rotary tool.
Use a pipe cutter for straight sections, heat gently to soften if safe, and remove remnants with chisels or sanding.
Clean and deburr before replacing.
Techniques for stuck, corroded, or seized connectors
When a connector will not budge, the guide recommends starting with penetrating oil and controlled heat to loosen seized fittings without damaging surrounding materials.
If those measures fail, cutting the connector or nut and using replacement parts is outlined as a safe alternative.
Special attention is given to restoring or rethreading rusted threads and addressing rounded or damaged nuts to guarantee a secure reconnection.
Using penetrating oil and heat safely
Apply penetrating oil and measured heat to loosen stuck or corroded pipe connectors, but always prioritize safety and appropriate technique.
Allow oil to penetrate per manufacturer time, reapply if needed.
Use a heat source suited to pipe material, avoid open flames on flammable fittings, and protect surrounding areas with heat shields.
Cool, test, and repeat cautiously; wear gloves, eye protection, and guarantee ventilation.
Cutting strategies when the connector cannot be unscrewed
If penetrating oil and controlled heat fail to free a seized pipe connector, cutting becomes the practical alternative to avoid damaging adjacent fittings or the piping system.
Assess material and space, select an appropriate cutter or reciprocating saw with a metal blade, protect nearby components with shields, clamp the pipe securely, make controlled cuts to remove the connector, and deburr edges before installing replacements.
Dealing with rusted threads and damaged nuts
Loosen seized fittings carefully by evaluating the extent of corrosion and the condition of both threads and nuts before applying force. Apply penetrating oil, allow dwell time, use heat cautiously, and protect surrounding materials. If threads are ruined, cut and replace; if nuts deform, use bolt extractors or nut splitters. Prioritize safety and plan for replacement.
| Problem | Action |
|---|---|
| Light rust | Penetrant |
| Moderate | Heat + wrench |
| Stripped threads | Cut/replace |
| Deformed nut | Extract/split |
Inspecting and preparing pipes after connector removal
After a connector is removed, the pipe ends should be inspected for damage, burrs, and deformation that could compromise a new joint.
Any residue or corrosion must be cleaned away, and burrs should be removed with deburring tools or a reamer to restore a smooth, concentric profile.
Finally, accurate measurements of outer diameter and wall condition guide the selection of the correct replacement connector.
Checking for damage, burrs, and deformation
Inspect the pipe ends closely for cracks, sharp burrs, flattened sections, or any distortion that could compromise a seal or impede proper alignment; these defects often occur during connector removal and must be addressed before reassembly.
Note any visible metal fatigue, splits, or pinching near the joint.
Document damage locations, measure deformations against original dimensions, and decide if repair, replacement, or further assessment is necessary.
Cleaning, deburring, and reaming pipe ends
Once pipe ends have been evaluated for cracks, burrs, and deformation, attention shifts to cleaning, deburring, and reaming to restore proper sealing surfaces and alignment.
Debris and corrosion are removed with wire brushes and solvent; internal burrs are smoothed with a hand reamer or deburring tool.
Final inspection verifies concentricity, correct chamfer, and clean surfaces before proceeding to connector replacement.
Measuring and selecting the correct replacement connector
Several precise measurements guide the selection of a replacement connector: pipe outer diameter, wall thickness, material type, and the connector’s expected pressure and temperature ratings.
The inspector records dimensions with calipers, notes pipe material and schedule, verifies thread type or socket depth, and confirms compatibility with system fluids and codes.
Choose a connector matching these specifications and reinstall using proper seals and torque.
Reassembly and testing for leaks
Reassembly begins with selecting and installing the correct replacement connector, following manufacturer torque and seating recommendations for threaded, compression, or push-fit types.
Appropriate use of thread sealant or PTFE tape and proper placement of compression ferrules are essential to create reliable joints.
Once reassembled, systems should be pressure-tested and inspected with soapy water or electronic leak detectors to confirm there are no leaks.
Proper installation steps for common replacement connectors
Begin by aligning the replacement connector with the pipe ends and seating any internal gaskets or O-rings exactly as specified by the manufacturer.
Hand-tighten coupling nuts, then use the correct wrench to finish to recommended torque.
Restore pressure gradually, inspect joints for weeps, and re-tighten if required.
Confirm dry connections after full system pressurization before returning to normal operation.
Applying thread sealants, tape, and compression ferrules correctly
When preparing threaded joints and compression fittings, select the correct sealant—PTFE tape for straight threads, pipe dope compatible with the pipe material for tapered threads, and properly sized ferrules for compression fittings—and apply each according to manufacturer instructions to guarantee a leak-tight reassembly and straightforward testing.
Wrap tape clockwise, use thin even coat of compound, seat ferrules fully, tighten to specified torque, and inspect threads for proper engagement.
Pressure testing and leak-check methods
Once fittings are reinstalled and sealants cured, pressure testing verifies joint integrity before returning the system to service.
The procedure uses gradual pressurization with air or water to working pressure plus safety margin.
Monitor gauges and inspect all joints for bubbles, drips, or pressure decay.
Isolate sections, relieve pressure slowly, and repair any leaks.
Record results and certify the system before normal operation.
Safety hazards and how to avoid them
The section outlines common safety hazards encountered when removing a pipe connector and how to prevent them.
It covers preventing water damage and electrical risks, safe use of heat and power tools near plumbing, and situations where chemical solvents should not be used.
Practical precautions and when to call a professional are highlighted.
Preventing water damage and electrical risks
Many incidents of connector removal lead to water intrusion or electrical shorts if precautions are not taken; professionals should first isolate the water supply and power at their respective shutoffs to eliminate immediate risks.
Use drain and pressure-relief measures, verify isolation with meters or visual checks, cap or plug exposed pipes, keep electrical panels closed, and employ waterproof barriers and drip trays to protect finishes and circuits.
Safe use of heat and power tools near plumbing
When working near plumbing, professionals must recognize that heat and power tools introduce burn, fire, melting, and electrical-shock hazards that can quickly compromise pipes, fittings, insulation, and surrounding materials.
Use insulated tools, guards, and flame shields; maintain clearance from combustible materials; disable nearby circuits and lock out power; ventilate workspaces; cool heated areas; monitor for hidden wiring; wear PPE and keep extinguishers nearby.
When chemical solvents are unsafe
After addressing risks from heat and power tools, attention shifts to situations where chemical solvents pose greater danger than benefit.
Solvents can ignite, corrode fittings, harm skin or lungs, and contaminate water. They are unsafe in confined spaces, near open flames, on sensitive materials, or when proper PPE and ventilation are unavailable.
Choose mechanical methods or non-toxic alternatives and dispose of chemicals per regulations.
Common mistakes to avoid when removing connectors
Common errors during connector removal include improperly torqued replacements, which can lead to leaks or damaged fittings.
Cutting too much pipe or preparing flares/compression fittings incorrectly compromises seal integrity.
Failing to relieve system pressure or drain residual water increases the risk of injury and water damage.
Over-tightening or under-tightening replacements
Avoiding over-tightening or under-tightening is critical because incorrect torque can damage threads, deform fittings, or cause leaks once the connector is reinstalled.
Installers should follow manufacturer torque specs, use calibrated tools, and apply steady, even force.
Hand-tightening alone is unreliable; overly aggressive tightening stresses seals and fittings, while insufficient torque allows movement and eventual leakage.
Verify tightness after pressurizing the system.
Cutting too much pipe or improper flare/compression prep
Cutting a pipe too short or failing to prepare flare and compression fittings correctly sets up many reinstall problems before work is finished. Technicians must measure twice, cut squarely, deburr, and confirm flare angles and nut seating. Mistakes force coupling extensions or replacements.
| Cut square | Deburr edge | Check flare angle |
|---|---|---|
| Measure twice | Nut seating | Test fit |
Ignoring system pressure and residual water
Check pressure and drain lines before loosening any connector: lingering system pressure or trapped residual water can spray, flood, or damage nearby components when a fitting is opened.
Technicians should isolate and depressurize systems, open downstream drains, and verify zero pressure with gauges.
Failure to do so risks personal injury, tool damage, contamination, and costly repairs; always follow lockout and purge procedures.
Time-saving tips and pro shortcuts
Professionals rely on specific tools and compact tricks—such as impact wrenches, strap wrenches, and heat or penetrating lubricants—to speed connector removal.
They also keep simple temporary fixes ready, like rubber patches or hose clamps, to stop leaks while sourcing replacement parts.
Clear part organization and labeling during disassembly prevents reassembly delays and guarantees correct replacements.
Tools and tricks professionals use for fast removal
Speed and efficiency on connector removal come from pairing the right tools with a few practiced shortcuts: using quality adjustable wrenches, strap or chain wrenches for rounded fittings, and a compact basin wrench for tight spaces, along with heat or penetrating oil applied judiciously to loosen seized threads.
Professionals also carry tubing cutters, flare nut wrenches, backup pliers, torque-limited drivers, and magnetic trays for fast, organized work.
Temporary fixes to stop leaks while sourcing parts
When a connector starts leaking and parts are not immediately available, a quick, temporary repair can prevent water damage and buy time for a proper fix:
Apply plumber’s tape around the joint, wrap a rubber patch or hose clamp tightly, or use epoxy putty rated for wet conditions.
Shut off water when possible.
Label the repair as temporary and replace the connector promptly with correct parts.
Organizing parts and labeling during disassembly
After stabilizing a leak with a temporary repair, efficiently organizing parts and labeling them during disassembly prevents hours of reassembly guesswork. The technician separates fittings, fasteners, and seals into labeled bags, photographs orientations, and notes order. Small bins and a magnetic tray keep hardware sorted. Refer to the photos during reassembly to restore sequence and torque.
| Item | Action |
|---|---|
| Fittings | Bag & label |
| Fasteners | Magnetic tray |
| Seals | Separate bag |
| Order | Photo note |
When to replace pipe versus connector
The section considers visible and functional signs indicating the pipe itself requires replacement, such as widespread corrosion, cracking, or repeated leaks.
It also compares costs and expected service life of replacing a connector versus replacing the entire pipe run.
Practical decision criteria and long-term value are then outlined to guide the choice.
Signs that the pipe itself needs replacement
If corrosion, widespread pitting, deformation, or recurring leaks appear along the length of a pipe rather than only at joints, replacement of the pipe itself is usually warranted because connectors alone will not stop progressive failure.
Additional signs include thinning walls visible with a flashlight, bulging, brittle or crumbling material, internal blockage from scale, or repeated repairs clustered along a section indicating systemic deterioration.
Cost and longevity considerations for repair options
Often a straightforward connector replacement will be far cheaper and quicker than replacing an entire pipe, but long‑term value depends on the extent of damage, material compatibility, and expected service life.
Decision factors include repair cost versus replacement cost, remaining pipe lifespan, corrosion or structural defects, and potential for future failures.
Professional inspection, warranty terms, and labor disruption should guide the choice.
Recommended replacement connectors for different scenarios
For replacing connectors, the guide recommends specific options tailored to material shifts, system type, and exposure conditions.
Consider these focused choices:
- Copper-to-PEX: compression or push-fit adapters rated for both metals.
- Residential supply vs drain: brass or PEX fittings for supply, PVC/ABS with solvent-weld or threaded fittings for drains.
- Corrosion resistance: stainless steel, brass with protective coatings, or plastic composites for harsh environments.
Best connectors for copper to PEX transitions
When shifting from copper to PEX, choosing the correct connector depends on pipe size, access, and permanence of the joint; common options include crimp/ring fittings for straightforward installations, compression adapters where access is limited, and push-fit or SharkBite connectors for quick repairs or temporary connections.
For durable, code-compliant changes, use brass or plastic adapter fittings rated for potable water and sized to match tubing.
Best choices for residential water supply versus drain lines
Several factors determine the ideal connector for residential water supply versus drain lines, including pressure rating, material compatibility, ease of installation, and code compliance.
For supply lines, use pressure-rated fittings like crimped PEX, brass compression, or copper sweat connectors.
For drain lines, use sanitary ABS/PVC solvent-weld or slip-joint fittings.
Match seals and sizes, prioritize local code-approved materials, and choose durable, proven brands.
Corrosion-resistant options for harsh environments
Because harsh environments accelerate metal degradation through chemical attack, abrasion, and electrochemical reactions, selecting corrosion-resistant connectors is essential to guarantee longevity and prevent leaks.
Recommended options include stainless steel (304/316) for chloride exposure, brass with protective coatings for general use, and fluoropolymer- or PTFE-lined connectors where chemical resistance is critical.
Consider sacrificial anodes, isolation fittings, and routine inspection schedules for added protection.
Step-by-step troubleshooting guide for common problems
When heat and penetrating oil fail to free a stubborn connector, the guide outlines escalation steps such as mechanical extraction and safety checks.
It also covers diagnosing and fixing a minor leak after reassembly, including tightening sequences and sealant options.
Finally, it explains how to assess and address thread damage or mismatched fittings, with repair and replacement recommendations.
Connector won’t budge after heat and penetrating oil
If a pipe connector remains stuck after applying heat and penetrating oil, proceed methodically to avoid damage and wasted effort.
Verify adequate soak time, reapply lubricant, and use correct-sized wrenches with steady, increasing torque.
Try gentle taps with a hammer to break corrosion, apply localized heat again if safe, and consider using a pipe extractor or cutting the fitting as a last resort.
Minor leak persists after reassembly
After reassembling the connector, a small leak may still appear around the joint.
The inspector should first tighten fittings incrementally, then depressurize and recheck. If leakage persists, disassemble, clean mating surfaces, remove old sealant, and apply appropriate thread tape or pipe compound evenly.
Reassemble and test under pressure. If seepage continues without visible defects, consult a professional plumber for further diagnosis.
Thread damage or mismatched fittings
Inspectors should begin by visually and tactilely examining threads and fittings for signs of cross-threading, burrs, corrosion, or incompatible sizes that prevent a proper seal.
If damage is evident, advise replacing the connector or fitting. Match thread standards (NPT, BSP) and sizes precisely.
Clean minor burrs with a file, use thread sealant compatible with materials, and retest under low pressure before full service.
Maintenance practices to prevent future removal headaches
Routine inspections and targeted corrosion prevention extend connector life and reduce seizure risk.
Consistent application of protective coatings, appropriate joint lubricants, and environmental controls help maintain accessibility.
Proper initial installation—correct torque, alignment, and use of compatible materials—minimizes the need for difficult removals later.
Routine inspections and corrosion prevention
When performed regularly and methodically, inspections identify early signs of wear, misalignment, or corrosion that, if left unchecked, complicate future connector removal.
Technicians should document seal condition, thread integrity, and surface deposits; measure clearances; and note exposure to moisture or chemicals.
Apply suitable corrosion inhibitors, maintain protective coatings, and schedule touch-ups.
Promptly replace compromised clamps or gaskets to avoid seizing and difficult disassembly.
Proper installation practices that simplify future repairs
Plan installations with future accessibility in mind: select connectors and fittings that provide clearance for tools, use compatible sealants and lubricants to prevent galling, and follow manufacturer torque and alignment specifications to avoid overstressing threads.
Record assembly details, mark orientations, and leave service loops. Use sacrificial fittings or unions where disassembly is likely.
Train staff on consistent installation and document materials to streamline future repairs.
Visual reference checklist before starting work
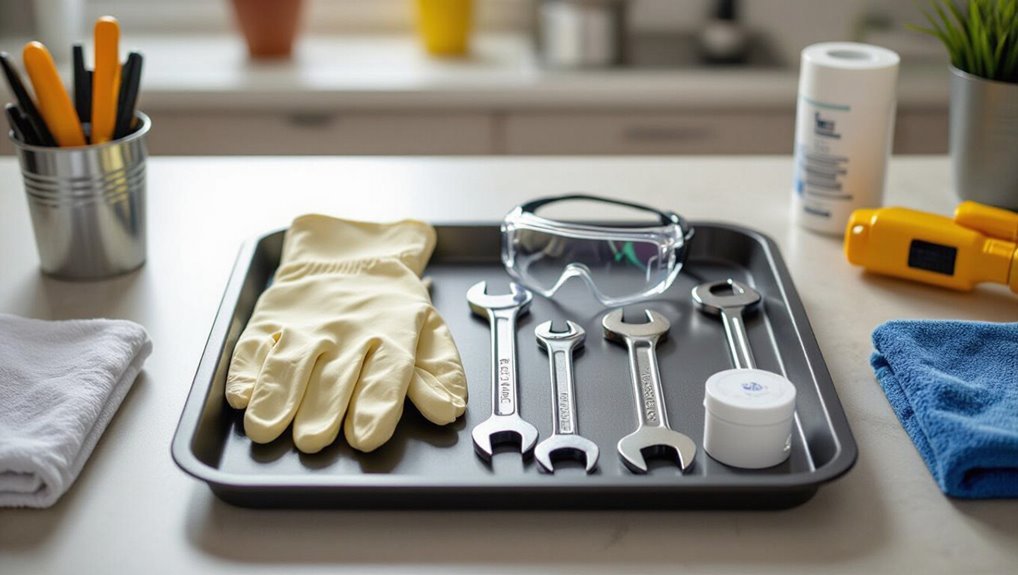
Before loosening any fittings, the technician should perform a concise visual reference checklist to document the connector type, material, orientation, and nearby components.
The technician records key details, photographs angles, and notes hazards.
Follow this numeric checklist for clarity:
- Identify connector type, material, thread direction.
- Photograph from multiple angles, include reference scale.
- Note adjacent valves, supports, and potential obstructions.
Conclusion
Concluding the guide, the reader is reminded that swift, safe pipe-connector removal blends technique, correct tools and respect for plumbing principles. Testing the theory that heat plus leverage always eases stubborn fittings reveals nuance: sometimes corrosion or wrong connectors defeat force, demanding cutting or replacement. Consequently, cautious assessment before action prevents damage. Ultimately, methodical preparation, proper materials and patience guarantee success and reduce future removal difficulty, validating preventive maintenance as best practice.
