How to Vent a Hot Water Tank Safely: Step-by-Step Guide for Homeowners
To safely vent a gas hot water tank, follow these essential steps: First, identify the tank type and then shut off the fuel and power supply. Next, drain and depressurize the tank. Inspect the vent route for any corrosion or obstructions, and install a compatible vent pipe with the correct slope and supports. Make sure to include a draft hood. Seal all joints, and install a termination cap and flashing. Once everything is set, restore services and conduct combustion and leak checks. Always adhere to maintenance schedules and local codes. For detailed guidance, follow the step-by-step instructions provided.
Why Proper Venting of a Hot Water Tank Matters
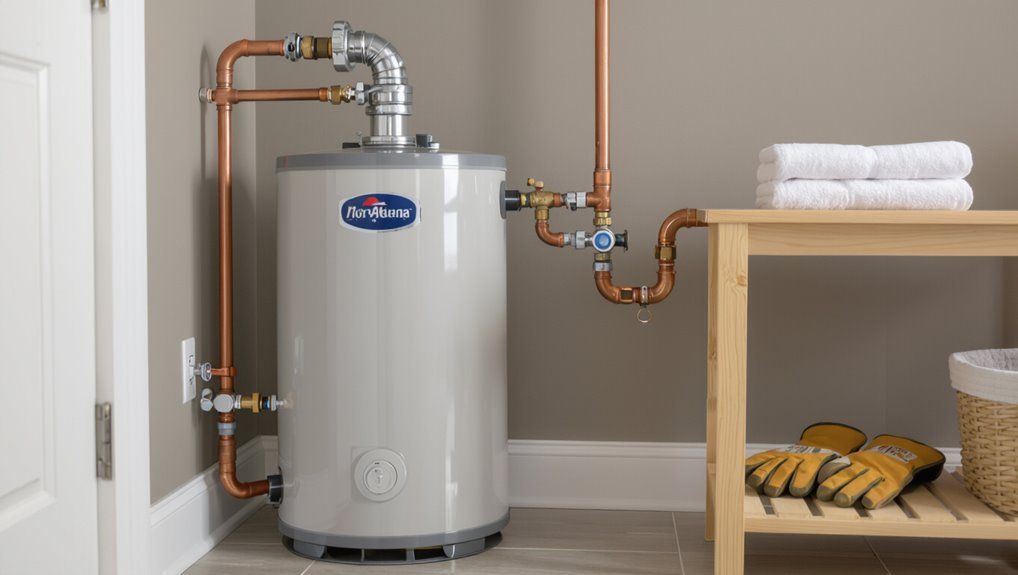
Proper venting of a hot water tank prevents hazards such as carbon monoxide poisoning, dangerous pressure buildup, and water damage from leaks or backflow.
It also influences appliance efficiency and service life by ensuring combustion gases and excess heat are removed correctly.
Routine checks can be handled by a knowledgeable homeowner, but signs of corrosion, persistent odor, or pilot/light issues warrant a professional inspection.
Risks of Improper Venting (carbon monoxide, pressure buildup, water damage)
Although often out of sight, a hot water tank’s venting directly affects household safety: inadequate vents can allow carbon monoxide to accumulate, permit excessive pressure to build inside the tank, and channel steam or leaking water into structural spaces, each creating distinct hazards.
Improper venting risks poisoning, explosions from pressure relief failure, and mold or structural damage; homeowners learning how to vent a hot water tank should prioritize inspections and repairs.
How venting affects efficiency and lifespan
Ventilation directly influences a hot water tank’s energy use and service life by controlling combustion efficiency, heat loss, and internal corrosion.
Proper venting guarantees complete fuel burn, reduces standby heat loss, and prevents condensation that accelerates rust.
Conversely, restricted or leaky vents increase fuel consumption, stress components, and shorten lifespan.
Regular inspection and correct vent sizing preserve efficiency and extend service intervals.
When to call a professional vs. DIY assessment
When should a homeowner tackle venting issues and when is a professional necessary?
Clear guidelines separate simple tasks—inspecting visible venting for blockages, tightening loose fittings, and replacing minor corroded sections—from complex problems: suspect carbon monoxide, gas leaks, drafting failures, chimney deterioration, or uncertain vent sizing.
If safety, code compliance, or combustion diagnostics are involved, a licensed plumber or HVAC technician should be contacted immediately.
Types of Hot Water Tanks and Their Venting Requirements
Different hot water tank designs have distinct venting needs that affect installation and safety.
Conventional atmospheric, power-vented, and direct-vent sealed-combustion units each require specific vent types and clearances, while electric tanks generally need no combustion venting.
Local codes and manufacturer instructions determine exact requirements and must be followed.
Conventional atmospheric vented tanks
Conventional atmospheric vented tanks rely on natural draft to expel combustion gases through a vertical flue connected to the chimney; their design assumes ambient air enters the appliance room and combustion byproducts rise on buoyancy alone.
Proper installation requires correct flue sizing, adequate clearance, sealed combustion chamber penetrations, and a level platform.
Regular inspection prevents soot buildup, backdrafting, and carbon monoxide risks.
Power-vented tanks
Moving from atmospheric units that rely on natural draft, power-vented tanks use a fan or blower to force combustion gases through relatively short, often horizontally run PVC or stainless-steel venting.
These units permit flexible routing, reduce backdraft risks, and require proper electrical supply, intake air, condensate management, and manufacturer-specified vent sizing.
Regular inspection of fan operation and vent integrity guarantees safe, efficient performance and prevents carbon monoxide hazards.
Direct-vent and sealed-combustion tanks
A sealed-combustion, or direct-vent, hot water tank draws combustion air from outside and expels exhaust directly outdoors through a coaxial or paired pipe system, isolating the burner from indoor air.
Installation requires correct pipe sizing, slope, and termination per code.
Regular inspections guarantee seals, joints, and vent caps remain intact to prevent leaks, blockage, or condensate damage and to maintain safe operation.
Electric tanks vs. gas tanks: venting differences
After covering sealed-combustion systems, attention turns to the fundamental differences between electric and gas hot water tanks, since their energy sources determine whether venting is required at all.
Electric tanks produce no combustion gases and need no flue; placement focuses on electrical access and drip pans.
Gas tanks require proper venting or power-assisted exhaust to remove combustion byproducts and prevent CO buildup.
Local code and manufacturer variations
Because venting requirements intersect with safety regulations and equipment design, installers must consult both local codes and the specific manufacturer’s instructions before selecting or modifying a hot water tank’s exhaust system.
Codes and manuals dictate vent type, materials, clearances, and termination. Noncompliance risks leaks or failure.
- Local code variations
- Manufacturer specifications
- Approved vent materials
- Inspection and permits
Tools, Materials, and Safety Equipment You’ll Need
A clear list of required tools, vent components, and safety equipment helps guarantee a proper and code-compliant installation.
Typical tools include screwdrivers, pipe wrenches, a drill, and a level, while vent materials cover pipe types, elbows, draft hoods, and caps.
Safety items and administrative steps should include a CO detector, gloves and goggles, and any necessary permits with an inspection checklist.
Required tools (screwdrivers, pipe wrenches, drill, level)
Gathering the right tools before beginning guarantees the venting job proceeds safely and efficiently.
Essential hand tools include flathead and Phillips screwdrivers, adjustable and pipe wrenches sized to connections, a cordless drill with metal bits, and a carpenter’s level for proper slope.
Also recommended: tape measure, channel locks, utility knife, and safety glasses to guarantee accurate, secure installation and safe work.
Vent materials and components (vent pipe types, elbows, draft hood, cap)
Proper venting requires selecting compatible materials and components that withstand heat, corrosion, and outdoor exposure.
Common vent pipe types include galvanized steel, stainless steel, and PVC (where permitted).
Use appropriate-diameter straight sections and minimal elbows; long-radius elbows reduce resistance.
A draft hood guarantees stable combustion draft; a weatherproof cap prevents downdrafts and animal entry.
Secure joints with approved fittings and sealants.
Safety gear and detection devices (CO detector, gloves, goggles)
Personal protective equipment and detection devices are essential before any work on a hot water tank begins.
A carbon monoxide detector must be installed nearby and tested.
Workers should wear chemical-resistant gloves, heat-resistant gloves for hot surfaces, and safety goggles to protect eyes from debris and splashes.
Respiratory protection is recommended in confined spaces; verify batteries and PPE meet manufacturer standards.
Permits and inspection checklist
Before any work begins, verify local permit requirements and arrange any required inspections; failure to obtain permits can void warranties, violate codes, and create liability.
A concise checklist guarantees compliance and safety:
- Permit application and approval confirmation.
- Approved venting plans and materials list.
- Scheduled rough and final inspections.
- Receipts, compliance labels, and inspector sign‑offs for records.
Pre-Work Safety Checks and Preparations
Before beginning any vent work, the technician confirms gas and electrical supplies are safely shut off and follows lockout/tagout procedures.
They then relieve pressure and drain the tank as required, and inspect the existing vent for corrosion, obstructions, and minimum clearances.
Finally, they verify the planned roof or sidewall vent route is unobstructed and compliant with manufacturer and code requirements.
Turning off gas and power safely
Shut off the water heater’s power and fuel sources methodically to eliminate ignition and electrical hazards during venting.
Turn off the circuit breaker labeled for the heater; verify power is off with a noncontact tester.
For gas units, close the manual shutoff valve on the gas line and confirm valves are fully seated.
Post a notice to prevent accidental reactivation until work is complete.
Draining and depressurizing the tank if needed
Drain and depressurize the tank to eliminate scald and pressure hazards before any venting work begins.
The technician opens a hot water faucet to relieve residual pressure, shuts the cold-water inlet, connects a hose to the drain valve, and directs water to a safe drain.
They partially open the relief valve if necessary, monitoring flow until pressure and temperature are safe for further work.
Checking existing vent condition and clearance
Inspect the venting system visually and by touch to verify the flue, draft hood, and vent pipe are intact, properly connected, and free of obstructions or corrosion.
Next, measure clearances from combustibles, guarantee joints are sealed and sloped toward the draft hood, and check for sagging, dents, or loose fasteners.
Note any damaged components for repair or replacement before proceeding.
Verifying roof or sidewall venting routes and obstacles
Before starting work, the technician should verify the chosen venting route—roof or sidewall—by tracing the run from the appliance to the exit point, identifying any changes in direction, joints, or penetrations that could block flow or collect debris.
- Inspect joists, attic access, and chase clearance.
- Note existing penetrations and seal integrity.
- Check for obstructions and condensate traps.
- Confirm code-compliant clearances and termination location.
Step-by-Step Guide to Venting a Gas Hot Water Tank
The technician begins by planning the vent route and measuring required lengths to guarantee proper fit.
Next steps include installing the draft hood and connecting the vent collar, then assembling and securing vent pipe sections with the correct slope and supports for both vertical and horizontal runs.
Finally, the technician installs the termination cap and flashing through the roof or sidewall to complete the venting system.
Planning the vent route and measuring lengths
Map the vent route carefully, accounting for straight runs, elbows, roof or wall termination points, and the required clearances from windows and air intakes.
Determine total equivalent length by adding straight lengths and elbow penalties per local code.
Note rise for proper draft, locate supports and access for future inspection, and record measurements for pipe, flashing, and termination components before purchase to avoid fitting issues.
Installing the draft hood and connecting vent collar
Begin by confirming the appliance is shut off, cooled, and isolated from gas and water supplies; only then proceed to fit the draft hood and vent collar.
Position the draft hood onto the flue outlet, secure with manufacturer screws, and guarantee a snug, level fit.
Slide the vent collar over the hood outlet, tighten fasteners, and seal joints with high-temperature sealant per code and instructions.
Assembling and securing vent pipe sections
Start by laying out the vent pipe sections and required fittings to verify correct lengths and types before cutting or joining.
Align male and female ends, apply approved sealant or tape where specified, and thread or crimp connections per manufacturer instructions.
Fasten joints with listed screws or clamps.
Anchor assemblies to structural supports using straps or brackets, ensuring vibration-free, gas-tight connections.
Creating proper slope and support for vertical/horizontal runs
Proper slope and secure support are essential for safe, code-compliant venting of a gas hot water tank: horizontal runs must pitch upward toward the chimney or termination at a minimum of 1/4 inch per foot (6 mm/m) to prevent condensate pooling, while vertical sections require continuous support to maintain alignment and prevent sagging.
Use corrosion-resistant hangers every 3–4 feet horizontally and every 6–10 feet vertically, anchor to structure, and avoid compressing joints.
Installing termination cap and flashing through roof or sidewall
Install the termination cap and flashing with attention to alignment, weatherproofing, and local code requirements to guarantee the vent discharges safely and prevents water intrusion; whether penetrating a roof or sidewall, verify clearance to combustibles, maintain the established slope, and select a cap and flashing sized and rated for the chimney or vent type.
Secure flashing to roof or siding, fasten cap per manufacturer, and provide durable exterior seals.
Sealing joints, testing for leaks, and insulating where necessary
Seal all vent joints, then verify integrity and add insulation only where required by code or manufacturer instructions.
Using approved sealants and high-temperature tape, the installer tightens connections, secures clamps, and inspects for gaps.
Perform a smoke or soapy-water leak test at joints. Repair any leaks immediately.
Insulate exposed vent sections only if condensation or local codes demand it; avoid covering required clearances.
Reconnecting gas and power, and performing startup checks
After vent joints and insulation are confirmed, the technician reconnects the gas and electrical supplies and performs a systematic series of startup checks to guarantee safe operation.
Pilot ignition and burner operation are observed, gas pressure and manifold readings verified, and electrical connections tested for correct voltage and grounding.
Combustion gases are analyzed, CO levels measured, and controls and safety devices validated before leaving the site.
Special Procedures for Power-Vented and Direct-Vent Units
Power-vented and direct-vent water heaters require specific procedures for proper installation and safe operation.
Attention must be paid to mounting and wiring the power vent blower, routing separate exhaust and intake pipes for direct-vent systems, and providing correct condensate handling and drains.
Final steps include testing electrical connections and confirming fan operation before placing the unit into service.
Mounting and wiring the power vent blower
Begin by positioning the blower unit according to the manufacturer’s template, verifying clearances, mounting surface strength, and orientation for proper airflow.
Secure with recommended fasteners and vibration isolators.
Route electrical cable through strain-relief fittings, connect to dedicated circuit per code, and ground the unit.
Follow wiring diagram, install inline disconnect and overcurrent protection, and test blower operation before sealing access panels.
Routing exhaust vs. intake pipes for direct-vent systems
Several critical considerations govern routing exhaust and intake pipes for direct-vent and power-vent hot water systems: pipe length and layout, material and sizing compliant with the unit’s venting chart, separate runs for combustion intake and exhaust where required, and termination locations that meet clearance and backflow prevention rules.
Install straight runs when possible, minimize joints, slope condensate away (if applicable), and secure supports per manufacturer specifications.
Condensate handling and drain requirements
Because combustion and flue gases can produce acidic condensate that damages materials and equipment, power-vented and direct-vent water heaters require dedicated condensate management: collection trays or internal drains, suitable corrosion-resistant piping, an appropriate trap and slope to prevent backflow and freezing, and discharge to an approved drain or neutralizer per local code and manufacturer instructions.
Condensate lines must be accessible, protected from damage, and routed to prevent pooling or sanitary sewer contamination.
Testing electrical and fan operation
Power-vented and direct-vent water heaters require specific electrical and fan-function checks to guarantee safe, reliable operation.
A qualified technician verifies power supply, wiring integrity, and proper breaker sizing.
Fan motor rotation, blade clearance, and secure mounting are inspected.
Vent pressure switches, thermostat interlocks, and condensate pump wiring are tested.
Any faults are documented and corrected before unit return to service.
Common Problems, How to Spot Them, and Fixes
Common venting problems include backdrafting and soot buildup, corrosion and leaks in vent piping, inadequate draft or noisy operation, and common code violations found during inspections.
Each issue has identifiable signs—smoke or soot near connections, rust or water stains, unusual sounds or weak exhaust flow, and improper clearances or materials—that guide diagnosis.
Simple fixes range from cleaning and sealing joints to replacing damaged vent sections, adjusting drafts, or bringing installations up to code by a qualified technician.
Backdrafting and soot buildup causes and remedies
Recognize backdrafting and soot accumulation as serious signs of improper combustion or ventilation in a water heater system.
Causes include blocked vents, negative house pressure, incomplete combustion, or improper flue sizing.
Spotting involves smoky odors, visible soot around the draft hood, yellow pilot flames, or frequent pilot outages.
Remedies: clear obstructions, improve make-up air, adjust burner tuning, and consult a qualified technician for safe inspection and repairs.
Corrosion and leaks in vent piping repair options
Many water heater vent systems eventually show signs of corrosion or develop small leaks that, if left unaddressed, compromise draft and allow combustion gases to escape.
Homeowners should inspect seams, joints, and supports for rust, holes, or staining.
Repair options include replacing damaged sections with matching material, sealing minor pinholes with high-temperature sealant, tightening or replacing fasteners, and consulting a professional for extensive corrosion.
Inadequate draft or noisy venting troubleshooting steps
Inspecting and diagnosing inadequate draft or noisy venting begins with observing symptoms such as slow or incomplete burner ignition, yellow or flickering flames, soot buildup, gurgling or whistling sounds from the vent, and visible exhaust spillage at the draft hood.
Check for blockages, bird nests, or debris; verify vent slope and secure joints; test combustion air supply; clean or replace damaged venting; retest draft and flames.
Code violations commonly found during inspections
How can common code violations around hot water tank venting be identified and remedied to guarantee safe operation?
Inspectors note improper clearances, incorrect vent materials, blocked terminations, and missing draft hoods.
Remedies include restoring clearances, replacing noncompliant venting, clearing or extending terminations, and installing required draft controls.
Typical checklist:
- Clearance violations
- Wrong vent material
- Blocked outlet
- Missing draft hood
How to Test and Verify Safe Vent Operation
A qualified technician begins testing vent operation with a combustion analyzer and a CO detector to confirm safe exhaust composition and acceptable CO levels.
They perform visual checks for steady draft and proper flame behavior, then conduct pressure and leak testing on vent joints to guarantee airtight connections.
Finally, a concise inspection checklist is used to verify all safety items have been addressed before returning the system to service.
Using a combustion analyzer and CO detector
Begin by confirming that combustion analysis equipment and a functioning carbon monoxide (CO) detector are on hand and calibrated, since accurate readings are essential for verifying safe vent operation.
Use the combustion analyzer to measure O2, CO, CO2, and flue temperature at the draft point.
Compare results to manufacturer limits. If CO exceeds safe thresholds, shut down the appliance and ventilate before troubleshooting or calling a qualified technician.
Visual checks for proper draft and flame behavior
With combustion readings confirmed, attention turns to visual checks of draft and flame behavior to corroborate instrument data.
The technician observes steady upward draft at the vent connector, stable blue flame with minimal yellow tipping, and absence of soot or smoking.
Flicker, rollback, or delayed ignition indicate venting or burner issues.
Document observations and retest after adjustments to guarantee consistent safe operation.
Pressure and leak testing of vent joints
Perform pressure and leak testing on vent joints to confirm there are no openings that could allow combustion gases to escape into the living space.
A qualified technician seals terminals, applies a calibrated manometer or smoke pencil, and pressurizes the system to specified tolerances.
Any detected leaks are marked and corrected with approved high-temperature sealants or replacement fittings.
Repeat testing until readings remain stable and within code limits.
Final inspection checklist for homeowners
After pressure and leak testing confirms vent integrity, the homeowner’s final inspection checklist guides a systematic verification of safe operation.
Inspect for clearances, secure fittings, and corrosion. Confirm draft and combustion air. Verify termination cap condition and absence of obstructions.
- Check for proper slope and support.
- Confirm vent cap clearance.
- Test draft with smoke or draft gauge.
- Inspect for soot, rust, leaks.
Maintenance Schedule and Long-Term Care
A clear maintenance schedule helps preserve vent performance and prevent hazardous blockages.
Inspections should occur at regular intervals to check for soot buildup, obstructions, corrosion, and damaged components, with cleaning and clearance performed as needed.
Replace worn parts or the entire venting system when corrosion, persistent leakage, or structural damage is present, and follow seasonal precautions—especially winterization—to prevent freezing and ice blockages.
Routine inspection intervals and what to look for
Owners should inspect a hot water tank at predictable intervals—monthly visual checks, quarterly functional tests, and a thorough annual service—to catch wear, leaks, and draft or venting issues before they escalate.
Inspect seals, valves, and pressure-relief function; check for corrosion, rust stains, and mineral buildup; verify vent connections are secure and undamaged; listen for unusual noises and confirm pilot flame stability and proper thermostat operation.
Cleaning soot and removing obstructions
Inspect vents and combustion areas at least twice yearly for soot buildup and blockages, increasing frequency in homes with dusty conditions or nearby wildfire smoke.
Use a stiff brush and vacuum with a HEPA-rated attachment to remove soot from vent interiors, burner covers, and draft hoods.
Clear bird nests, leaves, and debris from external terminals.
After cleaning, verify unobstructed airflow and reassemble components securely.
When to replace vent components or the entire vent system
When should vent components be replaced versus when the entire vent system needs renewal?
Inspectors recommend replacing individual parts—caps, elbows, seals, short pipe sections—when corrosion, cracks, or persistent leaks appear.
Replace the whole vent system if widespread corrosion, misalignment, extensive blockage, or multiple failed inspections exist, or after major appliance relocation.
Follow manufacturer intervals and local codes for long-term safety.
Seasonal considerations and winterization tips
Because vent performance can decline with seasonal temperature swings and weather exposure, routine winterization and seasonal checks are essential to prevent freeze damage, blockages from debris or snow, and venting inefficiencies.
Recommended actions include:
- Insulate exposed vent pipes and seals.
- Clear snow, leaves, and nests around terminations.
- Test draft and combustion annually before cold season.
- Replace deteriorated components and use frost caps when appropriate.
Cost Estimates, Permits, and When to Hire a Pro
Typical DIY venting projects often cost considerably less than hiring a professional, but prices vary widely depending on materials and complexity.
Local jurisdictions may require permits and inspections to guarantee code compliance, affecting both timeline and cost.
Homeowners should vet licensed contractors, ask about experience with gas venting, written estimates, permits, and warranty terms before hiring.
Typical DIY vs. professional cost ranges
Although some homeowners can vent a hot water tank with basic tools, cost outcomes vary widely depending on whether the work is DIY or performed by a licensed plumber. DIY materials typically run low; labor and unforeseen issues increase professional bills. Consider complexity, vent type, and safety risk when choosing.
| Scope | Typical Cost |
|---|---|
| DIY materials | $20–$150 |
| Basic pro job | $200–$600 |
| Complex pro job | $600–$1,500 |
Permit requirements and inspection process
Cost differences between DIY and professional venting often hinge on local permit and inspection requirements, which can add time and expense.
Homeowners should check municipal codes for required permits, submission documents, and fees.
Inspections verify proper vent sizing, clearances, combustion air, and carbon monoxide safety.
Failure to obtain permits risks fines, voided warranties, and failed resale inspections; plan timelines accordingly.
Choosing a qualified contractor and questions to ask
When should a homeowner hire a professional to vent a hot water tank, and how can they verify the contractor’s competence?
A qualified contractor is essential for safety, permits, and code compliance. Ask for written estimates, permits handling, insurance, and references.
Compare bids, confirm license and bonding, request inspection scheduling, and prefer specialists with gas and venting experience.
- Request license
- Ask for estimates
- Verify insurance
- Check references
Quick Safety Checklist Before You Finish the Job
Why double-check the basics before declaring the job done? A concise checklist guarantees venting works safely and reliably.
Inspectations should confirm proper draft, secure connections, and no obstructions. Follow this quick list:
- Vent pipe alignment and slope verified.
- Joints sealed and fasteners tight.
- Carbon monoxide detector functioning.
- Combustion airflow unobstructed and clear.
Conclusion
Like a lantern kept clear of smoke so its light may travel, a well-vented hot water tank lets warmth reach every corner without choking the home. Homeowners who follow the guide become careful gardeners of comfort, pruning vents, checking seals, and tending flues so combustion’s breath moves safely outdoors. Regular attention and timely professional help guarantee the household’s glow remains steady, clean, and harmless—an ordinary ritual that preserves safety and peace of mind.