How to Clean the Filter on a Rinnai Gas Water Heater (Step-by-Step Guide)
To clean the filter on a Rinnai gas water heater, follow these steps: Shut off the gas, power, and cold-water supply. Relieve pressure, then open the access panel and remove the filter screen. Rinse it with cool water, using a soft brush or soaking it in a 1:1 vinegar solution for tough mineral buildup. Inspect the O-rings, dry the components, and reassemble everything. Finally, restore the water supply and check for leaks. This step-by-step guide will help maintain optimal performance and prevent issues.
What a Rinnai Gas Water Heater Filter Does and Why Cleaning It Matters
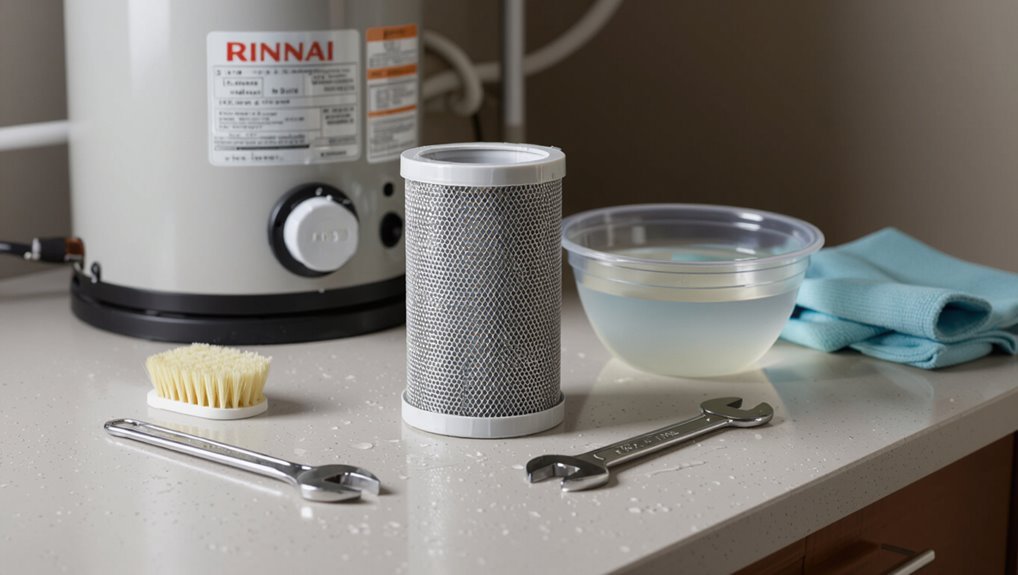
Rinnai gas water heaters use inlet and inline filters to trap sediment and debris before it reaches internal components, preserving flow and burner efficiency.
A clogged filter commonly presents as reduced water pressure, fluctuating temperature, or error codes that indicate restricted flow.
If left uncleaned, filters can cause premature wear, reduced efficiency, and potential system shutdowns that require costly repairs.
Function of the inlet and inline filters
A gas water heater’s inlet and inline filters trap sediment, rust, mineral scale, and debris carried by the municipal or well water supply before it enters the unit’s valves, heat exchanger, and burner assembly.
They protect internal components, maintain flow, and reduce wear.
Regular maintenance—learning how to clean filter on rinnai gas water heater—prevents buildup, preserves efficiency, and extends service life.
Signs a clogged filter is affecting performance
Several common indicators point to a clogged inlet or inline filter compromising a gas water heater’s performance.
Reduced hot water flow, fluctuating temperature, longer recovery times, and unusual noises during operation often appear.
Visible debris or discolored water at fixtures can signal blockage.
Increased cycling or error codes related to flow detection may also indicate filter restriction requiring inspection and cleaning.
Risks of neglecting filter maintenance
Neglecting regular filter maintenance allows sediment and mineral buildup to restrict water flow, which directly impairs heater efficiency and shortens component lifespan.
Reduced heat transfer raises gas use and operating costs. Blockages increase burner strain and risk of overheating, corrosion, or premature failure.
Poor filtration can cause inconsistent water temperatures, reduced hot water supply, and potential warranty voiding if recommended maintenance is ignored.
Tools and Materials You’ll Need
For cleaning a Rinnai gas water heater filter, the technician will gather basic tools such as a screwdriver, bucket, towel, and a soft brush.
Mild detergent or white vinegar are recommended for safe cleaning of the filter and housing.
The technician should also inspect and, if needed, replace small parts like O-rings and screens.
Recommended tools (screwdriver, bucket, towel, soft brush)
Gather basic tools before starting: a flathead or Phillips screwdriver to access the filter housing, a bucket to catch drained water, a towel for spills and wiping, and a soft brush to remove debris from the mesh.
Use a screwdriver sized for the screws, a sturdy bucket to contain runoff, a lint-free towel, and a non-abrasive brush to protect the filter screen.
Safe cleaning supplies (mild detergent, vinegar)
After assembling the basic tools, attention turns to the cleaning agents that will safely remove scale and grime without damaging the Rinnai filter.
Use a mild, phosphate-free dish detergent mixed with warm water for general debris.
For mineral buildup, dilute white vinegar (1:1 with water) and soak briefly.
Avoid harsh acids, bleach, or abrasive cleaners that can corrode metal or degrade seals.
Parts to inspect or replace (O-rings, screens)
Several small components warrant inspection or replacement during filter maintenance, primarily O-rings and mesh screens that secure a tight seal and trap debris.
O-rings should be checked for cracks, stiffness or compression set and replaced with matching silicone or EPDM seals.
Mesh screens require inspection for tears, corrosion or clogging; replace with identical stainless or nylon screens to guarantee proper flow and longevity.
Safety Precautions Before You Start
Before beginning filter maintenance, the user should shut off the gas and water supply to the Rinnai unit to prevent accidental flow or combustion.
For electronic models, power should be disconnected and ignition safeguards observed to avoid sparks or unexpected starts.
Work in a well-ventilated area and perform a thorough leak check after reassembly to guarantee no gas or water escape.
Turning off gas and water supply
Shut off the gas supply and close the cold-water inlet valve to eliminate ignition and flooding risks while servicing the Rinnai water heater.
Verify gas is off at the appliance and main shutoff.
Turn the cold inlet fully clockwise, then open a nearby hot faucet to relieve system pressure and drain residual water.
Confirm no gas odor before proceeding.
Power and ignition safety for electronic models
When servicing an electronic Rinnai model, make certain all electrical power and ignition sources are disabled to prevent accidental startup or electrical shock; this includes switching the unit’s power switch to OFF and disconnecting the appliance from its electrical supply at the breaker or unplugging it.
Verify power is off with a non-contact tester, remove batteries from the control panel if present, and wait several minutes for internal capacitors to discharge.
Ventilation and leak-checking basics
With electrical and ignition sources secured, attention should turn to ventilation and leak checking to confirm safe operation and prevent hazardous gas buildup.
Inspect flues, vents, and air intakes for obstructions or corrosion. Ascertain adequate room ventilation per manufacturer specs.
Perform a soap-solution or approved gas detector test at fittings and valve joints; repair or call a licensed technician if any leak is detected.
Step-by-Step Guide to Locating and Accessing the Filter
The section outlines where filters are typically found on common Rinnai models, noting variations between wall-mounted and tank-style units.
It explains how to remove access panels or snap-off covers safely and which fasteners to expect.
It also clarifies how to distinguish inlet (external) filters from internal strainers before attempting removal.
Common Rinnai models and typical filter locations
Although Rinnai produces several series of tankless and storage gas water heaters, most models share a few predictable filter locations that technicians routinely check.
Typical spots include inlet strainers on cold-water connections, inline filters near recirculation pumps, and small mesh screens at condensate traps or pressure relief assemblies.
Model-specific guides (e.g., V Series, RU Series, and RUR) confirm these common placements.
How to remove access panels and covers
Having identified the likely filter locations from common model layouts, the technician next removes the exterior access panels and covers to reach inlet strainers, inline screens, or condensate traps.
Power and gas are verified off, then fasteners are loosened with appropriate tools. Panels are lifted straight off, kept nearby, and small parts stored safely.
Seals and gaskets are inspected for damage before proceeding.
Identifying inlet vs. internal filters
Where is the filter located: at the cold-water inlet or inside the unit?
The technician inspects the inlet pipe for a removable strainer; many Rinnai models use a mesh screen in the inlet valve.
Others place a cartridge or screen behind an internal service panel near the heat exchanger.
Identification requires visual inspection and consulting the model diagram to confirm filter type and access method.
Step-by-Step Cleaning Procedure
Before cleaning begins, the water supply should be shut off and the system drained if the model requires it.
The filter is then removed carefully, the screen rinsed by hand, and stubborn buildup treated with a vinegar soak or mild detergent.
Finally, the filter housing and O-rings are inspected for damage or wear before reassembly.
Shutting off water and draining system if required
Turn off the cold-water supply valve to the Rinnai unit and close any downstream isolation valves to isolate the heater from the house plumbing.
If the model or procedure calls for draining, attach a hose to the drain port and open the drain valve into a safe container or floor drain.
Release pressure via a hot tap before fully draining; monitor flow until clear.
Removing the filter safely
One should confirm the unit is depressurized and the cold-water supply remains closed before beginning; then locate the inline sediment filter or inlet strainer—typically housed behind a removable cap or access panel on the cold-water inlet.
Using pliers or a screwdriver as appropriate, carefully remove the cap, support the filter to prevent drops, and extract it straight out, inspecting seals and o-rings for damage.
Cleaning the filter screen by hand
Begin by preparing a clean workspace and placing a shallow container beneath the filter to catch drips.
The technician should then handle the screen with steady, gloved hands and rinse it under a gentle stream of cool water to remove loose debris.
Lightly brush remaining particles with a soft nylon brush, inspect for damage, and shake off excess water before reinstalling or proceeding to further cleaning steps.
Deep-cleaning with vinegar or mild detergent
Soak the screen in a mild acidic or detergent solution to dissolve mineral buildup and remaining grime: prepare either a 1:1 white vinegar-to-water mix for mineral deposits or a warm water solution with a few drops of mild dish soap for general oily residue.
Submerge the screen fully in a nonreactive container, and allow it to sit for 15–30 minutes while checking periodically so the material is not overexposed.
After soaking, rinse thoroughly under running water, gently brush with a soft toothbrush to remove loosened debris, then air-dry completely before reinstallation.
Inspecting filter housing and O-rings
A visual and tactile inspection of the filter housing and O-rings guarantees the unit will reseal properly and prevent leaks after reassembly.
The technician examines the housing for cracks, corrosion, and mineral deposits, and checks O-rings for cuts, flattening, hardening, or swelling.
Damaged O-rings are noted for replacement; surfaces are wiped clean and lubricant applied only if manufacturer recommends it.
Reassembling and reseating the filter
With the housing and O-rings inspected and cleaned, reassembling the filter proceeds methodically to guarantee a proper seal and correct alignment.
The filter element is placed into the housing, ensuring orientation marks align. O-rings are lightly lubricated, seated without twists, and the housing cap tightened evenly by hand.
A final visual check confirms no pinched seals or misalignment before restoring services.
Restoring water and gas supply and performing a first-run check
Begin by slowly restoring the cold-water supply to the heater, opening the inlet shutoff valve just enough to pressurize the system and checking for leaks at the filter housing and downstream connections.
Once no leaks are detected, fully open the valve, then reopen any isolated fixtures to purge air.
Then restore gas, relight per manufacturer instructions, observe burner ignition, flame stability, and check for gas or water leaks during a brief hot-water draw.
How Often to Clean or Replace the Filter
Manufacturer guidance and model-specific maintenance schedules provide the baseline interval for cleaning or replacing a Rinnai water heater filter.
Actual frequency should be adjusted for factors such as local water hardness and household usage patterns.
Components showing wear, damage, or persistent clogging should be replaced rather than repeatedly cleaned.
Manufacturer recommendations and model-specific schedules
Rinnai provides model-specific guidance for filter maintenance, typically listing recommended cleaning intervals and replacement timelines in the product manual or on the company website.
Users should consult the exact model number to find schedules, parts lists, and official maintenance procedures.
Adhering to manufacturer instructions preserves warranty coverage and guarantees peak performance; when in doubt, contact Rinnai support or an authorized service technician for clarification.
Factors that affect frequency (water hardness, usage)
Because mineral content in the supply and the volume of hot water use directly change how quickly a filter clogs, cleaning and replacement intervals should be adjusted based on those conditions.
Higher hardness and heavy household or commercial use require more frequent inspection and cleaning—sometimes monthly. Softer water and minimal use allow longer intervals, often quarterly to biannually.
Local water reports and usage patterns guide scheduling.
When to replace filter components instead of cleaning
After considering how water hardness and usage affect cleaning intervals, it becomes important to recognize when cleaning is no longer sufficient and components must be replaced.
Persistent clogging, visible damage, torn mesh, corrosion, frequent reoccurrence after cleaning, or manufacturer’s age limits indicate replacement.
Use genuine Rinnai parts, consult the manual for part numbers, and replace seals, screens, or housings promptly to maintain efficiency and safety.
Troubleshooting Common Problems After Cleaning
After filter maintenance, the guide addresses persistent low flow or intermittent heating that may indicate remaining debris or flow restrictions.
It also covers diagnosing leaks at the filter housing or connections and tightening or replacing seals as needed.
Finally, common error codes related to water flow or pressure are explained with steps to verify supply conditions and when to contact a technician.
Persistent low flow or intermittent heating
Persistent low flow or intermittent heating after cleaning a Rinnai gas water heater often indicates an unresolved restriction, sensor issue, or air in the system rather than a problem caused by the cleaning itself.
Inspect inlet screens and supply lines for remaining debris, purge trapped air, verify flow sensor and temperature sensor connections, and check gas supply pressure.
Replace faulty sensors if diagnostics show errors.
Leaks at the filter housing or connections
Inspecting the filter housing and its connections is the first step when leaks appear following cleaning.
Check for loose fittings, cracked O-rings, or misaligned seals.
Tighten compression nuts gently, replace damaged O-rings with manufacturer-specified parts, and reseat the filter assembly.
After reassembly, pressurize the unit and observe for persistent drips; if leakage continues, consult a qualified technician.
Error codes related to water flow or pressure
When a Rinnai gas water heater displays error codes related to water flow or pressure, they most often indicate low inlet pressure, blocked filters, or faulty flow sensors; consulting the manual for the specific code is the quickest way to identify the underlying cause.
After cleaning, verify supply valve position, inspect inlet strainer, check water pressure with a gauge, and replace a malfunctioning flow sensor if errors persist.
Tips to Extend Filter Life and Improve Water Heater Performance
To prolong filter life and maintain efficiency, homeowners are encouraged to contemplate installing a pre-filter or whole-house sediment filter to trap debris before it reaches the Rinnai unit.
A concise regular maintenance checklist — including periodic visual inspections, scheduled filter cleaning, and water quality checks — helps prevent buildup and performance loss.
If persistent issues or complex repairs arise, contacting a professional technician guarantees safe diagnosis and corrective action.
Installing a pre-filter or whole-house sediment filter
Installing a pre-filter or whole-house sediment filter ahead of a Rinnai gas water heater reduces incoming particulate load, protects the heater’s internal components, and prolongs the life of the unit’s built-in filter.
Benefits include clearer water and fewer clogs.
Recommended actions:
- Select micron rating 20–100.
- Install upstream of the heater.
- Use bypass valves for service.
- Replace cartridges per manufacturer.
Regular maintenance checklist
Routine maintenance preserves filter efficiency and safeguards overall Rinnai gas water heater performance.
A concise checklist guarantees longevity and steady hot water supply. Follow these actions:
- Inspect filter monthly for debris buildup.
- Flush sediment quarterly following manufacturer steps.
- Replace damaged seals and O-rings as needed.
- Record maintenance dates and observations for seasonal review.
When to call a professional technician
After following the monthly inspections and quarterly flushes, a homeowner should recognize signs that require professional attention.
Persistent low hot-water pressure, unusual noises, error codes, gas smells, recurring filter clogging despite cleaning, or leaks warrant a certified Rinnai technician.
Scheduling service prevents damage, verifies combustion safety, and guarantees warranty compliance; document symptoms and maintenance performed before the visit.
Quick Reference: Cleaning Steps Summary
Begin by shutting off the gas and water supply to the Rinnai unit and allowing the system to cool; this guarantees safe access to the filter assembly.
A concise checklist follows:
- Remove access panel and locate filter.
- Extract and inspect filter for debris.
- Rinse or soak filter; dry thoroughly.
- Reinstall filter, restore water and gas, run unit to check for leaks.
Comparison of DIY Cleaning vs Professional Service
When comparing DIY filter cleaning with hiring a professional, homeowners should weigh cost savings and convenience against skill level, time investment, and risk of improper reassembly; DIY is typically cheaper and suitable for straightforward rinses, while professionals offer thorough inspections, guaranteed work, and detection of related issues.
| DIY | Professional |
|---|---|
| Lower cost | Higher cost |
| Quick rinse | Full inspection |
| User risk | Warranty/guarantee |
| Basic tools | Expert diagnosis |
Conclusion
Like a careful gardener tending a bonsai, the homeowner trims the little filter that sustains the Rinnai heater’s life. Small, regular attention keeps larger storms at bay: clear passages let warm water flow and parts breathe. Neglect turns a small seed into a choking tangle; routine cleaning prunes away trouble, preserving efficiency and lifespan. In this quiet stewardship, modest effort yields steady comfort and resilient service.