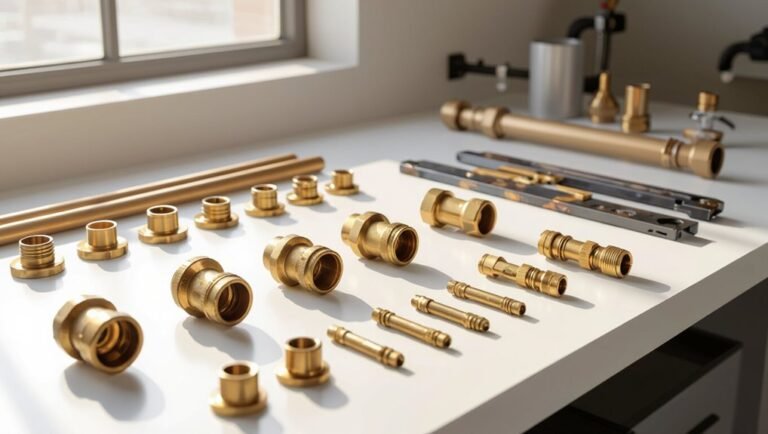
How to Remove Galvanized Water Pipes Safely: Step-by-Step DIY Guide
To safely remove galvanized water pipes, homeowners should act when they notice corrosion, brown or metallic-tasting water, low pressure, or frequent leaks. Ensure you follow local codes, obtain necessary permits, and wear personal protective equipment (PPE), especially while testing for lead. Gather essential tools, including a pipe cutter, wrenches, saws, and valves, and turn off the water supply before starting. Loosen fittings using two wrenches, apply penetrating oil if needed, and cut out sections to replace with copper, PEX, or CPVC. After replacement, conduct a pressure test, inspect for leaks, and recycle the old pipe. Follow the detailed step-by-step procedures and safety tips for a successful project.
Why and when to remove galvanized water pipes
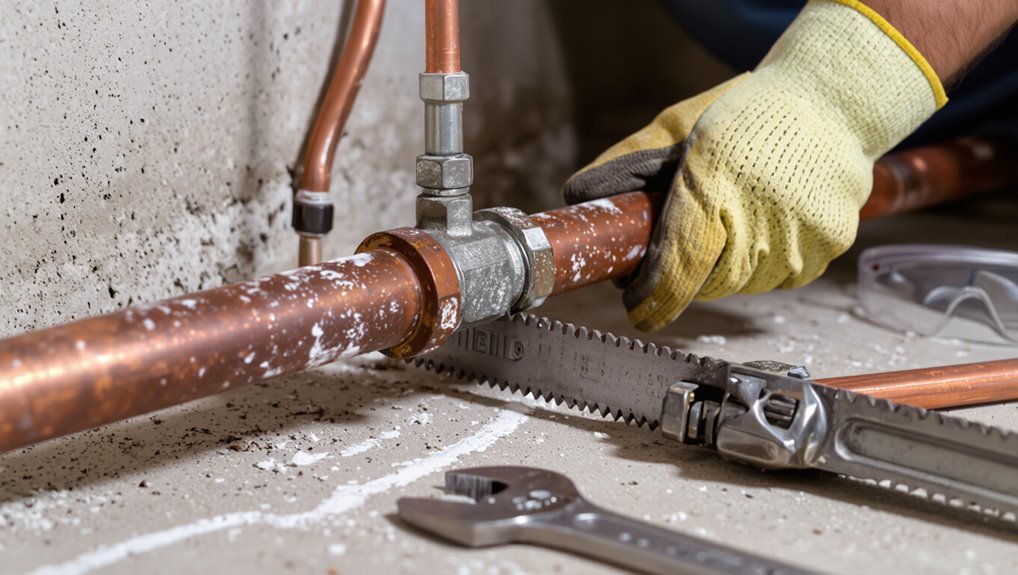
Common reasons to replace galvanized water pipes include visible corrosion, reduced water pressure, and signs of contamination such as discolored or metallic-tasting water.
Indicators that pipes need removal include leaks, rust flakes in fixtures, and persistent low flow despite other fixes.
Decisions about DIY versus hiring a professional rest on the homeowner’s plumbing skill, the scale of work, and local code or safety considerations.
Common reasons for replacement (corrosion, low water pressure, contamination)
Homeowners and plumbers often decide to replace galvanized water pipes when the metal shows significant corrosion, when water flow drops noticeably, or when tests reveal contamination.
These issues indicate declining performance and potential health risks that warrant replacement rather than patching.
Corrosion causes leaks and sediment, low pressure signals internal buildup, and contamination risks lead professionals to recommend replacing pipes and learning how to remove galvanized water pipes safely.
Signs your galvanized pipes need removal
After recognizing corrosion, low pressure, or contamination as reasons to replace galvanized piping, it becomes important to identify the specific signs that indicate removal is necessary.
Visible rust flaking inside or outside pipes, persistent brown or metallic-tasting water, frequent leaks, reduced flow despite valve checks, pressure fluctuations, and repeated clogs or pipe failures all signal that replacement should be planned to prevent structural and health risks.
When to hire a professional versus DIY
When should a professional be called instead of attempting a do-it-yourself replacement?
A professional is advised for extensive corrosion, multiple pipe runs, hidden or inaccessible lines, compromised structural elements, or lead contamination.
Homeowners should also hire pros when lacking tools, permits, or plumbing experience.
DIY is reasonable for small, isolated sections with clear access, standard fittings, and confidence in code compliance.
Safety considerations and legal requirements
Before removing galvanized pipes, the author outlines essential safety considerations including a concise PPE and safety-gear checklist.
They note the need to follow local building codes, obtain any required permits, and comply with disposal regulations for metal and hazardous waste.
The discussion also covers lead and rust contamination risks and practical steps to manage sampling, containment, and cleanup.
Personal protective equipment (PPE) and safety gear checklist
One essential element of removing galvanized water pipes safely is properly selected personal protective equipment (PPE) that protects workers from cuts, eye and respiratory hazards, and lead exposure.
Recommended checklist includes:
- NIOSH-rated respirator, safety goggles, and face shield.
- Cut-resistant gloves, coveralls, and steel-toe boots.
- Lead-safe HEPA vacuum, disposable shoe covers, and labeled waste bags.
Local codes, permits, and disposal regulations
Local jurisdictions establish specific codes, permit requirements, and waste disposal rules that govern the removal of galvanized water pipes. Compliance with these regulations is mandatory to avoid fines, work stoppages, and environmental or health hazards.
Contractors and homeowners must verify permit needs, follow approved removal methods, document inspections, and use licensed waste handlers.
Local landfill and recycling rules determine acceptable disposal or processing pathways.
Lead and rust contamination risks and how to manage them
Permit officers and waste handlers often require attention to contamination risks when galvanized piping is removed, because old zinc coatings and plumber’s solder can contain lead and rust particles that pose health and environmental hazards.
Professionals recommend testing debris for lead, using HEPA vacuums and wet cleanup, sealing and labeling contaminated waste, following local hazardous-waste disposal rules, and notifying authorities if contamination exceeds limits.
Tools, materials, and preparations needed
The next section lists the specific tools and materials required to remove galvanized water pipes safely, including cutters, wrenches, pipe extractors, and appropriate safety gear.
It also compares replacement pipe options and fittings—copper, PEX, and CPVC—while noting temporary shutoff and leak-prevention supplies such as hose bib clamps, caps, and repair tape.
Finally, it covers preparing the work area and protecting fixtures to minimize damage and contain debris.
Essential tools for cutting and removing galvanized pipes
Gather essential tools and materials before beginning any cut or removal of galvanized water pipes to guarantee efficiency and safety. Proper items reduce risk and speed work.
Required equipment includes cutting, gripping, and safety gear. Follow simple sequencing.
- Pipe cutter or reciprocating saw with metal blade
- Pipe wrench set, vise grips, and penetrating oil
- Safety glasses, gloves, respirator, and drop cloth
Replacement pipe options and fittings (copper, PEX, CPVC)
Several viable replacement options exist—copper, PEX, and CPVC—each requiring specific tools, materials, and preparation steps. The practitioner selects tubing, fittings, joining method (solder, crimp, solvent), and support hardware; measures, deburrs, and tests. Proper safety gear and compatible connectors are essential.
| Material | Joining Method | Common Fittings |
|---|---|---|
| Copper | Solder/braze | Elbows, tees, couplers |
| PEX | Crimp/expansion | Manifolds, adapters |
| CPVC | Solvent weld | Cemented tees, unions |
Materials for temporary water shutoff and leak prevention
A compact kit of shutoff and leak-control materials allows a worker to isolate supply lines and contain seepage during galvanized pipe removal.
Essential items include quick-close isolation valves, hose clamps, and sealing materials to manage residual water.
- Ball valve or gate valve for temporary isolation
- Rubber hose, pinch clamp, and shutoff wrench
- Epoxy putty, repair tape, and drip pans
Preparing the work area and protecting fixtures
Begin by clearing the immediate work area and laying down protective coverings to shield fixtures and finishes from debris, water, and tools.
Gather drop cloths, plastic sheeting, painter’s tape, pads, and tubs for parts.
Arrange portable lighting and a wet/dry vacuum.
Prepare basic tools: pipe wrenches, tubing cutter, penetrating oil, pipe caps, bucket, gloves, eye protection, and a respirator if needed.
Step-by-step process to remove a short section of galvanized pipe
The procedure begins by shutting off the water supply and draining the line to prevent spills and pressure.
The installer locates and marks the exact section to remove, then selects an appropriate cutting method—tube cutter, reciprocating saw, or hacksaw—weighing speed versus control and finish.
After cutting, fittings and unions are removed, threads and cut ends are deburred and cleaned, and the pipe is prepared for the new connection.
Shutting off water and draining the system
Shut off the main water supply and relieve pressure before cutting into any galvanized piping.
Next, open all faucets and drain valves served by that line, including the lowest basement spigot, until flow stops.
Close faucets and cap or plug fixtures to prevent backflow.
Use a bucket and rags to catch residual drips.
Verify no water pressure remains before beginning removal.
Locating and marking the section to remove
Locate the exact run of galvanized pipe to be removed and mark both ends clearly before cutting, ensuring measurements account for any fittings and a comfortable working space for a replacement section.
Verify orientation, nearby joints, supports, and clearances. Measure twice, record pipe diameter and thread type, note nearby valves or fixtures, and mark access points for temporary supports and corrosion inspection.
Cutting methods: pipe cutter, reciprocating saw, hacksaw (pros and cons)
Begin by choosing the cutting method best suited to the pipe location, accessibility, and the installer’s tool skill: a wheel-type pipe cutter offers clean, controlled cuts in tight spaces; a reciprocating saw (Sawzall) is fast and effective for awkward or thick sections but risks vibration damage to nearby fittings; a hacksaw is low-cost and precise for short, accessible runs but is slower and more physically demanding.
| Tool | Best use |
|---|---|
| Pipe cutter | Tight spaces, clean edges |
| Reciprocating saw | Thick/awkward sections, quick cuts |
| Hacksaw | Simple jobs, low cost |
Removing fittings, unions, and threaded connections
Loosen fittings systematically, working outward from the section to be removed to isolate unions, threaded joints, and couplings without disturbing adjacent plumbing.
Use two adjustable wrenches to counter-hold and break corrosion, applying penetrating oil and tapping joints if seized.
Remove nuts, slip off unions, and unscrew nipples clockwise if left-hand threads suspected.
Label parts and retain washers for reuse or replacement.
Deburring, cleaning threads, and preparing ends for new connections
After removing the targeted section, the cut ends must be deburred, threads cleaned, and pipe faces prepared to guarantee a reliable seal for new fittings.
Use a round file and reamer to remove burrs, brush threads with a wire brush, and chase damaged threads with a die or tap.
Wipe surfaces, apply thread sealant or tape, and test fit before final assembly.
Replacing longer runs and re-piping strategies
When plans extend beyond a short repair, the homeowner must weigh sectional replacement against a whole-house re-pipe based on pipe condition, budget, and long-term goals.
Converting galvanized runs to copper, PEX, or CPVC requires attention to fittings, dielectric unions, and strategies for routing around branches and confined access areas.
Proper slope, secure supports, and insulation are essential to maintain flow, prevent freezing, and reduce stress on new piping.
Sectional replacement versus whole-house re-pipe
Deciding between sectional replacement and a whole-house re-pipe depends on the extent of corrosion, water quality, and budget constraints.
Sectional work targets specific problematic runs, while full re-piping replaces all galvanized lines to prevent recurring failures.
Sectional replacement minimizes cost and disruption but may leave aging sections intact.
Whole-house re-pipe increases upfront expense yet reduces future leaks, maintenance, and uneven flow risks.
Converting galvanized to modern materials
Following the choice between sectional fixes and a full re-pipe, attention shifts to converting galvanized lines to modern materials by replacing longer runs and planning re-piping strategies.
Evaluate system layout, prioritize continuous copper or PEX trunk lines, minimize joints, and sequence work to limit water outage.
Coordinate shutoffs, venting, and pressure testing.
Document changes and update valves for future maintenance.
Managing branching lines and tricky access areas
Although branching lines and confined access add complexity to a re-pipe, clear planning and targeted techniques keep the work efficient and durable.
Assess branch locations, map shutoffs, and sequence replacements to minimize downtime.
Use flexible connectors, preassembled manifolds, and sectional replacements where full removal is impractical.
Employ access panels and strategic cuts to reach junctions while preserving structure and reducing demolition.
Ensuring proper slope, supports, and insulation
Proper slope, sturdy supports, and adequate insulation form the foundation of a reliable re-pipe, especially on longer runs where small errors compound into leaks, noise, or heat loss.
Install consistent fall for drain lines, maintain 1/2–1 inch per 10 feet where required, space hangers per code, use vibration isolators near equipment, and apply foam insulation to prevent freezing and thermal loss.
Common problems during removal and how to solve them
Removal of galvanized pipes often encounters seized or heavily corroded fittings that require penetrating oil, heat, or cutting to free.
Hidden joints and undocumented connections demand careful tracing and pressure testing before cutting to avoid surprises.
Pinhole leaks and brittle sections are best addressed by isolating and replacing affected runs or using approved coupling and repair methods when full replacement is impractical.
Seized or corroded fittings: techniques to loosen
When fittings seize from rust, mineral buildup, or decades of galvanic corrosion, simple wrenches often fail and improper force can damage pipes or fixtures.
Techniques focus on penetrating looseners, controlled heat, and mechanical advantage without twisting the pipe.
- Apply penetrating oil, wait, then work back and forth.
- Use a heat gun or torch cautiously to expand metal.
- Employ pipe wrenches with cheater bar sparingly.
Hidden joints and unknown connections troubleshooting
Begin by locating and mapping all visible runs and fittings before cutting or applying force, since unseen joints, hidden tees, and buried couplings are the most common surprises that halt a removal job.
Probe walls, follow branch lines, and test with a magnet to detect fittings. When found, expose minimally, loosen adjacent unions, cap or isolate supply lines, and document changes for reassembly.
Dealing with pinhole leaks and brittle pipes
After mapping visible runs and exposing suspect fittings, attention turns to pinhole leaks and brittle sections that commonly appear in older galvanized systems.
Assess severity, isolate affected runs, and drain lines.
Cut back to sound metal, replace with copper or PEX using appropriate connection fittings, or install repair clamps for temporary fixes.
Wear gloves, eye protection, and respirator when cutting corroded pipe.
Testing, finishing, and cleanup
Following re-piping, the installer performs pressure testing and uses leak-detection methods to confirm system integrity.
Removed galvanized pipe is sorted for proper disposal or recycling according to local regulations.
Finally, drywall, insulation, and finishes are restored or replaced to return the space to its pre-work condition.
Pressure testing and leak detection methods
Pressure testing verifies the integrity of replaced or rerouted water lines and identifies leaks before walls and finishes are closed.
A qualified person isolates the system, pressurizes with water or air to specified psi, monitors gauge stability, and inspects joints and fittings.
Complement with electronic leak detectors, soapy solution for small bubbles, or thermal imaging.
Document results and repair any detected leaks promptly.
Proper disposal and recycling of removed galvanized pipe
Collect and segregate removed galvanized pipe by size and condition to streamline disposal and recycling; loose fittings, valves, and heavily corroded sections should be separated from solid, salvageable lengths.
Confirm local regulations for metal disposal, transport materials to authorized scrap yards, and obtain weight receipts. Hazardous debris like lead-containing solder requires special handling.
Recycle usable sections, document receipts, and sanitize work area after removal.
Restoring drywall, insulation, and finishes after re-piping
Begin by testing the new plumbing for leaks and proper flow before sealing any wall or ceiling openings. Once verified, proceed with insulation replacement, drywall repairs, and surface finishing in a systematic order to restore thermal performance and aesthetics.
Inspect cavities for moisture, replace damaged insulation, hang and tape drywall, apply joint compound, sand smooth, prime, and paint.
Clean debris, dispose responsibly, and restore trim.
Time, cost estimates, and project planning
Typical DIY removal projects range from a few hours for a single fixture to several days for whole-house repiping.
A clear cost breakdown—including fittings, replacement pipe, specialty tools, and rental equipment—helps set realistic budgets.
Contingency funds should cover unexpected corrosion, permit or inspection fees, and the option to hire a professional if complications arise.
Typical DIY timeframes by project scope
Most homeowners can expect a range of time and cost outcomes depending on project scope:
Small repairs (single fitting or short run) usually take 2–6 hours and one day for planning.
Moderate jobs (several rooms or branch replacement) require 1–3 days.
Whole-house conversions often span 3–7 days with possible permit delays.
Contingencies for corrosion, access, and drying add variable hours and expenses.
Materials and tool cost breakdown
After outlining timeframes by project scope, attention turns to the materials and tools required for each scenario and how they affect budget and scheduling. Itemize essentials, rental versus purchase choices, and estimate typical costs and time per task to plan efficiently.
| Item | Typical cost/time |
|---|---|
| Pipe cutter | $20 / 0.5–1 hr |
| Replacement pipe | $30–$200 |
| Fittings/sealant | $10–$60 |
| Wrenches/pliers | $15–$50 |
| Safety gear | $10–$40 |
Budgeting for unexpected issues and hiring pros
Contingency planning is essential when replacing galvanized water pipes because hidden corrosion, inaccessible fittings, or unexpected drywall and floor repairs can quickly increase time and cost.
Allocate a 20–40% contingency, estimate 1–3 extra days, and compare quotes from licensed plumbers.
Factor permits, disposal, and potential water damage repairs.
Prioritize hiring professionals for structural or complex joins to avoid costly mistakes.
Tips to extend the life of replacement plumbing
After replacing galvanized pipes, attention to corrosion prevention and appropriate water treatment can greatly prolong system life.
A concise regular maintenance checklist—including leak checks, pressure monitoring, and filter changes—helps catch problems early.
Professional inspections should be scheduled when changes in water quality, persistent leaks, or routine multi-year assessments indicate potential issues.
Corrosion prevention and water treatment options
Several practical steps can greatly reduce corrosion and prolong the life of replacement plumbing: selecting compatible materials, controlling water chemistry, and using targeted inhibitors or filtration.
Specify copper, PEX, or corrosion-resistant fittings; guarantee pH and alkalinity are balanced; reduce dissolved oxygen and chlorides when feasible.
Consider phosphate or silicate inhibitors, water softeners for hardness, and point-of-entry filters to remove particulates that accelerate corrosion.
Regular maintenance checklist
Having selected compatible materials and adjusted water chemistry, a concise maintenance checklist helps preserve those improvements and extend the life of replacement plumbing.
Recommended routine actions include:
- Inspect joints, fittings, and exposed pipes quarterly for leaks, corrosion, and insulation integrity.
- Flush lines annually to remove sediment and test water pressure.
- Replace worn valves, seals, and sacrificial anodes promptly to prevent localized failure.
When to schedule professional inspections
While routine homeowner checks catch many issues, scheduling a professional inspection at key intervals guarantees hidden problems are identified before they cause failures.
A licensed plumber should inspect new replacements after installation, then every 3–5 years thereafter, sooner if water discoloration, pressure loss, leaks, or unusual noises appear.
Inspections focus on joints, corrosion, valve operation, and overall system integrity to extend service life.
Visual guides and resources
The article points readers to recommended step-by-step videos and manufacturer guides for safe removal and installation practices.
It highlights clear diagrams of common joint types and conversion methods to help identify fittings and connection options.
These visual resources are presented as practical references to reduce mistakes and clarify each work stage.
Recommended step-by-step videos and manufacturer guides
Consult reliable visual resources that demonstrate each phase of galvanized pipe removal, from initial inspection and shutoff to cutting, corrosion treatment, and safe disposal.
Recommended sources include manufacturer manuals and professionally produced tutorials that show tool selection, protective measures, and waste handling.
Verify publication dates and credentials.
- Manufacturer installation/removal guides
- Trade association videos
- Certified plumber tutorials
Diagrams for common joint types and conversions
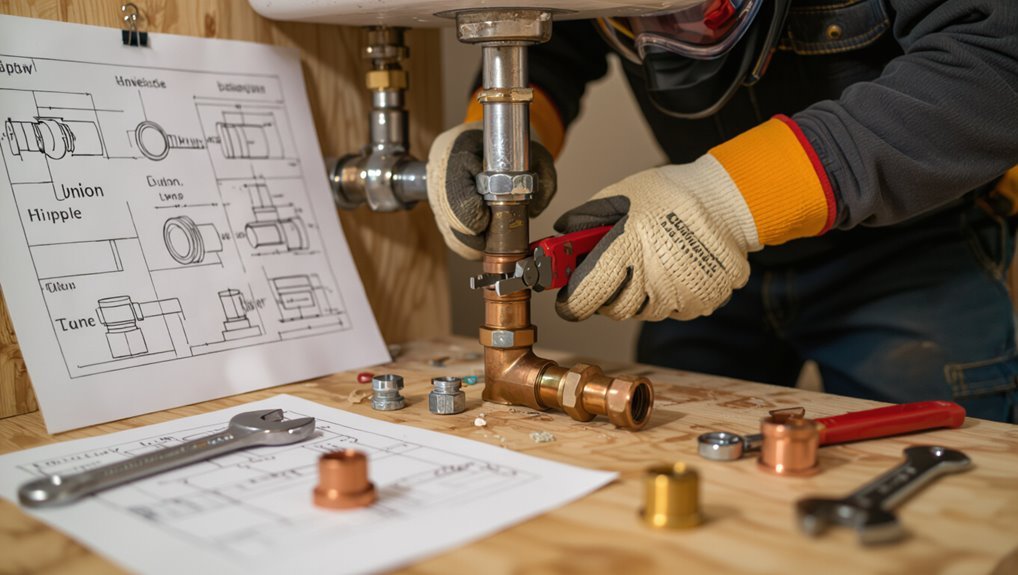
Several clear diagrams illustrate the most common galvanized pipe joints—threaded, soldered (where applicable with connection fittings), compression, and flared—and show standard conversion methods to modern materials like copper, PEX, and CPVC.
Accompanying labels identify fittings, thread direction, sealant types, and torque guidelines. Cross-section views clarify corrosion, cutting points, and adapter placement.
Printable schematics and downloadable PDFs facilitate planning and measurement.
Conclusion
Removing galvanized water pipes can greatly improve water quality and system reliability. Studies show nearly 70% of U.S. homes built before 1960 still contain galvanized plumbing, highlighting widespread need for updates. Homeowners should weigh safety, legal permits, and proper materials when planning removal or re-piping. With the right tools, precautions, and professional help when needed, replacing galvanized lines enhances flow, reduces corrosion risk, and provides long-term peace of mind for household water systems.