How to Use a Hole Saw: Step-by-Step Guide for Perfect Circular Cuts
A hole saw is an essential tool for making precise circular cuts in various materials, including wood, drywall, plastic, metal, and tile. To achieve perfect results, select the appropriate saw and arbor, attach a pilot bit, securely clamp your workpiece, and mark the center. Begin cutting at a low speed with consistent pressure, lubricate when working with metal, and periodically pause to clear debris. Once completed, remove the plug and deburr the edges for a clean finish. For additional assistance, follow safety tips, troubleshooting advice, and material-specific recommendations to enhance your cutting experience.
What a Hole Saw Is and When to Use It
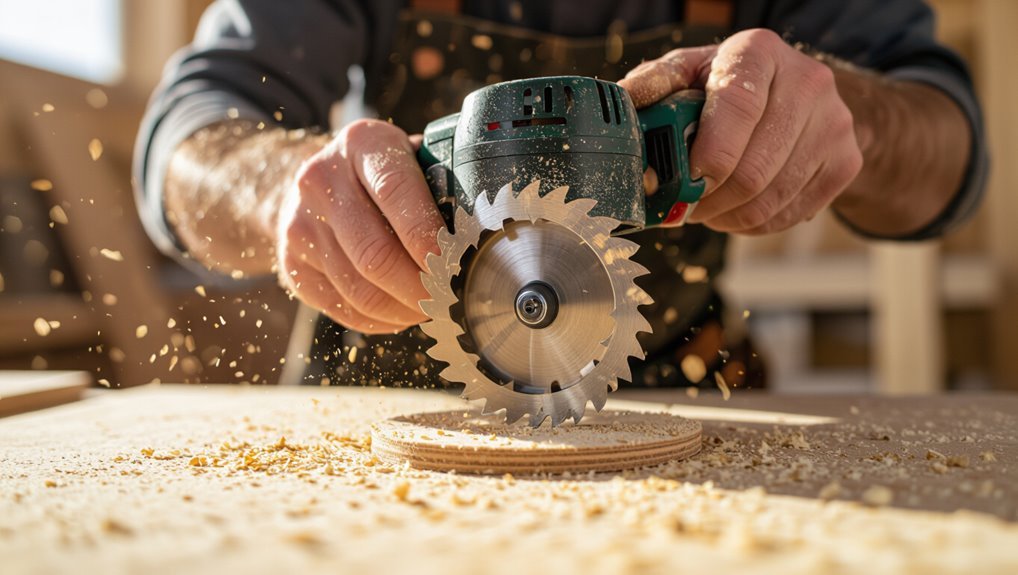
A hole saw is a cylindrical cutting tool composed of a toothed cup, pilot drill, and arbor that mounts to a drill. It is used to cut clean, large-diameter holes in materials such as wood, metal, plastic, and drywall for tasks like installing pipes, wiring, and hardware.
Varieties include bi-metal, carbide, and diamond-cut cups with different arbor systems for quick-change, mandrel, or pilot-only setups.
Definition and basic components of a hole saw
Hole saws are circular cutting tools designed to bore clean, large-diameter holes through materials such as wood, metal, plastic, and drywall.
A typical set includes the cup (saw body), arbor with pilot bit, pilot drill, and optional mandrel or pilot removal tools.
Understanding these components is essential for safe, effective how to use a hole saw and proper assembly before cutting.
Common applications and materials suited for hole saws
Understanding the cup, arbor, and pilot drill helps clarify when a hole saw is the right choice: it excels at cutting large, clean circular holes quickly in materials such as wood, drywall, plastic, thin sheet metal, and some composites.
Typical applications include installing door hardware, running pipes and conduit, creating recessed lighting openings, and cutting access panels in cabinetry and HVAC ducts.
Types of hole saws and arbor systems
Different designs and arbor systems determine a hole saw’s suitability for specific materials and tasks. Choices include bi-metal, carbide-tipped, diamond, and abrasive cups; arbor types vary by pilot bit, quick-change, or mandrel systems.
Selection affects cutting speed, longevity, and hole quality.
- Bi-metal for wood/metal
- Carbide for tough alloys
- Diamond for tile/glass
- Abrasive for masonry
- Quick-change arbors for efficiency
Quick Overview: Steps to Make a Perfect Circular Cut
A concise sequence guides the user from marking the center and securing the material to selecting the correct hole saw, mounting it properly, and cutting at a steady speed.
Before beginning, the user should confirm bit compatibility, clamp the workpiece, wear eye and hearing protection, and clear the area of loose clothing or flammables.
Following these precautions and steps helps guarantee a clean, accurate circular cut.
One-sentence summary of the process
Begin by marking the hole location, securing the workpiece, selecting the correct hole saw and pilot bit, then drill at steady speed with light pressure until the cut completes and the plug is removed.
The process requires proper alignment, pilot guidance, cooling or clearing debris as needed, controlled feed rate, periodic backing out to eject chips, and final deburring for a clean, accurate circular opening.
Safety essentials to observe before starting
Before cutting, the operator should verify that personal protective equipment—safety glasses, hearing protection, and gloves appropriate for the material and tool—is worn. The workpiece is securely clamped, and the drill and hole saw are inspected for damage or dull teeth.
Additionally, check that the pilot bit is properly seated, the drill’s speed and torque settings are suitable, and the workspace is clear of loose objects and bystanders.
The operator confirms power is disconnected when changing accessories, marks the layout, and guarantees adequate lighting and ventilation.
Tools, Accessories, and Safety Gear Needed
The section lists the essential tools and useful accessories for hole-saw work, from drills and arbor kits to pilot bits and lubricants.
It outlines recommended hole-saw sizes and tooth geometries for common materials such as wood, metal, and masonry.
It also specifies required personal protective equipment and a safe, well-arranged workspace to minimize hazards.
Required tools and optional extras
A compact set of core tools and a few optional accessories make hole-saw work efficient and safe: a drill (corded or cordless) with sufficient torque, a matching arbor and pilot bit, a range of saw sizes, clamps to secure the workpiece, and basic measuring and marking tools.
Recommended extras include a lubricant for metal cutting, a mandrel with pilot-bearing, a backing board for clean exit holes, and safety gear—safety glasses, hearing protection, gloves, and a dust mask.
- Drill with compatible arbor
- Assortment of hole saws
- Clamps and backing board
- Lubricant and pilot-bearing mandrel
- Personal protective equipment
Recommended hole saw sizes and material-specific teeth
Once the basic kit and safety gear are assembled, selecting the correct hole saw sizes and tooth types becomes the next priority.
Choose diameters matching fixture holes, conduits, or hardware clearances; common ranges span 3/4″–6″ (20–150mm).
Match teeth to material: bi-metal for wood/metal, carbide-tipped for tile/masonry, and diamond for ceramics/glass.
Pilot bits and arbors must be compatible.
Personal protective equipment and workplace setup
Several essential items protect both operator and workspace when using a hole saw: safety goggles or a full face shield, hearing protection, cut-resistant gloves, and a dust mask or respirator appropriate for the material.
- Stable workbench or clamped workpiece
- Proper drill with torque control
- Pilot bit and arbor
- Vacuum or dust collection
- Fire-resistant cloth for sparks
Preparing the Workpiece and Marking the Cut
Before cutting, the workpiece must be measured and the hole location chosen for fit and clearance.
Center points and pilot holes are marked precisely to guide the hole saw and prevent wandering.
Thin, fragile, or curved materials are clamped and supported to prevent movement and splintering during drilling.
Choosing the correct location and measuring the hole
Careful placement and accurate measurements determine a successful hole saw cut. The operator assesses material layout, avoids structural members, and confirms clearance behind the surface.
Measurements use straight edges and calipers to set diameter, edge distance, and alignment with surrounding features. Templates or masking tape improve visibility.
Final verification guarantees symmetry and functional fit before cutting proceeds.
Techniques for marking center points and pilot holes
Having confirmed placement and clearance, the operator marks the exact center for the hole saw and lays out any required pilot-drill location with deliberate, repeatable methods.
Use a center punch for metal or a sharp awl for wood to prevent bit wandering.
Verify alignment with a ruler or square, remeasure diagonals, and scribe reference circles.
Confirm markings before drilling.
Clamping and supporting thin, fragile, or curved materials
Clamp or brace the workpiece so it cannot flex, shift, or vibrate when the hole saw contacts the material.
Use sacrificial backing boards, double-sided tape, or low-profile clamps for thin sheet, securing both sides to distribute cutting forces.
For fragile or curved pieces, form-mm soft cauls and padded straps to support contours, prevent crushing, and maintain alignment while cutting.
Step-by-Step Procedure for Using a Hole Saw
The procedure begins with selecting the correct arbor and pilot bit, installing them securely, and verifying alignment with marked center points.
Next, a pilot hole is drilled and the hole saw is run at a speed and pressure appropriate to the material while maintaining steady feed, intermittent pauses, and coolant or lubrication as needed.
Finally, the plug is removed and the hole edge is cleaned and deburred to complete the cut.
Selecting and installing the correct arbor and pilot bit
Before cutting, verify the arbor and pilot bit match the hole saw and the drill: the arbor’s shank size must fit the drill chuck, its pilot bit should be the proper length and diameter for centering, and any quick-change or hex fittings must be compatible with the saw’s mounting holes.
Tighten arbor threads or locking pins securely, check pilot bit straightness, and guarantee the arbor seats fully in the saw before use.
Drilling pilot holes and aligning the saw
With the arbor and pilot bit securely installed and checked for straightness, the operator marks the cut center and positions the drill so the pilot bit sits precisely on that mark.
They apply steady pressure, start the drill to create a shallow pilot hole, confirm alignment, then resume cutting.
Frequent checks guarantee the saw remains square and the pilot controls direction throughout the cut.
Recommended drill speed and pressure for different materials
Speeds and pressure vary by material: harder substrates call for slower RPMs and firm, steady feed, while softer woods and plastics allow higher speeds with lighter, consistent pressure to prevent tear-out or melting. Recommended settings guide selection by material and hole-saw size; adjust based on pilot-bit stability and saw condition.
| Material | Suggested RPM/Pressure |
|---|---|
| Mild steel | Low RPM / Firm |
| Hardwood | Medium RPM / Moderate |
Cutting technique: feed rate, cooling/lubrication, and pause strategy
After selecting an appropriate RPM and applying steady pressure for the material at hand, control of feed rate, cooling, and strategic pauses governs cut quality and tool life.
The operator should feed steadily—neither forcing nor stalling—apply coolant or lubricant appropriate to the substrate, and pause periodically to clear chips and let the bit cool.
Short, regular breaks prevent overheating and extend cutter life.
Removing the cut plug and finishing the edge
Once the hole is complete, remove the arbor and extract the cut plug by pulling it straight out or by pushing it from the back side if accessible.
Deburr the rim with a countersink, file, or sandpaper to eliminate sharp edges.
Inspect for splintering; apply wood filler, metal deburring compound, or paint as needed.
Clean debris and verify fit before final assembly.
Material-Specific Instructions and Adjustments
Different materials require specific hole saw choices and technique adjustments to produce clean, safe cuts.
For wood and plywood, anti-splintering backing and moderate speed help; metal needs cutting fluid and slower feeds or a drill press for stability.
Plastics benefit from low speed and backing to prevent cracking, while tile, masonry, and drywall require diamond or carbide blades and appropriate anchors or inserts.
Cutting wood and plywood: tips to prevent splintering
Prevent splintering by stabilizing the workpiece and scoring the cut line before drilling: clamp the wood to a sacrificial backing board, mark the hole precisely, and trace the perimeter with a sharp utility knife or thin saw to sever surface fibers.
Use a sharp, fine-tooth hole saw, drill slowly near the exit, support the waste piece, and sand edges lightly to remove tear-out for a clean finish.
Cutting metal: coolant use and drill press considerations
When cutting metal with a hole saw, apply a steady coolant and use a drill press whenever possible to control speed, reduce heat, and extend tool life.
Select a bi-metal or carbide hole saw, clamp work securely, and set slow RPMs.
Periodically withdraw the saw to clear chips and replenish coolant.
Monitor cutting temperature and feed gently to prevent tooth dulling or workpiece distortion.
Cutting plastic and acrylic: avoiding cracking and melting
Cutting plastic and acrylic requires low speeds, sharp teeth, and gentle feed to prevent melting, chipping, or cracking. Selecting a fine-toothed hole saw, supporting the workpiece close to the cut, and using backing material will minimize vibration and burrs.
Pilot holes, intermittent cutting to clear chips, lubricant like water for heat control, and slow, steady pressure produce clean edges. Finish with fine sanding.
Cutting tile, masonry, and drywall: special blades and anchors
Select blades and techniques that match the material: diamond-grit or carbide-tipped hole saws with water cooling for ceramic and porcelain tile, masonry hole saws and carbide teeth for brick and concrete, and fine-toothed bi-metal saws for drywall.
Use low speed, steady pressure, and continuous cooling on hard materials.
Anchor drywall with backing or a scrap piece to prevent tear-out; secure masonry anchors after drilling.
Common Problems and How to Fix Them
Common problems with hole saw use include binding or overheating, broken pilot bits or stripped arbors, uneven or off-center cuts, and stuck saws or plugs.
The following section outlines clear causes and practical fixes for each issue, such as slowing feed rate and using cutting fluid to prevent heat buildup or replacing a damaged arbor.
Practical removal techniques and alignment checks are also described to restore accuracy and retrieve jammed pieces.
Preventing the hole saw from binding or overheating
Preventing a hole saw from binding or overheating requires attention to feed rate, lubrication, and chip removal to maintain safe cutting temperatures and prevent the tool from stalling.
Operators should use steady, moderate pressure, back out periodically to clear chips, apply cutting oil for metal or coolant for harder materials, and reduce RPM on large diameters.
Inspect teeth and pause if smoke or burning odor appears.
Dealing with a broken pilot bit or stripped arbor
Even with proper feed, lubrication, and chip clearing, pilot bits can snap and arbors can strip under heavy load or from wear.
When a pilot breaks, remove remaining shank with pliers or an easy-out; replace with correct-size bit.
For a stripped arbor, inspect threads/keyways; replace the arbor or use a compatible adapter.
Always verify compatibility and torque limits before reuse.
Fixes for uneven cuts, wobble, or off-center holes
Addressing uneven cuts, wobble, and off-center holes starts with diagnosing the tool and setup to identify the root cause—loose arbor, dull or misaligned pilot bit, worn mandrel, improper clamping, or unstable workpiece.
Tighten or replace the arbor, sharpen or realign the pilot, replace a worn mandrel, secure the workpiece with clamps or a jig, use a drill press for precision, and test on scrap before proceeding.
How to remove a stuck hole saw or plug
When a hole saw binds in the workpiece or leaves a stubborn plug lodged in its cup, removing it quickly and safely prevents damage to the tool and the material.
Stop drilling, secure the work, and reverse the arbor if possible. Use pliers or a screwdriver to pry out the plug; for metal, tap the arbor gently to loosen debris.
Inspect and clean before reuse.
Maintenance, Sharpening, and When to Replace a Hole Saw
Regular cleaning of teeth and proper storage in a dry, organized case extend a hole saw’s service life and prevent rust.
Visible wear—rounded or chipped teeth, excessive wobble, burning or slow cutting—indicates dulling or failure.
Simple tooth filing or professional sharpening can restore many bi-metal saws, but severe damage or carbide tooth loss requires replacement.
Cleaning and storage best practices
Keep hole saws clean and dry after each use to prevent rust, resin build-up, and premature wear.
Remove debris with a brush, wipe teeth and arbor with a lightly oiled cloth, and clear cooling holes.
Store saws vertically or in labeled cases to protect teeth and maintain organization.
Inspect for corrosion before storage and rotate stock to use older units first.
Signs a hole saw has dulled or failed
Inspecting a hole saw for signs of dulling or failure helps prevent poor cuts, motor strain, and safety hazards.
Indicators include slow, uneven cutting; excessive chatter or vibration; burning, melting, or discoloration on cut edges; increased feed pressure; visible rounded, chipped, or missing teeth; excessive burrs or tearing on material; and unusual motor overheating or current draw.
Regular checks catch issues early.
Sharpening options and when to replace
When a hole saw begins to show wear, users must decide whether to sharpen the teeth or replace the tool based on material, tooth condition, and cost-effectiveness. Light dulling or minor nicks can often be remedied with a file or specialized diamond wheel, while broken, excessively rounded, or missing teeth, significant blade deformation, or carbide tooth failure warrant replacement.
- File for minor dulling
- Diamond wheel for carbide tips
- Re-joint tooth angles sparingly
- Replace if teeth missing or deformed
- Keep spare saws for tough materials
Time-Saving Techniques and Professional Tips
Experienced users rely on jigs, guides, and drill presses to guarantee repeatable, precise hole placement.
For production or repetitive cutting, workflow strategies—such as staging material, using consistent feeds, and selecting the right arbor—significantly reduce cycle time.
Quality accessories like pilot bits, anti‑kickback arbors, and lubrication systems further speed cutting and improve finish.
Using jigs, guides, and drill presses for precision
Clamp a simple jig or align a guide and the cut centers itself, turning a rough hand-held process into a repeatable operation.
Using a drill press eliminates drift, guarantees perpendicularity, and controls depth. Fixtures hold workpieces steady; bushings and pilot bits maintain start accuracy.
Select appropriate feed, speed, and support under the work to prevent breakout, vibration, and uneven cuts for consistently precise holes.
Best practices for repetitive cutting and production work
Streamline repetitive hole-saw work by establishing a consistent setup: dedicate one or more jigs or templates to each frequent size and material, label them, and pre-set ideal speeds, pilot bits, and backing supports so operators can swap fixtures without time-consuming adjustments.
Maintain sharp cutters, inspect arbors, and schedule tool changes.
Batch parts, mark feed depths, use clamps and waste boards, and record cycle times for continuous improvement.
Accessories that improve speed and cut quality
Enhance speed and cut quality by adding targeted accessories to the hole-saw setup: sacrificial backing boards to prevent blowout, pilot-bit extensions and quick-change arbors for faster tool swaps, lubrication feeds or coolant pads for cleaner cuts in metal, and depth stops or collars to guarantee consistent hole depth.
- Arbor wrenches for rapid tightening
- Anti-vibration pads
- Chip-ejection drills
- Cooling/oil reservoirs
- Magnetic work clamps
Comparison of Popular Hole Saw Brands and Kits
When choosing between budget and professional-grade hole saws, the distinctions in material quality, durability, and included accessories become decisive. Buyers should prioritize tooth type, arbor compatibility, and case completeness to match project demands. The table below highlights typical trade-offs to guide selection.
| Feature | Budget Kits | Professional Kits |
|---|---|---|
| Material quality | Lower-cost steels | High-speed or bi-metal |
| Durability | Moderate | High |
| Included accessories | Limited | Extensive |
| Typical price range | Low | Higher |
Budget vs. professional-grade options
Choosing between budget and professional-grade hole saws hinges on planned use, frequency, and material demands: casual DIYers may find economy kits adequate for occasional cuts in soft wood or thin drywall, while contractors and heavy users benefit from premium bi-metal or carbide-tipped sets that hold teeth longer, cut cleaner, and resist heat.
Price reflects durability, warranty, and included arbors; match choice to workload.
What to look for when buying a hole saw kit
Which features matter most depends on the user’s applications and budget: a good hole saw kit balances blade material (bi‑metal vs. carbide), tooth geometry, range of diameters, arbor quality, pilot drill robustness, and case organization.
Compare durability, cutting speed, and compatibility with cordless or corded drills. Evaluate brand warranty, spare parts availability, and user reviews to match performance needs and long‑term value.
Suggested Projects and Practical Examples
Suggested projects highlight typical hole saw uses such as installing door hardware and cutting openings for recessed lighting.
Practical examples also cover plumbing and electrical through-panel holes, with attention to hole placement and material considerations.
A few craft and woodworking project examples conclude with recommended speeds, pilot bit choices, and backing techniques for clean cuts.
Installing door hardware and recessed lighting
Begin by planning the cut locations and verifying clearances before fitting a hole saw for door hardware or recessed lighting; precise measurements and knowledge of what lies behind the surface prevent misaligned locks or damaged wiring.
Use templates, pilot bits, and appropriate saw diameters, clamping panels, and steady drill speed.
Check edge finish, test-fit hardware or housings, and adjust mounting depth before final installation.
Plumbing and electrical through-panel holes
Cut precise through-panel holes for plumbing and electrical runs by mapping routes, verifying back-side clearances, and selecting correct hole-saw diameters for pipe or conduit sizes.
Mark center points, use pilot bits for stability, and clamp panels to prevent tear-out.
Deburr edges, fit sleeves or grommets for protection, and confirm sealant or firestopping requirements.
Test fit prior to final assembly.
Craft and woodworking project examples with recommended settings
Several small projects illustrate how hole saws transform ordinary boards into functional and decorative pieces: a dowel-joint jig with 3/8″ and 1/2″ holes, a recessed bottle-opener mounted in a 1 1/4″ opening, and a set of wooden planters using 2″ and 3″ drainage ports.
Recommended settings: slow feed, 1,500–2,500 RPM for hardwoods, 2,500–3,500 RPM for softwoods, bi-metal or carbide teeth.
Quick Troubleshooting Checklist Before You Restart a Job
Before restarting a hole-saw job, a concise troubleshooting checklist guarantees safety, tool integrity, and correct setup. The operator should confirm blade sharpness and seating, inspect arbor and pilot bit for wear or looseness, verify correct speeds and feed rates for the material, check for clogged teeth or cooling/lubrication issues, and make certain the workpiece is securely clamped and aligned.
- Re-seat arbor and tighten fittings
- Replace dull saw
- Clear chips and debris
- Adjust speed/feed to material
- Verify coolant or lubricant flow
Conclusion
A properly used hole saw transforms awkward circular cuts into quick, precise results. Studies show professionals complete hole-saw cuts up to 40% faster than with alternative methods, underscoring efficiency gains for both DIYers and tradespeople. With correct setup, pilot drilling, steady feed, and cooling pauses, users minimize tear-out and binding. Mastery of basic safety, appropriate arbor selection, and blade choice guarantees consistent, clean holes across wood, metal, and composite materials—making hole saws indispensable.