How to Replace a Water Pump: Step-by-Step Guide for DIY Repairs and Cost Saving Tips
If you’re dealing with a failing water pump—characterized by leaks, overheating, noise, or coolant loss—it’s crucial to replace it to prevent engine damage. This guide outlines a straightforward, step-by-step process for DIY repairs, helping you save on labor costs while ensuring your vehicle runs smoothly.
Essential Tools and Materials:
- Sockets
- Torque wrench
- Gasket kit
- Fresh coolant
- Sealant
- Safety gear
Replacement Steps:
- Drain and Label the Cooling System: Ensure you properly drain the coolant and label hoses for easy reassembly.
- Remove Belts and Covers: Carefully take off any belts and covers obstructing access to the water pump.
- Replace the Pump: Remove the old pump and install the new one with a clean gasket.
- Torque Bolts in Sequence: Follow the proper torque specifications and sequence for securing the pump.
- Refill and Bleed the Cooling System: Carefully refill the system with fresh coolant and bleed out any air pockets.
- Test for Leaks and Noise: Start the engine and check for any leaks or unusual noises.
By following these steps, you can efficiently replace your water pump and keep your vehicle in optimal condition. For troubleshooting advice and additional cost-saving tips, continue reading our detailed guide.
What Replacing a Water Pump Involves and Why You Might Do It
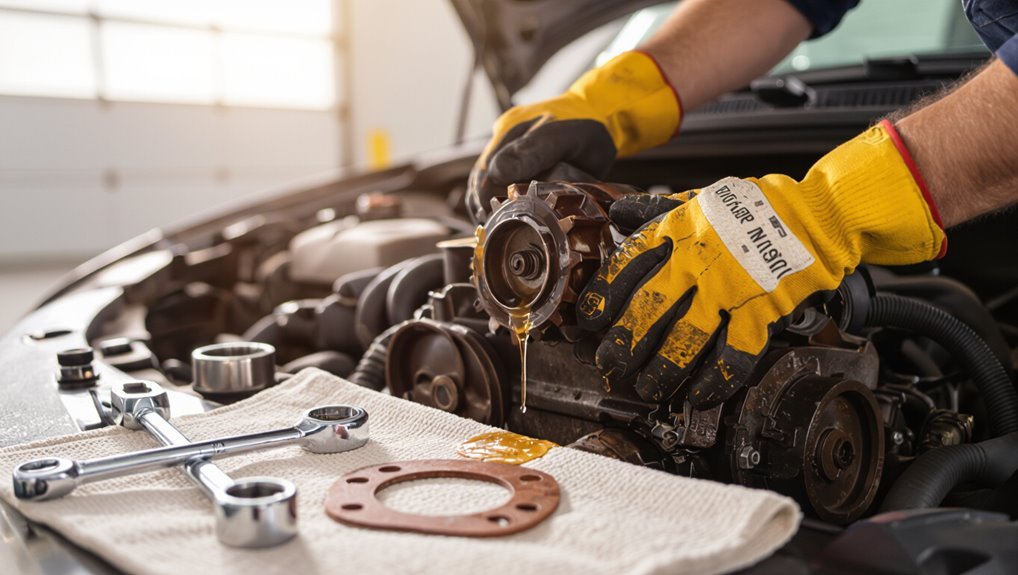
A failing water pump often reveals itself through coolant leaks, overheating, grinding noises, or steam from the engine bay.
Ignoring these signs can lead to engine damage, head gasket failure, or stranded vehicles, so timely replacement mitigates those risks.
Typical pumps vary by make — mechanical, electric, or timing-belt-driven — and their locations differ between front-mounted accessory drives and inboard engine positions.
Signs your vehicle needs a new water pump
Several clear symptoms indicate when a vehicle’s water pump is failing: coolant leaks beneath the engine, persistent engine overheating, a grinding or whining noise from the front of the engine, or visible coolant residue around the pump housing.
Other signs include steam from the radiator, low coolant levels without visible external leaks, and a wobbling pulley.
These cues prompt owners to learn how to replace a water pump.
Risks of delaying replacement
Waiting to replace a failing water pump increases the chance of cascading engine damage: continued coolant loss and overheats can warp the cylinder head gasket or cause seized pistons, while a broken pump pulley or bearing can send debris into the timing belt/chain system and trigger sudden breakdowns.
Delays also raise repair complexity and cost, risk roadside failures, and may necessitate replacing additional components like hoses, belts, and coolant.
Overview of typical water pump types and locations by vehicle
Water pumps come in distinct designs—external, internal/inline, and electric—and their placement varies by engine layout and drive system, which affects accessibility and replacement complexity.
External pumps mount to the front of the block on many inline engines. Internal/inline units sit behind timing covers on transverse or V engines.
Electric pumps appear in hybrids and some modern cars, often located near the coolant reservoir or in the heater circuit.
Tools, Parts, and Materials You’ll Need
The following section lists the essential and optional tools a DIYer will want on hand—wrenches, sockets, pliers, a torque wrench, and lift supports—plus helpful extras like a pulley puller or angle grinder.
It also covers parts and consumables to procure before starting: the correct replacement water pump, new gasket or O-ring, fresh coolant, mounting bolts, and appropriate sealant.
Guidance is provided on selecting a pump that matches the vehicle’s make, model, engine code, and OEM or equivalent specifications.
Essential tools for a DIY water pump replacement
Gathering the right tools and parts before beginning a DIY water pump replacement prevents delays and reduces the chance of mistakes.
Essential items focus on safe removal and precise installation, ensuring proper sealing and torque.
- Socket set with extensions
- Torque wrench
- Gasket scraper and sealant
- Pliers and hose clamps
- Drain pan and replacement gasket
Optional tools that make the job easier
Alongside the core kit already listed, a handful of optional tools can streamline removal and installation, save time, and reduce frustration.
Useful extras include a cordless impact wrench for stubborn bolts, a torque wrench for final tightening, a pulley puller, a gasket scraper with plastic blade, a seal driver, hose clamp pliers, and a small inspection mirror with LED to view tight spaces and check clearances.
Parts and consumables to buy (water pump, gasket, coolant, bolts, sealant)
A concise list of required parts and consumables guarantees the job proceeds without interruption.
The installer should obtain a replacement water pump (OEM or equivalent), a new gasket or O-ring, appropriate coolant or antifreeze, fresh mounting bolts or studs, and high-temperature sealant where specified.
Include threadlocker for fasteners, a drain pan, and shop rags to handle spills and secure a proper, leak-free installation.
How to choose the correct water pump for your vehicle
Select the exact water pump specified for the vehicle’s make, model, year, engine code, and drivetrain configuration to guarantee fit and function. Verify OEM versus aftermarket, bearing quality, impeller material, and warranty. Cross-check part numbers and supplier return policies. Inspect included gasket, bolts, and sealant compatibility before purchase.
| Item | Check | Importance |
|---|---|---|
| Part number | Match VIN | High |
| Impeller | Metal/plastic | Medium |
| Warranty | Length/coverage | High |
| Fitment | Test fit | Critical |
Preparation Before You Start
Before beginning the replacement, the mechanic verifies safety measures and arranges a clean, well-lit workspace with appropriate jack stands and protective gear.
They consult the vehicle’s repair manual or service guide for model‑specific procedures, then drain the cooling system while deciding whether to capture coolant for reuse or dispose of it according to local regulations.
Finally, they mark and photograph belt routing and hose connections to guarantee correct reassembly.
Safety precautions and workspace setup
Clear the work area and gather protective gear, tools, and fluids so the job can proceed safely and without interruption.
The technician guarantees vehicle is on level ground, parking brake engaged, and battery disconnected.
Use jack stands, wheel chocks, gloves, eye protection, and appropriate clothing.
Ventilate enclosed spaces and handle coolant with spill containment.
Keep a fire extinguisher and first-aid kit nearby.
How to obtain and read your vehicle’s repair manual or service guide
How should the technician proceed with documentation?
The technician obtains the factory service manual or vehicle-specific repair guide—via dealer, publisher, or reputable online subscription—and locates water-pump procedures, torque specs, gasket diagrams, and special-tools notes.
Read targeted sections, mark steps, and cross-reference engine codes.
Print or annotate critical pages for the job to guarantee correct disassembly, reassembly, and specification adherence.
Draining coolant and preserving fluid for reuse vs. disposal
Begin by depressurizing and cooling the system. Then collect coolant using a proper drain pan or recovery bottle to prevent spills and contamination.
Inspect fluid for clarity, color, and debris; reuse only if uncontaminated and matching manufacturer specs.
Store reclaimed coolant in labeled, sealed containers.
If disposal is required, follow local hazardous-waste regulations or take to an authorized recycling facility.
Marking and photographing belt routing and hose connections
After draining and either saving or properly disposing of coolant, attention turns to documenting belt routing and hose connections before disassembly.
The mechanic labels hoses and clamps with tape and a marker, traces belt path, and takes multiple clear photos from different angles.
Notes include clamp positions, hose orientation, and accessory alignment to guarantee accurate reassembly and prevent leaks or misrouting.
Step-by-Step Water Pump Replacement Procedure
The replacement procedure proceeds through a clear sequence of tasks to guarantee safe, effective removal and installation.
First, obstructing components such as belts, fan, shroud, and pulleys are removed and the cooling system is drained and isolated.
Next, hoses and ancillary parts are detached, the old pump is unbolted and removed, and mating surfaces are cleaned while surrounding parts are inspected.
Step 1 Remove components blocking access (belts, fan, shroud, pulleys)
To access the water pump, remove any components that obstruct the front of the engine—typically the drive belts, cooling fan and shroud, and any accessory pulleys—so the pump housing and mounting bolts are fully exposed.
Disconnect belt tensioners, note belt routing, and unbolt fan/clutch assemblies as required.
Store fasteners separately and label parts. Work methodically to prevent interference during pump removal.
Step 2 Drain and isolate the cooling system
Begin by relieving pressure and draining the coolant to prevent spills and protect the engine.
Then close the radiator cap, open the drain petcock or remove the lower radiator hose and collect coolant in a suitable container.
Cap or plug openings, disconnect the battery to prevent electrical hazards, and label hoses or components to maintain system isolation before proceeding to pump removal.
Step 3 Detach hoses and ancillary components from the pump
Unfasten clamps and connectors securing coolant hoses, then remove any drive belts, timing covers, or accessory brackets that obstruct pump access.
Label and cap disconnected hoses to prevent contamination and coolant loss.
Detach sensor plugs, bypass hoses, and heater lines as applicable.
Keep fasteners organized by location.
Inspect removed components for wear or damage and set aside parts needed for reuse or replacement.
Step 4 Unbolt and remove the old water pump safely
With hoses labeled and ancillary parts set aside, the technician proceeds to free the pump from the engine block.
Bolts are removed in a planned sequence, retaining hardware in a labeled tray. The unit is gently rocked to break the seal, then lifted straight outward to avoid damaging mounting surfaces.
Any residual coolant is caught with a pan and disposed of properly.
Step 5 Clean mating surfaces and inspect surrounding parts
After removing the pump, the technician scrapes and cleans the mating surfaces to guarantee a flat, contaminant-free seal.
Residual gasket material, corrosion and adhesive are removed with appropriate tools and solvent.
Adjacent components—pulley, thermostat housing, hoses, and mounting bolts—are inspected for wear, leaks or damage.
Any warped or compromised parts are noted for replacement before reassembly.
Step 6 Install the new pump, gasket, and torque bolts to spec
Once the mating surfaces are clean and surrounding parts verified, the technician positions the new gasket and water pump, ensuring alignment of dowel pins and bolt holes before seating the unit.
Bolts are hand-started, then tightened in the manufacturer’s specified crisscross pattern to the correct torque with a calibrated wrench.
Threadlocker used only if specified; excess sealant avoided.
Step 7 Reinstall removed components and re-tension belts
Begin reassembling the engine bay by reinstalling all components removed to access the water pump, following the reverse order of disassembly and any reference marks previously made.
Refit pulleys, brackets, and hoses, torquing bolts to specified values.
Reinstall the serpentine or timing belt, ensuring correct alignment and tension per manufacturer procedure.
Double-check fasteners, clips, and routing before proceeding to coolant service.
Step 8 Refill coolant, bleed the cooling system, and check for leaks
Refill the cooling system with the correct type and mixture of coolant, using a clean funnel to prevent contamination, and top up the overflow reservoir to the recommended level.
Open bleed valves or run heater on high to purge air, cycling thermostat if applicable.
Monitor for dripping at pump, hoses, and fittings.
Tighten any weeping connections and recheck fluid level after bleeding is complete.
Step 9 Post-installation checks and test drive procedures
Power the engine and observe system behavior before leaving the work area: verify coolant level, confirm the heater produces hot air, and watch for leaks or abnormal noises while the engine reaches normal operating temperature.
After warm-up, shut off, recheck fasteners and hose clamps, top off coolant if needed, then perform a short test drive monitoring temperature, smell, and undercarriage for leaks; reinspect afterward.
Common Complications and How to Troubleshoot Them
After a water pump replacement, a handful of recurring issues commonly appear and require methodical troubleshooting.
Typical problems include post-installation leaks and their seals or gasket causes, overheating that needs step-by-step diagnosis, noisy bearings or impeller faults, and belt alignment or tension errors.
Each issue can be isolated by inspecting seals and fasteners, checking coolant flow and thermostat operation, listening for bearing noise and shaft play, and verifying pulley alignment and belt tension.
Leaks after installation causes and fixes
Leaks discovered after a water pump installation commonly indicate issues with sealing surfaces, gasket alignment, or fastener torque.
Inspect mating surfaces for warping or debris, verify gasket or O‑ring seating, and confirm bolts meet manufacturer torque specs.
Check hose clamps, inlet/outlet fittings, and coolant passage plugs.
Repair or replace damaged seals, retorque fasteners, and pressure-test the system to confirm the leak is resolved.
Overheating after replacement diagnostic steps
A pump that appears sound externally can still contribute to engine overheating, so technicians should proceed from visible leak checks to thermal and flow diagnostics when high temperature is reported.
Inspect coolant level and air pockets, verify correct belt tension and pulley alignment, confirm thermostat operation and radiator cap pressure, use infrared or coolant flow tests to detect circulation problems, and pressure-test the system for hidden leaks.
Noisy pump or bearing issues what to inspect
Several telltale noises—grinding, whining, or rhythmic clunking—indicate water pump or bearing problems and warrant immediate inspection.
Check for play at the pulley, wobble in the shaft, and metal shavings in coolant. Inspect seals for leakage and corrosion on housing.
Verify impeller condition and adjacent mounting bolts for looseness. Replace bearings or the pump if wear, scoring, or persistent vibration is found.
Belt alignment and tension problems
Many belt-related failures stem from improper alignment or incorrect tension, which cause premature wear, squeal, slipping, or bearing overload.
Inspect pulleys for lateral offset and wobble, check belt routing, and measure tension against manufacturer specs.
Adjust idler or tensioner, replace glazed or cracked belts, and realign pulleys using shims or repositioning.
Verify operation under load to confirm noise and slip elimination.
Cost Savings, Time Estimates, and When to Hire a Pro
A concise cost and time overview helps readers weigh DIY savings against professional fees, with a breakdown of typical parts and labor costs and estimates tailored to beginner, intermediate, and expert skill levels.
Practical tips for sourcing parts and minimizing expenses—such as comparing suppliers, reusing compatible components, and buying quality aftermarket items—can reduce overall outlay.
Guidance is provided on when to hire a pro, including complex vehicles, limited tools or workspace, diagnostic uncertainty, or tight timelines.
Typical parts and DIY labor cost breakdown
Estimate parts and labor separately to understand true replacement costs. Typical parts: pump, gasket, coolant; DIY labor time varies by model. Budget for tools and unexpected seals. Consider professional help for complex timing or leaking systems.
| Item | Typical Cost | Notes |
|---|---|---|
| Pump | $50–$300 | Brand/model dependent |
| Gasket | $5–$30 | Replace every time |
| Coolant | $10–$40 | Flush recommended |
Time required by experience level: beginner, intermediate, expert
When evaluating water pump replacement, experience level strongly influences time, cost savings, and risk.
Beginners typically take substantially longer and may incur extra expenses for tools and mistakes.
Intermediates work more efficiently with moderate savings.
Experts complete the job fastest with the least ancillary cost.
Typical time ranges: beginners 6–12 hours, intermediates 3–6 hours, experts 1–3 hours.
Cost-saving tips when buying parts and supplies
After outlining how experience level affects time and risk, the focus shifts to minimizing parts and supply costs without sacrificing reliability.
Compare OEM versus aftermarket warranties, source quality used or remanufactured pumps, buy gasket and seal kits in bundles, and use common tools already owned.
Track prices across suppliers, factor shipping and return policies, and prioritize critical components while avoiding false economy on seals.
Scenarios when professional service is recommended
Who should consider hiring a professional depends on vehicle complexity, the owner’s skill level, and the potential cost of mistakes.
Professionals are recommended for modern engines with tight access, timing-belt water pumps, or integrated assemblies.
When time constraints, lack of tools, or diagnostic uncertainty exist, paid service often saves money long-term.
Obtain written estimates and warranty details before deciding.
Maintenance Tips to Extend Water Pump Life
Regular maintenance can extend a water pump’s lifespan by using the correct coolant type and following recommended replacement intervals.
Owners should monitor pump performance between services by checking for leaks, unusual noises, and fluctuations in temperature or pressure.
Inspecting or proactively replacing related components—thermostat, belts, and hoses—helps prevent premature pump failure.
Coolant types and replacement intervals
Because coolant chemistry directly affects corrosion protection, freezing point, and heat transfer, choosing the correct type and replacing it at proper intervals is essential to water pump longevity.
OEM-recommended coolant formulations and proper concentration prevent galvanic corrosion and seal degradation. Typical replacement intervals range from 2–5 years or 30,000–60,000 miles depending on type; follow manufacturer schedules and inspect for contamination or loss of inhibitor strength.
How to monitor pump performance between services
Monitor bearing noise, shaft play, and coolant flow visually and audibly between scheduled services to catch early signs of deterioration.
Inspect for leaks, vibration, and unusual temperature changes during operation. Record observations and compare over time to identify trends.
Check pulley alignment and spin resistance with the engine off. Promptly address anomalies to prevent failure and reduce repair complexity.
Related components to inspect or replace proactively (thermostat, belts, hoses)
Inspect related cooling-system components—thermostat, drive belts, and hoses—at the same intervals used for water pump checks, since their failure can accelerate pump wear or mask pump issues.
Verify thermostat operation, replace if sticking; check belts for cracks, glazing, proper tension; examine hoses for soft spots, bulges, or leaks and replace aged rubber.
Proactive replacement prevents cascading failures and reduces labor redundancy.
Checklist for Completing the Job
Before reassembly, a concise pre-installation checklist guarantees all parts, seals, and tools are present and the mounting surface is clean.
After installation, a final inspection and test checklist verifies leak-free connections, correct belt tension or drive alignment, and proper pump operation under load.
Completing both checklists reduces the chance of premature failure and confirms the repair meets safety and performance expectations.
Pre-installation checklist
Gather the necessary tools, replacement parts, and safety gear and confirm that the vehicle is on a level surface with the engine cool and the battery disconnected.
The technician verifies part compatibility, orders fresh coolant, prepares drain pans, reviews the service manual, and sets aside replacement gaskets and seals.
- Confirm part number and fitment
- Fresh coolant on hand
- Drain pans and rags ready
- Service manual available
- New gaskets and fasteners
Final inspection and test checklist
With the pump installed and cooling system reassembled, the technician proceeds to the final inspection and test checklist to confirm proper operation and leak-free assembly.
- Verify coolant level and correct mixture.
- Start engine; watch for unusual noises.
- Inspect for leaks at pump, hoses, and gasket.
- Confirm thermostat opens and temperature stabilizes.
- Road-test vehicle; recheck fittings and coolant after cooldown.
Conclusion
Replacing a water pump can transform a leaky, inefficient system into a reliable workhorse; confidently following the steps outlined yields real savings. One striking stat: properly maintained pumps can cut energy use by up to 20%, enough to power an average home’s refrigerator for nearly a month each year. With the right tools, vigilance for common issues, and routine care, DIY replacement becomes a practical investment in durability, efficiency, and long-term cost control.