How to Adjust Gas Regulator Safely: Step-by-Step Guide for Home & RV Use
To safely adjust a gas regulator for home or RV use, follow these key steps:
- Isolate the Gas Supply: Turn off the gas supply to prevent any leaks.
- Wear Personal Protective Equipment (PPE): Use gloves and safety goggles to protect yourself during the process.
- Ventilate the Area: Ensure proper airflow to minimize any risk of gas accumulation.
- Verify Zero Flow: Check that there is no gas flow before beginning adjustments.
Next, attach a calibrated pressure gauge to the test ports and record the inlet and outlet pressures. Make small, controlled turns of the regulator screw, pausing to stabilize and checking for leaks after each adjustment. If you hear hissing or notice pressure swings, stop immediately and contact a licensed technician for assistance. Additional steps and examples for both home and RV systems are provided below.
How to Adjust a Gas Regulator Safely for Home and RV Use

A gas regulator adjusts downstream pressure from the supply and may need resetting when appliances lose performance, after equipment replacement, or when switching between propane and natural gas.
Procedures differ for residential and RV systems, so appropriate inlet/outlet checks and small incremental turns are recommended.
Homeowners and RV users should prioritize shutoff, leak testing, and professional service if unsure.
Quick overview of gas regulator adjustment and when it’s needed
When appliances produce uneven flames or pressure-sensitive devices underperform, adjusting the gas regulator may be necessary to restore proper flow and safety.
A brief overview explains what regulators do, common signs of pressure issues, and basic steps on how to adjust gas regulator settings.
It also notes when professional inspection or replacement is preferable to DIY adjustment to maintain safety and compliance.
One-line safety-first summary for homeowners and RV owners
Homeowners and RV owners should always prioritize shutting off the gas supply and consulting the appliance manual before attempting any regulator adjustment.
Only qualified individuals should adjust regulators; verify correct pressure with calibrated gauges, inspect fittings for leaks using approved solutions, and restore gas slowly while monitoring for abnormalities.
If unsure or if leaks, odors, or persistent issues occur, stop and contact a licensed technician immediately.
Understanding Gas Regulators: Basics Everyone Should Know
A gas regulator controls downstream pressure from a fuel source and comes in common types suited for home and RV propane or natural gas systems.
Key components include the inlet, outlet, diaphragm, vent, and adjusting screw, all of which affect performance and serviceability.
Differences between propane and natural gas regulators, plus signs like pressure fluctuations, hissing, or obvious damage, indicate when adjustment or replacement may be needed.
What a gas regulator does and common types for home and RV systems
Gas regulators control the pressure of fuel gas delivered from a supply source to appliances, ensuring safe, consistent operation by reducing high cylinder or line pressures to usable levels.
They maintain steady downstream pressure despite supply or demand changes. Common types include single-stage and two-stage regulators, adjustable and fixed-output models, and dedicated RV regulators designed for mobility, vibration resistance, and propane-specific fittings.
Key components: inlet, outlet, diaphragm, vent, adjusting screw
Proper operation of a regulator depends on a few simple but essential parts: the inlet and outlet ports, the flexible diaphragm that responds to pressure changes, the vent that equalizes or exhausts air, and the adjusting screw that sets the desired downstream pressure.
The inlet receives gas, the outlet supplies appliances, the diaphragm senses pressure differential, the vent prevents buildup, and the screw fine-tunes output.
How regulators differ between propane and natural gas systems
Because propane and natural gas operate at different pressures and have different physical properties, their regulators are designed with distinct features and settings.
Propane regulators deliver higher outlet pressures and often include two-stage configurations for cylinders, while natural gas regulators provide lower, steady pressures suited to utility supply.
Materials, orifices, spring rates and venting differ to match fuel density, volatility and system requirements.
Signs a regulator may need adjustment or replacement
Monitor regulators for clear signs of trouble: fluctuating flame size, hissing or unusual odors near the valve, visible corrosion or physical damage, and persistent pressure drop or surge during appliance operation.
Additional indicators include soot buildup, frequent pilot outages, or gauge readings outside manufacturer specifications.
If observed, discontinue use, isolate the supply, and consult a qualified technician for testing, adjustment, or replacement to guarantee safety.
Safety Precautions Before You Start
Before any adjustment, the person should confirm required personal protective equipment and assemble the correct tools.
They must also shut off the gas supply, ventilate the area, and verify no leaks are present before proceeding.
If codes, manufacturer instructions, or the condition of the regulator indicate risk, a licensed professional should be contacted rather than attempting DIY.
Required personal protective equipment and tools
A few essential items protect the technician during regulator adjustment: safety glasses or a face shield to guard against debris and sudden gas discharge, flame-resistant gloves to prevent burns, and hearing protection when working near noisy equipment.
Additional required tools include an adjustable wrench, calibrated pressure gauge, leak detector solution or electronic sniffer, flashlight, and non-sparking tools for metal fittings.
How to shut off gas supply and ventilate the area safely
With PPE and tools in place, the technician must shut off the gas supply and ventilate the work area to eliminate ignition and exposure hazards.
Close the appliance valve, then the regulator or cylinder valve.
Open windows and doors, use powered ventilation if needed, and avoid sparks, flames, or electronics.
Verify zero gas with a leak detector and wait appropriate purge time before proceeding.
When to call a licensed professional instead of DIY
When should a licensed professional be contacted instead of attempting a DIY adjustment: whenever the technician encounters damaged regulator components, ambiguous or corroded piping, unexplained pressure fluctuations, persistent leaks, or lacks certification and experience with local gas codes.
A professional should also be called for complex regulator replacements, multi-appliance systems, odor detection without obvious source, or any uncertainty about safe isolation and proper testing procedures.
Local codes, standards, and manufacturer instructions to check
Before starting any regulator adjustment, the technician must verify applicable local codes, industry standards, and the regulator manufacturer’s instructions to guarantee legal compliance and safe operation.
They should confirm permitted tools, required certifications, setback distances, ventilation and leak-testing methods, and pressure limits.
Consult utility provider and appliance manuals for model-specific procedures, retain documentation, and follow mandated reporting or permitting before altering gas system components.
Step-by-Step Procedure to Adjust a Gas Regulator (Home & RV)
The procedure begins with preparing the system: confirming gas type and regulator model, checking for leaks, and taking baseline inlet and outlet pressure readings.
Next, all appliances are turned off and the regulator is isolated before a pressure gauge is attached to record inlet and outlet values.
Finally, adjustments are made in small, controlled turns of the adjustment screw while monitoring pressures and rechecking for leaks.
Preparing the system: pressure gauges, leak detection, and baseline readings
A clear pre-adjustment checklist guarantees safe, accurate regulator tuning: Inspect fittings and hoses visually, mount calibrated pressure gauges upstream and downstream, and record ambient conditions.
Perform a soap-solution or approved electronic leak test on all connections.
Note existing inlet and outlet pressures as baseline readings before any adjustment.
Secure ventilation and isolate downstream appliances during testing.
Step 1 Confirm gas type and correct regulator model
Why confirm the gas type and regulator model? The technician verifies fuel (natural gas vs. propane) and matches the regulator’s model, inlet/outlet pressures, and connection type to system specifications.
Incorrect pairing risks malfunction, leaks, or unsafe pressures. Check labels, serial numbers, and manufacturer datasheets; confirm regulator calibration range and certification before proceeding with any adjustment.
Step 2 Turn off appliances and isolate the regulator
Having confirmed gas type and regulator model, the technician next shuts off all downstream appliances and isolates the regulator to create a safe work environment.
Valves are closed at appliance and branch levels, and the main supply is secured if required.
Electrical ignition and pilot systems are disabled.
Remaining gas is vented per local code and lockout/tagout applied before proceeding to adjustments.
Step 3 Attach pressure gauge and record inlet/outlet pressures
Connect a calibrated pressure gauge to the regulator’s inlet and outlet test ports using appropriate fittings and thread sealant rated for gas service, ensuring all connections are tight and leak-free before proceeding.
Verify gauge calibration date.
Slowly restore supply, observe and record static inlet pressure and downstream regulated outlet pressure under no-load conditions.
Note any pressure fluctuations and label readings with time and test conditions for reference.
Step 4 How to make small, controlled adjustments to the screw
Begin adjustments with small, deliberate turns of the regulator screw, using a properly sized screwdriver or wrench and counting quarter-turns to maintain control.
After each quarter-turn, wait briefly for pressure to stabilize, then read the gauge.
Make incremental corrections, reversing direction slightly if overshoot occurs.
Log each change and its effect.
Stop when desired outlet pressure aligns with safe, specified limits.
Step 5 Re-check pressures under typical load conditions
After small, controlled screw adjustments and confirmation of static outlet pressure, the technician should verify regulator performance under the typical load the system will encounter.
Measure dynamic outlet pressure with appliances operating simultaneously, note pressure drop and stability, and compare to manufacturer specifications.
Observe for surging or slow recovery. Document readings and any anomalies for further adjustment or troubleshooting before finalizing the procedure.
Step 6 Secure adjustment, reassemble, and perform leak test
Once the desired outlet pressure is confirmed under both static and load conditions, the technician secures the adjustment, reassembles any removed components, and performs a thorough leak test.
Locking screws or caps are tightened to manufacturer torque. Connections, fittings, and diaphragms are inspected, reinstalled, and sealed.
A soap solution or approved detector is applied; any bubbles prompt immediate correction until no leaks remain.
Step 7 Restart appliances and monitor for proper operation
With the regulator secured and verified leak-free, appliances can be restarted and observed for correct operation.
The technician lights each appliance per manufacturer instructions, checks flame qualities, pilot stability, and ignition timing.
Gas meter and regulator pressures are monitored for anomalies.
Any irregularities prompt immediate shutdown, reinspection of connections and adjustments, and consulting a qualified service professional before further use.
Tools, Materials, and Equipment Checklist
A concise checklist of required and optional items prepares the reader for safe, accurate regulator adjustments in both home and RV settings.
The following list outlines essential tools and gauges, recommended optional equipment that enhances safety or precision, and brand/spec suggestions tailored to RV versus residential use.
Readers should match tools to the installation type and chosen safety margins before beginning work.
- Required tools and gauges (wrenches, pressure gauge, leak detector).
- Optional items that improve accuracy or safety (manifold gauge set, regulator lock, gas sniffer).
- Recommended brands and specs for RV vs. home use (compact, low-flow rated regulators for RV; higher-capacity, code-compliant units for homes).
Required tools and gauges
Precise tools and calibrated gauges are essential for safely adjusting a gas regulator; this checklist outlines what a technician will need before beginning work.
Required items: adjustable wrench set, screwdrivers (flat and Phillips), leak detection solution, calibrated manometer or pressure gauge rated for LPG/propane, regulator-compatible fittings and adapters, pipe sealant or PTFE tape, safety gloves and eye protection.
Optional items that improve accuracy or safety
Consider including optional items that enhance measurement accuracy and worker safety when adjusting a gas regulator.
Digital manometers, inline flow meters, and calibrated pressure transducers offer finer readings.
Leak-detection solution, respirator masks, and safety glasses reduce exposure risks.
Anti-static gloves, vibration-resistant mounting clips, and a magnetic scope for fittings improve stability and inspection.
Carry a lockout tag and portable fire extinguisher for emergencies.
Recommended brands and specs for RV vs. home use
Because RV and home gas systems face different usage patterns and space constraints, recommended brands and specifications diverge accordingly:
RV users prefer compact, low-pressure regulators from manufacturers like Suburban, Atwood, and Camco, rated 0–11″ WC with built-in POL/OPD compatibility.
Home installations favor durable, higher-capacity regulators from Fisher, RegO, or Fairview, typically 10–60 psi or service-specific settings, certified to ANSI/CSA standards.
Typical Pressure Ranges and Settings
Typical pressure ranges and common settings help identify whether appliances, RV systems, or regulators are operating within safe limits. A quick reference table can illustrate typical outlet pressures, RV dual-stage notes, and common troubleshooting targets when readings are out of range. Technicians should compare measured values to expected ranges and follow manufacturer guidance if pressures differ.
| Application | Typical Outlet Pressure | Notes |
|---|---|---|
| Home appliances (stove, furnace) | 7–11 in. WC | Check appliance spec for exact setting |
| RV propane regulator | 11 in. WC (single), staged lower/higher for dual-stage | Inspect for leaks and regulator freezing |
| Troubleshooting targets | Low: <5 in. WC, High: >14 in. WC | Verify regulator, supply, and fittings |
Common outlet pressures for home appliances
Many home appliances require specific outlet pressures to operate safely and efficiently; common settings generally fall within narrow ranges such as 3–11 inches of water column (in. wc) for natural gas and 8–11 in. wc for propane appliances, with certain high-demand equipment like commercial-style ranges or boilers sometimes needing higher regulated pressures.
Typical household appliances:
- furnaces ~3–4 in. wc
- water heaters ~3–6 in. wc
- ovens/ranges ~3–5 in. wc
Typical RV propane regulator pressures and dual-stage notes
RV systems commonly use two standard regulator types: an appliance (first-stage) regulator at the tank and a secondary (or second-stage) regulator near the RV’s fittings to deliver consistent appliance pressure.
Typical output pressures are 10–11 inches water column (≈0.36–0.40 psi) for most RV appliances; some systems use 11 inches WC nominal.
Dual-stage setups reduce pressure fluctuation and protect appliances from high inlet variations.
Troubleshooting pressure readings that fall outside expected ranges
What should be checked when regulator pressure readings fall outside the expected 10–11 inches WC range?
Inspect for leaks, damaged hoses, clogged filters, and correct regulator orientation.
Verify gauge calibration and test under known load.
Confirm proper tank pressure and stage operation (single vs dual).
Replace suspect regulators or components and retest.
If uncertainty remains, consult a certified technician for safe diagnosis.
Common Problems, Causes, and Fixes
Common regulator issues include low pressure or sputtering appliances, overpressure or altered flame characteristics, and post-adjustment hissing or leaks; each symptom has common causes and specific corrective steps.
The discussion will outline troubleshooting for weak flow (blocked lines, incorrect setpoint), for high pressure (maladjustment, diaphragm failure), and immediate actions if a leak is suspected.
Guidance will also clarify when replacement is required instead of further adjustment.
Symptom: Low pressure or appliances sputtering causes and corrective steps
When burners sputter or appliances operate with weak flames, low gas pressure is often the culprit and requires prompt diagnosis to prevent unsafe conditions or equipment damage.
Technicians should check regulator diaphragms, inlet supply, and downstream leaks; inspect filters and hoses for blockage or kinks; verify tank/line pressure with gauges; replace faulty regulators or clogged components; and retest appliances after repairs to confirm stable, proper pressure.
Symptom: Overpressure or flame change causes and corrective steps
Although low-pressure issues typically produce weak flames or sputtering, the opposite problem—excessive pressure—can equally compromise appliance performance and safety.
Causes include regulator failure, incorrect regulator type, upstream overpressure, or obstructed pilot/venturi.
Corrective steps: stop use, isolate supply, relieve pressure, inspect regulator and fittings, replace with proper-rated regulator, verify appliance orifices and manifold pressure with a gauge, and test under supervision.
Symptom: Hissing or leaks after adjustment immediate actions
Detecting hissing or the smell of gas immediately after adjusting a regulator indicates a potential leak or seal failure that requires prompt attention.
The technician should shut off the gas supply, ventilate the area, and avoid sparks or flames.
Apply a soapy water solution to fittings to locate leaks. If bubbles appear, keep the system isolated and contact a qualified technician for repair or further testing.
When regulator replacement is necessary rather than adjustment
Why replace a gas regulator instead of adjusting it?
Replacement is required when physical damage, persistent leaks, corrosion, diaphragm failure, or inconsistent outlet pressure persist after attempted adjustments.
Regulators beyond their service life, missing safety features, or showing internal contamination also demand replacement.
For safety and compliance, technicians replace faulty regulators rather than risk unreliable adjustments that could cause leaks or appliance malfunction.
Mistakes to Avoid When Adjusting Regulators
Common mistakes when adjusting gas regulators include taking dangerous shortcuts that compromise safety, such as bypassing proper leak checks and using improvised tools.
Over-tightening adjustments can strip threads, warp components, or create leaks that lead to malfunction.
Ignoring manufacturer specifications and local code requirements increases the risk of improper pressure settings and regulatory violations.
Dangerous shortcuts and why they fail
When technicians bypass standard procedures or improvise with makeshift tools, the apparent time saved often leads to unpredictable pressure spikes, gas leaks, or damaged regulator components.
These outcomes arise because regulators are engineered to precise tolerances and require correct sequencing, calibration, and compatible fittings to function safely.
Skipping testing, using incorrect adapters, or neglecting leak checks undermines system integrity and increases failure, fire, and poisoning risks.
Over-tightening adjustments and damage risks
Excessive force during regulator adjustments can strip threads, deform diaphragms, and compromise seals, leading to leaks or erratic pressure control.
Technicians who over-tighten fittings or jam adjustment screws risk permanent regulator impairment and unsafe gas flow.
Proper torque, gentle turns, and using specified tools prevent mechanical damage.
Inspect for wear after any heavy-handed adjustment and replace compromised components promptly to maintain safety.
Ignoring manufacturer specs and code requirements
One critical error is disregarding manufacturer specifications and applicable codes, which can void warranties and create hazardous operating conditions.
Technicians must follow pressure ranges, adjustment procedures, and approved parts. Ignoring local codes or installer instructions risks improper ventilation, leaks, noncompliant installations, and liability.
Consult manuals, regulatory guidance, and certified professionals; document compliance and use certified replacement components to guarantee safety and legality.
Maintenance Schedule and Best Practices
A clear maintenance schedule helps guarantee regulator reliability for both home and RV systems, with monthly or seasonal checks recommended for RVs and annual inspections typical for stationary home units.
Before winter travel, RV systems should be winterized and inspected for leaks, venting obstruction, and regulator function.
All adjustments, replacements, leak test results, and dates should be logged to track service history and inform future maintenance.
Recommended inspection intervals for home and RV regulators
Regular inspections of home and RV gas regulators should occur on a predictable schedule to guarantee safe operation and early detection of wear or leaks.
Recommend visual checks monthly, functional tests and leak checks biannually, and full professional inspections annually.
Replace regulators that show corrosion, damage, or pressure instability immediately.
Document dates, findings, and any corrective actions for compliance and safety tracking.
Winterizing and seasonal checks for RV systems
Why prepare an RV gas system for seasonal changes?
The RV owner should drain water lines, insulate exposed piping, close and vent propane tanks per manufacturer guidance, and check regulator vents for blockage.
Inspect hoses, fittings and seals for cracking or corrosion; replace aged components.
Test appliances and leak-check connections after recommissioning.
Schedule pre-winter and spring inspections to prevent freeze damage and gas leaks.
Record-keeping: what to log after adjustments or replacements
When adjustments or replacements are made to the RV gas system, the owner should log date, component replaced or adjusted, reason for the work, and the technician or service source.
The record should also note parts and serial numbers, pre- and post-adjustment pressure readings, test results, propane source, mileage or hours, warranty information, and next inspection due date.
Store copies digitally and on paper.
When to Call a Professional and How to Choose One
Signs such as persistent gas odors, unexplained pressure fluctuations, or visible regulator damage warrant immediate attention from a licensed professional.
Homeowners should ask technicians about licenses, insurance, experience with gas regulators, and request an itemized estimate that separates inspection, adjustment, and replacement costs.
Typical service or replacement fees vary by region and complexity, so obtaining multiple quotes helps set realistic cost expectations.
Clear red flags that require licensed service
Certain symptoms surrounding a gas regulator indicate the need for licensed intervention: persistent hissing or strong odor of gas, repeated pressure fluctuations despite adjustments, visible regulator damage or corrosion, gas appliances failing to ignite or producing yellow flames, and any detection of leaks by a gas detector.
Immediate professional service is required for safety, unexpected regulator replacement, complex piping issues, or recurring faults beyond basic adjustments.
Questions to ask a technician and credentials to check
Who should be trusted with gas-regulator work and why matters for safety and compliance.
Ask for licensure (plumber/Gas Safe certificate or local equivalent), proof of insurance, and experience with residential or RV regulators.
Request references, written estimates, and verification of permitting and code familiarity.
Confirm use of calibrated tools, post-service pressure testing, and a clear warranty or service guarantee.
Cost expectations for professional adjustment or replacement
When deciding whether to call a professional for a gas regulator adjustment or replacement, homeowners should weigh typical price ranges, the complexity of the job, and potential safety liabilities.
Professional adjustment often costs $75–$200; replacement ranges $150–$600 or more depending on regulator type and labor.
Obtain multiple estimates, verify licensing and insurance, ask for itemized bids, and prefer certified gas technicians with local referrals.
Real-World Scenarios and Step-by-Step Examples
The following examples illustrate typical regulator issues and clear adjustment steps for non-commercial settings.
Each case presents symptoms, diagnostic checks, and safe corrective actions that a competent homeowner or RV owner can follow, with notes on when to stop and call a professional.
Practical outcomes and common pitfalls are highlighted to show expected results and limits of DIY work.
- Example A: Adjusting a single-stage home propane regulator after appliance upgrade — check appliance demand, measure outlet pressure, and incrementally lower regulator spring tension while monitoring for leaks and stable operation.
- Example B: Re-tuning an RV regulator after adding a portable generator — isolate supply lines, run appliances with generator load, adjust regulator to maintain rated pressure under combined loads, and recheck all connections for vibration-related loosening.
- Example C: Diagnosing pressure drop on cold mornings — inspect for regulator ice accumulation, verify tank pressure and vaporization rate, and consider installing a larger regulator, heat source, or staged supply if freezing or low vapor pressure is confirmed.
Example A: Adjusting a single-stage home propane regulator after appliance upgrade
After replacing a gas range with a higher-BTU model, a homeowner must verify and, if necessary, adjust the single-stage propane regulator to guarantee proper outlet pressure and safe appliance operation.
They isolate supply, bleed pressure, connect a manometer to the appliance test point, power appliances, observe static and operating pressures, make small regulator adjustments, recheck for leaks, and restore normal service if readings meet manufacturer specifications.
Example B: Re-tuning an RV regulator after adding a portable generator
An RV owner adds a portable generator and then checks the onboard propane regulator to verify the additional load doesn’t drop outlet pressure below appliance requirements.
They isolate appliances, run the generator while monitoring manifold pressure with a gauge, adjust the regulator screw incrementally to restore correct psi, secure the locknut, and retest under combined loads.
Any persistent low pressure prompts valve replacement or professional service.
Example C: Diagnosing pressure drop on cold mornings
Cold mornings often reveal a gradual drop in propane pressure that affects appliance performance, and diagnosing it requires a focused sequence of checks.
The technician inspects tank temperature, regulator frost or ice, hose and connection integrity, and pressure at the regulator outlet with a gauge.
If readings fall below specifications, they replace or heat the regulator, purge air, and recheck under load to confirm restoration.
Additional Resources and Manufacturer References
This section directs readers to authoritative materials that support safe regulator adjustment.
It highlights standards and codes, manufacturer documentation, and practical learning resources to guarantee procedures match official specifications and best practices.
Referenced items include:
- Useful standards, code references, and safety organizations.
- Links to regulator manuals and pressure specification charts.
- Recommended tutorials and video demonstrations.
Useful standards, code references, and safety organizations
Several key standards bodies, codes, and safety organizations provide authoritative guidance for gas regulator selection, installation, testing, and maintenance.
Relevant references include NFPA (e.g., NFPA 54/58), ANSI/ASME standards, CSA standards, ISO regulator/testing documents, and local building and propane codes.
Industry groups such as CGA and local utilities offer application guidance, while accredited testing labs and certification marks verify compliance and performance.
Links to regulator manuals and pressure specification charts
When consulting regulator documentation for installation or troubleshooting, users should reference manufacturer manuals and pressure specification charts to confirm model-specific settings, allowable inlet/outlet pressures, and required accessories.
Provide direct links to OEM manuals, PDF datasheets, and installation guides from major brands.
Include pressure tables, part numbers, revision dates, and contact information for technical support to guarantee correct selection and safe adjustments.
Recommended tutorials and video demonstrations
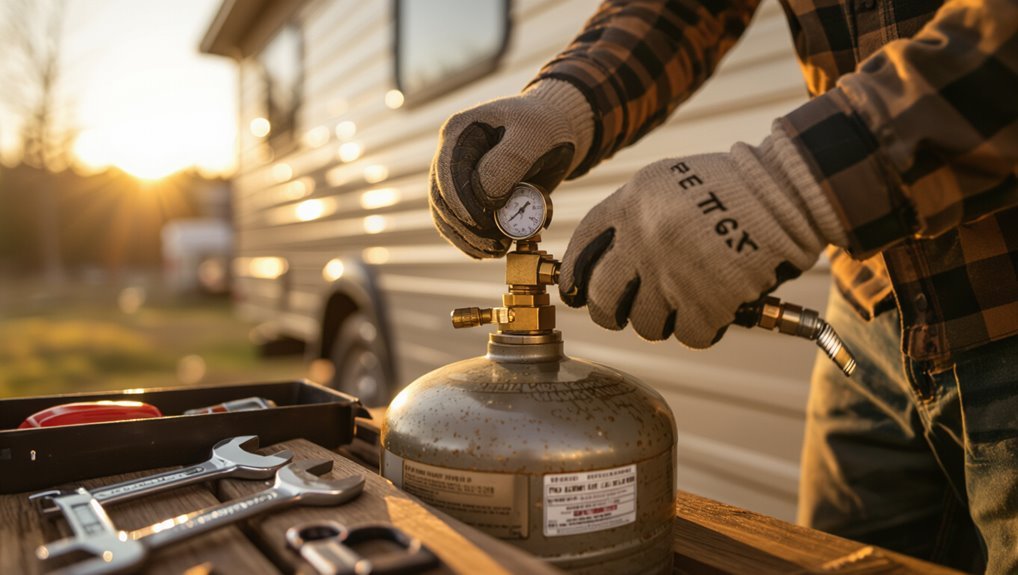
Although hands-on demonstration can clarify procedures faster than text alone, users should rely on curated tutorials and manufacturer video demonstrations that explicitly show model-specific setup, adjustment techniques, and safety checks.
Recommended sources include OEM channels, certified technicians’ walkthroughs, and regulator brand playlists. Prioritize videos with clear timestamps, parts identification, torque and pressure readings, safety callouts, and links to official manuals.
Conclusion
The reader is reminded that adjusting a gas regulator is not unlike tuning an instrument: measured, attentive hands and respect for the system’s voice yield harmony rather than discord. With safety protocols observed and clear procedures followed, the household or caravan breathes securely. When doubt lingers, calling a qualified technician preserves both structure and serenity. Ultimately, prudent maintenance transforms potential peril into reliable comfort, much as care converts raw metal into a well-tempered tool.