How to Install a Central Air Conditioning System: Step-by-Step Guide for Homeowners
To install a central air conditioning system, start by assessing your home’s cooling load, ductwork, electrical capacity, and necessary permits. Choose an appropriately sized split or packaged system based on this evaluation. Prepare the site by leveling the condenser pad and routing the refrigerant, condensate, and power lines. Proceed to install the air handler, seal the ducts, and complete the electrical connections. Finally, evacuate and charge the refrigerant, and check airflow and system controls. Remember to adhere to local codes, conduct leak tests, and keep warranty documentation. For detailed steps and troubleshooting guidance, refer to the subsequent sections.
Overview of Central Air Conditioning Installation for Homeowners
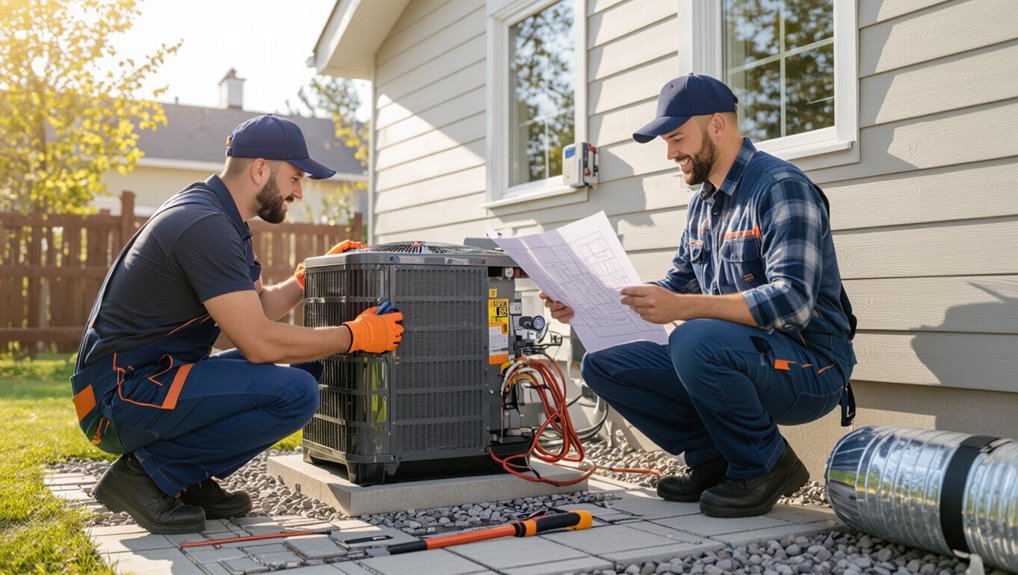
A central air system typically consists of an outdoor condenser, an indoor air handler or furnace, ductwork, refrigerant lines, and a thermostat, with familiar terms including SEER, tonnage, and static pressure.
Homeowners should expect multi-day timelines and variable costs depending on equipment and ductwork condition, and consider professional help for refrigerant handling, system sizing, or complex duct modifications.
Local permits, building codes, and basic safety practices—electrical disconnects, proper refrigerant disposal, and secure duct and gas connections—govern residential installations.
What a central air system includes (components and terminology)
Central air systems consist of several key components—outdoor condenser, indoor evaporator coil and air handler (or furnace), ductwork, thermostat, and refrigerant lines—each serving a specific role in cooling and distributing conditioned air throughout a home.
Terminology includes SEER, BTU, and tonnage; components include expansion valve, blower, filter, return and supply registers.
This clarifies what homeowners encounter when learning how to install central air conditioning system.
Typical timelines, costs, and when to consider professional help
When homeowners plan a central air installation, they should expect project timelines to range from a single day for straightforward condenser swaps to several days or even weeks for full-system retrofits that require new ductwork or electrical upgrades.
Costs vary widely: simple replacements can run $3,000–$6,000; full replacements or retrofits often reach $7,000–$20,000+.
Hire professionals for load calculations, complex ductwork, refrigerant handling, or electrical upgrades.
Permits, codes, and safety considerations specific to residential installations
Many installations require local permits and must comply with building, electrical, and mechanical codes to secure safe, legal operation.
Homeowners should verify permit requirements, submit plans, and schedule inspections.
Qualified technicians confirm refrigerant handling meets EPA rules, electrical connections follow NEC, and equipment placement respects clearances and structural limits.
Prioritizing code compliance and safety inspections prevents hazards, fines, and voided warranties.
Evaluating Whether Your Home Is Ready for Central Air
Before beginning installation, the homeowner should evaluate existing ductwork and insulation to guarantee airflow efficiency and minimal leakage.
A proper cooling-load calculation will determine required BTU/tonnage and guide condenser and air-handler placement options.
Electrical service capacity and circuit requirements must also be checked to verify the home can safely support the new system.
Assessing existing ductwork and insulation
A thorough inspection of a home’s ductwork and insulation is essential to determine whether the structure can support a central air system and to estimate both performance and installation cost.
Inspect for leaks, disconnected or crushed ducts, inadequate sizing, and poor sealing.
Verify insulation levels in attic, crawlspace, and around duct runs.
Document repairs, sealing, and added insulation needed before installation proceeds.
Calculating cooling load and selecting the right system size (BTU/tonnage)
When determining whether a home is ready for central air, calculating the cooling load provides the precise measure of capacity required. This load—expressed in BTUs or tons—reflects heat gains from occupants, appliances, sun exposure, infiltration, and the building envelope.
A Manual J calculation or qualified contractor assessment yields required capacity, accounting for orientation, shading, insulation, and occupancy patterns to avoid oversizing or undersizing.
Determining condenser and air handler placement options
Although site constraints and duct layout largely dictate equipment placement, homeowners benefit from a deliberate evaluation of condenser and air handler locations to guarantee efficiency, serviceability, and minimal disruption.
Consider proximity to existing ducts, shortest refrigerant and condensate runs, noise and vibration impact, outdoor shading and clearance, airflow around the condenser, and attic or closet access for the air handler to simplify installation and future maintenance.
Electrical capacity and circuit requirements check
Begin by confirming the home’s electrical service and panel capacity to verify they can support the added load of a central air system.
Assess ampacity, available breaker spaces, and main service rating.
Calculate unit starting and running currents, determine required dedicated circuit size and breaker type, and check wire gauge and disconnect proximity.
Consult a licensed electrician to approve upgrades or permit needs.
Choosing the Right Central Air System
Selecting the appropriate central air system requires comparing split systems and packaged units for space, installation complexity, and performance.
Attention should be paid to efficiency ratings (SEER, EER) and their long‑term cost implications, as well as compatibility with the existing furnace or air handler and the refrigerant type.
Finally, evaluating reputable brands and warranty terms helps guarantee reliability and resale value.
Types of systems: split systems vs packaged units
Homes typically use either split systems or packaged units for central air conditioning, and understanding the differences helps match system type to space and budget.
Split systems separate indoor evaporator and outdoor condenser, offering flexible installation and quieter indoor operation.
Packaged units house all components in one outdoor cabinet, conserving indoor space and simplifying installation for homes without basements or utility rooms.
Efficiency ratings (SEER, EER) and long-term cost implications
When comparing central air options, efficiency ratings like SEER and EER provide standardized measures of performance that directly affect operating costs and long-term savings.
Higher SEER/EER units reduce energy consumption, lowering monthly bills and carbon footprint. Upfront costs increase with efficiency, but payback occurs through reduced utility expenses and potential rebates.
Consider climate, usage patterns, and lifecycle costs when choosing equipment.
Matching furnace/air handler compatibility and refrigerant types
After weighing efficiency ratings and lifecycle costs, attention shifts to how the outdoor condensing unit pairs with indoor components: the furnace or air handler and the refrigerant it uses.
Compatibility requires matching airflow, coil size, and control wiring; confirm the air handler/furnace is rated for the condenser’s tonnage.
Verify refrigerant type (R‑410A vs alternatives) for system seals, lubricants, and pressure specifications.
Brand and warranty comparison
Several respected manufacturers dominate the central air market, and their reputations, product lines, and warranty structures should guide the buyer’s choice. Comparison should weigh reliability, energy efficiency, and warranty length/coverage; extended parts and labor plans add value. Regional service networks and transferable warranties affect resale value.
| Brand | Warranty Length | Notes |
|---|---|---|
| Brand A | 10 years | Limited labor |
| Brand B | 12 years | Parts+compressor |
| Brand C | 5 years | Basic coverage |
| Brand D | 15 years | Transferable |
Step-by-Step Installation Preparation
The installer lists required tools, materials, and PPE to guarantee safe, code-compliant work.
The site is prepared by grading and installing a level pad, confirming clearances and access routes, and marking utility lines.
Landscaping and the home exterior are protected with barriers and ground covers to prevent damage during the job.
Tools, materials, and PPE required
Gathering the correct tools, materials, and personal protective equipment is a critical first step in preparing for a central air conditioning installation. A well-organized inventory reduces downtime and prevents safety lapses.
Required items include hand and power tools, refrigerant handling gear, mounting hardware, electrical supplies, duct accessories, sealants, and PPE. Inventory should match unit specifications and local codes.
- Refrigerant gauges, vacuum pump, manifold
- Corded drill, wrenches, tubing cutter
- Gloves, safety glasses, respirator
Preparing the site: leveling pad, clearances, and access routes
After verifying tools, materials, and PPE, attention turns to preparing the outdoor and indoor sites where the system will sit and connect.
Level a firm, vibration-absorbing pad for the condenser, confirm manufacturer-recommended clearances from walls and vegetation, and guarantee a straight, unobstructed route for refrigerant lines, condensate drain, and electrical conduit.
Verify proper slope for drainage and safe technician access.
Protecting landscaping and home exterior during work
Protective measures preserve both landscaping and exterior finishes while installers work.
Installers lay down plywood pathways, ground cloth, and plastic sheeting to prevent soil compaction and plant damage.
Shrubs and delicate plants receive temporary barriers; irrigation heads are marked and shielded.
Exterior walls, siding, and finishes are covered at contact points; debris is contained and removed promptly to minimize staining and impact.
Installing the Condenser and Outdoor Components
The installer begins by setting and securing the condenser pad on level, compacted ground to prevent settling.
Placement is chosen to guarantee adequate airflow, minimize noise impact on occupants or neighbors, and allow clear access for routine maintenance.
Finally, refrigerant lines, the condensate drain, and the electrical disconnect are routed and fastened according to code to complete the outdoor assembly.
Setting and securing the condenser pad
Positioning the condenser pad correctly is critical to system performance and longevity. The pad must be level, stable, and sized to support the unit.
Compact crushed stone or a concrete slab provides drainage and prevents settling. Secure the condenser to the pad with manufacturer-recommended anchors or vibration isolators.
Verify elevation to avoid water pooling and recheck level after initial operation.
Positioning for airflow, noise, and maintenance access
Careful placement of the condenser and other outdoor components maximizes airflow, minimizes noise transmission, and secures clear access for routine maintenance.
Position units at least 24 inches from walls and shrubs, guarantee unobstructed clearance around the fan, orient discharge away from living spaces, and maintain a service walkway.
Elevate slightly for drainage, avoid vibration transfer to structure, and consider local codes and neighbor impact.
Installing refrigerant lines, condensate drain, and electrical disconnect
Begin by routing refrigerant lines, the condensate drain, and the electrical disconnect with exacting alignment and secure attachment to prevent leaks, blockages, and safety hazards.
Insulate and slope refrigerant and drain lines toward the outdoor unit. Use vibration isolators, protective conduit for wiring, and a dedicated fused disconnect per code.
Pressure-test, evacuate, and verify proper drainage before energizing the system.
Installing the Air Handler and Indoor Components
The technician mounts the air handler or evaporator coil securely, ensuring proper alignment and access for service.
Refrigerant lines and any heat exchanger interfaces are connected and pressure-tested to confirm leak-free joints.
Condensate drainage is installed with appropriate slope and overflow protection, then tested for reliable evacuation.
Mounting the air handler or evaporator coil
Mounting the air handler or evaporator coil requires precise alignment, secure support, and clear access for refrigerant, condensate, and electrical connections.
The unit is leveled on vibration isolators or a sturdy platform, fastening to framing or brackets.
Condensate pan slope and drain routing are verified.
Airflow plenum and return ducts are sealed, access panels remain unobstructed, and safety clearances around the unit are maintained.
Connecting refrigerant lines and heat exchanger interfaces
Connect copper refrigerant lines and heat exchanger interfaces with precision, ensuring leak-free joints, proper routing, and correct insulation to preserve system performance and safety.
Technicians flare or brazing techniques per manufacturer specifications, torque service valves, and pressure-test the circuit.
Secure lines to minimize vibration, maintain required clearances, label connections, and verify thermal insulation continuity to prevent condensation and efficiency loss before commissioning the refrigerant system.
Installing and testing condensate drainage and overflow protection
Installers must guarantee condensate drainage and overflow protection are correctly sized, sloped, and integrated with the air handler to prevent water damage and maintain indoor air quality.
They should install primary and secondary drain pans, PVC drain lines with 1/8–1/4 inch per foot slope, trap and vent per code, and an overflow safety switch.
Perform flow and leak tests, documenting results.
Ductwork Installation and Optimization
Next, attention turns to ductwork installation and optimization, starting with inspection, sealing, and insulation of existing ducts to prevent losses.
Proper sizing and placement of new runs, registers, and returns are installed alongside material selection and common retrofit solutions.
Finally, airflow is balanced and zoned where needed, with leak testing used to verify system performance.
Inspecting, sealing, and insulating existing ducts
Inspecting, sealing, and insulating existing ducts begins with a systematic assessment of the entire duct network to identify leaks, loose connections, and areas of insufficient insulation.
Technicians then clean accessible ducts, seal joints and gaps with mastic or UL-rated tape, reinforce connections, and add insulation to maintain R-value.
Final testing verifies airflow balance and reduced leakage before restoring registers and system operation.
Sizing and installing new duct runs, registers, and returns
After sealing and insulating the existing network, attention shifts to designing and fitting new duct runs, registers, and returns to guarantee balanced airflow and system efficiency.
Proper sizing follows manual D principles, minimizing friction and bends.
Use rigid ducts where possible, seal joints with mastic, insulate to prevent losses, and place registers and returns for even distribution and accessible servicing, following local codes and manufacturer specifications.
Balancing airflow and zoning considerations
Balancing airflow and implementing zoning are critical steps to guarantee that a central air system delivers consistent comfort and operates efficiently across varied spaces.
Proper balancing adjusts dampers, registers, and fan speeds to match design CFM while zoning isolates different areas with motorized dampers and controls to accommodate distinct temperature needs.
Technicians measure static pressure, verify supply/return parity, program zone thermostats, and sequence dampers to prevent short cycling.
Duct materials, leak testing, and common retrofit solutions
Select durable, code-compliant duct materials and verify airtight installations through systematic leak testing to maximize system efficiency and indoor comfort.
Use galvanized steel or rigid ductboard where feasible; flexible ducts suit short runs only. Seal seams with mastic and UL-rated tapes.
Perform pressure pan or blower door tests, repair detected leaks, and consider insulated liners, return-path fixes, or mini-duct/ductless retrofits for constrained spaces.
Electrical Hookup and Controls
Attention turns to the electrical hookup and control systems required for a central air installation, including running dedicated power to the condenser and air handler and sizing the circuit breaker appropriately.
The section will cover thermostat and smart control installation, wiring configurations for conventional and communicating systems, and proper grounding.
It will also address surge protection, safety switches, and other required electrical safeguards.
Running power to condenser and air handler, and breaker sizing
Begin by identifying the electrical requirements for both the outdoor condenser and the indoor air handler, including voltage, phase, and full-load amperage as specified on each unit’s nameplate and in the manufacturer’s installation manual.
Run appropriately sized conduit and copper conductors from the main panel to each unit, install separate disconnects, and select breakers sized per NEC ampacity plus manufacturer recommended minimum circuit ampacity.
Installing thermostat, smart controls, and wiring configurations
Install the thermostat and control wiring with attention to proper compatibility, placement, and signal integrity: confirm the system type (conventional heat/cool, heat pump, or multi-stage), verify required control circuits (R, C, W, Y, G, O/B, Aux/E, and any dedicated communications like S1/S2 or Modbus), and route thermostat cable from the air handler to the chosen thermostat location avoiding high-voltage runs and sources of electrical noise.
Select compatible smart thermostat, connect communication and power terminals, configure equipment settings, label wires, test heat/cool stages and fan operation, and verify remote app pairing and firmware updates.
Grounding, surge protection, and safety switches
Proper grounding, surge protection, and safety switches form the foundation of a safe, code-compliant central air installation by preventing electrical faults, minimizing transient damage, and providing rapid shutdown in hazardous conditions.
Install equipment-grounding conductors to local code, mount a dedicated surge protector at the outdoor unit and indoor panel, and fit fused or non-fused safety switches for maintenance isolation and compressor protection, tested after energization.
Refrigerant Charging, Vacuuming, and Leak Testing
The technician begins by pulling a deep vacuum to remove moisture and non-condensables, following proper pump-down times and gauge readings.
Refrigerant is then charged precisely to the manufacturer’s specifications while monitoring system pressures and superheat/subcooling values.
Leak detection and repair are performed as needed, with all work conducted in compliance with EPA regulations and by certified personnel.
Proper vacuum procedure and moisture removal
Begin by evacuating the system to remove air, moisture, and non-condensables that impair performance and risk compressor damage.
Use a deep vacuum pump and manifold gauges, pull down to at least 500 microns, and hold to verify stability.
Perform multiple isolation and purge cycles if needed.
Confirm moisture removal with micron gauge readings and a short hold test before proceeding to leak testing.
Charging refrigerant to manufacturer specifications
Charge the system strictly to the manufacturer’s specified refrigerant type and charge amount, using calibrated manifold gauges and a refrigerant scale to guarantee accuracy.
Technicians monitor pressures and superheat/subcooling values, adjusting charge until readings match service specifications.
Perform final system performance checks—airflow, temperature split, and compressor operation—documenting refrigerant weight and readings.
Do not attempt charging without proper tools and training.
Detecting and repairing leaks; EPA regulations and certifications
Following verification of correct refrigerant type and charge, attention shifts to identifying and repairing leaks and complying with EPA rules governing refrigerant handling.
Technicians perform vacuuming, pressure and electronic leak detection, and dye or soap tests.
Repaired joints require retesting; recovered refrigerant must be documented.
Only EPA-certified individuals should handle charging, recovery, and disposal to meet federal regulations and prevent environmental harm.
System Startup, Calibration, and Performance Testing
The technician begins with an initial startup checklist and safety verifications to confirm power, controls, and refrigerant levels are correct before running the system.
Instrumentation is then used to measure airflow, temperature split, and static pressures to guarantee the unit operates within design parameters.
Finally, performance metrics are compared to expected efficiency and any startup issues are diagnosed and corrected.
Initial startup checklist and safety verifications
Begin by confirming that all mechanical, electrical, and refrigerant connections conform to manufacturer specifications and local codes before energizing the system.
Verify circuit protection, grounding, and correct wiring.
Inspect condensate drain and pans for proper slope and clearance.
Guarantee safety controls, float switches, and pressure/temperature sensors are installed and functional.
Confirm refrigerant charge labels and accessible service ports for future maintenance.
Measuring airflow, temperature split, and static pressure
With electrical, refrigerant, and safety verifications complete, attention shifts to measuring airflow, temperature split, and static pressure to confirm system performance.
Technicians measure supply and return CFM at registers, record temperature rise across the evaporator to verify correct superheat/subcooling indirectly, and measure duct static pressure with manometers.
Results guide minor airflow adjustments and fan speed settings to meet manufacturer specifications and design intent.
Verifying efficiency and resolving startup issues
Powering the system and initiating controlled test cycles confirms operational integrity and exposes early faults before handover.
Technicians record temperatures, pressures, airflow, and amperage against manufacturer specifications.
Calibrate thermostats, verify refrigerant charge, and adjust airflow for design CFM.
Resolve startup issues—electrical faults, improper sequencing, leaks, or compressor stalls—then retest until performance meets efficiency targets and safety standards.
Post-Installation Tasks and Documentation
Once installation is complete, the crew should clean the work area, dispose of old equipment per local regulations, and restore landscaping or finishes as needed.
They must document system specifications, warranties, and a recommended maintenance schedule for the homeowner’s records.
Finally, a brief walkthrough should be conducted to demonstrate basic operation, filter care, and how to contact service for future needs.
Cleanup, disposal of old equipment, and site restoration
Begin by clearing the work area of debris, tools, and temporary materials to leave the site safe and orderly; this includes sweeping up dust, removing packaging, and securing loose wiring or trim for homeowner inspection.
Remove and properly dispose of old equipment per local regulations, recycle salvageable components, clean condensate drains and surrounding surfaces, and repair any disturbed landscaping or finishes.
Document disposal actions for records.
Recording system specs, warranties, and maintenance schedule
A concise record of the new system’s specifications, warranty details, and recommended maintenance schedule should be compiled and delivered to the homeowner.
The document lists model and serial numbers, installation date, contractor contact, warranty terms and registration instructions, filter and coil service intervals, refrigerant type and charge, and suggested inspection frequency.
Copies are retained for service providers and warranty claims.
Homeowner walkthrough and basic operation training
The technician conducts a concise homeowner walkthrough to demonstrate system controls, safety features, and basic troubleshooting steps, ensuring the occupant understands thermostat settings, filter access and replacement, emergency shutoff location, and how to recognize unusual noises or leaks.
The homeowner receives operation notes, maintenance reminders, warranty contacts, and clear instructions for seasonal startup/shutdown, plus guidance on when to call a professional for diagnostics or repairs.
Common Problems During and After Installation and How to Fix Them
Common installation and post-installation issues include poor cooling, uneven temperatures between rooms, and restricted airflow that undermine system performance.
Technicians also encounter strange noises, excess vibration, and condensation buildup that signal mechanical or ductwork problems.
Electrical trips, thermostat errors, and refrigerant faults require prompt diagnosis to prevent damage and restore reliable operation.
Poor cooling, uneven rooms, and airflow issues
Diagnose persistent hot spots and weak airflow promptly to prevent comfort complaints and wasted energy; these issues often stem from improper duct design, incorrect system sizing, blocked vents, or imbalance between supply and return air.
Inspect and seal ducts, adjust or add registers, verify blower and fan settings, rebalance returns, and confirm proper refrigerant charge and thermostat placement.
Retest and document airflow improvements.
Strange noises, vibration, and condensation problems
Listen for abnormal rattles, clanks, hisses, or steady hums and note any excessive vibration or visible condensation, since these symptoms often indicate installation errors, loose components, refrigerant issues, or drainage faults.
Tighten mounts, secure panels, balance fan blades, and realign piping to reduce vibration.
Clear and regrade condensate drains, insulate lines, check drain pan alignment, and replace damaged drip pans to stop leakage.
Electrical trips, thermostat errors, and refrigerant-related faults
When electrical trips, thermostat errors, or refrigerant faults occur during or after installation, they typically reflect wiring mistakes, control mismatches, or leaks and pressure imbalances in the refrigerant circuit.
Technicians should verify circuit sizing, breaker condition, and proper grounding; confirm thermostat wiring, configuration, and sensor placement; pressure-test, evacuate, and recharge refrigerant to manufacturer specifications; and repair leaks, replacing faulty valves or components as needed.
Maintenance and Seasonal Care to Prolong System Life
Routine maintenance preserves system efficiency and prevents costly failures: homeowners should prioritize regular filter replacement, coil cleaning, and condensate line care.
Annual professional tune-ups that include refrigerant checks, airflow testing, electrical inspections, and thermostat calibration help catch developing issues early.
Clear signs such as reduced cooling capacity, unusual noises, rising energy bills, or frequent cycling indicate the need for repair or possible replacement.
Filter replacement, coil cleaning, and condensate maintenance
Maintain filters, coils, and the condensate system regularly to keep a central air conditioner efficient and reliable.
Filters should be checked monthly and replaced or cleaned per manufacturer guidance.
Evaporator and condenser coils require gentle cleaning to remove debris.
Confirm condensate drain lines remain clear and the pan drains properly to prevent overflow and mold.
- Replace or clean filters monthly
- Clean coils gently
- Clear condensate drain lines
Annual professional tune-ups and what they include
An annual professional tune-up provides an extensive inspection and servicing that addresses wear, safety, and efficiency concerns beyond basic homeowner tasks.
Technicians verify refrigerant levels, test electrical components, tighten connections, lubricate motors, inspect and calibrate thermostats, clean coils and drain lines thoroughly, and assess airflow and duct integrity.
A written report and recommended corrective actions complete the service.
Signs your system needs repair or replacement
How can a homeowner tell when an air conditioning system has moved beyond routine upkeep and requires repair or replacement?
Indicators include persistent weak cooling, frequent cycling, rising energy bills, unusual noises or odors, visible refrigerant leaks, frozen coils, and repeated breakdowns despite repairs.
Age over 10–15 years combined with costly compressor or coil failures often justifies replacement for efficiency and reliability.
Costs, Financing Options, and Energy-Saving Tips
A clear understanding of cost components—equipment, labor, permits, and ductwork—helps homeowners budget accurately for a central air installation.
Available rebates, tax credits, and financing programs can greatly lower upfront expenses and should be explored before committing.
Simple upgrades like programmable thermostats, improved insulation, and sealing ducts offer quick efficiency gains that reduce long-term energy bills.
Breakdown of installation cost components
Several key factors determine the total cost of installing a central air system, including equipment type and size, labor and permitting, ductwork modifications, and any required electrical upgrades.
Additional expenses include thermostat and control upgrades, condensate and drainage work, refrigerant lines, disposal of old equipment, and warranty or service contracts.
Regional labor rates and accessibility also greatly affect final pricing.
Rebates, tax incentives, and financing programs
Many homeowners qualify for rebates, tax credits, or low-interest financing when upgrading to high-efficiency central air systems, which can considerably lower upfront costs and shorten payback periods.
Local utility programs, federal/state tax incentives, and manufacturer rebates vary by location and system efficiency. Homeowners should verify eligibility, required documentation, and application timelines before purchase.
- Check utility rebate portals
- Confirm tax credit rules
- Compare lender terms
Quick upgrades to improve efficiency and reduce bills
Simple upgrades can yield noticeable drops in cooling costs while smoothing the path to a more efficient central air system.
Homeowners should seal ducts, add attic insulation, install a programmable thermostat, and replace dirty filters regularly.
Shade windows, use ceiling fans, and upgrade to ENERGY STAR appliances.
Consider zoning dampers and smart vents.
Small investments lower bills and extend equipment life.
When to Hire a Professional vs. DIY Considerations
A clear assessment of tasks that experienced DIYers can safely handle—such as installing ductwork or mounting an air handler—versus those requiring certified handling of refrigerants and electrical connections helps determine the approach.
Legal and safety considerations, including local licensing and permit requirements and liability for improper installation, often necessitate hiring a licensed HVAC contractor.
Prospective homeowners should ask contractors about licenses, insurance, references, warranties, and a detailed written quote to compare scope, timeline, and total cost.
Tasks safe for skilled DIYers and required certifications
Determine which steps of a central air installation a homeowner can safely undertake and which legally require licensed professionals.
Skilled DIYers may handle planning, removing old equipment, mounting condensers, running basic ductwork and electrical conduit if competent.
Tasks often requiring certification include refrigerant handling, pressure testing, system charging, and final electrical hookups.
Verify local licensing and EPA Section 608 requirements before attempting any restricted work.
Legal and safety reasons to hire licensed HVAC contractors
Because central air systems combine high-voltage electricity, pressurized refrigerants, and complex airflow dynamics, hiring a licensed HVAC contractor is often necessary to secure legal compliance and safe operation.
Licensed professionals ascertain proper refrigerant handling, accurate electrical work, code-compliant permits and inspections, and warranty-valid installations.
They reduce liability, prevent hazards like leaks or fire, and provide certified diagnostics and reliable documentation for future service.
Questions to ask potential contractors and how to compare quotes
When should a homeowner probe a contractor’s credentials and bid details versus attempting any part of the installation themselves? A homeowner should prioritize licensed contractors for complex tasks, seek clear warranties, and verify insurance.
Compare written quotes by scope, efficiency ratings, and total cost; favor transparent breakdowns and references.
- Ask about license, insurance, and permits
- Request itemized, comparable bids
- Check references and warranty terms
Conclusion
In sum, installing central air may be thought of as a thoughtful home improvement rather than an ordeal. With prudent assessment, suited equipment selection, careful preparation, and mindful upkeep, the household’s comfort quietly advances. Occasional complications become gentle reminders to pause, consult guidance, or seek skilled hands. Financial planning and energy-wise choices ease burdens, and when limits are met, professional expertise arrives as a considerate companion on the path to lasting, cool serenity.