How to Install AO Smith Tankless Water Heater: Step-by-Step Guide for DIYers
Installing an AO Smith tankless water heater is a straightforward process for competent DIYers. Begin by selecting the appropriate model and preparing the installation site. The installation steps include removing the old unit, mounting the new heater, connecting cold and hot water lines, setting up venting and condensate drains, and making gas and electrical connections. Don’t forget to conduct leak and safety tests. Regular maintenance, such as flushing and filter checks, will enhance the heater’s longevity. If you have concerns about gas lines, high-voltage work, or adhering to local codes, it’s best to consult a licensed professional.
Overview of AO Smith Tankless Water Heaters and DIY Feasibility
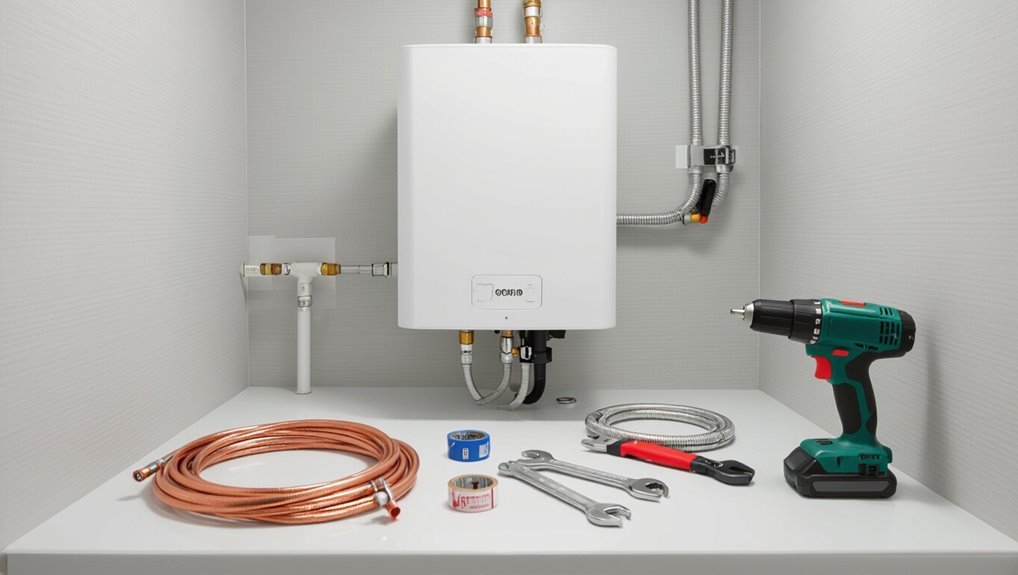
A tankless water heater provides on-demand hot water without a storage tank. AO Smith models distinguish themselves by specific flow rates, ignition systems, and energy-efficiency features.
Installing one can save space and reduce energy bills but may require significant gas, electrical, or ventilation upgrades that challenge a DIYer. A licensed professional should be hired for complex hookups, code compliance, or any work involving gas lines, high-capacity electrical connections, or permits.
What a tankless water heater is and how AO Smith models differ
Tankless water heaters heat water on demand instead of storing it in a tank, delivering continuous hot water and improving energy efficiency by eliminating standby heat loss.
AO Smith models combine compact design, varied flow-rate capacities, and integrated safety features, differing in fuel type and venting needs.
The guide covers how to install AO Smith tankless water heater while noting installation complexity and required permits.
Benefits and limitations of installing your own unit
Although DIY installation can reduce upfront costs and give hands-on homeowners control over the process, evaluating the benefits and limitations of installing an AO Smith tankless water heater requires weighing technical skills, local code requirements, and model-specific demands.
DIY advantages include cost savings and scheduling flexibility; limitations involve electrical/gas competency, correct venting, warranty implications, and potential inspection or permit complexities that affect compliance and safety.
When to hire a licensed professional instead
When should a homeowner call a licensed professional instead of attempting an AO Smith tankless water heater installation alone?
A professional is advised for complex gas line modifications, high-voltage electrical hookups, unfamiliar local codes, inadequate ventilation, multi-zone plumbing, or when required by warranty.
Also hire help if lacking tools, experience with pressure testing, or confidence; licensed installers guarantee safety, compliance, and reliable performance.
Required Tools, Materials, and Safety Equipment
A concise checklist of tools and materials guarantees the installation proceeds efficiently and without unnecessary trips to the hardware store.
The installer should confirm availability of specific replacement parts, PPE (gloves, eye protection, respirator as needed), and jobsite safety measures before beginning.
Finally, adherence to permits, local plumbing/electrical/gas codes, and scheduling of required inspections must be verified to avoid violations or rework.
Tools checklist
Numerous specialized and common tools, specific materials, and appropriate safety equipment are required to install an AO Smith tankless water heater safely and correctly.
The installer should prepare precise hand and power tools, measuring and testing devices, plus basic consumables.
Safety gear must protect eyes, hands, and hearing while ensuring safe gas and electrical work.
- Torque wrench, pipe cutters, adjustable wrench
- Multimeter, gas leak detector, level
- Safety glasses, gloves, ear protection
Materials and replacement parts checklist
Several specific materials and replacement parts are essential to guarantee a safe, code-compliant AO Smith tankless water heater installation and to minimize callbacks for repairs.
Required components include proper fittings, venting, and electrical supplies; spare parts reduce downtime.
Suggested checklist:
- Flexible stainless steel connectors, isolation valves, and union fittings
- Category III/IV vent kit, termination cap, and corrosion-resistant pipe
- Compatible circuit breakers, wiring, and surge protection components
Personal protective equipment and jobsite safety precautions
When working on an AO Smith tankless water heater, technicians must wear appropriate personal protective equipment and follow strict jobsite safety protocols to prevent injury and guarantee compliance with codes.
Safety includes eye and hand protection, respiratory precautions for dust or fumes, and knee/back support for prolonged work.
Recommended items:
- Safety glasses and face shield
- Cut-resistant gloves and work gloves
- N95/respirator and knee pads
Permits, local codes, and electrical/gas inspection requirements
Because installation affects plumbing, gas, and electrical systems, securing the proper permits and adhering to local codes is mandatory before work begins; inspectors will verify compliance with venting, combustion air, pressure relief, wiring, and gas line sizing requirements.
Contractors or homeowners must obtain building permits, submit plans, and schedule rough and final inspections.
Failure to comply can void warranties and result in fines or unsafe installations.
Selecting the Right AO Smith Tankless Model for Your Home
Selecting an appropriate AO Smith tankless model requires calculating required flow rate (GPM) and temperature rise to guarantee sufficient hot water output for the household.
Consideration of fuel type—natural gas, propane, or electric—along with their respective performance, cost, and installation implications, affects model choice and venting needs.
Finally, evaluate venting clearances, physical space, and whether existing plumbing and electrical capacity can support the selected unit.
Sizing the unit: flow rate (GPM) and temperature rise calculations
Determining the correct AO Smith tankless model hinges on two measurements: the household’s peak simultaneous flow rate in gallons per minute (GPM) and the required temperature rise — the difference between incoming groundwater temperature and the desired hot output.
Calculate total GPM from fixtures used concurrently, then subtract inlet temperature from target temperature to get rise.
Match resulting GPM×rise to unit specifications, allowing a safety margin.
Fuel type options: natural gas, propane, electric pros and cons
Choose the fuel type that best matches a home’s existing infrastructure, hot water demand, and local fuel availability. Each fuel has trade-offs: natural gas and propane deliver higher BTU and faster recovery; electric models are simpler and lower maintenance but may require upgraded electrical service. Compare cost, efficiency, and availability before selecting.
| Fuel | Strengths | Limitations |
|---|---|---|
| Natural gas | High output, common | Requires gas line |
| Propane | Portable, high output | Fuel delivery needed |
| Electric | Simple, compact | Higher operating cost |
Venting requirements and space considerations
Because venting directly affects performance and safety, homeowners must match an AO Smith tankless model to available venting options and the physical space where it will sit.
Consider required clearances, indoor versus concentric or direct-vent termination, and access for maintenance.
Verify exhaust routing avoids obstructions, uses approved materials, and meets local codes.
Allow service clearance and plan for condensate drainage where applicable.
Matching existing plumbing and electrical capacity
After confirming venting and clearances, attention turns to matching the tankless unit to the home’s existing plumbing and electrical systems.
Assess pipe sizes, water flow rates, and any pressure-reducing valves to guarantee required GPM.
Verify electrical service: amperage, breaker capacity, and dedicated circuits for electric models.
For gas units, confirm supply line size and meter capacity.
Consider professional verification before purchase.
Pre-Installation Preparation
Before beginning work, all utilities—water, gas, and electrical power—should be shut off and verified safe to prevent hazards.
The old heater must be removed and the mounting area cleared and measured for the new unit.
A technician should inspect existing piping, the gas line, and the electrical panel, and plan the venting route and condensate drain location to guarantee code compliance and proper operation.
Turning off water, gas, and power safely
Shut off the main water supply, the gas line, and electrical power to the existing heater to eliminate hazards before any work begins.
Verify closures using pressure gauges and a shutoff valve test; guarantee the gas meter shows zero flow and pilot lights are extinguished.
Lock out and tag electrical breakers, bleed residual water, and ventilate the area.
Confirm absence of gas odor before proceeding.
Removing the old water heater and preparing the mounting area
Disconnecting and removing the existing tanked heater begins with draining residual water and detaching supply lines, venting, and electrical or gas connections per the shutoff confirmations already completed.
The unit is unbolted and lifted clear, using assistance for weight. The mounting wall is cleared of debris, studs exposed, and surfaces leveled.
Mark and reinforce designated mounting points; clean and dry the area for installer access.
Assessing piping, gas line, and electrical panel needs
Survey the existing plumbing, gas, and electrical systems to determine compatibility with the AO Smith tankless unit’s requirements.
Inspect pipe sizes, materials, and flow capacity; identify need for new copper, stainless, or flexible connectors.
Verify gas line diameter, pressure, shutoff location and any upgrade needs.
Confirm electrical panel capacity, dedicated circuit requirements, and placement for the heater’s power supply.
Planning venting route and condensate drain location
With piping, gas, and electrical needs confirmed, attention turns to locating the venting route and condensate drain for the AO Smith tankless unit.
The installer evaluates shortest, code-compliant vent runs, clearances, and termination points to minimize elbows.
Condensate drain placement must slope to an approved drain or pump, avoid freeze exposure, and follow manufacturer and local codes.
Plan access for service and inspections.
Step-by-Step Installation Process
The following step-by-step installation process covers mounting the AO Smith tankless unit on the wall and securing all plumbing connections, including supply, cold inlet, hot outlet, and the pressure relief line.
It also addresses proper venting and sealing of penetrations, gas line sizing with a shutoff valve and leak testing, and the required electrical hookup for ignition, controls, and grounding.
Each step emphasizes correct sequencing and adherence to local codes to guarantee safe, reliable operation.
Mounting the AO Smith tankless unit on the wall
Begin by locating a suitable mounting spot that meets the unit’s clearance, structural, and service-access requirements: a solid wall near the water and gas/electrical connections, free of obstructions and within manufacturer-specified clearances.
Mark mounting holes using the template, drill appropriate anchors into studs or masonry, install the mounting bracket securely, then hang the heater and verify it is level and firmly seated before finishing.
Connecting the water lines: supply, cold inlet, hot outlet, and pressure relief
Prepare to connect the water lines by confirming water supply is shut off and the unit is positioned so inlet and outlet ports align with the home plumbing; identify the cold-water inlet, hot-water outlet, supply line, and location for the temperature and pressure relief (TPR) valve before cutting or fitting any pipes.
- Attach isolation valves to inlet and outlet for serviceability.
- Install a TPR valve with drip leg and proper discharge.
- Use appropriate fittings, thread sealant, and test for leaks under pressure.
Installing the venting system and sealing penetrations
Install the venting system with attention to clearances, proper pipe slope, and manufacturer-specified materials to guarantee safe exhaust and combustion air intake.
Use approved concentric or direct-vent piping, secure joints with manufacturer methods, and maintain required support spacing.
Penetrations through walls/roof must be sealed with listed firestop and weatherproofing materials to prevent drafts, moisture, and exhaust leakage.
Connecting the gas line: sizing, shutoff valve, and leak testing
After sealing vent penetrations, attention turns to the gas connection: proper pipe sizing, a readily accessible shutoff valve, and methodical leak testing guarantee safe, reliable fuel delivery.
Verify pipe diameter and length against heater BTU requirements, install a code-compliant shutoff upstream, use approved fittings and sealant, pressure-test the system per local code, inspect joints for bubbles, and correct any leaks before commissioning.
Electrical hookup for ignition, controls, and grounding
One step focuses on establishing the electrical connections required for the unit’s electronic ignition, control circuitry, and equipment grounding.
A licensed electrician should run correct-gauge branch circuit wiring to the heater, install a dedicated breaker and disconnect, and bond the chassis to building ground.
Follow manufacturer wiring diagram, tighten terminal connections, secure conduit, and verify voltage, polarity, and continuity before energizing the system.
Installing condensate drain and water filtration/softener if required
With electrical connections verified and the unit de-energized, attention shifts to managing condensate and incoming water quality.
Condensate drain must slope continuously to an appropriate drain or neutralizer; use corrosion-resistant tubing and secure fittings.
Install recommended sediment filter, scale inhibitor or softener per water hardness and manufacturer guidance upstream of the unit.
Pressure and bypass valves should remain accessible for maintenance and winterization.
Initial start-up procedure and setting temperature
Once electrical and plumbing connections are confirmed and the unit remains de-energized, the installer begins the initial start-up by purging air from the water lines, verifying proper gas or electrical supply, and preparing the control interface for configuration.
The technician energizes power, checks for leaks, runs diagnostics, sets the outlet temperature per code and user preference (commonly 120°F), and documents settings and safety checks.
Testing, Commissioning, and First-Use Checks
The installer conducts a systematic testing and commissioning sequence to confirm safe operation and performance.
This includes checking for water, gas, and venting leaks, verifying flow rate, temperature rise, and fixture activation, and interpreting AO Smith diagnostic codes.
A final inspection checklist is completed and signed off before the job is closed.
Checking for water, gas, and venting leaks
Begin by visually inspecting all water, gas, and vent connections for proper fittings and secure fastenings before pressurizing the system.
Slowly open water and gas valves, watching joints for drips or bubbles using soapy water on fittings.
Check vent seams and caps for obstructions or gaps.
If any leak is detected, shut off supply, repair or tighten, and retest until fully sealed.
Verifying flow rate, temperature rise, and activation at fixtures
After confirming there are no leaks in water, gas, or venting, attention shifts to verifying the unit’s performance at the fixtures.
Run each hot tap, measure flow with a flow meter or timed container, and confirm activation threshold.
Record inlet and outlet temperatures to calculate temperature rise.
Guarantee stable output at expected setpoints and that multiple fixtures can operate without cold-water sandwich or shutdown.
Diagnostic codes and how to interpret AO Smith error messages
Consulting the unit’s diagnostic codes provides a quick, objective snapshot of operational status and fault history during testing, commissioning, and first-use checks.
Technicians reference the code table in the manual, note timestamps, and correlate codes with observed symptoms to determine corrective steps.
- E1/E2: ignition or flame failure — check gas supply, venting, electrodes.
- AF: flow sensor issue — verify flow, clean or replace sensor.
- LH: high-limit trip — inspect heat exchanger, scale, and recirculation.
Final inspection checklist before closing the job
When all component checks and diagnostic code verifications are complete, a concise final inspection guarantees the AO Smith tankless water heater is safe, compliant, and operational before the job is closed.
Verify leak-free plumbing, proper venting, secure electrical connections, correct gas pressure, and intact condensate drain.
Confirm temperature setpoints, run a hot-water demand test, document readings, and obtain required permits/sign-offs before leaving site.
Common Installation Problems and Troubleshooting
The guide next outlines frequent installation problems and practical troubleshooting steps.
It covers causes and fixes for no ignition or intermittent firing, low hot-water flow or insufficient temperature, and condensation, venting, and corrosion concerns.
It also explains how to diagnose common electrical and gas supply issues.
No ignition or intermittent firing causes and fixes
Diagnose ignition failures methodically, since intermittent firing or a complete lack of ignition is one of the most common issues after installation.
Check gas supply, pressure, and valve positions; verify electrical connections, grounding, and control board fault codes.
Inspect ignition electrode and flame sensor for soiling or misalignment.
Confirm proper venting and condensate drainage.
Replace faulty components per manufacturer specifications.
Low hot water flow or insufficient temperature solutions
After confirming ignition reliability and clearing any electrode or venting faults, attention shifts to low hot water flow or inadequate temperatures, a frequent post-installation complaint.
Inspect inlet strainers and filters for debris, verify correct gas pressure and flow rates, guarantee proper water flow minimums, check for cross-connections or mixing valves, and confirm temperature setpoints and remote sensor calibration to restore expected performance.
Condensation, venting, and corrosion issues
Many installations encounter condensation, venting, and corrosion issues that degrade performance and shorten equipment life; addressing them requires focused inspection of flue routing, material compatibility, drain provisions, and combustion byproduct management.
Inspect vent slopes and seals to prevent condensate pooling, use corrosion-resistant stainless or CPVC per code, provide a condensate trap/drain, avoid mixing metals without dielectric fittings, and monitor exhaust for acidic corrosion.
Electrical and gas supply problem diagnostics
When electrical or gas faults impair a tankless AO Smith unit, technicians should systematically verify supply integrity before replacing components: confirm correct voltage, proper grounding, and secure, code-compliant wiring connections; check that the gas line delivers adequate pressure and flow under load, that shutoff valves and unions are fully open, and that fittings match the heater’s required pipe size and thread type.
Diagnose loose terminals, tripped breakers, inadequate meter readings, regulator failures, or partial blockages.
Maintenance After Installation
Routine maintenance guarantees longevity and efficiency of the AO Smith tankless water heater.
Recommended tasks include periodic flushing and descaling on a regular schedule, replacing filters, anodes, and worn components at manufacturer-specified intervals, and performing seasonal checks to winterize or prepare the unit for colder months.
The following section outlines specific timelines and step-by-step procedures for each maintenance activity.
Recommended flushing and descaling schedule
Establish a regular flushing and descaling schedule to preserve efficiency and prevent mineral buildup in an AO Smith tankless water heater.
Perform a full flush with a descaling solution every 6–12 months, adjusting frequency for hard-water areas or heavy use.
Inspect heat exchanger performance during service.
Document dates and results to track trends and prompt earlier intervention if flow, temperature, or error codes indicate scaling.
Filter, anode, and component replacement intervals
Monitor and replace filters, sacrificial anodes, and wearable components on a predictable schedule to maintain AO Smith tankless water heater reliability.
Inspect inlet strainers and replace every 6–12 months depending on water quality.
Check sacrificial anodes annually and replace when 50% depleted.
Replace pressure-relief valves, gaskets, and sensors per manufacturer intervals or upon signs of wear, typically every 3–5 years.
Seasonal checks and preparing the unit for winter
As colder months approach, seasonal checks and winter preparation protect the AO Smith tankless water heater from freeze damage and performance loss.
Inspect inlet/outlet insulation, pipe heat tape, and seals; drain and flush if service manual recommends.
Confirm condensate drain and vent clearances, check ignition operation, and test freeze protection settings.
Schedule professional service for persistent issues or complex winterization tasks.
Cost Breakdown, Time Estimates, and ROI Considerations
An overview of upfront and ongoing costs compares typical DIY expenses—parts and permits—to professional installation fees and potential upgrades.
A phase-by-phase time estimate outlines site preparation, unit installation, electrical/gas connections, and testing.
Projected energy savings and a payback timeline based on local fuel prices and usage complete the financial picture.
Typical DIY costs versus professional installation
Cost comparisons between DIY and professional installation hinge on materials, labor, permits, and potential upgrades; a homeowner tackling an AO Smith tankless water heater can expect lower out-of-pocket labor costs but must account for specialized tools, gas or electrical work, venting materials, and unexpected complications. DIY: lower labor, higher risk. Pro: higher cost, warranty confidence.
| Item | DIY | Pro |
|---|---|---|
| Labor | Low | High |
| Permits | Variable | Included |
| Risk | Higher | Lower |
Estimated time required for each installation phase
Estimated time for each installation phase varies with site conditions and installer experience, but a typical AO Smith tankless water heater project breaks down into discrete tasks:
- Preparation and system assessment: 30–90 minutes for measurements, permits, and materials check.
- Mounting and plumbing/gas hookup: 2–5 hours depending on modifications and venting complexity.
- Electrical hookup, testing, and commissioning: 1–2 hours including safety checks.
Energy savings and payback timeline
Long-term savings from a tankless AO Smith system derive mainly from reduced standby losses, higher efficiency during hot-water demand, and lower operating hours compared with a traditional tank heater.
Typical annual energy savings vary 10–30% depending on usage and fuel. Upfront cost premium often yields a 5–12 year payback; incentives, fuel prices, and household consumption drive actual ROI.
Useful Resources, Documentation, and Warranty Notes
The manufacturer’s website and included literature provide manuals, wiring diagrams, and parts lists needed for correct installation.
Installers should note how specific installation practices and registration affect the AO Smith warranty and follow any registration steps required.
For questions about compatibility, warranty coverage, or complex installations, AO Smith support or a licensed technician should be contacted.
Where to find AO Smith manuals, wiring diagrams, and parts lists
When seeking AO Smith tankless water heater documentation, consult the manufacturer’s website first, where user manuals, wiring diagrams, and exploded parts lists are organized by model number and serial range.
Additional reliable sources include authorized dealers, service centers, and OEM parts distributors. Use model-specific PDFs for accurate installation and replacements.
- AO Smith support/downloads page
- Authorized dealer parts lookup
- OEM technical service centers
How installation affects manufacturer warranty and registration steps
Installers should recognize that proper installation directly influences AO Smith’s warranty eligibility and the steps required for registration; failure to follow manufacturer specifications, use authorized parts, or document installation can void coverage.
Installers must record serial numbers, retain receipts, complete online registration within specified timeframes, and submit required installation details and contractor information.
Noncompliance may limit parts or labor claims.
When to call AO Smith support or a licensed technician
Why contact AO Smith support or a licensed technician now?
The manufacturer should be contacted for registration questions, warranty claims, error codes, or unclear installation requirements.
A licensed technician is advised for gas line modifications, venting issues, electrical upgrades, and failed diagnostics.
Professional involvement prevents safety hazards, preserves warranty validity, and guarantees compliance with local codes and proper system performance.
Conclusion
Installing an AO Smith tankless water heater can cut energy consumption considerably; one study found tankless units reduce energy use by up to 34% compared with traditional tanks. With proper model selection, tools, permits, and attention to gas, electrical, and venting requirements, many DIYers complete installation safely. Regular maintenance preserves efficiency and warranty eligibility. For those unsure, hiring a licensed pro guarantees code compliance and peak performance, protecting long‑term savings and reliability.