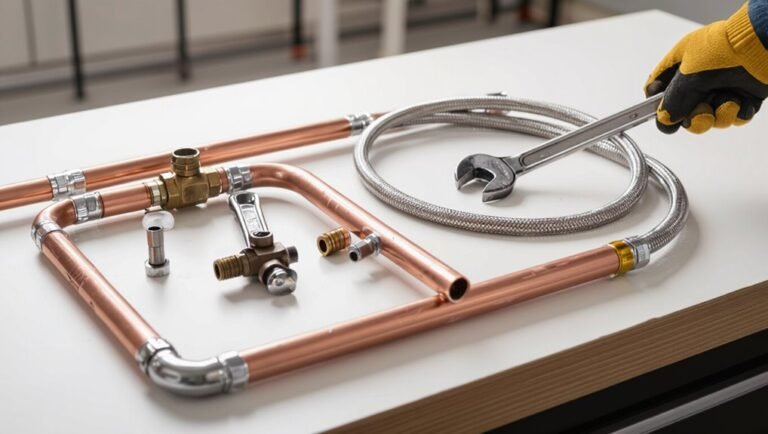
How to Install an EcoSmart Tankless Water Heater: Step-by-Step Guide for DIY Success
To install an EcoSmart tankless electric water heater, start by obtaining the necessary permits and determining the correct size for your home. Plan your electrical and plumbing routes before mounting the unit on a suitable wall. Install shutoff, pressure-reducing, and backflow valves, then connect the inlet and outlet with appropriate unions, ensuring proper torque. Run dedicated circuit wiring with the correct gauge, grounding, and breakers before turning on the power. Finally, conduct a pressure test, perform diagnostics, and flush the system to remove any mineral buildup. For detailed steps, safety checks, and troubleshooting tips, continue reading.
Overview of Installing an EcoSmart Tankless Water Heater
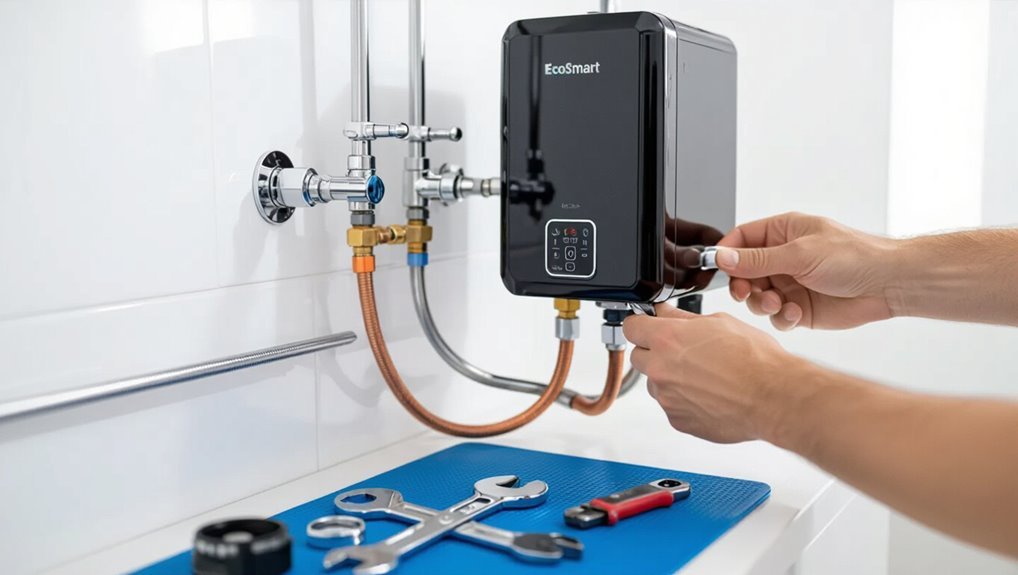
An EcoSmart tankless water heater is a compact, on-demand system that heats water electronically as it flows through the unit, eliminating a storage tank.
Installing one can offer energy savings and space advantages. A motivated homeowner may complete the project with basic electrical and plumbing skills.
However, local permits and code compliance are often required. Complex electrical upgrades, gas hookups, or unfamiliarity with regulations are valid reasons to hire a licensed professional.
What an EcoSmart tankless water heater is and how it works
Several models of EcoSmart tankless water heaters provide on-demand hot water by heating cold water as it flows through a compact, wall-mounted unit.
These electric units use modular heating elements and digital thermostats to regulate temperature, minimizing standby loss.
Understanding flow rates, electrical requirements, and plumbing connections is essential when researching how to install ecosmart tankless water heater safely and correctly.
Benefits of installing a tankless unit yourself
Many homeowners gain tangible advantages by installing an EcoSmart tankless water heater themselves, including lower upfront labor costs, direct control over placement and routing, and the opportunity to verify workmanship to personal standards.
DIY installation can accelerate project timelines, foster familiarity with system operation and maintenance, and yield long-term savings through ideal setup and efficient operation when performed competently and carefully.
Required permits, codes, and when to hire a professional
After weighing the cost and control benefits of a DIY EcoSmart tankless installation, attention turns to legal and safety requirements that govern the work.
Local building codes, plumbing and electrical permits, and inspection schedules vary; confirming requirements with the municipality is essential.
Complex gas, electrical, or structural modifications, lack of permit access, or uncertainty about compliance warrant hiring a licensed contractor.
Tools, Materials, and Pre-Installation Checklist
Before beginning installation, the installer should list required tools for both electrical and plumbing work and gather EcoSmart-specific parts and materials.
A site evaluation must confirm suitable location, required clearances, and ventilation.
Finally, electrical service capacity and water supply compatibility should be verified to guarantee the unit will operate safely and efficiently.
Tools needed for electrical and plumbing work
A compact list of essential tools and materials guarantees the electrical and plumbing tasks for installing an EcoSmart tankless water heater proceed safely and efficiently.
- Multimeter, voltage tester, and wire strippers for electrical verification and connections.
- Adjustable wrench, pipe cutter, and tubing bender for plumbing manipulation.
- Pipe thread sealant, Teflon tape, and flux for leak-free joints.
- Circuit breaker, conduit, and grounding tools for compliant power installation.
Materials and parts specific to EcoSmart models
Several specific components and consumables are required for EcoSmart tankless models to secure proper fit, performance, and warranty compliance.
Recommended materials include model-specific electrical connectors, pressure relief valves rated for tankless units, dielectric unions or isolation valves, and manufacturer-approved pipe fittings.
These guarantee safe installation, correct flow rates, and preserve warranty terms.
- Electrical connectors
- Pressure relief valve
- Dielectric unions/isolation valves
- Approved pipe fittings
Site evaluation: location, clearances, and ventilation requirements
Site evaluation examines the proposed installation area for an EcoSmart tankless unit to confirm adequate location, required clearances, and proper ventilation.
The assessor verifies mounting surface, nearby combustibles, service access, and manufacturer-specified clearance distances.
Venting paths, termination points, and outdoor vs. indoor placement are checked for code compliance.
Combustion air and exhaust routing are confirmed to prevent backdrafting and moisture issues.
Verifying electrical service and water supply compatibility
Confirm electrical service capacity and water supply conditions before beginning installation to guarantee the EcoSmart tankless unit will operate safely and efficiently.
Verify voltage, amperage, breaker size, and dedicated circuits meet EcoSmart specifications. Confirm ground-fault protection, conductor sizing, and panel capacity.
Assess incoming water pressure, flow rate, and hardness; install pressure regulators, filters, or water softeners as required for reliable performance and warranty compliance.
Electrical Requirements and Preparation
The electrical preparation outlines the necessary calculations for power demand and proper circuit sizing based on the chosen EcoSmart model and whether a single or multi-unit setup is used.
It also covers when a service panel upgrade and specific breaker selection are required to meet code and manufacturer specifications.
Clear safety precautions for working on live electrical systems are emphasized before any wiring work begins.
Calculating power requirements and circuit sizing
Before installing an EcoSmart tankless water heater, calculate its total electrical load and required circuit size to guarantee safe, code-compliant operation.
Determine unit amperage at maximum kW, add branch-circuit allowances, and apply continuous-load derating per NEC (125%).
Verify service capacity and panel space.
Select appropriately rated breakers, wire gauge, and disconnects.
Consult local code and a licensed electrician for final approval.
Choosing between single- and multi-unit installations
When sizing electrical infrastructure, should one opt for a single high-capacity EcoSmart unit or multiple lower-capacity units, the decision hinges on household demand patterns, available service capacity, and panel space.
A single unit simplifies plumbing and control but concentrates load; multiple units provide staged heating, redundancy, and distributed circuit loads.
Consider simultaneous fixture use, installation complexity, and maintenance access when selecting configuration.
Upgrading service panel and breaker selection
If multiple lower-capacity EcoSmart units were chosen to spread load and provide redundancy, that decision directly affects service panel capacity and breaker strategy.
Panel upgrades may be required to accommodate additional 240V circuits and total amperage.
Breaker selection must match each unit’s rated amperage and comply with local code, allowing for simultaneous operation, proper conductor sizing, and space for future expansion without overloading the service.
Safety precautions for working on live electrical systems
Exercise strict caution around energized circuits: only qualified personnel should interact with live electrical systems, using insulated tools, appropriate personal protective equipment (PPE), and verified test instruments.
Lockout/tagout procedures, clear labeling, and circuit verification prevent accidental energization.
Maintain safe distance, avoid conductive jewelry, and use voltage-rated gloves and mats.
Document steps, notify occupants, and restore power only after thorough inspection and testing.
Plumbing Preparation and Water Line Considerations
Before connecting the unit, the installer should confirm ideal cold-water inlet and hot-water outlet locations and plan for pressure limiting, isolation, and check valves to protect the heater and allow servicing.
Any required sediment filters or water softeners should be positioned upstream to prevent scaling and debris from shortening the unit’s lifespan.
Appropriate pipe materials, fittings, and backing supports must be selected and secured per local code and manufacturer recommendations.
Assessing cold-water inlet and hot-water outlet locations
Several key measurements guide the placement of the cold-water inlet and hot-water outlet to secure proper flow, ease of connection, and compliance with local codes.
The installer verifies distance to existing supply and fixtures, aligns inlet/outlet with unit’s specified pipe centers, confirms adequate clearance for fittings and condensate, and plans straight runs to minimize elbows and pressure loss while maintaining service access.
Pressure limiting, isolation valves, and check valves
After locating inlet and outlet points, attention turns to pressure-limiting devices and valve arrangements that protect the EcoSmart unit and allow serviceability.
A pressure-reducing valve prevents overpressure; install shutoff isolation valves on both inlet and outlet for maintenance.
A backflow-preventing check valve safeguards potable water.
Confirm valves are accessible, properly oriented, and rated for system pressure and temperature to meet code and manufacturer recommendations.
Installing sediment filters and water softeners if needed
If water quality issues such as visible sediment or hardness are present, install a sediment filter and consider a water softener upstream of the EcoSmart unit to protect internal components and maintain efficiency.
Select filters rated for particulate size and flow, place them before isolation valves, and choose a softener sized to local hardness and household demand.
Regular maintenance and periodic cartridge or media replacement are essential.
Pipe materials, fittings, and recommended backing supports
Proper selection of pipe materials, fittings, and backing supports is essential to guarantee reliable water delivery, prevent leaks, and avoid damage to an EcoSmart tankless water heater.
Use copper, CPVC, or PEX rated for hot water; choose brass or stainless fittings.
Include isolation valves, dielectric unions where dissimilar metals meet, and secure piping with wall anchors or metal straps spaced per code to minimize stress and vibration.
Step-by-Step Installation Process
The installation sequence begins with securely mounting the EcoSmart unit to a suitably rated wall and verifying clearance and support.
Next, the technician connects the cold-water inlet and hot-water outlet, tests for leaks, and completes the electrical work—wiring to the specified breakers, installing grounding and bonding, and adding surge protection as required.
Finally, the installer configures temperature settings and flow-activation parameters before performing a full operational check.
Mounting the EcoSmart unit securely to the wall
Begin by marking the wall mounting location and confirming studs or suitable anchors are available to support the unit’s weight and vibration.
Position the mounting bracket level, drill pilot holes, and secure with manufacturer-recommended fasteners.
Lift the EcoSmart unit onto the bracket, engage safety locks, and verify vertical and horizontal alignment.
Tighten all hardware to specified torque and inspect for firm, rattle-free attachment.
Connecting water lines: inlet, outlet, and leak testing
Once mounted, attention turns to connecting the cold-water inlet and hot-water outlet, ensuring flow direction and valve orientation match the unit’s markings before making any seals.
Install shutoff valves and compatible fittings, use appropriate thread tape or sealant, tighten per torque specs, and open valves slowly.
Pressurize the system, inspect all joints for leaks, and re-tighten or reseal as needed until dry.
Making electrical connections and wiring the unit to breakers
Proceed to make the electrical connections only after confirming the power is shut off at the main panel and the unit’s required voltage and amperage match the supply.
Install appropriate gauge conductors into the heater’s junction box, tighten connections to manufacturer torque specs, route wiring to dedicated breakers, label circuits, and secure conduit.
Verify polarity and continuity before energizing, following local codes and manufacturer instructions.
Installing grounding, bonding, and surge protection
After the electrical branch circuits are installed and verified, attention turns to grounding, bonding, and surge protection to safeguard the EcoSmart unit and the building electrical system.
Install a dedicated grounding conductor to the heater’s ground lug and bond to the building ground. Verify continuity with a meter.
Mount an appropriate surge protector at the service or panel per manufacturer specifications and local code.
Configuring temperature settings and flow activation
Configure the EcoSmart unit’s temperature setpoint and flow activation parameters according to the installation requirements and local codes.
The technician programs desired outlet temperature, limits maximum temperature for safety, and sets minimum activation flow to prevent short cycling.
Confirm ECO mode, anti-scald and vacation settings, and lock adjustments if available.
Document final settings and label the unit for homeowner reference.
Initial startup procedure and verifying hot-water delivery
Begin the initial startup by confirming all electrical and plumbing connections are secure and that inlet filters and strainers are clean.
Open supply valves slowly, purge air by running a nearby hot faucet until steady flow appears.
Energize the unit, observe startup indicators and error codes, then verify consistent hot-water temperature and adequate flow at multiple fixtures.
Document readings and adjust settings if needed.
Post-Installation Checks and Commissioning
After installation, the technician runs the EcoSmart unit’s diagnostic routines and checks any displayed error codes to confirm proper operation.
They verify and adjust hot water temperatures, inspect all fittings for leaks or unusual noises, and measure flow rates to guarantee performance meets specifications.
Finally, breakers and the unit are labeled, warranty information is registered, and manuals are stored with the job documentation.
System diagnostics and reading error codes
Run a diagnostic check to verify the EcoSmart tankless water heater is operating within specified parameters and to identify any error codes that require attention.
Consult the unit’s LED display or app for code listings, reference the manual for meanings, note frequency and conditions of faults, clear transient errors after fixes, and document persistent codes for troubleshooting or professional service.
Water temperature verification and adjustment
With diagnostic results reviewed and any persistent error codes documented, the installer proceeds to verify and adjust the water temperature settings to secure safe, comfortable operation.
Using a calibrated thermometer at a hot tap, they confirm outlet temperature matches setpoint. If adjustment is needed, the installer fine-tunes digital controls or flow/temperature trim, then rechecks stability under typical demand to guarantee consistent delivery.
Checking for leaks, noises, and proper flow rates
Begin a systematic inspection for leaks, unusual noises, and correct flow rates immediately following commissioning to confirm safe, efficient operation.
Visually inspect all joints, valves, and condensate drains while the system runs.
Listen for grinding, banging, or hissing.
Verify inlet and outlet flow rates meet manufacturer specs using a flow meter or timed volume test.
Address any anomalies before regular use.
Documentation: labeling breakers, warranty registration, and manuals
After confirming mechanical and electrical performance, documentation tasks guarantee future safe operation and serviceability:
Label the dedicated breaker clearly at the panel, note circuit amperage and unit model.
Complete warranty registration promptly using purchase and installation details.
Store the owner’s manual, installation notes, serial number, and maintenance record in a safe, accessible place.
Provide copies to homeowners and service technicians for accountability.
Common Problems During Installation and How to Fix Them
Common installation issues include insufficient hot water or reduced flow, electrical faults that trip breakers, and leaks at fittings or from the unit.
The installer should also be prepared to interpret EcoSmart-specific error codes and follow the manufacturer’s troubleshooting steps.
Each problem requires targeted diagnostics—flow and temperature checks for performance issues, electrical inspection for breaker trips, pressure and seal checks for leaks, and code lookup for electronic errors.
Insufficient hot water or reduced flow
Many homeowners encounter insufficient hot water or reduced flow when installing an EcoSmart tankless water heater, typically caused by incorrect unit sizing, mineral buildup, or restrictive plumbing components.
Diagnosing the exact cause requires systematic checks of flow rate, inlet/outlet temperatures, and filter or valve conditions.
After identifying the issue, remedy options include upsizing the unit, descaling heat exchanger, cleaning/replacing filters, and removing restrictive fittings or partially closed valves.
Tripping breakers and electrical faults
Troubleshooting flow and temperature issues often reveals that electrical problems are a separate but equally important category of installation failures.
The guide notes breakers tripping, loose connections, incorrect breaker sizing, and overheating as common causes.
Inspect wiring, confirm neutral and ground integrity, verify correct breaker amperage and dedicated circuit, and guarantee proper torque on terminals.
Recommend professional electrician for persistent faults.
Leaks at fittings or from unit
If water appears at pipe joints or from the heater casing after installation, the leak source should be isolated immediately to prevent water damage and electrical hazards.
Inspect fittings, unions, and flanges for loose connections or insufficient thread sealant. Tighten fittings to manufacturer torque specs, replace damaged seals or gaskets, and retape threaded joints with proper plumber’s tape.
Repressurize and verify no further seepage.
Error codes specific to EcoSmart models and troubleshooting steps
Several EcoSmart tankless models display alphanumeric error codes on their control panels to indicate specific faults during installation or initial operation.
Common codes include E1 (overheat), E2 (sensor failure), and E3 (low water flow).
Troubleshooting: verify wiring, confirm proper water pressure and flow, clear debris from filters, reset unit, and replace faulty sensors or elements.
Consult the manual for code-specific instructions.
Maintenance, Safety, and Long-Term Care
Routine maintenance, including a descaling and flushing schedule and a seasonal checklist, preserves performance and prevents mineral buildup.
Clear safety guidance—owner precautions and emergency shutoff procedures—reduces risk during malfunctions.
Advice on water quality and usage practices helps extend the unit’s lifespan and minimize repairs.
Routine descaling and flushing schedule
Longevity depends on regular descaling and flushing to prevent mineral buildup that reduces efficiency and can damage internal components.
A monthly flush is recommended in hard-water areas; every six to twelve months suffices for soft-water regions.
Use a vinegar or manufacturer-approved descaling solution, follow isolation valve and pump procedures, and document each service to track trends and anticipate professional intervention when performance declines.
Seasonal maintenance checklist
A seasonal maintenance checklist guarantees the EcoSmart tankless water heater performs safely and efficiently throughout the year by aligning specific inspections and tasks with changing environmental conditions.
Recommended quarterly and seasonal actions include:
- Inspect exterior, vents, and clearance for debris or nesting.
- Check filters and clean or replace as needed.
- Verify pressure, temperature settings, and leak signs.
- Schedule professional inspection for electrical and heat-exchange components.
Safety tips for owners and emergency shutoff procedures
After completing seasonal checks, owners should focus on safety practices and the emergency shutoff sequence to prevent injury and equipment damage.
Locate and clearly label gas/electric and main water shutoff valves; practice turn-off steps.
Install carbon monoxide and leak detectors nearby.
Wear protective gear when servicing.
If unusual smells, noises, or leaks occur, shut off utilities immediately and contact a qualified technician.
Extending lifespan: water quality and usage recommendations
When water quality and usage are managed proactively, an EcoSmart tankless water heater will operate more efficiently and with fewer failures.
Regular descaling in hard-water areas, installing a sediment filter and water softener, and flushing the unit every 6–12 months reduce mineral buildup.
Moderate temperature settings and staggered high-demand usage minimize thermal stress, extending component life and preserving warranty conditions.
Comparison and Decision Aids
A concise comparison weighs EcoSmart tankless units against traditional tank heaters by considering energy efficiency, space, and upfront versus operating costs.
It also contrasts single-unit whole-house installs with multiple-point EcoSmart setups to match flow needs and budget.
Finally, the analysis notes scenarios where professional installation yields lower total cost due to electrical, plumbing, or permitting complexities.
EcoSmart tankless vs. traditional tank heaters
Many homeowners weigh EcoSmart tankless units against conventional storage-tank heaters to decide which best fits their needs; the comparison centers on energy efficiency, upfront and operating costs, longevity, and installation complexity.
| Feature | EcoSmart Tankless | Traditional Tank |
|---|---|---|
| Efficiency | Higher | Lower |
| Cost | Higher upfront, lower operating | Lower upfront, higher operating |
| Lifespan | Longer | Shorter |
Single-unit vs. multiple-point EcoSmart installations
Homeowners comparing EcoSmart tankless units to traditional tank heaters must next decide whether a single whole-house unit or multiple point-of-use units better suits their plumbing layout, hot-water demand patterns, and budget. A single unit simplifies maintenance; multiple units reduce wait time and tailor capacity. Consider upfront cost, energy savings, redundancy, and installation complexity when choosing.
| Option | Emotional cue |
|---|---|
| Single whole-house | Relief |
| Multiple point-of-use | Confidence |
| Hybrid | Assurance |
When professional installation is more cost-effective
When complex gas, electrical, or venting modifications are required, hiring a licensed installer often becomes the more economical choice than DIY attempts.
Professionals reduce risk, guarantee code compliance, and avoid costly rework. For multi-unit setups, high-capacity electrical upgrades, or nonstandard venting, quoted labor bolsters warranty validity and insurance coverage.
Homeowners should compare total installed cost versus DIY materials and potential permit fines.
Cost Breakdown and Time Estimates
A concise cost and time overview helps readers weigh options before starting an EcoSmart tankless water heater install.
Typical DIY material and tool expenses, estimated labor hours for novice through experienced DIYers, and a clear comparison of total DIY versus professional installation costs will be presented.
This information frames budget and scheduling decisions for homeowners.
Typical DIY material and tool costs
Although costs vary by region and project scope, a DIY installation of an EcoSmart tankless water heater typically requires budgeting for both consumable materials and a few specialty tools.
Typical expenses:
- piping, fittings, valves, mounting hardware, electrical supplies ($150–$400);
- basic tools if needed (wrenches, pipe cutter, multimeter $50–$150);
- optional specialty items (conduit, surge protector $50–$200).
Total commonly $250–$750.
Estimated labor hours for different skill levels
Skill level strongly influences time on task: novice installers typically require 6–12 hours due to slower pacing and troubleshooting.
Intermediate DIYers generally complete the job in 3–6 hours with fewer pauses.
Experienced professionals often finish within 2–4 hours while also performing final safety checks and documentation.
Time varies with site complexity, piping modifications, electrical upgrades, permit processing, and unexpected issues; plan buffers accordingly.
Cost comparison: DIY vs. professional installation
How much does installing an EcoSmart tankless water heater actually cost when comparing DIY to hiring a professional?
A DIY installer typically spends $300–$800 on unit, fittings, tools and permits, plus 4–12 hours of labor.
A professional charges $800–$2,500 including labor and warranty, with 2–6 hours onsite.
Complexity, electrical upgrades and permits drive higher costs.
Quick Reference: Installation Checklist and Troubleshooting Flowchart
A concise checklist and a clear troubleshooting flowchart together guide installers through the EcoSmart tankless water heater setup, outlining essential pre-installation confirmations, step-by-step connections, electrical and gas checks, and common fault-resolution paths so that each phase can be completed efficiently and verified before moving on.
- Verify site, power, and venting
- Confirm water and gas connections
- Test electrical and ignition sequences
- Follow fault codes to resolution steps
Conclusion
Installation concludes with a surprising coincidence: as the final screwhole aligned perfectly, the homeowner noticed the old water bill tucked under a box—now obsolete thanks to the new EcoSmart tankless unit. The guide’s clear steps, paired with proper electrical and plumbing prep, meant the swap finished on schedule and without leaks. Routine maintenance and safety checks will preserve efficiency, turning an accidental discovery into reassurance that the DIY effort yielded reliable, long-term savings.