How to Reset Rinnai Tankless Water Heater: Quick Step-by-Step Guide and Troubleshooting
To reset your Rinnai tankless water heater, turn off the power and gas, then open the front cover to access the reset button. Follow the specific button sequence for your model, restore power and water, and monitor the startup for any error codes. If issues persist, check the supply, venting, and igniter. For ongoing errors or gas odors, contact a certified technician. Further troubleshooting steps are available below.
What a Rinnai Tankless Water Heater Reset Does and When to Use It
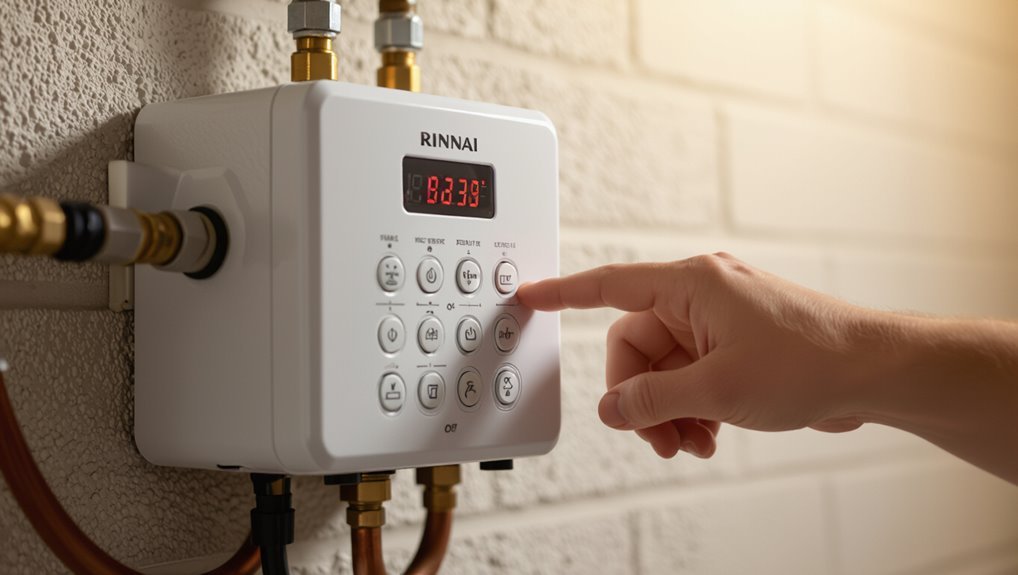
A reset clears temporary faults and reinitializes the control board to restore normal operation in Rinnai tankless water heaters.
It is commonly used after power interruptions, error codes that do not persist, or when troubleshooting intermittent performance issues.
Before attempting a reset, power and gas should be safely turned off and the unit inspected for obvious hazards to prevent injury or equipment damage.
Purpose of a reset for Rinnai units
Resetting a Rinnai tankless water heater clears temporary faults, restarts internal controls, and returns the unit to its default operating sequence.
This allows it to re-evaluate conditions like ignition failures, sensor errors, or communication glitches.
The reset purpose is diagnostic and corrective: it restores normal sequencing, clears transient error states, and allows technicians or owners following how to reset rinnai tankless water heater steps to determine if persistent faults remain.
Common situations that require a reset
Recognize that a reset is typically used when the unit encounters temporary or intermittent issues—common triggers include ignition interrupts, blocked or fluctuating water flow, brief sensor faults, and communication errors between the controller and the heat exchanger.
Other situations warranting reset: transient error codes, unexpected shutdowns after power spikes, failed ignition attempts during startup, or minor firmware/communication glitches resolved by restarting control electronics.
Safety precautions before attempting a reset
Before attempting a reset, users should confirm that basic safety steps have been taken to prevent injury or equipment damage.
The technician or homeowner must shut off power and gas supply, allow the unit to cool, and close water valves if required.
Protective gloves and eye protection are recommended.
Verify adequate ventilation and consult the manual; if unsure, contact a qualified service provider.
Quick Step-by-Step Reset Procedure for Most Rinnai Models
The following quick procedure outlines the basic tools and materials required and the standard steps to reset most Rinnai tankless units.
It instructs the user to shut off water and power, locate the reset button or control panel, follow the correct button-press sequence, then restore power and water.
After restoration, the unit should be checked to confirm normal operation.
Tools and materials needed
A small set of tools and a few common materials are required to perform the quick reset on most Rinnai tankless water heaters.
Required items include a flathead or Phillips screwdriver, adjustable wrench, multimeter for verifying power, and a cloth.
Optional: replacement batteries for remote controls and manufacturer’s manual.
Safety gloves and eye protection are recommended for handling components.
Step 1 Turn off water and power sources
Shut off both the cold water supply and the electrical power to the unit to eliminate water flow and electrical hazards before any reset work begins.
Confirm the breaker is off and close the isolation valve feeding the heater.
Drain residual pressure by opening a nearby hot tap.
Verify power remains disconnected and no water flows to the heater before proceeding to the next step.
Step 2 Locate the reset button or control panel
With power isolated and water flow stopped, attention moves to locating the unit’s reset control.
The reset button or control panel sits behind the front cover or on the lower right front on many Rinnai models.
Consult the model label for panel location.
Look for a small recessed button or digital display with reset/menu markings; remove trim carefully to access controls.
Step 3 Perform the reset (button press sequences)
Begin the reset by identifying the specific control layout on the model—either a single recessed reset button or a digital control pad—so the correct sequence can be followed without guessing.
For a recessed button, press and hold for 5–10 seconds until LEDs change.
For digital pads, press and hold the power and temperature down buttons simultaneously for 3–5 seconds, then release and wait for display confirmation.
Step 4 Restore power and water, and confirm operation
Restore electrical and water supplies and observe the unit’s startup sequence to verify the reset completed successfully.
The heater should cycle through ignition and pilot checks; listen for normal burner activation and watch indicator lights or display for ready status.
Check for leaks at connections.
If the unit fails to start or displays fault codes, consult the manual or proceed with troubleshooting steps.
Step 5 Verify hot water flow and monitor for errors
Turn on a hot-water faucet and allow flow until temperature stabilizes, observing both water delivery and the heater’s display or indicator lights for any error codes.
Confirm consistent temperature and adequate pressure; note any intermittent drops or delays.
If an error appears, record the code and consult the manual.
Recheck connections and venting if problems persist, and contact certified service when necessary.
Model-Specific Reset Instructions
The article next outlines reset procedures tailored to specific Rinnai families, including RUR, RU, and V Series models.
It also contrasts steps for older or legacy units that may use different controls and wiring.
Finally, distinctions between electric and gas-fired Rinnai resets are noted to guarantee safe, correct handling.
Resetting Rinnai tankless models (RUR, RU, V Series)
Several Rinnai tankless models—particularly the RUR, RU, and V Series—share similar reset procedures but require model-specific steps and display cues.
Technicians should verify the exact model number before proceeding to confirm correct button sequences and error-code handling. Common actions include checking power, clearing fault codes, and following panel prompts.
- Confirm model and wiring before resets
- Use front-panel buttons per manual
- Observe LED/display error codes
- Power-cycle only after documenting faults
Reset steps for older/legacy Rinnai models
Although older Rinnai tankless models differ from current units in controls and fault codes, their reset procedures generally follow model-specific sequences that must be confirmed from the unit label or service manual before attempting any action.
Technicians should verify model number, follow the manual’s reset steps, power-cycle if directed, and log fault codes for reference.
- Verify model and serial number
- Consult service manual
- Execute specified button/remote sequence
- Power-cycle and recheck codes
Electric vs. gas-fired Rinnai reset differences
Following model verification and manual checks for legacy units, attention shifts to differences between electric and gas-fired Rinnai reset procedures, which stem from distinct control systems, ignition components, and safety interlocks.
Electric units require power-cycle and controller resets; gas units add gas-valve and ignition sequence resets, plus pressure and venting checks.
Technicians follow model-specific prompts and consult manuals for error-code guidance and safe restart steps.
Troubleshooting After Reset
After a reset, persistent error codes should be checked against Rinnai’s code list to determine if service is required.
The technician or owner can read the unit’s display and interpret codes to distinguish sensor, ignition, or flow issues.
If the heater fails to power up or the burner will not ignite after reset, basic checks — power supply, gas valve, venting, and error history — should be performed before contacting a qualified service technician.
Common error codes that persist after resetting
Several persistent error codes may remain on a Rinnai tankless water heater even after a reset, indicating issues that require targeted troubleshooting or professional service. Common persistent codes often relate to ignition, flame, venting, or sensor faults and usually demand inspection rather than repeated resets.
| Code type | Likely cause | Action required |
|---|---|---|
| Ignition | Gas supply/igniter | Check supply/replace igniter |
| Flame | Burner/vent | Clean burner/inspect vent |
| Sensor | Temperature/flow sensor | Test/replace sensor |
| Venting | Blockage/exhaust | Clear/repair venting system |
How to read and interpret Rinnai error codes
When an error code persists on a Rinnai tankless water heater after a reset, it conveys a specific diagnostic clue about the unit’s malfunction rather than a generic fault.
Understanding the code’s category—ignition, flame, sensor, or venting—lets a technician or homeowner prioritize checks and repairs.
Consult the manufacturer code list, note code frequency and conditions, correlate with recent symptoms, and follow targeted troubleshooting steps or contact certified service.
Steps to take when the unit won’t power on after reset
If the Rinnai tankless heater fails to power on following a reset, the immediate focus should be on verifying basic electrical and control inputs before assuming a major fault.
Check breaker and supply voltage, confirm wiring connections at the unit and remote thermostat, inspect fuse and ground, guarantee gas valve remains set off, and test the control board indicator.
If unresolved, document observations for technician support.
What to do if the burner won’t ignite after reset
After confirming power and control inputs, attention shifts to ignition-related systems when the burner fails to light after a reset.
The technician checks gas supply, verifies manual shutoffs, inspects the igniter and flame sensor for damage or debris, and confirms proper venting and air supply.
Error codes should be noted; if unresolved, contact certified service for component testing and replacement.
Preventing Frequent Resets
To minimize the need for repeated resets, the article recommends a concise routine maintenance checklist focused on flushing the heat exchanger, inspecting filters, and checking error logs.
Attention to water quality—using softeners, sediment filters, and regular descaling—helps prevent scale buildup that commonly triggers faults.
Regular inspection of venting and gas supply lines, including pressure and leak checks, further reduces the chance of recurring errors.
Routine maintenance checklist to reduce resets
Establishing a concise routine maintenance checklist prevents the common causes of Rinnai tankless water heater resets by ensuring filters stay clean, combustion air passages remain unobstructed, and scale buildup is controlled.
A technician or homeowner should follow scheduled inspections and simple tasks to reduce faults and prolong unit life.
- Inspect and clean inlet filters monthly
- Check venting and air intake clearances
- Verify error codes and log occurrences
- Tighten connections and inspect for leaks
Water quality and scale prevention tips
Any household water chemistry that favors mineral deposition increases the risk of scale buildup inside a Rinnai tankless water heater.
This, in turn, raises inlet temperatures, reduces heat exchange efficiency, and triggers frequent resets.
Regular descaling, installing a water softener or scale inhibitor, using a magnetic or electronic conditioner where appropriate, and periodic hardness testing minimize deposits and extend reliable heater operation.
Venting and gas supply checks to avoid recurring faults
Inspecting venting and gas supply is critical for preventing recurring resets on a Rinnai tankless water heater, since restricted combustion air, blocked exhaust, or improper gas pressure can trigger fault codes and intermittent shutdowns.
Verify vent terminals are clear, seals intact, and airflow unobstructed.
Measure gas pressure per manual, check fittings for leaks, and correct inadequate line size or regulator issues to restore stable operation.
When to Call a Professional
If resets fail to clear persistent error codes, recurring shutdowns, unusual noises, or gas and water leaks, a professional should be contacted because these signs indicate underlying faults beyond a simple reset.
Safety and warranty rules may require certified service for gas, electrical, or internal component repairs, so homeowners should avoid DIY fixes in those cases.
When calling a technician, provide the model and serial number, recent error codes or lights, a brief history of the issue, and any steps already taken.
Signs a reset won’t fix the underlying problem
When recurring error codes, persistent cold water, unusual noises, or visible leaks continue after a reset, these indicate a deeper mechanical, electrical, or gas supply issue that requires professional diagnosis.
Continuing to reset the unit can mask damage and create safety risks. Technicians should be consulted for ignition failures, corrosion, blocked venting, erratic pressure, or repeated thermostat and sensor faults to prevent further harm.
Safety and warranty considerations
Several clear safety and warranty triggers indicate that a professional should be contacted rather than attempting further resets: visible gas smells, persistent leaks, signs of combustion irregularities (soot, yellow flame), repeated error codes tied to ignition or sensors, or any evidence of corrosion or damaged venting.
Contacting authorized service preserves warranty coverage and guarantees certified inspection, safe repairs, and proper replacement parts.
What information to provide to a technician
What details should be prepared before the technician arrives? Provide model and serial numbers, purchase and installation dates, warranty status, and error codes displayed. Note recent symptoms, when they began, and any troubleshooting steps already attempted (resets, power cycles, water/gas shutoffs). Include photos of the unit and vents, maintenance records, and accessibility or safety concerns at the site.
Quick Reference: Reset Cheat Sheet
A concise cheat sheet lists a fast checklist for common Rinnai models to guide quick resets.
It pairs frequent error codes with clear, model-specific actions in an easy-to-scan table. Readers can use this reference to determine whether a simple reset is appropriate or if professional service is needed.
Fast checklist for common Rinnai models
This quick checklist condenses the reset steps for common Rinnai tankless water heater models into a concise reference so technicians and homeowners can diagnose and perform standard resets efficiently.
It prioritizes safety, sequence, and verification for fast troubleshooting.
- Confirm power and gas supply before reset.
- Use control panel reset or power-cycle method.
- Inspect vents and error indicators post-reset.
- Run hot water to verify proper ignition and flow.
Error-code-to-action quick table
Several common Rinnai error codes map directly to concise corrective steps, enabling quick diagnostics and targeted resets without unnecessary disassembly. The following compact cheat sheet pairs codes with immediate actions and expected follow-ups for efficient troubleshooting.
| Error Code | Immediate Action | Follow-up |
|---|---|---|
| E190 | Reset unit | Check venting |
| C12 | Clear blockage | Test restart |
| U0F | Power cycle | Inspect wiring |
Conclusion
After a reset, the Rinnai tankless water heater springs back to life like a caffeinated clockwork beast, shrugging off glitches and hiccups—at least for a while. This quick ritual often banishes transient faults, restores normal operation, and buys homeowners calm confidence. If problems persist, deeper diagnostics are probably lurking beneath the surface. Regular care prevents dramatic meltdowns; when complexity remains, calling a pro tames the stubborn, roaring appliance and restores reliable hot-water order.