How to Install a Drain Strainer: Step-by-Step Guide for Kitchen & Bathroom Sinks
Installing a drain strainer is a straightforward process that helps prevent clogs by blocking solids while allowing water to flow freely. To install one, start by measuring the drain and removing the old strainer. Clean the drain opening thoroughly. Next, apply plumber’s putty or a gasket to the flange, place the new strainer in position, and secure it using the appropriate locknut or clips. Tighten evenly to prevent any rocking, then test for smooth operation and leaks by running water through the sink. For more detailed steps, necessary tools, and troubleshooting tips, continue reading.
What a Drain Strainer Is and Why It Matters
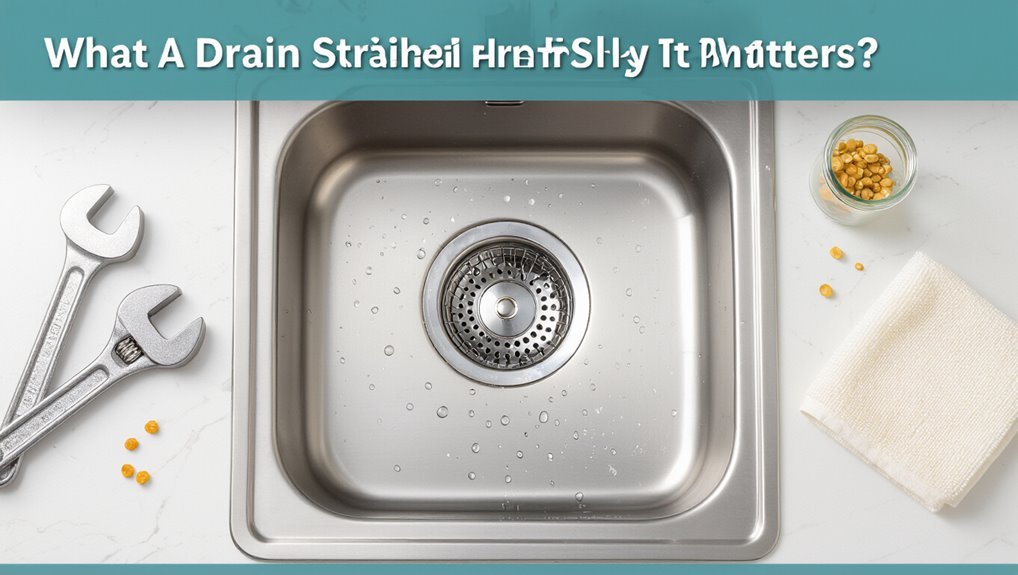
A drain strainer is a simple fitting that sits in a sink’s drain to block solids while allowing water to pass, and it comes in various forms suited to kitchen or bathroom use.
Kitchen strainers typically handle food particles and grease, while bathroom options focus on hair and soap scum.
Installing a strainer reduces clogs, limits odors, and protects the drain for longer service life.
Types of drain strainers for kitchen and bathroom sinks
Drain strainers come in several designs tailored to different sink functions and debris types, from simple mesh baskets for kitchens to low-profile pop-up covers for bathroom sinks.
Selection affects ease of use and maintenance and relates to how to install a drain strainer correctly.
Common options include:
- Mesh basket strainers
- Pop-up and flip models
- Silicone stretch covers
Benefits of installing a drain strainer (clog prevention, odor control, durability)
Prevention of clogs, reduction of odors, and increased fixture longevity are among the primary benefits gained from installing a strainer in kitchen and bathroom sinks.
Strainers catch hair, food particles, and debris, minimizing blockages and costly plumbing calls. They limit organic buildup that causes unpleasant smells and protect finishes and seals from corrosion and wear, extending sink and drain component service life.
Tools and Materials You’ll Need
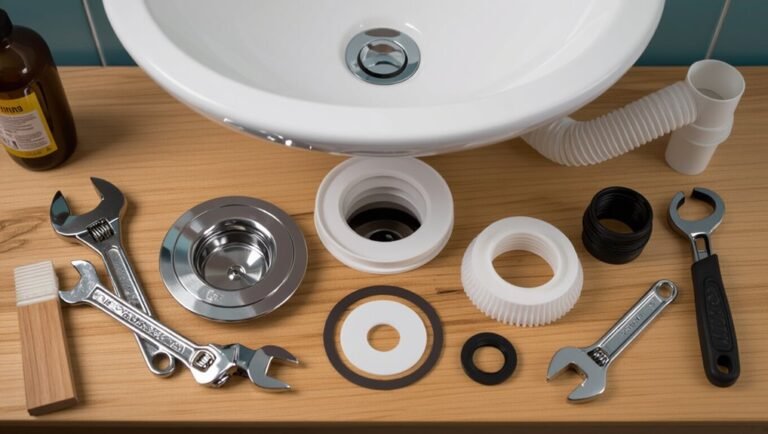
A basic toolkit for installing a drain strainer typically includes a screwdriver, adjustable wrench, plumber’s putty or silicone, and a utility knife.
Materials and parts vary by application—common options are basket or flat strainers, rubber gaskets, and replacement screws.
Selecting the correct strainer size requires measuring the sink’s drain opening and matching that diameter to the strainer specifications.
Common tools list
Tools and materials required for installing a drain strainer are modest and commonly found in household toolkits or local hardware stores.
Essential tools focus on removal, fitting, and sealing tasks without listing parts. Typical selections include:
- Adjustable wrench or basin wrench for nut removal and tightening.
- Screwdriver set for retaining screws.
- Utility knife or scraper for old sealant cleanup.
Materials and parts (strainer types, gaskets, plumber’s putty, silicone)
Select parts that match the sink and installation method to guarantee a watertight, long-lasting fit.
Common strainers include basket, flat, and flip types in stainless steel or brass.
Essential seals: rubber gaskets, fiber washers, and locknuts.
Use plumber’s putty for traditional sinks; choose silicone sealant for stone or where putty is unsuitable.
Match materials to sink finish for corrosion resistance.
How to choose the right strainer size for your sink
With the appropriate strainer type and seals chosen, attention turns to sizing to guarantee a proper fit and leak-free performance.
Measure the sink drain diameter across the opening, noting whether it’s standard (1.25″, 1.5″) or larger. Confirm flange thickness and tailpiece thread size.
Match measurements to manufacturer specs, account for basket clearance, and select a strainer ensuring snug seating and aligned tailpiece connections.
Preparing the Sink and Work Area
Before beginning the installation, the installer should set up safety measures and wear appropriate protective gear such as gloves and eye protection.
The sink and drain should be cleared of debris and visually inspected for corrosion or obstructions that could affect the new strainer.
If access requires removing the P-trap, it should be done with a catch pan in place and the cabinet protected with a towel or drip tray to prevent water damage.
Safety precautions and protective gear
Wear appropriate protective gear and take basic safety steps to prevent injury and damage when preparing the sink and work area.
Gloves protect hands from sharp edges and chemical cleaners; safety glasses shield eyes from splashes.
Lay down towels or a mat to catch dropped parts and prevent scratches.
Confirm adequate lighting and ventilation.
Turn off nearby disposals or appliances to avoid accidental activation.
How to clear and inspect the sink drain before installation
Clear the sink of dishes and debris, then visually inspect the drain and surrounding area for buildup, corrosion, or damage that could interfere with the strainer’s seal or fit.
Remove visible gunk with a soft brush and mild cleaner, rinse thoroughly, and dry the surface.
Check the flange and threads for warping or cracks; note any irregularities before proceeding with installation.
When to remove the P-trap and how to protect the cabinet
Determine whether the P-trap needs removal by checking access, visible clogs, and whether the new strainer or tailpiece will fit without disassembling existing piping.
If removal is required, place a bucket beneath, loosen slip nuts carefully, and detach.
Protect the cabinet with waterproof drop cloths or towels and cardboard; cover exposed surfaces and hardware to catch drips and prevent scratches while working.
Step-by-Step Installation for Drop-In (Top-Mounted) Drain Strainers
The procedure begins with removing the old strainer and thoroughly cleaning the drain opening to guarantee a proper seal.
Next, the installer applies plumber’s putty or a gasket, positions the drop-in strainer, and tightens the locknut to secure it.
Finally, the tailpiece is reconnected and the assembly is tested for leaks.
Removing the old strainer and cleaning the drain opening
Begin by loosening and removing the old drop-in strainer with a screwdriver or adjustable pliers, taking care not to damage the sink finish.
Disassemble any retaining parts beneath the sink, collecting screws and washers.
Scrape away old sealant and debris with a putty knife, then scrub the opening with a brush and mild cleaner.
Rinse thoroughly and dry before proceeding.
Applying plumber’s putty or gasket correctly
Apply a consistent bead of plumber’s putty or fit the rubber gasket to the underside of the drop-in strainer flange, ensuring full contact around the perimeter to prevent leaks.
Smooth the putty evenly so it forms a continuous seal without gaps. Remove excess material.
Check that the gasket sits flat and aligned with the flange hole before proceeding to the next installation step.
Positioning the strainer and tightening the locknut
After the putty or gasket is smoothed and excess removed, the strainer body is lowered into the sink opening so the flange sits flush against the sink surface.
From beneath, the rubber gasket and friction washer are aligned, then the locknut is threaded hand-tight. A wrench finishes with firm, even turns until the assembly is snug and centered, avoiding overtightening that could deform components.
Reconnecting the tailpiece and testing for leaks
Reconnect the tailpiece to the strainer by sliding it up into place and threading or securing the slip nut until hand-tight.
Tighten an additional quarter turn with a wrench if needed, avoiding overtightening.
Restore any trap connections, run water, and inspect all joints for drips.
Wipe connections dry, then watch for slow leaks during a ten-minute test.
Tighten or re-seat seals if necessary.
Step-by-Step Installation for Basket or Twist-In Strainers
The guide outlines preparing the basket or twist-in strainer and inserting it into the drain opening.
It then covers securing the unit with spring clips or threaded connections and making any necessary adjustments for a snug fit.
Finally, it explains testing the assembly for proper fit and smooth operation before finishing.
Preparing and inserting the basket strainer
Begin by inspecting the basket strainer and the sink opening to confirm compatibility and identify any debris or old sealant that must be removed.
Clean surfaces thoroughly and dry.
Apply a new gasket or plumber’s putty to the strainer flange as specified.
Lower the strainer straight into the drain hole, ensuring alignment.
Remove excess putty and verify the strainer sits flush without rocking.
Securing and adjusting spring clips or threaded connections
Securing the strainer requires choosing the correct fastening method—spring clips for twist-in styles or a threaded locknut for basket strainers—and verifying that all parts are clean and properly oriented before tightening.
For spring clips, compress and seat each clip into its slot, ensuring equal engagement.
For threaded locknuts, hand-start the nut, then tighten evenly with a wrench or pliers until gasket compression is uniform.
Testing fit and functionality
After fastening, verify fit and function by visually inspecting the strainer assembly, checking for proper alignment, uniform gasket compression, and secure engagement of clips or locknut.
Operate the stopper or basket to confirm smooth movement and positive seating. Run water to observe drainage rate and detect leaks.
Re-tighten or re-seat components if necessary, then perform a final leak check under moderate water pressure.
Step-by-Step Installation for Pop-Up and Assembly-Style Strainers
The section explains how to assemble the pop-up mechanism, install the strainer body and linkage, and align the stopper for proper operation.
It outlines the sequence of parts and fasteners required for secure installation.
A final check of stopper alignment and a functional test confirm correct movement and seal.
Assembling the pop-up mechanism
Begin by aligning the pop-up stem, flange, and lift rod so each component seats without binding; proper alignment prevents leaks and guarantees smooth operation.
Insert the stem through the flange, secure retaining nut finger-tight, then engage the lift rod clevis to the stem pivot.
Adjust travel limiting screws or clip positions so the stopper seals fully and lifts freely.
Test movement before final tightening.
Installing the strainer body and linkage
With the pop-up mechanism aligned and tested, attention turns to seating the strainer body and connecting the linkage so the assembly seals and operates reliably.
Apply plumber’s putty or gasket under flange, lower strainer into sink, tighten locknut evenly beneath.
Attach pivot rod to tilt arm or lift rod clip, adjust clevis position, secure retaining nut.
Check for secure, smooth linkage movement.
Aligning the stopper and testing operation
Verify stopper alignment and function before finalizing the installation to guarantee a watertight seal and smooth operation.
The installer lowers and raises the stopper, adjusts the ball rod or linkage clip, and fine-tunes vertical position until the stopper seats evenly.
Perform a fill-and-hold water test to check for leaks, then cycle several times to confirm consistent sealing and free movement without binding.
Installation for Specialty Sinks and Materials
Different sink materials and mounting styles require specific approaches to strainer selection and sealing: stainless steel, porcelain, and composite surfaces each affect gasket choice and torque.
Undermount installations need care with backing and sealant to protect the sink rim and prevent leaks.
For sinks with overflows, the installer must use overflow-compatible strainers and confirm alignment with the overflow channel.
Stainless steel vs. porcelain vs. composite sinks’ special considerations
Although drain strainer installation follows the same basic steps, material-specific factors—such as sink thickness, mounting lip profile, and finish sensitivity—require distinct approaches for stainless steel, porcelain, and composite sinks.
Stainless steel tolerates drilling and thin lips; porcelain requires gentle handling, support and non-abrasive sealants to prevent cracking.
Composite sinks demand compatible adhesives, attention to thermal expansion, and care to avoid surface marring during fitting.
Undermount sink installation notes
When installing a drain strainer on an undermount sink, installers must account for the sink’s concealed rim and the need to seal against the countertop rather than the sink deck.
Measurements must guarantee the strainer flange aligns with the sink bowl opening.
Use appropriate gasket or silicone between flange and countertop, clamp or support the assembly from below, and verify watertightness before finalizing mounting.
Installing overflow-compatible strainers
Installers must select and fit a strainer designed to interface with the sink’s overflow channel, ensuring the overflow inlet, tailpiece, and gasket align precisely with the sink’s molded passage.
They should use the correct length tailpiece, compress seals without distortion, and secure locknut torque to prevent leaks.
Verify clearance for clips or baskets and test overflow by filling to confirm proper drainage and sealing.
How to Test and Troubleshoot Common Installation Problems
The installer should begin by running water and inspecting the flange and tailpiece for leaks, tightening connections or replacing gaskets as needed.
Next, alignment problems and stuck stoppers are checked by testing the stopper mechanism and adjusting or re-seating the strainer assembly.
Finally, the fit is evaluated—retightening or loosening the locknut and using shims or a replacement unit if the strainer is excessively loose or tight.
Identifying and fixing leaks at the flange or tailpiece
Begin by isolating the source of moisture to determine whether the leak originates at the flange seal or the tailpiece connection; this distinction guides the appropriate corrective steps.
Inspect flange gasket and plumber’s putty for gaps, tighten flange screws, reseat with new gasket or putty if needed.
For tailpiece leaks, tighten slip nut, replace worn washer or ferrule, and confirm proper pipe alignment before retesting.
Dealing with alignment issues and stuck stoppers
After verifying flange and tailpiece seals, attention should turn to alignment problems and stuck stoppers, which commonly cause poor drainage or persistent standing water.
Inspect stopper linkage for bends, loose clips, or mispositioned pivot rods. Realign the drain assembly so the stopper seats evenly; clean debris and mineral buildup.
Test movement repeatedly, adjusting linkage length until smooth operation and proper sealing are restored.
What to do if the strainer is too loose or too tight
Check the strainer fit by hand and observe how it sits in the drain seat: a loose strainer will wobble or drop under slight pressure, while an overly tight one resists insertion or requires excessive force to turn.
For loose fits, add or replace rubber gaskets, use plumber’s putty, or tighten the locknut.
For tight fits, remove burrs, trim flange edges, or slightly loosen the locknut.
Maintenance After Installation
After installation, routine cleaning—such as removing debris and using a gentle brush or safe cleaner—helps prevent clogs and keeps water flowing.
Periodic removal and resealing of the strainer is advised if the seal shows wear or after heavy buildup to maintain a watertight fit.
Replace the strainer when cracks, persistent corrosion, or repeated leaks appear to guarantee reliable performance.
Routine cleaning tips to prevent clogs
Establishing a simple, consistent cleaning routine greatly reduces the chance of buildup and clogs in a newly installed drain strainer.
Regular brief tasks prevent grease, hair, and debris accumulation. Use mild cleaners and soft brushes; avoid harsh chemicals that can damage seals.
- Remove visible debris after each use.
- Flush with hot water weekly.
- Scrub strainer monthly with baking soda and vinegar.
When to remove and reseal the strainer
Periodic removal and resealing of a drain strainer is necessary when signs of leakage, persistent odors, or loosened fittings appear, or at least once every one to two years to guarantee a watertight seal.
During removal, inspect the flange, gasket, and threads for wear, clean mating surfaces, apply appropriate plumber’s putty or silicone, and reassemble finger-tight then snug with tools to prevent overtightening.
Signs it’s time to replace the strainer
When should a drain strainer be replaced? A strainer should be replaced when corrosion, cracks, or persistent leaks appear, when clogs recur despite cleaning, or when the fit becomes loose and seals fail.
Visible rust, warped metal, stripped threads, or damaged baskets indicate replacement. Upgrading to a more durable model after frequent repairs improves drainage performance and prevents water damage.
Common Mistakes to Avoid During Installation
Avoiding common installation mistakes prevents leaks, clogs, and the need for early replacement of the drain strainer. The installer should follow manufacturer instructions, guarantee proper sealing, and test for leaks before finalizing.
Common errors include cross-threading, inadequate sealant, and overtightening, each causing failure or damage if ignored.
- Cross-threading or misalignment
- Insufficient or wrong gasket/sealant
- Overtightening fittings
Cost, Time Estimate, and When to Call a Plumber
Typical parts and basic tools for a drain strainer cost anywhere from a few dollars to around $50, while specialty or replacement strainers may be pricier.
Installation time varies by type—simple pop-in strainers can be fitted in 10–20 minutes, while threaded or flange-style units may take 30–60 minutes for a DIYer.
Professional assistance should be sought for persistent leaks, damaged drain fittings, corroded pipes, or when access and tools exceed homeowner capabilities.
Typical cost range for parts and tools
Although prices vary by region and fixture type, most homeowners can expect to spend between $5 and $60 on parts and basic tools to install a sink drain strainer. Typical expenses include the strainer, plumber’s putty or silicone, and basic hand tools; premium strainers or specialty fittings raise costs. Below is a quick cost breakdown:
| Item | Low | High |
|---|---|---|
| Basic strainer | $5 | $20 |
| Sealant | $1 | $8 |
| Tools | $0 | $30 |
| Specialty parts | $3 | $60 |
Estimated time for DIY installation by type of strainer
With parts and tools accounted for, the next consideration is how long a DIY installation will take depending on the type of strainer.
Simple drop-in strainers: 10–20 minutes.
Basket or twist-and-lock models: 20–45 minutes.
Pop-up or threaded sink assemblies: 30–60 minutes.
New drain flange with sealant or plumber’s putty: 45–90 minutes.
Time varies with experience and access.
Situations that require professional help
Recognize when a DIY approach reaches its limits: complex plumbing layouts, damaged or corroded drain pipes, persistent leaks, or issues affecting multiple fixtures typically justify professional intervention.
Costs vary—basic service calls often range $75–$150; repairs or replacements can run $200–$1,200 depending on parts and labor. Expect 1–4 hours.
Call a plumber for unclear causes, recurring problems, or structural concerns.
Quick Reference: Installation Checklist
Before beginning the installation, the checklist presents a concise sequence of tasks and required items to ascertain proper fit and function: A brief checklist guarantees efficiency and avoids mistakes.
Items and steps are verified before work starts, tools are organized, and seal integrity is confirmed.
Key points include:
- Confirm strainer size and sink compatibility
- Gather tools, plumber’s putty, and sealant
- Inspect and clean drain opening before fitting
Conclusion
A drain strainer both protects pipes and prevents clogs, and by coincidence the simplest installations often yield the most reliable results. When a homeowner follows basic preparation, uses the right tools, and tightens seals properly, the sink performs quietly for years. Conversely, skipping a step can lead to immediate leaks, underscoring that careful attention during installation matters. Ultimately, a modest effort up front coincidentally prevents major repairs later.