How to Use Root Killer for Drains: Safe, Step-by-Step Methods That Work
To effectively use root killer for drains, first ensure that roots are the confirmed cause of the blockage. The product targets and eliminates invasive roots within pipes through methods like cleanouts, targeted injections, or trench treatments. Always wear personal protective equipment (PPE), safeguard nearby plants and pets, and adhere to the dosing instructions on the label. Avoid spills near septic systems. After application, allow adequate dwell time before flushing the system and inspecting with a camera or cleanout. Follow these step-by-step instructions for safe application and prevention of future issues.
Can You Safely Use Root Killer for Drains?
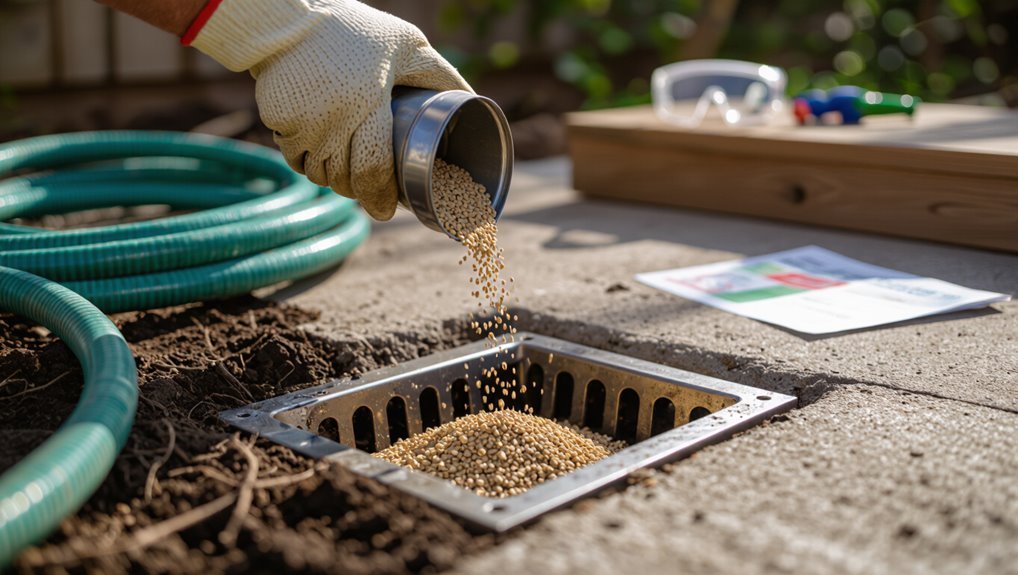
A clear recommendation is to use chemical root killer only when inspections confirm roots are the primary cause and nonchemical fixes (mechanical clearing, pipe repair, or barrier installation) are impractical.
Homeowners should prefer mechanical or preventive alternatives for minor or recurring issues to avoid chemical exposure and environmental harm.
Chemical treatments are best reserved for severe infestations or when professionals confirm they are the most effective, applied according to label directions.
Short, direct recommendation
Use root killer products for drains only when the label specifically states they are formulated for sewer lines and root control; otherwise, avoid them.
For safe how to use root killer for drains, follow label directions, wear protection, control application volume, and prevent runoff.
Prefer contractor consultation for severe infestations.
Limit use to indicated situations to minimize pipe, soil, and environmental harm.
When to choose chemical root killer vs alternatives
Decide between chemical root killers and alternatives based on infestation severity, pipe material, access, and environmental risks.
For minor, surface-level roots or sensitive environments, recommend mechanical removal, root barriers, or manual cutting.
For aggressive, deep intrusions with inaccessible access and durable pipes, chemical root killers offer longer control but require careful dosing, permits, and protection of nearby vegetation and water sources.
How Root Killer Works Basic Understanding
Root killer products are chemical formulations—commonly copper sulfate, dichlobenil, or herbicidal foams—designed to target root growth in drains and sewer lines.
They act by poisoning or desiccating invading roots at the point of contact, stopping further blockage and decay within the pipe.
Applications vary by situation and include pouring or flushing down the pipe, trenching and treating exposed roots, or injecting concentrated solutions into service lines.
What is root killer? Active ingredients and formulations
A chemical root killer is a specialized formulation designed to eliminate tree and shrub roots that invade sewer and drainage pipes. It contains active ingredients like dichlobenil, copper sulfate, and foaming sodium hydroxide in liquid, tablet, or gel forms; additives aid adhesion, foaming, or slow release.
| Ingredient | Typical role |
|---|---|
| Dichlobenil | Root growth inhibitor |
| Copper sulfate | Contact herbicide |
| Sodium hydroxide | Caustic agent |
| Gel carriers | Prolong contact |
| Tablets | Slow release |
How it kills roots in drains and sewer lines
Penetrating the pipe interior, root-killing formulations act through chemical contact and physiological disruption: caustic agents denature root tissue and burn cells, copper compounds interfere with metabolic processes, and growth inhibitors such as dichlobenil prevent cell division and elongation.
Treated roots collapse, lose turgor and die back; remaining tissue decays, detaching from pipe walls and clearing obstructions while inhibiting short-term regrowth.
Typical application methods (in-pipe, trench, injection)
Application methods for root killers fall into three common categories—in-pipe flushing, trench exposure, and targeted injection—each chosen based on pipe access, root severity, and environmental constraints.
In-pipe flushing introduces chemical solution into flowing water.
Trench exposure treats open sections where roots intersect mains.
Targeted injection uses pressurized ports or hydro-jetting to deliver product directly into root masses with minimal excavation.
Safety Considerations Before You Start
Before applying root killer, the reader should assess required personal protective equipment and review any environmental or municipal regulations that govern chemical drain treatments.
They should also consider risks to nearby plants, pets, septic systems, and plumbing, and take steps to minimize exposure.
If the issue is extensive, persistent, or involves a septic system, a licensed professional should be consulted.
Personal protective equipment (PPE) required
Personal protective equipment (PPE) is essential when handling root-killing chemicals to prevent burns, inhalation, and eye injury.
Users should wear chemical-resistant gloves, splash goggles or a face shield, long sleeves, and closed-toe shoes. Proper PPE minimizes exposure and contamination.
Recommended items:
- Chemical-resistant gloves
- Splash goggles or face shield
- Long-sleeved, impermeable clothing
- Closed-toe, chemical-resistant footwear
Environmental and municipal regulations to check
Why check local rules and permits? The user must verify municipal codes, stormwater and wastewater discharge restrictions, and approved chemical lists before applying root killers.
Some jurisdictions require permits or licensed applicators, prohibit certain active ingredients, or mandate disposal procedures.
Checking prevents fines, legal liability, and environmental harm.
Contact local public works or environmental agencies and review state regulations and utility easements.
Risks to plants, pets, septic systems, and nearby plumbing
After confirming applicable regulations and permit requirements, attention should turn to how root-killing chemicals and their residues can affect surrounding living things and systems.
Toxic runoff can harm nearby plants, contaminate soil, and poison pets if ingested. Chemicals may damage septic bacteria, impair treatment, and corrode old pipes or joints.
Users must isolate areas, follow label limits, and avoid excess application.
When to call a professional instead
When should a professional be called instead of attempting a DIY root treatment?
A professional is advised if roots recur after treatment, multiple drains clog, sewage backups occur, a septic system is present, or property lines and large trees are involved.
Also call if the user lacks proper tools, suspects major pipe damage, or prefers long-term solutions like trenching, relining, or replacement.
Tools and Materials You’ll Need
The section lists recommended root killer products and appropriate concentrations for common pipe types and blockages.
It also provides a concise checklist of tools, supplies, and personal protective equipment (PPE) needed for safe application.
Finally, optional equipment for tackling stubborn roots is outlined for more persistent infestations.
Recommended root killer products and concentrations
If persistent roots are the issue, choose a root killer formulated for sewer and lateral lines that lists dichlobenil, copper sulfate, or foaming sodium hydroxide-based products on the label and specifies concentrations for residential use; these active ingredients target root tissue differently, so selection should match pipe material and infestation severity.
| Product | Active Ingredient | Typical Residential Concentration |
|---|---|---|
| Granular | Dichlobenil | 5–10% |
| Crystals | Copper sulfate | 2–4% |
| Foam | Sodium hydroxide foam | 10–20% |
| Pellets | Copper sulfate pentahydrate | 3–6% |
Tools, supplies, and PPE checklist
After selecting an appropriate root killer and concentration based on pipe material and infestation severity, gather the right tools, supplies, and personal protective equipment before beginning work.
Necessary items include measuring tools, applicators, and cleanup supplies to contain spills and protect surfaces.
- Nitrile gloves, chemical-resistant goggles
- Measuring cup or syringe with markings
- Plastic tubing or applicator bottle
- Absorbent pads and sealable waste bags
Optional equipment for stubborn roots
Consider adding specialized equipment when roots resist standard treatment: a manual auger or drain snake with a root-cutting head, a small wet/dry vacuum for flushing debris, and a hand-operated hydro jet or high-pressure nozzle for targeted dislodging.
Protective gloves, eye protection, and respirator remain essential.
Include extension cables, a sturdy bucket, replacement blades, and a camera inspection probe to verify clearance and prevent recurrence.
Step-by-Step: Safe Application of Root Killer for Drains
The following steps guide a safe, systematic application of root killer for drains, beginning with diagnosing the blockage and locating suitable access points.
They cover preparing the area to protect landscaping and septic systems, accurately measuring and mixing the chemical per manufacturer instructions, and the correct technique for applying the product to the drain or sewer line.
Finally, guidance on required dwell time and expected results explains how to monitor effectiveness and know when follow-up is needed.
Step 1 Diagnose the problem and locate access points
Begin by confirming whether roots are truly the cause: signs include slow drains across multiple fixtures, gurgling, sudden backups, and visible roots or hairline cracks at exposed pipes.
Inspect cleanouts, basement drains, and sewer line access points. Use a drain camera or sewer probe if available to pinpoint intrusion location and depth.
Record access positions for targeted treatment and future reference.
Step 2 Prepare the area and protect landscaping/septic systems
Clear the work area and establish barriers to prevent accidental exposure to lawn, garden beds, pets, and children before applying root killer.
Inspect for nearby landscaping, direct runoff away from plants, cover sensitive vegetation, and remove toys or pet bowls.
Identify septic tank locations; avoid spills or trenching near lids.
Have absorbent materials and water on hand to contain and neutralize accidental releases.
Step 3 Measure and mix chemical according to manufacturer instructions
With the area secured and runoff controlled, attention turns to preparing the root killer according to the product label.
The user measures concentrate and diluent precisely, using calibrated tools and gloves. They mix in a well-ventilated area, following temperature and order-of-addition guidance.
Containers are labeled; excess is stored per instructions or disposed of safely at a hazardous-waste facility.
Step 4 Apply root killer to the drain/sewer line (detailed technique)
Positioned over the access point, the technician prepares to introduce the mixed root killer into the drain, ensuring flow direction and dosage align with the manufacturer’s directions and local regulations.
Using a calibrated pouring container or pump, they apply the solution steadily to avoid splashing.
They record volume introduced, reseal access, rinse equipment per protocol, and wear PPE throughout to prevent exposure.
Step 5 Let chemical work: dwell time and what to expect
Once the root killer has been applied, the technician allows the chemical to remain in the line for the manufacturer’s recommended dwell time, during which the active ingredient will contact and neutralize root tissue without disturbance.
During this period, no water or mechanical agitation is introduced. Expected effects include gradual root desiccation and reduced flow restriction; safety precautions remain in place until treatment completion.
Step 6 Flush lines and perform post-treatment checks
After the dwell time ends, the technician flushes the line to remove residual chemical and dislodged root fragments.
Then, they carry out a concise set of inspections to confirm system integrity and treatment effectiveness.
They check downstream flows, examine cleanouts and traps for obstructions or damage, verify no chemical odors persist, record observations and photos, and note any follow-up repairs or safety concerns before leaving the site.
Step 7 Repeat schedule and monitoring recommendations
Step 7 establishes a repeat-treatment schedule and monitoring plan that aligns with pipe material, root species, and severity of intrusion.
Technicians recommend an initial follow-up application in 6–12 weeks for severe infestations, then routine maintenance treatments every 6–12 months, with shorter intervals for aggressive root systems or damaged lines.
Routine camera inspections, clean-water flow checks, and documenting treatments guide adjustments and confirm effectiveness.
Alternatives and Complementary Methods
Alongside chemical root killers, mechanical approaches such as augering, hydro-jetting, and targeted root cutting offer immediate physical removal of intrusions.
Biological and eco-friendly options, including enzyme-based products, can help reduce organic buildup and slow regrowth without harsh chemicals.
For recurring problems, trenchless repairs and installed root barriers provide longer-term prevention by restoring pipe integrity and blocking root access.
Mechanical removal: augering, hydro-jetting, and root cutting
Mechanical removal methods—augering, hydro-jetting, and targeted root cutting—provide direct ways to clear root intrusions and restore flow without relying solely on chemicals.
- Augering: mechanical snake breaks and removes roots.
- Hydro-jetting: high-pressure water clears debris and small roots.
- Root cutting: specialized cutters trim invasions in pipes.
- Follow-up inspection confirms clearance; coordinate with chemical treatments if needed.
Biological and eco-friendly options (biological enzyme products)
Consider biological and eco-friendly enzyme products for a gentler alternative to chemical root killers: these formulations use bacteria and enzymes to break down organic matter, reduce buildup, and restore flow over time without harming soil or groundwater when used as directed.
They suit maintenance programs, require repeated dosing, work slowly versus chemicals, and complement mechanical cleaning; suitability depends on blockage type and severity.
Trenchless repairs and root barriers
Trenchless repairs and root barriers offer durable, less-disruptive alternatives to repeated chemical or manual root removal, addressing both damaged pipes and future intrusion. Professionals recommend lining, pipe bursting, and physical barriers as long-term solutions that minimize digging and chemical reliance. Homeowners should weigh cost, disruption, and vegetation impact when combining these with targeted root killer applications.
| Method | Benefit |
|---|---|
| CIPP lining | Restores flow |
| Pipe bursting | Replaces pipe |
| Root barrier | Redirects roots |
| Surface sealing | Prevents intrusions |
| Combined approach | Long-term control |
Common Mistakes and How to Avoid Them
Common mistakes when using root killer include overuse or incorrect dosing, applying chemicals in inappropriate locations (such as indoor drains instead of the sewer line), and ignoring safety protocols or local regulations.
Practitioners also frequently miss underlying pipe damage that requires physical repair rather than chemical treatment.
Identifying and avoiding these errors preserves system integrity and reduces health, legal, and environmental risks.
Overuse and incorrect dosing
Overapplying root killer or using doses higher than recommended can damage pipes, harm beneficial soil organisms, and increase risks to pets and people. Users should follow label instructions and measure treatments precisely to avoid these consequences.
Excessive or repeated applications offer diminishing returns, elevate corrosion and contamination risk, and may foster resistant root regrowth.
Calibrate doses, record treatments, and consult professionals for persistent infestations.
Applying in the wrong location (e.g., indoors vs sewer)
After addressing dosing errors, attention must turn to where root killer is applied: placing chemical treatments in the wrong location—such as pouring a product indoors into bathroom or kitchen drains instead of directly into the sewer main or designated cleanout—can render the treatment ineffective and create hazards.
Users should identify the main cleanout, apply product there, and confirm flow path to target roots for effective, contained treatment.
Ignoring safety protocols and regulatory requirements
Many users overlook safety protocols and local regulations when handling chemical root killers, creating risks to people, pets, and the environment.
Professionals recommend reading labels, wearing PPE, following application limits, and checking municipal discharge rules.
Ignoring permits, disposal guidelines, or buffer zones can cause legal penalties and contamination.
Compliance minimizes harm, guarantees effective treatment, and protects public health and waterways.
Failing to diagnose underlying pipe damage
Failing to inspect pipes for cracks, root intrusion, or collapsed sections before applying root killer can turn a targeted treatment into a temporary fix that masks serious structural problems.
Technicians should evaluate lines with cameras or professional diagnostics first. If damage exists, prioritize repairs or relining rather than chemical control alone.
Document findings, communicate risks to owners, and schedule corrective action to prevent recurrence and liability.
Prevention and Long-Term Best Practices
Preventive care focuses on regular inspections, recognition of early warning signs, and scheduled maintenance treatments to limit root intrusion over time.
Proper landscaping and targeted root management around sewer lines reduce reliance on chemical controls and help determine appropriate timing and frequency of treatments.
Decisions about continued chemical management versus pipe replacement should be guided by inspection findings, cost, and the extent of structural damage.
Regular inspection schedules and early warning signs
Although drains often seem trouble-free, establishing a regular inspection schedule helps catch small issues before they become clogs or pipe damage.
Periodic checks and prompt responses extend system life.
Recommended actions:
- Monthly visual checks for slow drains or odors.
- Quarterly test of cleanouts and trap vents.
- Biannual camera inspection for early root intrusion.
- Immediate follow-up on unusual gurgling or backups.
Landscaping and tree-root management around sewer lines
Many homeowners benefit from strategic landscaping that minimizes root intrusion into sewer lines while preserving yard aesthetics and tree health.
Plant trees away from sewer easements, choose species with non-invasive roots, install root barriers between plantings and pipes, and use shallow-rooted shrubs near lines.
Maintain irrigation practices that discourage roots seeking moisture near pipes and consider professional assessments before major plantings.
Maintenance treatments: timing and frequency
When should maintenance treatments be scheduled and how often should they recur to keep sewer lines clear of roots?
Regular preventative treatments are advised every 6–12 months, adjusted for tree density, previous infestations, and pipe material.
Inspect annually with camera surveys; treat promptly if regrowth appears.
Seasonal timing—late summer to early fall—targets active root growth, improving chemical uptake and long-term control.
When to replace pipes versus ongoing chemical control
Decisions about replacing sewer pipes versus continuing chemical root control hinge on pipe condition, recurrence rate of intrusion, and long-term costs: if camera inspections reveal structural failures—cracks, collapses, severe joint displacement—or if roots repeatedly invade despite appropriately timed chemical treatments, replacement becomes the more reliable solution;
conversely, intact pipes with isolated or slow regrowth can often be managed long-term with routine root-killing maintenance combined with targeted repairs and ongoing monitoring.
Cost, Timeframe, and Expected Results
Typical costs range from inexpensive DIY chemical treatments to higher-priced professional services that may include inspection and mechanical removal.
Results can appear within days to weeks, with protective effects lasting months to a year depending on method and root regrowth.
Success is indicated by restored flow and no recurring backups, while continued blockages, foul odors, or rapid regrowth signal failure and the need for alternative action.
Typical costs for DIY vs professional treatment
Cost comparisons between DIY root killer treatments and professional services hinge on product price, labor, and the extent of root intrusion. DIY typically costs $15–$100 for chemicals and minimal tools; professional excavation or hydro-jetting ranges from $300–$2,000 plus inspection fees. Professionals add diagnosis, warranty, and higher success rates for severe intrusions.
| Option | Typical cost |
|---|---|
| DIY chemicals | $15–$100 |
| Plumber visit | $100–$300 |
| Hydro-jetting | $300–$1,000 |
| Excavation/repair | $1,000–$2,000 |
How long before you see results and how long protection lasts
How soon will homeowners notice improvement after applying a root killer depends on the product and severity of the intrusion:
Visible reduction in slow drains or backups can occur within 24–72 hours for chemical foams or gels; harsher infestations may take weeks with repeated applications.
Protection typically lasts several months; routine maintenance treatments every 3–12 months extend efficacy depending on root regrowth and product strength.
Indicators treatment was successful or unsuccessful
Success is measured by clear, observable changes: drains that once gurgled or backed up move freely within days, reduced odors disappear, and inspection tools (camera or plumber’s snake) show fewer or no root masses.
Costs vary: low for do-it-yourself chemicals, higher for professional service.
Timeframe: days to weeks.
Successful results include sustained flow and reduced maintenance; persistent backups, odors, or visible roots indicate failure.
Visuals and How-To Demonstrations
The article recommends including clear step-by-step photos or diagrams that show each stage of root killer application, from preparation to final flushing.
It also suggests before-and-after images of treated lines to verify effectiveness and illustrate expected changes.
These visuals should be labeled and captioned for quick reference.
Step-by-step application photos or diagrams
Begin by laying out clear, sequential images or diagrams that show each step of applying root killer to a drain, from identifying the affected section to the final flush; labels should indicate required tools, safety gear, and quantities of product.
Include close-ups of application points, measured dosing, waiting interval, and safe disposal.
Numbered frames and brief captions clarify timing and precautions without extra text.
Before-and-after images of treated lines
Photographs document the effect of root killer on pipe interiors by pairing pre-treatment images—showing root intrusions, mineral buildup, or reduced flow profiles—with post-treatment images captured from the same angle and distance.
Each paired set includes a brief caption noting treatment date, product and dose used, camera position, and elapsed time to demonstrate efficacy and help viewers assess real-world results.
Comparative sequences highlight remaining roots, clearance extent, and any repeat-treatment indications.
Conclusion
In summary, one might say the homeowner quietly negotiated with unruly roots rather than waging chemical war. With cautious application and respect for pipes, soil, and ecosystem, the problem often yields to measured intervention. Professionals recommend restraint and follow-up care to keep future intrusions politely at bay. When used as designed, root killers serve as a discreet, temporary courtesy—one part remedy, one part reminder to maintain channels before nature resumes its gentle occupation.