How to Cover a Sewage Drain Safely: DIY Options, Materials, and Step-by-Step Guide
To cover a sewage drain safely, choose the right cover based on its function, accessibility, and load requirements. For short-term solutions, use tight plastic caps, weighted grates, or sealed buckets. For longer-term options, consider rubber plugs, bolt-down lids with sealant, or cast-iron/concrete flush covers in high-traffic areas. Always wear personal protective equipment (PPE), check for odors or vapors, shut off nearby water, and ensure future access for maintenance. Follow local regulations and consult a plumber for persistent issues. Detailed methods and step-by-step instructions are provided below.
How to Cover a Sewage Drain Safely Quick Answer and When to Act
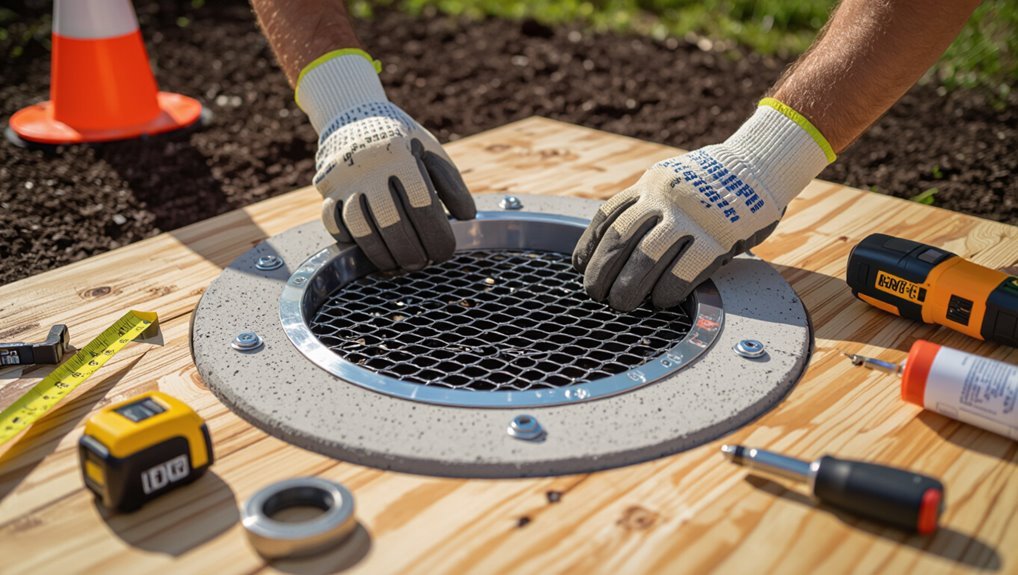
The quick answer is that safe coverings range from temporary solutions like sealed plastic caps or weighted grates to permanent options such as fitted metal or concrete covers.
Immediate covering is warranted when exposed drains pose safety hazards, emit strong odors, attract pests, or when local regulations require containment.
The following section outlines suitable short‑ and long‑term choices and criteria for acting now versus planning a permanent fix.
Safe, temporary and permanent covering options summary
Summarize viable coverings by distinguishing quick temporary fixes from durable permanent solutions and outlining when each is appropriate.
Quick options (plastic caps, weighted grates, sealed buckets) stop hazards short-term and suit immediate needs while awaiting repair.
Permanent solutions (cast-iron covers, custom-fitted sealed lids, concrete flush mounts) provide long-term safety, odor control, and compliance.
Choose based on duration, access needs, and site conditions when deciding how to cover sewage drain.
When immediate covering is necessary (safety, odor, pests, legal)
Any situation that exposes people, animals, or property to sewage requires immediate covering to prevent injury, disease transmission, pest infestation, and legal liability.
Immediate action is warranted when drains are open, leaking, overflowing, emitting strong odors, attracting insects or rodents, or when local codes mandate containment.
Temporary covers, signage, and professional notification minimize risk until permanent repairs or sealed replacements are completed.
Basic Understanding What a Sewage Drain Is and Why Proper Covering Matters
Sewage drains come in several common forms—yard cleanouts, floor drains, and access ports—each with distinct locations and cover requirements.
Improper covering can create health hazards, structural damage, and violations of building or sanitary codes.
Understanding local legal and code considerations is consequently essential before selecting or installing any drain cover.
Types of sewage drains (yard cleanouts, floor drains, access ports)
A property’s drainage system includes several distinct access points—yard cleanouts, floor drains, and access ports—each serving specific functions and requiring appropriate coverings.
Yard cleanouts provide outdoor service access; floor drains handle interior wastewater and occasional overflow; access ports allow inspection and maintenance of main lines.
Covers differ by location, load-bearing needs, ventilation, and sealing requirements to prevent debris and allow service.
Risks of improper covering (health, structural, code violations)
Improperly covering a sewage drain can create immediate and long-term hazards that affect health, building integrity, and legal compliance.
Blocked vents or loose lids permit pathogen spread, foul odors, and pest entry. Water backup and soil saturation undermine foundations, flooring, and finishes.
Temporary or insecure covers risk injury and contamination. Proper, durable sealing prevents these public-health, structural, and safety consequences.
Legal and local code considerations
Because municipal codes and plumbing standards vary by jurisdiction, understanding local legal requirements is essential before altering or covering a sewage drain.
The homeowner should verify permits, approved materials, inspection schedules, and setback/access rules. Noncompliance risks fines and unsafe installations.
- Permits required
- Approved cover materials
- Inspection and testing
- Access and setback rules
Materials and Tools You’ll Need
A clear inventory of materials and tools helps determine the safest and most cost-effective cover for a sewage drain.
Temporary options such as rubber plugs, plywood, or plastic sheeting are contrasted with semi-permanent and permanent solutions like cast-iron lids, concrete slabs, or custom steel grates, with considerations of cost and durability guiding selection.
Essential tools—saw, drill, level, appropriate sealants—and personal protective equipment are required for proper installation and testing.
Materials for temporary covers (rubber plugs, plywood, plastic sheeting)
Selecting the right temporary cover depends on the drain opening size, site conditions, and expected duration of use.
Suitable options prioritize sealing, load capacity, and weather resistance.
- Rubber plugs — flexible, form-fitting seals for round openings.
- Plywood — thick, supported boards for pedestrian protection.
- Plastic sheeting — vapor barrier and debris control.
- Sandbags — secure edges and weight for wind resistance.
Materials for semi-permanent and permanent covers (cast-iron/lid, concrete slab, custom steel/grate)
After temporary measures have been evaluated for short-term containment, attention shifts to more durable solutions for long-term safety and load-bearing requirements.
Semi-permanent and permanent options prioritize strength, corrosion resistance, and fit. Typical materials include:
- Cast iron lids for street drains.
- Reinforced concrete slabs.
- Custom steel grates with anti-corrosion coating.
- Stainless steel plates for corrosive environments.
Tools required (saw, drill, level, sealants, safety gear)
Several essential tools and safety items are required to install semi-permanent or permanent sewage drain covers: A concise kit guarantees accuracy and protection during cutting, drilling, and sealing.
Typical items include measuring tools, power tools, and personal protective equipment.
- Circular saw or angle grinder
- Drill with masonry bits
- Level, tape measure, sealants (epoxy/caulk)
- Gloves, goggles, respirator, knee pads
Cost and durability comparison of common materials
Material choice affects both upfront cost and long-term performance when covering a sewage drain, so comparing price, lifespan, and maintenance requirements is essential. A concise comparison helps select materials balancing budget and durability; consider corrosion resistance, load capacity, and replacement frequency before choosing.
| Material | Approx. Cost | Typical Lifespan |
|---|---|---|
| Plastic | Low | 5–15 years |
| Steel | Medium | 15–30 years |
| Concrete | Medium–High | 20–50 years |
How to Choose the Right Cover Decision Checklist
Selecting a sewage drain cover requires weighing factors such as drain type, required load-bearing capacity, waterproofing, and ventilation needs.
The choice should also reflect the location—indoor covers prioritize hygiene and odor control, while outdoor covers emphasize durability and weather resistance.
If complexity, safety loads, or local codes are uncertain, professional assessment is recommended rather than a DIY approach.
Factors to consider (drain type, load-bearing needs, waterproofing, ventilation)
A practical decision checklist for covering a sewage drain begins by identifying the drain type (floor, cleanout, storm, or combined), since shape, size, access frequency, and local code constraints determine compatible cover styles.
Then assess load-bearing requirements, waterproofing needs, venting or trap access, material chemical resistance, locking or tamper-proofing, and ease of routine inspection and maintenance.
Choosing based on location (indoor vs outdoor)
Whether indoors or outdoors, location dictates key performance requirements for a sewage drain cover: Indoor covers prioritize odor control, aesthetic integration, and easy access for maintenance, while outdoor covers emphasize weather resistance, load capacity, and pest exclusion.
- Indoor: low-profile, sealed gasket, ventilation control.
- Outdoor: corrosion-resistant, heavy-duty, locking option.
- Materials: match environment (plastic, cast iron, composite).
- Installation: guarantee slope, anchoring, and local code compliance.
When to call a professional vs DIY
Evaluate risk and complexity before deciding to tackle a sewage drain cover as a DIY task or hire a professional.
Decision factors include safety, skill, and local code compliance. Use this checklist:
- Hazard level: exposure, gas, or sewage contamination.
- Structural complexity: slab cutting, load-bearing concerns.
- Tools and skills: welding, concrete work, plumbing.
- Permit and code requirements: mandatory professional work.
Step-by-Step DIY Guide Temporary, Semi-Permanent, and Permanent Solutions
Before beginning any cover work, the person should complete safety preparations including appropriate PPE, odor checks, and shutting off water if required.
They then inspect and measure the drain opening to determine fit and suitability for each approach.
The guide proceeds through installing temporary covers (rubber plug, weighted plywood), a semi‑permanent bolt‑down lid with sealant, and permanent options such as cast‑iron grates or a concrete pour.
Safety preparations before you start (PPE, odor checks, turning off water if needed)
Because working with a sewage drain can expose individuals to biological hazards and plumbing risks, proper safety preparations are essential:
- Wear PPE—nitrile gloves, eye protection, a respirator if odors are strong, and waterproof boots.
- Ventilate the area; use fans or open windows.
- Conduct odor and vapor checks before beginning.
- Shut off nearby water sources and isolate valves to prevent accidental flow.
Step 1: Inspecting the drain and measuring the opening
One clear inspection and accurate measurements of the drain opening are essential before selecting a temporary, semi‑permanent, or permanent cover.
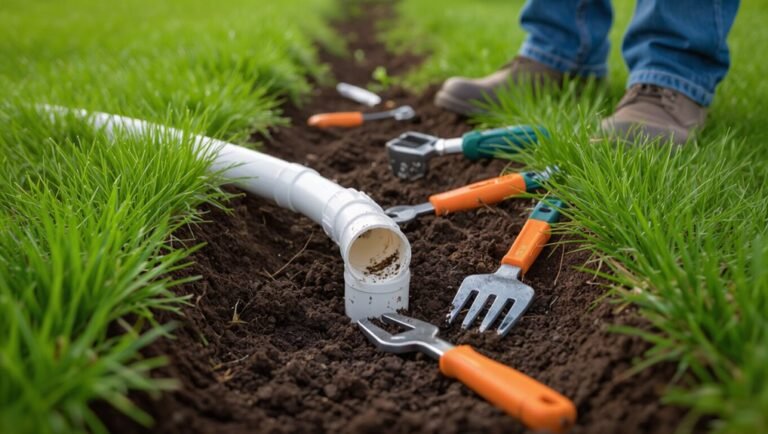
The individual notes shape, diameter, depth, and condition; photographs and a tape measure record dimensions.
Consider edge condition and nearby fixtures to guarantee fit and sealing.
Recommended checks:
- Diameter
- Depth
- Shape (round/oval)
- Edge integrity
Step 2: Installing temporary covers (rubber plug method, weighted plywood)
With measurements and edge condition confirmed, the installer can move on to temporary covers that block odor, pests, and accidental falls while more permanent work is planned.
Fit a molded rubber plug sized to the drain, ensuring a tight seal and using a handle for removal.
Alternatively, place a plywood board cut to overlap edges and add weights or straps to prevent displacement.
Step 3: Installing a semi-permanent cover (sealant + bolt-down lid)
Prepare to shift from a temporary barrier to a more durable solution by fitting a semi-permanent cover that combines a waterproof sealant with a bolt-down lid.
Clean the flange, apply compatible sealant evenly, set the gasketed lid, then torque bolts in a star pattern to specified torque.
Verify seal integrity, allow curing time, and recheck bolts before regular use.
Step 4: Installing a permanent cover (cast-iron/grate or concrete pour)
After the semi-permanent lid is seated and the sealant has cured, attention moves to a permanent cover that will withstand long-term traffic and environmental stress.
Choices include a cast-iron threaded or bolted grate set into a concrete collar, or pouring a reinforced concrete slab with embedded anchor points.
Ascertain proper drainage slope, load rating, corrosion protection, and secure fastening to prevent displacement and infiltration.
Step 5: Finishing touches venting, labeling, landscaping integration
Although the cover is in place, final steps confirm safety, functionality, and aesthetic integration: proper venting to prevent gas buildup, clear labeling for maintenance and emergency responders, and thoughtful landscaping to blend the cover without obstructing access.
Confirm vents meet code, apply weatherproof identification tags, and use removable plantings or gravel borders to conceal edges while preserving visibility and tool access for inspections or repairs.
Comparison of Cover Options Pros, Cons, and Use Cases
The article compares temporary, semi-permanent, and permanent drain covers by outlining their advantages, limitations, and typical use cases.
It highlights which materials and designs suit high-traffic or vehicle areas versus lighter pedestrian zones.
It also evaluates options best for odor control and pest prevention to guide appropriate selection.
Temporary covers vs semi-permanent vs permanent
When selecting between temporary, semi-permanent, and permanent sewage drain covers, decision factors center on duration of need, site conditions, budget, and safety requirements. Temporary covers offer quick, low-cost protection but limited durability. Semi-permanent balances cost and longevity for moderate use. Permanent solutions prioritize strength and long-term safety with higher upfront expense.
| Type | Typical use |
|---|---|
| Temporary | Short-term, emergencies |
| Semi-permanent | Seasonal or moderate use |
| Permanent | Long-term, critical locations |
Best options for high-traffic or vehicle areas
For high-traffic pedestrian zones and vehicle lanes, cover selection must prioritize load capacity, slip resistance, and secure fastening to prevent displacement under repeated or heavy loads.
Cast iron or ductile iron frames with bolted steel or composite lids offer high strength; reinforced concrete slabs suit permanent installations.
Advantages: durability and safety.
Cons: weight, cost, and installation complexity.
Use cases: roads, driveways, commercial walkways.
Best options for odor control and pest prevention
Consider odor and pest control as primary design criteria when selecting sewage drain covers, because effective options combine airtight sealing, durable barriers, and easy maintenance access.
Rigid metal or heavy-duty plastic lids with neoprene gaskets block smells and rodents; trap inserts and one-way valves reduce gas and insect entry; screened vents with charcoal filters balance ventilation and odor capture.
Regular inspection preserves performance.
Common Problems and How to Fix Them
Common problems after installing a sewage drain cover include covers shifting or popping out, persistent odors, water pooling or drainage issues, and corrosion or material failure.
Each issue has specific causes—improper fit or anchoring, trapped gases or clogged vents, altered flow paths or misaligned drains, and incompatible or degraded materials—that suggest targeted fixes.
The following section outlines diagnostic steps and practical repairs for each problem to restore safe, functional coverage.
Cover shifting or popping out causes and fixes
Cover shifting or popping out typically indicates underlying issues with installation, foundation movement, surface loads, or deterioration of the cover and its seating.
Diagnose by inspecting frame alignment, surrounding soil or concrete, and signs of corrosion or cracks.
Fix by resetting or replacing the frame, adding shims or mortar, anchoring with appropriate fasteners, and upgrading to a heavier, properly matched cover to prevent recurrence.
Persistent odors after covering troubleshooting steps
After addressing shifting or seating issues, attention should turn to lingering sewage odors that can persist despite a properly seated cover.
Inspect traps for dry or damaged seals, check for vent blockages, and verify gasket integrity. Clean buildup in the drain and replace deteriorated P-traps or seals.
If odors continue, consult a plumber to evaluate deeper sewer line leaks or biofilm accumulation.
Water pooling or drainage issues after cover installation
Water pooling or slow drainage following installation often indicates misalignment, blockages, or inadequate slope rather than a manufacturing defect.
Inspect alignment and clear debris; remove cover and snake the drain if needed.
Verify grate seating and regrade surrounding surface to restore proper slope.
For persistent issues, check sub-surface piping for sags or crushes and consult a plumber to reseat or relink sections.
Corrosion or material failure and repair options
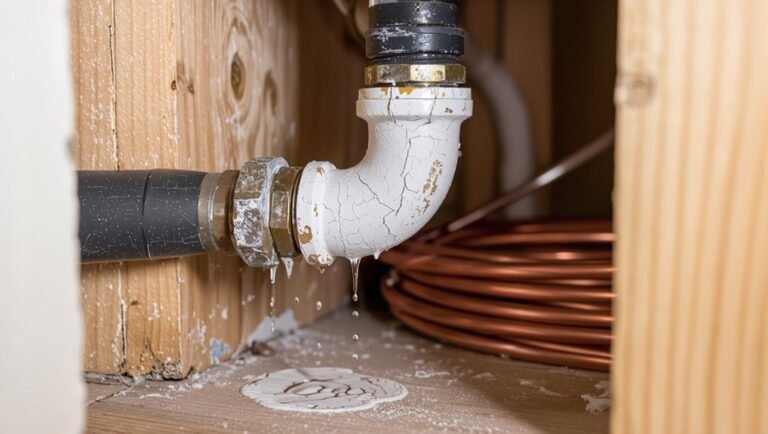
Inspecting sewage drain components reveals that corrosion and material failure are common causes of leaks, weakened structural integrity, and compromised safety.
Regular inspection identifies rust, cracks, and degraded seals.
Repair options include localized patching, seal replacement, sectional pipe replacement, and upgrading to corrosion-resistant materials (PVC, stainless steel).
For extensive damage, consult a licensed plumber to guarantee proper replacement and code compliance.
Safety Mistakes to Avoid
Common safety mistakes include using non-load-bearing materials in traffic areas and blocking ventilation or cleanout access, both of which can create immediate hazards.
Ignoring local codes and inspection requirements often leads to unsafe, noncompliant work.
Unsafe DIY practices—such as skipping PPE or failing to seal joints properly—compound risks and should be avoided.
Using non-load-bearing materials in traffic areas
When a cover in a pedestrian or vehicle pathway is made from materials not rated to bear expected loads, the risk of collapse, trip hazards, and accelerated wear increases substantially.
Using lightweight plastics, thin plywood, or decorative panels in traffic zones invites sudden failure, injury, and costly repairs.
Select load-rated grates or reinforced covers, confirm load class, and secure fittings to prevent movement and premature degradation.
Blocking necessary ventilation or cleanout access
Obstructing vents or cleanout access can impede airflow, trap sewer gases, and prevent timely maintenance, creating health and operational hazards.
Covering or sealing these points blocks pressure equalization, hides leaks, and delays repairs.
Proper covers must preserve access, be removable without tools or damage, and clearly mark cleanouts and vent locations to guarantee safe, prompt inspection and emergency intervention.
Ignoring local codes and inspection requirements
Failing to follow local codes and inspection requirements compounds the risks posed by blocked vents or inaccessible cleanouts.
Ignoring permits, setback rules, or required materials can void warranties, incur fines, and create hazards undetected by inspectors.
Compliance guarantees proper methods, access, and documentation; it also protects occupants and future property sales.
Consult authorities before modifying drainage components.
Unsafe DIY practices (no PPE, inadequate sealing)
Use proper personal protective equipment and reliable sealing methods to prevent direct exposure to sewage and the spread of contaminants.
DIYers who skip gloves, masks, goggles, or fail to seal joints risk disease, odor infiltration, and structural damage.
Proper PPE, correct gasket or solvent-weld techniques, and pressure-tested seals reduce health hazards and costly repairs; consult professionals for uncertain conditions.
Prevention, Maintenance, and Best Practices
A practical prevention and maintenance program begins with a routine inspection schedule that notes cover fit, seals, corrosion, and nearby soil or vegetation issues.
Seasonal tasks—protecting covers from freeze/thaw cycles, clearing windblown debris, and ensuring drainage paths—reduce wear and emergency repairs.
Clear documentation and marking of drain locations, plus criteria for when replacement is preferable to repair, support safe long‑term performance.
Routine inspection schedule and what to look for
When establishing a routine inspection schedule for a sewage drain, inspections should occur at predictable intervals—typically quarterly for residential systems and monthly for commercial or high-use installations—to identify early signs of blockages, corrosion, root intrusion, or failed seals.
Inspectors should document findings and act promptly on issues.
- Visual cover integrity
- Drainage flow rate
- Joint and seal condition
- Odor and moisture anomalies
Seasonal maintenance tips (freeze/thaw, debris removal)
Prepare for seasonal shifts by scheduling targeted maintenance that addresses freeze/thaw risks and seasonal debris accumulation around sewage drain covers.
Inspect seals and cover fit before cold snaps, remove leaves and sediment frequently, and clear gutters to reduce runoff.
Use non-corrosive de-icing agents sparingly, protect vents from ice dams, and document any damage for timely repair to prevent blockages and cover displacement.
Documenting and marking drain locations for future work
Following seasonal inspections and repairs, locating and recording sewage drain positions guarantees future maintenance is efficient and safe.
Technicians should mark coordinates on property plans, photograph covers and nearby landmarks, and place durable ground markers or flags.
Log material, cover type, depth, and access notes in maintenance records.
Share maps with contractors and update after any relocation or repair to prevent accidental damage.
When to replace rather than repair
How should a decision be made between repairing a sewer drain cover and replacing it outright?
Assessment should consider structural damage, corrosion, persistent leaks, safety hazards, and cost-effectiveness.
If integrity is compromised, repairs are temporary, or regulatory standards aren’t met, replacement is warranted.
Routine inspections, documented deterioration, and recurring failures indicate proactive replacement to guarantee long-term safety and compliance.
Cost Estimates, Timeframes, and When to Hire a Pro
Typical cost ranges for temporary, semi-permanent, and permanent drain covers vary from low-cost DIY materials to larger investments for engineered or code-compliant solutions.
DIY installations often take a few hours to a day, while professional jobs may require scheduling, inspections, and a day or more on site.
A licensed plumber or contractor should be hired for persistent leaks, structural concerns, odor or backup issues, or when permits and code compliance are required.
Typical cost ranges for temporary, semi-permanent, and permanent solutions
Cost ranges and timeframes for covering a sewage drain vary widely depending on whether the solution is temporary, semi‑permanent, or permanent; estimates: temporary foam or plywood covers $10–$100, semi‑permanent grates or concrete lids $100–$600, permanent engineered covers $600–$3,000. Hire a pro for structural work, permits, or complex plumbing.
| Type | Typical cost | Notes |
|---|---|---|
| Temporary | $10–$100 | Quick, short‑term |
| Semi‑permanent | $100–$600 | Moderate durability |
| Permanent | $600–$3,000 | Long‑lasting, professional |
Estimated time for DIY installs vs professional jobs
Several factors determine whether a DIY cover takes an hour or a full weekend versus a professional job that may require a day or more.
Complexity, materials, site access, required sealing and curing times, and skill level drive duration. Simple temporary caps install quickly; custom castings, concrete pads, or recessed metal grates extend time.
Professionals streamline permits, cutting, and drainage adjustments, reducing unexpected delays.
Signs you should hire a licensed plumber or contractor
When unexpected complications arise—extensive pipe damage, suspected blockages beyond a simple cap, or evidence of sewage backing up into the building—it’s time to call a licensed plumber or contractor.
Other signs: persistent odors, repeated DIY failures, visible corrosion, sinkholes or settling near drain lines, and required permits for alterations.
Professionals provide accurate diagnostics, safety, code compliance, and clear cost and timeline estimates.
Conclusion
Properly covering a sewage drain protects health, prevents odors, and reduces contamination risks. Homeowners should assess location, usage, and local codes before choosing temporary, semi‑permanent, or permanent solutions, selecting materials and installation methods suited to their needs. Regular inspection and maintenance prevent failures; common problems can often be fixed with basic repairs, but complex issues or structural concerns warrant professional help. Prioritizing safety and appropriate materials guarantees long‑term, effective protection.