How to Change Copper Pipe: Step-by-Step Guide for DIY Repairs and Replacements
To replace a short, accessible run of copper pipe, first shut off the water supply and drain the line. Next, cut out the damaged section, clean and deburr the ends, and connect new tubing using solder, compression, push-fit, or crimp fittings. Ensure to inspect for corrosion, measure accurately, and adhere to local plumbing codes. After installation, conduct a pressure test to check for leaks, then insulate and support the new pipe. For further guidance, refer to detailed steps, tool lists, and safety precautions.
Can You Change Copper Pipe Yourself?
A homeowner can tackle copper pipe replacement for simple, exposed runs and small repairs with basic tools and careful soldering.
Complex jobs—hidden pipes, extensive corrosion, gas lines, or work requiring permits—are best handled by a licensed professional. Safety risks and code compliance are the main reasons to call an expert.
Short summary of when DIY is appropriate
Many homeowners can replace short sections of copper pipe themselves when the job is straightforward—such as a single leaking joint, accessible run, and when basic tools (pipe cutter, torch or push-fit fittings) and safety knowledge are available.
A concise DIY is appropriate if fittings are standard, shutoff is possible, corrosion is limited, and one follows clear steps on how to change copper pipe without altering system layout or code requirements.
When to call a professional
Homeowners should call a licensed plumber when the repair involves multiple fittings, hidden or hard-to-access runs, significant corrosion, altered pipe routing, or any work that risks violating local codes or supply shutoff reliability.
Complex jobs also warrant a professional when flammable methods (soldering/torches) are required, lead or galvanized connections are present, or the leak affects structural elements or potable-water safety.
A professional is also advised for permits, pressure testing, unfamiliar systems, or recurring failures to guarantee code compliance and long-term integrity.
Basic Understanding What Is a Copper Pipe and Why Change It?
A copper pipe is a metal plumbing tube available in different types and grades—Type K, L, M and DWV—each suited to specific pressure, depth and drainage uses.
Homeowners and plumbers commonly replace copper due to leaks, corrosion, remodeling needs or freeze damage.
Basic tools, materials and safety gear for such work include cutters, fittings, soldering or compression supplies, flux, a torch or crimping tools, gloves and eye protection.
Types and grades of copper pipe (Type K, L, M, DWV)
When selecting copper pipe for replacement, understanding the different types and wall thicknesses—Type K, L, M, and DWV—is essential because each is engineered for specific pressure, corrosion resistance, and drainage applications. Type K: thickest, underground/industrial. Type L: common residential. Type M: thinner, low-pressure. DWV: for drainage, waste, vent.
| Type | Typical Use |
|---|---|
| K | Underground/High pressure |
| L | Water distribution |
| M | Low-pressure fixtures |
| DWV | Drainage systems |
Common reasons for replacement (leaks, corrosion, remodeling, freezing)
Many plumbing failures trace back to a handful of causes—leaks from pinhole corrosion, visible pitting from chemical wear, system upgrades during remodeling, and damage from freezing—each prompting copper pipe replacement for safety or performance.
Other common indicators include persistent dampness, reduced water flow from internal buildup, recurring joint failures, and visible deformation after ice expansion; any of these justify timely replacement to prevent bigger failures.
Tools, materials, and safety gear overview
Several essential tools and materials are required to replace copper pipe, and proper safety gear guarantees the work proceeds without injury or contamination.
The overview lists required equipment, consumables, and protective items for typical DIY replacements, emphasizing functionality and safety.
- Pipe cutter, torch or soldering kit, emery cloth
- Copper fittings, flux, solder, replacement pipe
- Pipe wrenches, tubing bender, deburring tool
- Gloves, goggles, respirator, fire extinguisher
How to Prepare Assessing the Job and Planning
The first step is a careful inspection of the existing piping to locate leaks, corrosion, and the exact sections needing replacement.
Measurements and a mapped route for new pipe runs should be recorded, and any applicable permits, local codes, and inspection requirements confirmed before work begins.
Finally, the planner compares joining methods—soldering, compression, push-fit, and flaring—to select the appropriate technique for the job and code.
Inspecting the existing piping and locating the problem
Begin by visually tracing the copper runs from fixtures to the main supply, noting joints, valves, and any visible corrosion or discoloration that indicate leaks or weakening.
Listen for drips, feel for dampness or cold spots, and check surrounding insulation and fittings.
Identify pinhole leaks, green/white deposits, and loose connections.
Photograph problem areas and record locations for repair planning.
Measuring, mapping, and determining pipe route
After documenting damaged sections, attention shifts to measuring and mapping the system to plan the new routing.
The technician measures pipe lengths, records diameters and fittings, notes access points and clearances, and sketches the route with elevations and fixtures.
Materials and joint types are specified.
Potential obstructions and isolation valves are marked to guarantee accurate cutting, replacement lengths, and efficient reassembly.
Permits, local codes, and when inspections are required
Why is a permit necessary for this job? A permit verifies compliance with local plumbing codes, protects safety, and guarantees proper materials and methods.
Homeowners should check municipal requirements, code updates, and whether licensed tradespeople must perform work.
Inspections are typically required for alterations, concealed work, or system changes; schedule inspections at prescribed stages to avoid fines and guarantee code compliance.
Choosing joining methods: soldering vs. compression vs. push-fit vs. flaring
With permits and inspections confirmed, the next planning step is selecting a joining method that matches the job’s access, pressure requirements, and skill level. Soldering offers permanent, leak-resistant joints but needs torch skill; compression suits tight spots without heat; push-fit is fastest for repairs; flaring fits high-pressure lines and appliances.
| Method | Strength | Best use |
|---|---|---|
| Solder | Permanent | Long runs |
| Push-fit | Fast | Temporary/repairs |
| Flare | High-pressure | Appliances |
Step-by-Step Guide to Changing Copper Pipe
The procedure begins by shutting off the water and draining the system to prevent leaks and pressure.
The damaged section is cut out, pipe ends are cleaned and deburred, and flux is applied in preparation for joining.
Connections are completed either by full soldering (sweat) following proper technique or by using alternatives such as compression fittings, push-fit (SharkBite), or crimp systems.
Step 1 Shut off water and drain the system
Shut off the main water supply before touching any fittings to prevent flooding and limit water loss.
Next, open faucets and relief valves to drain remaining water. Close isolation valves if present. Use buckets or towels for residual pools. Verify dryness before proceeding.
- Locate and shut main valve.
- Open lowest and highest taps.
- Drain water heater relief.
- Inspect for residual moisture.
Step 2 Cut out the damaged section safely
Measure and mark the damaged section to be removed, allowing an extra 1/2–1 inch on each side for fittings and cleanup.
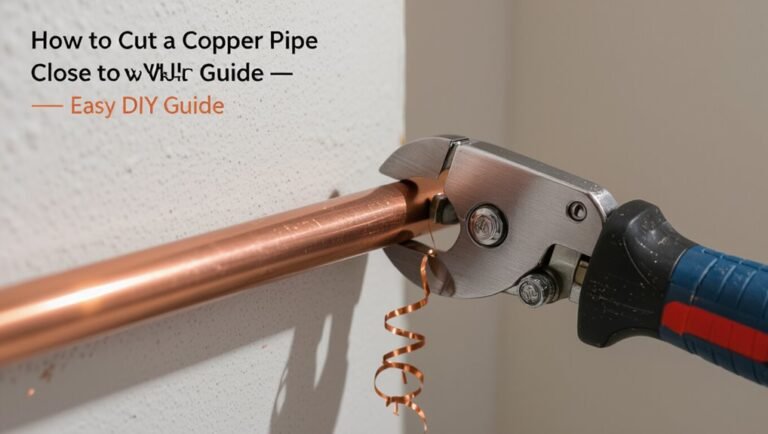
Wear safety glasses and gloves. Use a tubing cutter or fine-tooth saw to score and cut squarely, rotating the cutter for a clean cut.
Support adjacent pipe to prevent stress. Remove burrs only as needed later; contain debris and inspect for hidden corrosion.
Step 3 Prepare pipe ends (cleaning, deburring, flux)
With the damaged section removed and adjacent pipe supported, attention turns to preparing the cut ends for a reliable joint.
Cut ends are deburred using a reamer or file, followed by sanding or abrasive cloth to bright copper.
Surfaces must be wiped clean of dust, oil, and moisture.
Apply appropriate flux evenly to the fitting area, avoiding excess that could migrate.
Step 4 Join using soldering (sweat) full soldering procedure
Begin by fitting the cleaned, flux-coated pipe ends fully into the coupling or fitting until they seat; heat the joint evenly with a propane or MAPP torch, concentrating on the fitting, not the solder.
Touch solder to the heated seam; allow capillary action to draw it in.
Remove heat, wipe excess flux, and let the joint cool undisturbed.
Inspect for continuous, shiny fillet.
Step 5 Alternatives to soldering: compression fittings, push-fit (SharkBite), and crimp systems
Consider practical solder-free options when heat, tools, or time make sweating joints impractical: compression fittings, push-fit connectors (commonly branded SharkBite), and crimp systems each provide reliable mechanical seals for copper pipe with different trade-offs in cost, required tools, permanence, and suitability for concealed or pressurized installations.
| Type | Tools | Best use |
|---|---|---|
| Compression | Wrenches | Temporary/accessible |
| Push-fit | None | Quick repairs |
| Crimp | Crimper & rings | Permanent, concealed |
Step 6 Pressure test the repair and check for leaks
After choosing and installing a solder-free or soldered joint, the repair must be pressure tested to confirm a watertight seal before restoring normal service.
The technician isolates the section, fills it, and raises pressure to recommended levels while monitoring gauges. Observe fittings and joints for drops or drips.
If pressure holds, restore supply; if not, depressurize and rework the leak.
- Isolate and cap section
- Fill and purge air
- Pressurize to spec
- Monitor for drops
Step 7 Insulation, support, and finishing touches
One final pass addresses insulation, mechanical support, and cosmetic finishing to guarantee longevity and code compliance.
The installer fits appropriate pipe insulation, seals joints against condensation and heat loss, secures piping with rated straps and hangers at code spacing, checks for movement or vibration, restores wall or ceiling finishes, and labels the circuit.
Final documentation and cleanup complete the job.
Comparison of Joining Methods: Pros, Cons, and Cost
The article compares soldering, compression, push-fit, and flare fittings by outlining their advantages, disadvantages, and typical costs.
It also identifies which method suits specific situations—tight spaces, hot water lines, permanent repairs, or temporary fixes.
Readers are guided to weigh durability, ease of installation, and price when selecting a joining technique.
Soldering vs. compression vs. push-fit vs. flare
Compare four common copper pipe joining methods—soldering, compression, push-fit, and flare—by evaluating their reliability, skill requirements, tools, typical applications, and relative cost. Each method balances permanence, ease, and expense: soldering is durable but skillful; compression is moderate and tool-light; push-fit is fastest and costly; flare suits gas/fixtures. Choose based on longevity, access, and budget.
| Method | Quick summary |
|---|---|
| Soldering | Durable, requires torch and skill |
| Compression | Moderate, simple tools, replaceable nut |
| Push-fit | Fast, expensive, tool-free |
| Flare | Secure for gas, needs flare tool |
Best method by situation (tight spaces, hot water lines, repairs, temporary fixes)
Match the joining method to the situation by weighing space constraints, temperature, permanence, and budget. Choice depends on access, heat tolerance, durability, and cost.
For common scenarios:
- Tight spaces: push-fit or compression for ease and no torch.
- Hot water lines: soldered joints for heat resistance and longevity.
- Repairs: compression or push-fit for speed.
- Temporary fixes: clamp or push-fit, then schedule permanent repair.
Common Problems and Mistakes to Avoid
Common failures include poor solder joints that lead to pinhole leaks and choosing the wrong pipe or fitting size.
Overheating can damage nearby materials, creating fire or plastic-melting hazards.
Inadequate pressure testing often leaves hidden leaks that worsen over time.
Poor solder joints and pinhole leaks
Poor solder joints and pinhole leaks are frequent causes of failures in copper piping, arising from inadequate heat, dirty fittings, or improper flux application.
Technicians should clean tubing and fittings thoroughly, apply appropriate flux sparingly, and heat evenly until solder flows fully.
Inspect joints for voids or cold solder, pressure-test systems, and rework or replace compromised sections promptly to prevent progressive corrosion and water damage.
Overheating or burning surrounding materials
Overheating during soldering can easily ignite nearby insulation, wood framing, or vapor barriers. Therefore, technicians must control flame size, maintain safe clearances, and protect adjacent materials with heat shields or wet rags.
Failure to shield combustibles or monitor residual heat causes scorched surfaces, hidden smoldering, and fire risk.
Use temperature-controlled tools, remove flammable items, and inspect surrounding areas after cooling.
Choosing incorrect pipe type or fitting size
Selecting the wrong type of copper pipe or mismatched fitting sizes undermines system integrity and leads to leaks, reduced flow, or premature failure.
Using soft versus rigid grades, incorrect diameter, or incompatible fittings results in joint stress, poor sealing, and pressure loss.
Properly identifying Type K, L, or M, matching OD and fitting style, and verifying manufacturer compatibility prevents costly rework.
Improper pressure testing and hidden leaks
Mistakes in pipe selection and fittings often only become apparent during pressure testing. Inadequate testing procedures or failure to detect hidden leaks can render an otherwise well-installed system unsafe or inefficient.
Proper pressurization, monitored duration, and use of leak-detection methods prevent missed failures. Inspect joints, watch for pressure decay, and isolate sections.
Address minor seepage immediately to avoid corrosion, water damage, or systemic failure.
Prevention, Maintenance, and Best Practices
Preventive measures such as insulating exposed runs and controlling water chemistry reduce the risk of freezing and corrosion.
Routine inspections for leaks, pinholes, and thinning walls help determine when proactive replacement is warranted.
Proper pipe support, allowance for thermal expansion, and appropriate water treatment greatly extend service life.
Protecting pipes from freezing and corrosion
When temperatures drop or water chemistry shifts, copper piping requires targeted measures to prevent freezing and corrosion that can lead to costly damage.
Routine insulation, proper drainage, and monitoring water quality form the core of effective protection strategies.
Install foam sleeves, heat tape where needed, slope lines to drain, and maintain neutral pH and low dissolved oxygen.
Remove debris and avoid dissimilar metal contact.
Regular inspection tips and when to proactively replace piping
Why inspect copper piping regularly?
Routine visual checks reveal greenish corrosion, pinholes, joint leaks, or bulging.
Listen for drips and monitor water pressure and discoloration.
Schedule inspections annually and after freezing events.
Proactively replace sections showing recurrent leaks, thinning walls, or extensive corrosion rather than waiting for failure.
Document findings and date replacements to track pipe lifecycle.
Proper support, expansion allowances, and water treatment to extend life
Support copper piping with properly spaced hangers and allow deliberate room for thermal expansion to prevent stress fractures and joint strain.
Routine checks catch sagging, corrosion, and loose supports. Water chemistry control minimizes pitting and galvanic corrosion. Regular flushing removes deposits and maintains flow.
- Secure supports at recommended intervals.
- Install expansion loops or slips.
- Test and adjust water pH.
- Flush lines seasonally.
Tools and Materials Checklist (Before You Start)
The section lists essential tools every DIYer should have on hand, such as a pipe cutter, emery cloth, flux, and torch.
It also outlines optional professional-grade tools for tougher jobs, like a tubing bender and press tool.
Typical material quantities and a brief cost estimate for fittings, pipe, and solder are provided to aid planning.
Essential tools for every DIYer
A compact set of reliable tools and materials can make replacing or repairing copper pipe safe, efficient, and predictable. Before starting, the DIYer should assemble items for cutting, joining, measuring, fluxing, and safety.
- Pipe cutter, deburring tool, and tubing brush.
- Solder, flux, propane torch, and fittings.
- Adjustable wrench, pliers, and emery cloth.
- Tape measure, marker, safety glasses, and gloves.
Optional tools for professionals or tougher jobs
For more complex repairs or commercial work, professionals often bring specialized tools that speed the job, improve joint quality, and handle larger or confined installations; examples include powered tubing cutters, blowtorches with adjustable tips, brazing rods, press-fit tools, internal pipe cutters, and inspection cameras.
- Press-fit kits for quick joints.
- Brazing setup for high-strength connections.
- Internal cutters for confined runs.
- Inspection cameras for hidden faults.
Typical material quantities and cost estimate
Professionals often carry extra supplies beyond specialized tools, and knowing typical quantities and costs helps both DIYers and tradespeople plan purchases. Typical small repair kit: 3–6 ft pipe, 2–4 fittings, 1 roll solder, flux, and 1–2 clamps. Estimate: $30–120 depending on copper type and fittings.
| Item | Typical quantity |
|---|---|
| Pipe | 3–6 ft |
| Fittings | 2–4 pieces |
Step-by-Step Scenarios and Quick Repairs
The section outlines clear procedures for replacing a small copper section hidden behind a wall, including common access methods and safety considerations.
It then covers practical steps for swapping pipe runs under sinks or inside cabinets where space and fittings differ.
Finally, it presents reliable emergency temporary fixes to stop leaks and buy time until a full replacement can be performed.
Replacing a small section behind a wall (access options)
When a short length of copper pipe behind a wall needs replacement, evaluating access options is the first step: locate the damaged area, determine wall material, and decide whether a small access panel, cut-and-replace patch, or removing a larger section is necessary based on space, nearby fixtures, and future maintenance needs.
Choose minimal invasive access to preserve finishes; guarantee safe plumbing shutoff, clearances, and proper support for the new section.
Replacing a pipe under a sink or in a cabinet
Begin by turning off the water supply and clearing the cabinet so the work area is accessible.
Then verify which shutoff valves control the affected lines.
Inspect fittings, loosen slip nuts or unsolder joints as needed, cut out the damaged section, deburr and clean pipe ends.
Fit replacement tubing with appropriate couplings or compression fittings, test for leaks, and resecure piping and cabinet contents.
Emergency temporary fixes until full replacement
After shutting off the water and clearing the cabinet as previously described, a homeowner may need short-term measures to stop leaks and limit damage until a proper replacement is made.
Apply pipe repair tape or a rubber patch secured with hose clamps for pinhole leaks.
For larger breaches use a rubber sleeve and clamp or a push-fit repair coupling.
Dry area, monitor, and schedule permanent replacement promptly.
Visual Reference Gallery and Diagrams
The gallery presents common fittings with clear labels to help identify each component during replacement.
A sequential photo series demonstrates soldering steps from joint preparation to finished connection.
Example layouts show typical pipe runs alongside their after-replacement diagrams for quick comparison.
Common fittings and their names
A compact visual gallery and labeled diagrams help readers quickly identify common copper pipe fittings—elbows, tees, couplings, adapters, reducers, and caps—showing their shapes, connection types (sweat, compression, push-fit), and typical orientations.
Brief captions name each fitting, note size markings, flow direction where applicable, and indicate material compatibility.
Icons distinguish male/female threads, slip joints, and connecting pieces for mixed-metal connections.
Step-by-step photo sequence for soldering
Begin by laying out a clear, numbered photo sequence that guides viewers through soldering copper pipe:
- Cleaning and fitting the joint
- Applying flux
- Heating the connection
- Feeding solder
- Wiping excess
- Inspecting the finished seam
Capture close-ups of brush cleaning, fitted parts, flux application, flame position, molten solder flow, cloth wiping, and final seam.
Include brief captions noting tools, temperature cues, and safety reminders.
Example pipe layouts before and after replacement
Several compact before-and-after diagrams illustrate common copper pipe replacement scenarios, showing original problem areas (corrosion, pinhole leaks, improper routing) alongside corrected layouts with new fittings and support.
Each visual labels materials, joint types, and clamp locations. Flow direction arrows and clearance measurements clarify routing changes.
A legend explains symbols for soldered, compression, and push-fit connections, aiding quick comparison and implementation.
Conclusion
The guide leaves readers empowered yet cautious: confident hands can replace corroded copper yet a single misstep floods a home. Practical diagrams and clear steps promise DIY victory while the weight of water damage reminders demands respect for code and safety. Informed homeowners may tackle straightforward runs, but complex joints or old systems often require professional judgment. Ultimately, competence and humility must coexist when changing copper pipe.