How to Flare Copper Pipe: Step-by-Step Guide for DIY Plumbing
To flare copper pipe effectively for plumbing, refrigeration, or gas lines, follow these steps for a leak-tight seal:
Key Takeaways:
- Cut the Tube: Measure and make a square cut on the copper tubing.
- Deburr and Chamfer: Remove all burrs and chamfer both the inside and outside edges.
- Clamp in Flaring Tool: Secure the tube squarely in a flaring tool.
- Form the Flare: Apply appropriate pressure to create a uniform 45° cone.
- Assemble with Flare Nut: Attach a flare nut and tighten it securely.
- Pressure-Test for Leaks: Conduct a pressure test to ensure there are no leaks.
This concise method will help you achieve a reliable flare on copper tubing, making it suitable for serviceable applications. For more detailed techniques and troubleshooting tips, continue reading.
Who This Guide Is For and a Quick How‑To Summary
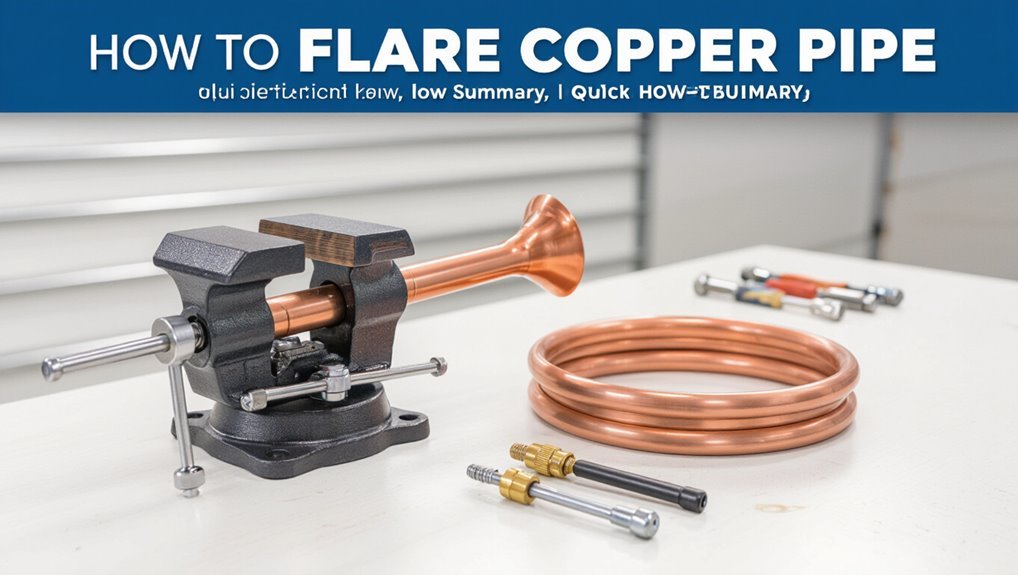
For homeowners, HVAC technicians, and DIY plumbers seeking a concise introduction to flare copper pipework, this guide outlines who will benefit from the content and provides a brief step‑by‑step overview of core tasks—selecting the correct tubing, cutting and deburring, forming the flare, and making a leak‑free connection.
It suits readers needing safe mechanical joints for fuel, refrigeration, or water lines without soldering.
The summary emphasizes proper material selection, accurate tube end preparation, correct flare tool setup, controlled flange formation, and careful fitting with compatible fittings and sealing.
Safety, measurement accuracy, and verification for leaks complete the essential checklist.
Quick Answer: When to Flare vs Solder or Compression
When a joint must resist vibration, handle pressure changes, or allow later disassembly, flaring is preferred; soldering is chosen for permanent, smooth-bore water lines and where brazing strength is needed, while compression fittings suit quick, low-pressure or temporary connections without special tools.
- Flaring: durable, serviceable, good for gas lines, refrigeration, and situations needing a mechanical seal.
- Soldering (brazing): permanent, smooth flow, higher temperature tolerance; best where disassembly is unlikely.
- Compression: fast, tool-light, ideal for provisional hookups or tight spaces.
- Choose based on serviceability, pressure, temperature, and available tools.
Flaring vs Solder and Compression: When to Choose Each
The guide compares flaring, soldering, and compression fittings to clarify appropriate applications.
Flaring is recommended for high-pressure refrigeration and gas lines where a mechanical seal is needed.
Soldering suits permanent water connections, while compression fittings are preferred for quick, low-temperature repairs or where heat must be avoided.
When To Flare
In situations where vibration, disassembly, or fuel-line serviceability are priorities, flaring often outperforms solder and compression fittings because it creates a metal-to-metal seal that resists vibration and can be reassembled without heat.
Flaring suits thin-walled copper used in automotive, refrigeration, and gas lines where vibration or periodic service occurs. It is preferred when heat is hazardous or prohibited. Proper flare geometry and clean tubing ends guarantee leak-free joints.
Consider tool and skill availability; flaring requires a flaring tool and careful alignment.
Typical applications include:
- Automotive brake and fuel lines
- Refrigeration connections
- Gas appliance service lines
- Situations needing frequent disassembly
When To Solder
Soldering offers a different set of advantages compared with flaring, particularly where permanence, fluid-tight seals on thicker-walled tubing, or smooth internal flow are priorities.
It suits rigid installations, invisible joints and connections inside walls or where vibration is minimal.
Soldered joints withstand higher internal pressure and heat, resist leakage over long periods, and produce a lower-profile interior bore than flared fittings.
Proper flux, clean surfaces and correct solder alloy matter; overheating or poor technique weakens joints.
Soldering is preferable for potable water lines, main distribution runs and repairs where a permanent, durable seal is required rather than a removable connection.
When To Use Compression
Many situations call for compression fittings rather than flares or soldered joints, especially when quick assembly, serviceability, or heat-sensitive environments are priorities.
Compression is suited to repairs, tight spaces, and materials that cannot be heated. It provides a mechanical seal with minimal tooling and is reversible for maintenance.
Consider limitations like vibration sensitivity and periodic retightening.
- Temporary repairs where soldering is impractical or prohibited.
- Connections near flammable materials or finished surfaces sensitive to heat.
- Situations requiring future disassembly or component replacement.
- Thin-walled tubing or mixed-metal joins where soldering risks damage.
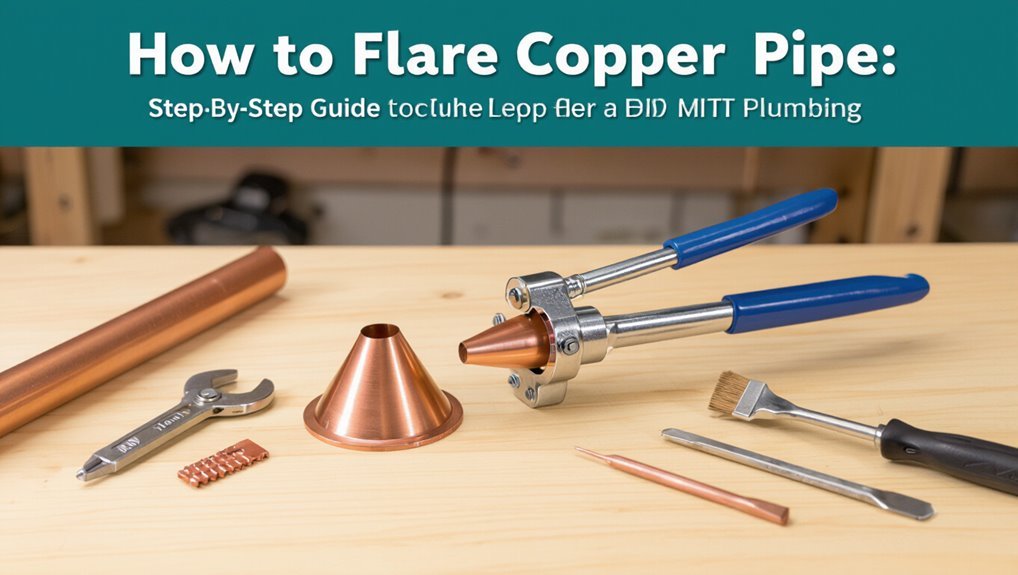
Essential and Optional Tools & Materials for Flaring Copper Tubing
For flaring copper tubing successfully, a clear set of essential and optional tools streamlines the process and reduces the risk of leaks or damaged fittings.
Essential items include a tubing cutter, reamer or deburring tool, dedicated flaring tool (single or double), appropriate adapters and flare fittings, a small vise or clamp, and safety glasses.
Optional but helpful materials are emery cloth or fine sandpaper for cleaning, penetrating oil for stubborn fittings, tube bending springs, a micrometer or caliper for measuring wall thickness, flux and brush if soldering follows, and a marker for alignment.
Quality tools improve repeatable, leak-free flares.
Choosing the Right Flare Type and Copper Tubing Size
After gathering the proper tools and preparing tubing ends, the next decision is selecting the flare profile and tube diameter that match the system’s fittings and pressure requirements. The correct flare type (45° or double/AN) must correspond to fittings; using the wrong profile causes leaks. Tube OD must match fittings and consider wall thickness for pressure tolerance. Choose annealed tubing for easier forming, rigid for structural runs. Match metric vs. inch standards to avoid adapters.
- Verify fitting flare angle and standard
- Confirm tubing OD and wall thickness
- Select annealed vs. hard tube per application
- Avoid mismatched standards
Safety Tips and Best Practices for DIY Flares
Always wear eye protection and gloves when flaring copper to prevent injury from metal shards and sharp tubing edges; additionally, make sure the work area is well ventilated and free of flammable materials.
Use proper tools—a quality flaring tool, deburring knife, and vise—and inspect them before use.
Secure tubing firmly without deforming it.
Deburr and clean the end to guarantee a smooth, leak-free flare.
Apply light lubricant to the cone for cleaner forming when recommended.
Work slowly, aligning the flaring cone squarely.
Test fittings for tightness and check for leaks with soapy water.
Store tools safely after cooling.
Measure and Cut Copper Tubing Straight Every Time
Once the flare is inspected and leak-tested, attention turns to measuring and cutting copper tubing straight to guarantee proper fit and seal.
Accurate measurement and a square cut prevent misalignment and uneven flares. The technician marks twice, measures from the fitting face, and allows material for insertion. A tubing cutter with a sharp wheel and slow, even rotations yields a smooth, round cut.
Support the tube close to the cut to avoid deformation. Clean the outside before proceeding. Use a straightedge or guide for long runs to maintain alignment and recheck measurements before the final cut.
- Mark twice, cut once
- Use proper cutter
- Support tube near cut
- Recheck alignment
Deburring and Chamfering the Pipe End Before Flaring
Before flaring, the pipe end must be deburred to remove all sharp edges and metal fragments that can compromise the seal.
The edge should then be chamfered to the proper angle for the fitting to seat evenly.
Finally, the rim must be cleaned and inspected to guarantee a smooth, uncontaminated surface for a reliable flare.
Remove Burrs Completely
Deburring and chamfering the cut end removes sharp edges and metal slivers that would prevent a clean, secure flare; using a dedicated deburring tool or a fine file, the technician must smooth both the inside and outside edges to a consistent, slight bevel.
The objective is complete removal of burrs without altering tube diameter or creating uneven surfaces that affect sealing.
After deburring, the end should be free of visible flakes and feel uniformly smooth.
Recommended steps:
- Inspect cut end under light for burrs.
- Ream interior with rotating deburrer.
- File exterior gently to match bevel.
- Clean with cloth and recheck.
Chamfer At Correct Angle
With burrs removed and edges smoothed, attention shifts to shaping the chamfer at the proper angle to guarantee a uniform flare seat.
The installer uses a dedicated chamfering tool or fine file to create a consistent 45-degree bevel around the pipe ID and OD, removing any raised metal that could distort the flare.
Gentle, even strokes prevent overcutting; periodic checks with the flare fitting confirm the bevel matches the fitting’s conical surface.
Proper chamfering aligns metal thickness for an even compressive seal during flaring, reduces cracking risk, and promotes predictable, leak-free joints when correctly executed.
Clean And Inspect Edge
Prepare the pipe end by thoroughly cleaning and visually inspecting the cut edge for burrs, nicks, or deformation before any chamfering or flaring begins. Remove debris and corrosion with a clean cloth or brush, then rotate the pipe under good light to spot irregularities. Light burrs impede fitting and cause leaks; dents prevent a uniform flare.
- Use a deburring tool to remove internal and external burs.
- File minor nicks smooth with a fine triangular file.
- Re-clean the surface to remove metal shavings.
- Verify roundness and straightness before proceeding to chamfering and flaring.
Securing Tubing in the Flaring Tool
Before clamping the tubing, inspect the pipe end for straightness and a clean, square cut so the flare will seat evenly; then position the tube in the flaring tool’s vice jaw until the flange mark on the tool aligns with the tube end.
Tighten the clamp gradually, keeping the tube perpendicular to the jaws to prevent skewed gripping.
Make certain the tube extends uniformly beyond the clamp per the tool’s gauge.
Verify the tube cannot rotate or slip by applying slight torque; if movement occurs, re-seat and tighten incrementally.
Protect soft tubing with thin metal shims if necessary to avoid crushing while maintaining firm hold.
Form a Proper Flare : Step‑By‑Step
The technician begins by making certain the tubing is clean and cut square to prevent leaks and ensure a consistent flare.
Attention then turns to setting the proper flare depth in the tool so the cone forms evenly without cracking or thinning the tube wall.
These preparatory steps establish the conditions for a reliable, gas- or liquid-tight connection.
Clean And Square Cut
Cut the copper tube squarely using a tubing cutter or hacksaw, then deburr and clean the end to guarantee a tight, leak‑free flare.
Attention to the cut and finish makes certain the flange seats evenly against the fitting.
Remove burrs with a reamer or file; rotate gently to avoid reducing diameter.
Wipe away filings and oil with a clean cloth and solvent if needed.
Inspect for nicks or deformation; recut if imperfect.
Consistent preparation prevents uneven spreading and stress points during flaring.
- Measure and mark cut location.
- Use appropriate cutter and steady feed.
- Deburr inside and outside.
- Clean and inspect.
Proper Flare Depth
After preparing a clean, square end, attention turns to forming the flare at the correct depth to guarantee a reliable seal. The technician measures the tubing flare depth to match the fitting’s seat, typically allowing the tubing shoulder to rest flush against the flare nut when tightened.
Using a flaring tool with an adjustable stop or depth gauge secures consistent results; over-flaring thins the wall and risks leakage while under-flaring prevents full contact. After flaring, the conical face should be smooth, even, and free of cracks.
A trial fit with the fitting confirms correct depth before final assembly.
Checking Flare Angle and Flare‑Lip Quality
When inspecting a flare, the technician verifies that the 45° cone is uniform and that the flare lip is smooth, free of cracks, burrs, or uneven thinning; any deviation can compromise sealing and cause leaks.
The inspector uses visual and tactile checks, small magnification, and test fitting to confirm geometry and surface integrity before proceeding.
- Confirm consistent 45° angle around the circumference.
- Inspect for nicks, hairline cracks, or rolled edges on the flare lip.
- Check for thin spots or metal stretching that reduce compression.
- Use a clean rag and magnifier; remove burrs with a fine file if necessary.
Assembling Flare Fittings and Tightening Without Damage
Assemble flare fittings carefully to guarantee a reliable, leak‑free joint: slide the nut onto the tubing with the threads facing the flare, seat the tubing fully into the flare cone so the lip contacts the fitting face evenly, then hand‑start the nut to avoid cross‑threading.
Use a flare wrench or two appropriately sized wrenches to hold the fitting body and turn the nut; avoid using pliers that can mar surfaces. Tighten until snug, then apply incremental turns (usually a quarter to half turn) while maintaining alignment.
Inspect the flare for distortion; if deformation appears, disassemble and remake the flare.
How to Test for Leaks and Verify a Sealed Joint
Verify the flare joint’s integrity before putting the system into service by performing both a visual inspection and a pressure/leak test.
Inspect the flare face for uniform contact, absence of cracks, and correct seat against the fitting.
Use soap solution or approved leak detector at joints while system is pressurized to working pressure; watch for bubbles.
For gas systems, follow local code for sniffers or electronic detectors.
Record test duration and pressure readings; make sure no drop over specified hold time.
If no leaks, slowly return system to normal operation.
Maintain documentation of test results for future reference.
- Visual inspection
- Soap/leak solution
- Pressure hold test
- Record and document
Repairing a Poor Flare or Reflaring Damaged Tubing
After identifying a poor flare or damaged tubing, the technician prepares to repair or reflare by cutting back to sound copper, deburring and chamfering the tube end, and selecting the correct flare size and tooling for the material.
The technician measures insertion depth, secures the tube squarely in the clamp, and reforms the cone with a properly sized flaring tool.
Any remaining burrs are removed and the flare face inspected for concentricity and complete contact. If deformation persists, a slightly longer cut and repeat forming may be required.
Finally, the repaired flare is pressure-tested for leaks before reassembly.
Flaring Soft vs Hard Copper Tubing: Technique Differences
The guide contrasts preparation and handling for soft versus hard copper, noting that soft tubing requires careful annealing and straightening before flaring.
It outlines that hard copper often needs sturdier clamps and a different flaring tool to avoid cracking.
Technique differences are then addressed, focusing on flare seat depth, mandrel pressure, and alignment for each material.
Soft Copper Preparation
When preparing soft copper for flaring, the technician must make certain the tube’s malleability: soft copper stretches and deforms easily, so cuts need to be square and deburred carefully to prevent uneven flares and leaks.
The technician measures, supports, and handles the tube to minimize distortion.
Internal burrs are removed; the tube end is cleaned and lightly annealed if work hardening occurred.
Proper clamping prevents ovalization.
Final inspection makes certain uniform wall thickness at the flare point.
- Measure and mark accurately
- Square-cut with a quality cutter
- Deburr inside and outside
- Support and clamp during forming
Hard Copper Tools
Hard-copper flaring requires stiffer tools and firmer control than soft-copper work.
For hard tubing, a heavy-duty flaring tool with robust yoke and hardened cone is recommended to withstand greater resistance. A vice or clamp that secures tubing without crushing is necessary; soft jaws or protective inserts help prevent surface damage.
Cutting and deburring tools should be precise to avoid edges that resist forming. Lubrication with suitable cutting compound reduces stress on fittings.
Properly sized adapters and mandrels guarantee consistent flare geometry. Equipment durability and correct selection minimize tool wear and produce reliable, leak-free joints in hard copper.
Flare Technique Differences
Different flare techniques are required because soft and hard copper respond differently to forming forces: soft tubing deforms easily and tolerates slower, gentler flaring, while hard tubing demands higher force, firmer control, and more rigid tooling to achieve a proper seat without cracking.
The practitioner adjusts method, tool selection, and feed rate based on temper to make certain leak-free joints.
- Use slow, steady pressure and light reaming for soft copper to avoid thinning walls.
- Apply controlled, higher force with hardened flaring heads for hard copper.
- Deburr carefully on both to prevent sealing issues.
- Inspect flare angle and concentricity before assembly.
Common Mistakes DIYers Make When Flaring Copper Tubing
Frequently, DIYers make avoidable errors while flaring copper tubing that compromise joint integrity and lead to leaks or costly rework.
Common mistakes include cutting unevenly or leaving burrs, resulting in poor seating.
Improper deburring and failing to remove internal debris prevent tight seals.
Using the wrong flare tool or incorrect die size deforms the flare.
Overheating or applying excessive force cracks the flare lip.
Inadequate tube insertion depth and misaligned alignment with fittings cause gaps.
Skipping test-fitting and not cleaning contact surfaces invite leaks.
Neglecting to inspect flares for hairline fractures or undercuts often necessitates redo.
When to Call a Pro (Code, Leaks, Complex Runs)
Mistakes like uneven cuts, improper deburring, or misaligned flares can quickly turn a straightforward job into one that violates local codes or risks persistent leaks; when those errors occur, calling a licensed professional is often the safest option.
A pro should be engaged when:
- Code compliance is unclear or permits are required for visible or concealed work.
- Leaks persist after attempted repairs or fittings fail under pressure testing.
- Runs are complex: long lengths, multiple offsets, or tight spaces needing fittings.
- Work impacts safety systems: gas lines, fire suppression, or potable water contamination risks.
Timely professional intervention prevents damage and guarantees code adherence.
Conclusion
The finished flare, like a small brass sun, seals intent and skill: its smooth, even lip transforms raw copper into a dependable joint. For the careful DIYer this shape signifies more than function — it is a quiet promise against leaks, a measured victory over chance. When flares are true, plumbing hums; when they fail, the symbol warns to learn, correct, or call a steady hand to preserve the household’s quiet order.

