How to Cut 4 Inch PVC Pipe: Easy Steps & Pro Tips for Clean Cuts
Cutting a 4-inch PVC pipe cleanly involves a few simple steps:
- Mark the Cut: Clearly mark the area where you want to cut the pipe.
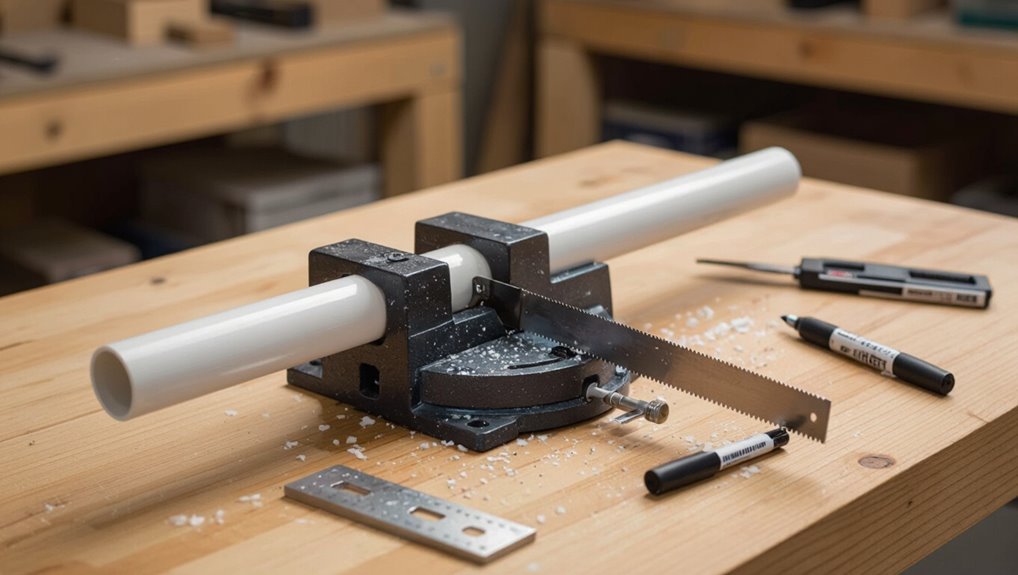
- Secure the Pipe: Use a padded vise or cradle to hold the pipe steady.
- Wear Protective Gear: Ensure you have eye, hand, and respiratory protection.
For occasional cuts, a fine-tooth hacksaw, tubing wheel cutter, or compact reciprocating saw with a plastic blade will work well. For larger production runs, opt for a miter or bandsaw equipped with a fine carbide blade.
Key Takeaway: Take slow, steady passes while cutting to prevent melting or chipping, and remember to deburr and chamfer the edges for a better fit. Further guidance can help with tool choices, jigs, and finishing techniques.
Quick: Best Way to Cut 4″ PVC Pipe
Measure and mark the 4-inch PVC pipe firmly, then secure it in a vise or pipe clamp to prevent movement during cutting.
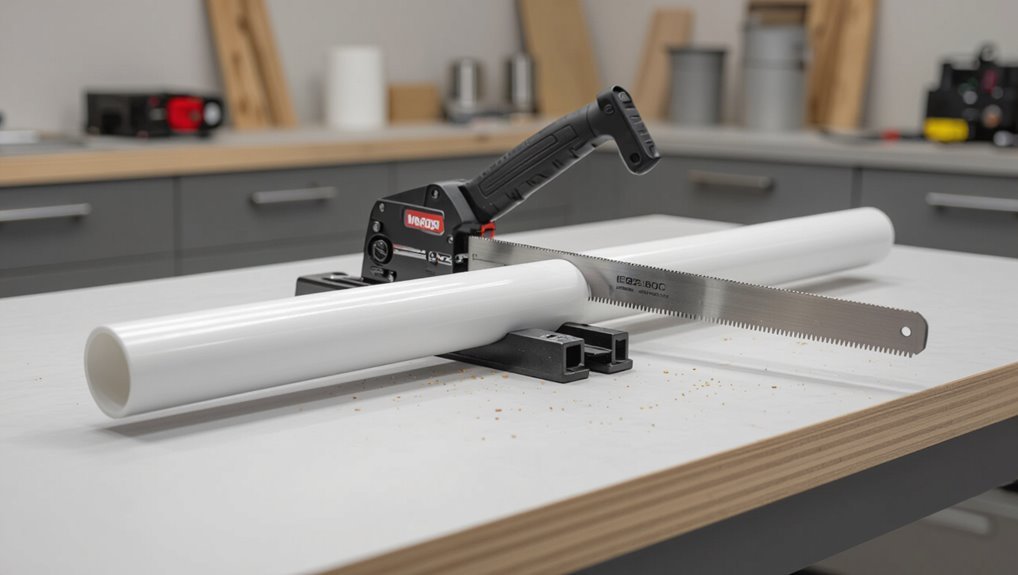
The recommended fast method uses a fine-toothed hacksaw or reciprocating saw with a PVC blade; both produce straight cuts when guided slowly and steadily. For cleaner edges, a miter box or pipe guide keeps the blade aligned.
After cutting, chamfer or deburr the inside and outside with a utility knife or round file to remove burrs and make certain proper fit. Wear safety glasses and gloves.
Inspect the cut for perpendicularity and adjust technique if the blade wandered.
Who Should Cut 4″ PVC and When?
When a job involves plumbing repairs, irrigation installation, or HVAC ducting, the task of cutting 4″ PVC should be assigned to someone with basic pipe-handling experience and access to the right tools; a skilled DIYer comfortable with a hacksaw, reciprocating saw, or miter box can handle most household cuts, while a licensed plumber or contractor is preferable for pressurized systems, concealed work, or code-sensitive installations where precise joints and adherence to regulations matter.
Homeowners tackling visible, low-pressure runs may cut pipe themselves; complex layouts, long runs, or warranty-related projects warrant professional involvement to guarantee fit, longevity, and compliance.
Safety Essentials Before You Cut 4″ PVC
Before cutting 4″ PVC, assess the work area and personal protective equipment so hazards are minimized and precision is preserved: make certain adequate ventilation, clear obstructions, stable lighting, and a flat work surface; don safety glasses, gloves, and a dust mask; confirm that nearby power is shut off for electrically powered tools and that the pipe is free of pressure, fluids, or hazardous contents.
The operator should secure the pipe to prevent movement and position bystanders away. Inspect the pipe for cracks, chemical residue, or embedded debris. Plan cuts to avoid strain, allow for clean-up of dust and shavings, and keep a first-aid kit accessible.
Essential Tools for Cutting 4″ PVC (Hand & Power)
For cutting 4″ PVC, a concise toolkit balances hand tools for control and power tools for speed, each chosen to match the cut type and site conditions. The list highlights clamps, measuring tools, and recommended saw types without repeating specific handheld saw models. Safety gear—glasses, gloves, dust mask—remains essential. A deburring tool or utility knife and file finish edges. For larger jobs, a powered miter saw or circular saw with a fine-tooth blade increases throughput; a portable workstand and pipe vise stabilize material. Choose tools by cut accuracy, portability, and available power.
| Tool Type | Purpose | Typical Choice |
|---|---|---|
| Clamps/vise | Stabilize pipe | Pipe vise |
| Measuring/marking | Accurate layout | Tape/marker |
| Cutting tools | Make cuts | Handsaw/power saw |
| Finishing tools | Deburr/clean | File/utility knife |
Best Handheld Saws for 4″ PVC Cuts
Handheld saws offer control and portability that complement the heavier tools listed previously, making them ideal for tight spaces and single cuts on 4″ PVC.
A fine-tooth hacksaw blade provides straight, controlled cuts with minimal burrs when tensioned and guided by a miter box.
A compact PVC/jab saw works well for quick trims and internal notches.
A coping saw fitted with a fresh blade allows curved or corrective cuts.
For cleaner edges, a pull saw with a fine tooth pattern reduces chipping.
In all cases, secure the pipe, mark the cut, and use steady, even strokes to maintain accuracy.
Best Power Tools for Fast 4″ PVC Cuts
Speed matters when cutting multiple lengths of 4″ PVC, and power tools deliver the consistency and rapidity manual saws cannot.
Circular saws with fine-tooth PVC blades produce straight, burr-free cuts quickly; use a guide or fence for repeatable accuracy.
A jigsaw with a plastic-cutting blade handles curves and odd angles but requires steady support to prevent chips.
Reciprocating saws excel in demolition or awkward positions though control is reduced.
A miter saw with a non-ferrous blade offers the fastest, cleanest crosscuts for production runs.
Always clamp securely, wear eye and respiratory protection, and remove shavings before assembly.
Choosing the Right Cutting Method by Project
When matching a cutting method to a project, the material thickness, required tolerances, and work environment determine the best tool and technique; thin-walled 4″ PVC for irrigation lines tolerates faster, rougher cuts, while plumbing or pressure-system pieces demand cleaner, square cuts and deburring. The decision balances accessibility, finish, and joint reliability: handheld saws and tubing cutters suit field repairs; miter saws or chop saws produce precise squares for glued joints; rotary tools work for tight spots. Safety, clamping, and deburring remain essential regardless of method.
| Project Type | Recommended Tool | Key Concern |
|---|---|---|
| Irrigation | Hand saw | Speed |
| Repair | Tubing cutter | Accessibility |
| Pressure plumbing | Miter/chop saw | Square cut |
| Tight spaces | Rotary tool | Control |
Fast Method Comparison: Speed, Accuracy, Cost
Compare common rapid cutting options by measuring how quickly they make a cut, how repeatable and square the cut is, and what each costs in tool investment and consumables. A utility knife or PVC scoring tool is cheapest, lightweight, and safe but slow and less consistent for large diameters.
A reciprocating saw is fast and inexpensive upfront; accuracy depends on blade quality and operator steadiness, producing more burrs.
A miter saw with a fine-tooth blade gives the fastest, cleanest, most repeatable square cuts but requires higher initial cost and safety precautions.
Tubing cutters balance speed and finish for moderate budgets.
Measuring Tips for Accurate 4″ PVC Lengths
After selecting a cutting method, achieving accurate 4″ PVC lengths depends on careful measuring and marking.
The writer recommends using a rigid tape measure or combination square for repeatable results; flexible tapes can bow on large diameters.
Measure from a fixed pipe end, account for any fittings or socket depth, and include a small allowance for deburring.
Confirm measurements twice before cutting.
When batch cutting multiple pieces, use a stop block or jig to guarantee consistent lengths.
Note temperature effects: PVC expands slightly when warm, so measure at ambient job-site temperature for best fit.
Marking 4″ PVC Pipe Cleanly and Repeatably
How should marks be laid out to stay straight and consistent across multiple 4″ PVC runs? A simple system uses a reference edge and single-point marks measured from the end. Use a fine-tip permanent marker, measure twice, and rotate the pipe to transfer the mark at 90° intervals for squareness. For repeatability, create a cardboard or wooden template keyed to the pipe OD to quickly place marks at identical distances.
| Tool | Purpose |
|---|---|
| Marker | Thin, permanent line |
| Template | Repeat spacing |
| Square | Guarantee 90° transfer |
Consistent light pressure prevents smear and preserves accuracy.
How to Secure 4″ Pipe Before Cutting
Before cutting, the 4″ PVC pipe must be firmly supported and immobilized to guarantee a square, safe cut; clamp the pipe in a padded vise or use a dedicated pipe cradle with straps so the section being cut cannot twist or slide.
Position supports close to the cut but not under the mark to prevent deflection.
For longer lengths, add a roller stand to keep the pipe level.
Use non-marring pads or wood blocks to avoid crushing.
Verify alignment visually and by feel before starting.
Keep hands clear of the cutting path and use slow, steady cutting motion to maintain control.
How to Get Perfectly Square Ends Every Time
With the pipe secured and immobilized, achieving a perfectly square end depends on accurate marking, stable support at the cut line, and the right cutting and finishing techniques. Use a square or combination square to scribe a clear line around the circumference. Support both sides of the cut so the blade doesn’t flex. Cut steadily, staying on the line. Finish by deburring and chamfering the inside and outside faces with a file or deburring tool. Check squareness against the square; rotate and trim tiny amounts if needed until the face sits flush.
| Step | Tool |
|---|---|
| Mark | Square |
| Support | V-block |
| Cut | Saw blade |
| Finish | File/deburr |
How to Use a Hacksaw on 4″ PVC
A hacksaw offers a simple, controlled method for cutting 4″ PVC when power tools are unavailable or oversize blades risk damage.
Mark the cut line clearly with a permanent marker and square it around the pipe.
Secure the pipe in a vise or with clamps, protecting the surface with scrap wood.
Use a fine-toothed blade designed for plastic; keep the saw at a shallow angle to avoid chipping.
Apply steady, even strokes, letting the blade do the work without excessive pressure.
Deburr the edge with a utility knife and sandpaper for a smooth, square finish ready for fitting.
How to Use a Reciprocating Saw on 4″ PVC
When cutting 4″ PVC with a reciprocating saw, the operator should first mark the cut line clearly and secure the pipe to prevent movement or vibration.
A fine-tooth blade designed for plastics reduces chipping and melting. The saw should be run at moderate speed, letting the blade do the work without forcing.
Support both sides of the pipe to maintain alignment and catch the cut section.
After cutting, deburr the edge with a utility knife or file and remove any melted beads. Wear eye protection and a dust mask; clean up plastic shavings to avoid slipping and contamination.
Using a Circular Saw for Straight 4″ PVC Cuts
Cutting 4″ PVC with a circular saw demands accurate setup and steady control to produce a straight, clean edge. The operator secures the pipe in a padded vise or on sawhorses, marks the cut line, fits a fine-tooth blade designed for plastics, and runs the saw at moderate speed to prevent melting. Cooling pauses and light clamping reduce vibration. After cutting, a deburring tool or utility knife removes burrs.
| Step | Purpose |
|---|---|
| Secure pipe | Prevent movement |
| Fine-tooth blade | Clean cut |
| Deburr | Smooth edge |
Using a Miter Saw for Precise Angle Cuts on 4″ PVC
A miter saw equipped with a fine-tooth carbide blade provides cleaner, more accurate angle cuts on 4″ PVC than a rougher blade.
Proper eye protection, hearing protection, and a dust mask are essential when cutting PVC to guard against chips and fumes.
Firm clamping and slow, steady feed rates help prevent splintering and guarantee repeatable, precise bevels.
Blade Type Selection
Select a blade designed for plastics rather than wood or metal to guarantee clean, burr-free cuts on 4-inch PVC with a miter saw.
A fine-tooth carbide blade with 80–120 teeth and alternate top bevel or triple-chip grind minimizes melting and chipping.
Thin-kerf blades reduce tear-out and require less power, preserving pipe shape.
Avoid blades with large gullets or aggressive tooth geometry meant for wood.
Make sure the blade is sharp and free of resin buildup; replace if cutting quality drops.
Match blade diameter to the saw and check RPM ratings to prevent overheating and extend blade life.
Safety Gear Essentials
Wearing appropriate personal protective equipment is essential when using a miter saw for precise angle cuts on 4″ PVC to prevent injury from flying chips, dust, and accidental contact with the blade. Safety gear should include ANSI-rated safety glasses or a full-face shield, hearing protection (earmuffs or plugs), and a dust mask or respirator rated for plastic particulates.
Cut-resistant gloves improve grip while minimizing vibration transfer. Close-fitting clothing avoids entanglement; long hair must be secured. Sturdy footwear protects feet from dropped pipe. A well-lit workspace and easily accessible emergency stop or power cut-off complete the safety setup.
Cutting Technique Tips
Before cutting, the pipe should be firmly supported and the saw set to the exact miter and bevel angles required; this guarantees accurate, repeatable cuts and reduces the chance of the blade wandering.
The operator aligns a measured mark with the blade, uses a clamp or jig to prevent rotation, and engages the saw slowly to establish a clean kerf.
A fine-tooth carbide blade minimizes chipping; feed rate should be steady, not forceful.
For compound angles, verify both axes before cutting.
After each cut, deburr and inspect the edge; adjust setup if any deviation is detected to maintain consistency.
Using a Pipe Cutter With 4″ Diameter PVC (Options)
When working with 4-inch PVC, a pipe cutter can offer faster, straighter cuts than a saw when the right model is chosen; wheel-style cutters, ratcheting PVC cutters, and rotary cutters each handle the pipe’s diameter differently and suit different budgets and skill levels.
Wheel-style cutters with larger wheels score and snap smaller sections but often require multiple passes and are limited by throat depth. Ratcheting cutters provide strong incremental cutting force and cleaner edges on thicker walls but need sufficient jaw clearance for 4″ OD.
Rotary cutters or hinge-style saw-cutters encircle the pipe for smooth, controlled rotations, ideal when stability and finish matter.
How to Cut 4″ PVC With a Jigsaw or Bandsaw
If a jigsaw or bandsaw is available, both tools can make rapid, accurate cuts in 4″ PVC when set up correctly and used with the proper blade and fixturing. The pipe is secured in a padded vise or cradle, the cutline marked, and a fine-tooth blade installed. Feed rate is moderate to prevent melting; coolant or short pauses reduce heat. Deburring with a file or sanding drum finishes the edge. Safety glasses and a dust mask are recommended.
| Tool | Blade Type | Tip |
|---|---|---|
| Jigsaw | Fine-tooth bi-metal | Support pipe undercut |
| Bandsaw | 14-18 TPI blade | Use slow feed rate |
| Both | Carbide or bimetal | Clamp and steady feed |
Cutting 4″ PVC Outdoors vs. Indoors (Ventilation & Cleanup)
Although cutting 4″ PVC produces similar chips and heat whether inside or out, the location markedly affects ventilation needs and cleanup methods.
Outdoors, air disperses fumes and dust quickly; wind conditions should be considered, and a portable workbench with clamps stabilizes the pipe.
Indoors, contain dust with plastic sheeting, run exhaust fans, and open windows; a shop vacuum with HEPA filter captures particulates at the source.
Collect larger offcuts in a bucket to prevent trip hazards both locations.
Dispose of PVC scraps per local regulations.
PPE—respirator, eye protection, gloves—remains essential regardless of setting to minimize exposure and injury.
Cutting 4″ PVC in Tight or Awkward Spaces
When space is limited, right-angle hacks and other angled approaches let the cutter reach tight spots without repositioning the pipe.
Compact cutting tools—such as mini reciprocating saws, ratcheting PVC cutters, or compact pipe saws—offer control and clearance in confined areas.
Proper bracing and steady, short strokes reduce binding and produce cleaner cuts in awkward positions.
Right-Angle Hacks
How can a straight cut be achieved where a saw barely fits? A marking guide wrapped around the pipe establishes a true reference; a pencil line and a small square guarantee alignment despite limited clearance.
Use a compact support under the pipe to stabilize and prevent rotation. Score the line deeply with a utility knife first, creating a groove that guides the blade and reduces chatter.
Employ slow, controlled strokes with whatever cutting implement fits the space, keeping the tool perpendicular to the mark. Finish by deburring with a file or sandpaper accessible in tight spots, preserving square edges and fit.
Compact Cutting Tools
Select compact cutting tools that balance accessibility with control: compact hacksaws, mini reciprocating saws with slim blade holders, rotary tools fitted with cutting wheels, and ratcheting PVC cutters designed for larger diameters each offer distinct advantages in cramped locations.
The detached observer notes tool choice depends on clearance, required speed, and desired finish.
Secure the pipe, mark the cut, and use short controlled strokes to avoid binding or gouging.
Deburring with a round file or sandpaper improves fit.
Prioritize tool stability and PPE when working overhead or inside enclosures.
- Choose based on clearance and blade profile
- Use guides or clamps where possible
- Prefer fine-tooth blades for cleaner cuts
- Test tool access before cutting
Techniques for Cutting Long Runs of 4″ PVC
For long runs of 4″ PVC, accurate planning and the right tools are vital to keep cuts straight, square, and efficient; measuring and marking at consistent intervals before cutting minimizes waste and rework.
Use a guide rail or chalk line to maintain alignment along the pipe length.
Support the pipe on rollers or sawhorses every few feet to prevent sagging and vibration.
Employ a powered miter saw with a fine-tooth blade or a track-mounted circular saw for speed and repeatability.
Cut sequentially, deburr immediately, and label pieces to preserve order.
Verify periodic measurements to guarantee cumulative accuracy.
How to Cut Angled and Mitered Ends on 4″ PVC
Angled and mitered ends on 4″ PVC are achieved by combining accurate layout, rigid workholding, and the correct saw setup to guarantee a snug, square joint or a precise bevel for connection pieces.
The technician marks angle using a protractor or bevel gauge, transfers the line around the circumference, and secures the pipe in a bench vise with padded jaws.
A miter saw with a fine-tooth blade or a guided circular saw follows the layout slowly, minimizing tearout.
Light sanding with a file or flap wheel chamfers the edge for fit and adhesive coverage before trial assembly.
- Use a full-wrap layout for consistent angle transfer
- Verify blade angle with a digital bevel
- Cut in multiple shallow passes to control heat
- Deburr and clean the joint for solvent application
Cutting 4″ PVC for Slip Fittings and Couplers
Prepare the pipe so its end will seat fully into the slip fitting or coupler by marking a clear square line at the insertion depth, securing the length in a padded vise or cradle, and cutting with a fine-tooth blade or PVC-rated saw using steady, shallow passes to prevent melting and guarantee a uniform face for solvent welding.
After cutting, deburr both inside and outside edges with a chamfer tool or utility knife to remove burs and make certain smooth insertion.
Dry-fit components to confirm depth and alignment.
Clean mating surfaces with appropriate PVC primer, apply solvent cement evenly, assemble briefly with a slight twist, and hold until initial set.
Cutting 4″ PVC for Bell‑and‑Spigot Joints
When moving from slip fittings and couplers to bell‑and‑spigot joints, the cutting approach shifts because the spigot must seat into a factory bell with an integral socket depth and often a gasket.
The cutter measures and marks the spigot length so the end lands short of the socket face, accounting for gasket compression and solvent‑weld overlap where required.
Deburring and chamfering the spigot outside edge guarantees smooth insertion without damaging the gasket.
Test‑fit before final cement or lubricant application.
Proper length control prevents leaks and misalignment, especially on long runs and slight grade changes.
- Measure twice, cut once: mark spigot insertion depth
- Deburr and chamfer outer edge
- Allow for gasket compression in measurements
- Test fit before gluing or lubricating
Cutting 4″ PVC for Roof and Gutter Work
For roof and gutter applications, cutting 4″ PVC emphasizes long, straight runs and precise end finishes to guarantee water flows freely and joints fit under tight eaves and flashings.
Installers measure run lengths accounting for downspout connections, offsets, and thermal expansion. Clamps and temporary supports maintain alignment during cuts.
A fine-tooth saw or powered cutter yields smooth faces; light sanding removes burrs without changing diameter. Marking tools indicate orientation for slot drains or outlet fittings.
After cutting, dry-fit components to confirm alignment under flashings before solvent welding or mechanical fasteners, ensuring proper slope for positive drainage.
How to Avoid Common Cutting Mistakes
The guide emphasizes measuring twice and marking once to ensure precise cuts on 4-inch PVC.
It recommends stabilizing the pipe securely before cutting to prevent slips and uneven edges.
Following these simple steps reduces waste and improves fit in roof and gutter installations.
Measure Twice, Mark Once
Accurately measuring and marking PVC before cutting substantially reduces fitting errors and rework. The installer should verify pipe length, allowance for fittings, and overlap twice using a reliable tape measure. Marking requires a fine, visible line around the circumference; a carpenter’s square or wrap-around template guarantees square cuts. Cross-check measurements against plans and dry-fit components before any blade touches plastic.
Mistakes at this stage are costly and time-consuming.
- Use two independent measurements from fixed reference points
- Select a non-smudging marker for clear sightlines
- Transfer marks around the pipe for a continuous guide
- Reconfirm measurements after clamping
Stabilize Before Cutting
Before cutting, secure the 4-inch PVC so it cannot shift, twist, or flex under the saw; instability is the most common cause of uneven, jagged, or undersized cuts.
Use a pipe vise or adjustable clamp on a sturdy workbench, protecting the pipe with scrap wood or rubber pads to prevent crushing.
Support long lengths with additional stands to eliminate sag and vibration.
Position the clamp so the marked cut extends beyond the jaws for an unobstructed blade path.
Recheck alignment and tighten fittings, then make the cut with steady feed and minimal lateral pressure to maintain a square, clean edge.
Pro Tips for Reducing Burrs and Shavings
Regularly following a few targeted techniques markedly cuts down on burrs and shavings when cutting 4-inch PVC pipe. Operators should employ steady feed rates, sharp blades, and minimal lateral pressure to prevent melting and ragged edges. Support the pipe close to the cut to avoid vibration, and mark the cut clearly to maintain a straight path. Cooler cutting and consistent motion reduce plastic buildup and loose particles that complicate finishing.
- Use a fine-tooth blade rated for PVC
- Clamp near the cut without crushing the pipe
- Maintain moderate cutting speed; avoid forcing the tool
- Clear shavings frequently during long cuts
How to Deburr and Chamfer 4″ PVC Ends
After minimizing burrs and shavings during cutting, finishing the end faces guarantees reliable joints and a professional appearance.
The article explains using a deburring tool or sharp utility knife to remove raised edges, working gently around the circumference to avoid gouges.
A small round file or sanding drum refines the inner edge, eliminating lip that can impede fit.
For chamfering, a 15–30° bevel on the outside edge eases insertion into fittings and reduces glue squeeze-out; a purpose-made chamfering bit or careful filing achieves this.
Inspect with fingers and visually to confirm smooth, consistent edges before assembly.
How to Clean 4″ PVC Ends Before Gluing
Prepare the joint surfaces by removing any dust, grease, or moisture that could interfere with solvent welding.
The pipe ends should be wiped with a clean, lint-free cloth, then inspected for contaminants or particles left from cutting.
Use a mild solvent or PVC cleaner to dissolve oils; allow it to evaporate fully.
Lightly re-wipe the surface and guarantee edges remain square and free of shavings.
Avoid touching cleaned areas with bare hands.
- Use dedicated PVC-cleaning solvent or isopropyl alcohol
- Work in a well-ventilated area
- Replace cloths if they become dirty
- Let surfaces air-dry before applying primer and cement
How to Measure and Account for Socket Depth on 4″ Fittings
Before cutting, the socket insertion depth of each 4″ fitting should be measured and noted.
An allowance for adhesive thickness must be marked on the pipe so the final insertion length compensates for glue buildup.
A dry-fit check of the pipe in the socket confirms measurements before any permanent cuts are made.
Measure Socket Insertion Depth
One clear step is to determine the socket insertion depth for each 4″ fitting to make sure the cut length accounts for the pipe that will sit inside the socket. The technician measures from the socket rim to the shoulder where the pipe stops, noting variations among elbows, tees, and couplings. Measurements are taken with a depth gauge or a marked probe, recorded for each fitting type, and averaged when multiples are used. Accurate insertion depths prevent short or protruding joints and assure proper alignment during assembly.
- Use a stiff probe or drill bit for consistent depth checks.
- Record depths on the fitting or job sheet.
- Measure several identical fittings to spot variance.
- Recheck after cleaning sockets.
Mark Allowance For Glue
After recording socket insertion depths, the technician must mark and account for the solvent-weld glue gap so cut lengths yield correct final run lengths. Using calipers or a tape, measure from the pipe end to the depth shoulder inside each fitting. Add a standard glue gap allowance (typically 1/16″–1/8″) to that insertion depth to compensate for cement thickness and entry clearance. Transfer the summed dimension onto the pipe and scribe the cut line.
For assemblies with multiple fittings, total all allowances into the layout to prevent cumulative shortfalls. Record measurements for repeatability and verify against manufacturer data.
Check Fit Before Cutting
When measuring socket depth on 4″ fittings, the technician should seat a clean pipe end into each hub and measure to the internal stop with calipers or a depth gauge to establish the true insertion distance.
The technician records each fitting’s depth, subtracts the desired glue layer (typically 1/16″–1/8″), and marks the pipe accordingly.
Account for coupling tolerances and chamfers; verify repeatability by testing a dry fit.
Consistent measurement prevents over-insertion or gap joints that weaken seals.
Final cuts should include the calculated allowance so assembled lengths meet plan dimensions without rework.
- Measure multiple fittings for variance
- Subtract adhesive thickness
- Check for internal burrs
- Verify dry-fit alignment
How to Cut 4″ PVC for Threaded Fittings
For threaded fittings, cutting 4″ PVC requires a clean, square face and an allowance for the thread depth to guarantee proper engagement and seal.
Mark the cut, measure back the thread engagement length plus thread start, and scribe a clear line perpendicular to the pipe axis.
Use a fine-toothed saw or PVC pipe cutter to make a true, burr-free cut.
Deburr and chamfer the ID slightly to prevent cross-threading, then dry-fit the threaded fitting to confirm alignment and engagement.
If solvent-welded adapters are used, maintain the specified thread gap and follow manufacturer torque recommendations to avoid cracking.
How to Cut Buried 4″ PVC Pipe Safely
Cutting buried 4″ PVC pipe safely requires careful planning and the right tools to prevent utility strikes, property damage, and personal injury. A locator should be used to identify utilities; expose the pipe by hand-digging or vacuum excavation; confirm pipe material and condition before cutting; and wear appropriate PPE.
After exposing, clear soil for full access, support the pipe to avoid stress, and choose a cutting method suited to depth and space. Backfill with proper bedding and compact to prevent settling. Document the repair location for future reference.
- Use utility locators and mark clearly
- Hand-dig within 18 inches of pipe
- Support pipe ends before cutting
- Inspect and record the repair site
How to Cut 4″ PVC Without Scarring the Finish
To preserve the pipe’s appearance, attention to surface protection is essential before cutting.
Appropriate barriers such as painter’s tape or a thin cloth prevent scratches from tools or clamps. Employing fine cutting tools—a fine-tooth saw blade or a tubing cutter designed for PVC—minimizes chatter and leaves a cleaner edge.
Protecting The PVC Surface
When working with 4-inch PVC meant for visible installation, maintaining an unmarred surface requires attention to tool choice, clamping methods, and protective barriers; each step reduces the risk of scratches, gouges, or heat marks that can detract from the finish.
The process favors non-abrasive contact, padding between jaws and pipe, and minimal force.
Clean surfaces before and after cutting to avoid grit embedding.
Cooling techniques prevent melting.
Protective films can stay during handling but must be removed before final assembly to check fit and adhesive bonding.
- Use padded clamps or wood blocks
- Apply low-tack protective film
- Keep cutting area free of debris
- Allow cooling time before sanding
Using Fine Cutting Tools
Selecting fine cutting tools and slow, deliberate technique preserves the smooth finish of 4″ PVC while producing an accurate, burr-free edge.
A fine-toothed blade or reinforced tubing cutter minimizes chatter and melting; a sharp utility knife or razor can score thin-wall pipe before sawing.
Secure the pipe in a non-marring vise or clamp padded with cloth to prevent crush marks.
Cut with steady, controlled strokes, letting the tool do the work rather than forcing pressure.
After cutting, deburr with a fine file or emery cloth, working lightly along the lip to maintain the factory surface and assure a clean fit.
How to Test‑Fit Pieces Before Solvent Welding
Dry-assemble all fittings and pipe segments to confirm alignment, depth of insertion, and correct orientation before applying solvent cement.
The assembler checks joint tolerances, guarantees chamfers and deburring are correct, and verifies that pipes fully seat without forcing.
Mark alignment with a pencil or tape to preserve orientation during final assembly.
Confirm that any gaskets or seals fit and that socket or spigot clearances match.
- Verify straightness and actuation of any rotating fittings
- Guarantee mating surfaces are clean, dry, and free of shavings
- Test-fit with intended support spacing and clamps
- Check for interference with adjacent structures
How to Glue and Assemble 4″ PVC Joints Correctly
After confirming fit, alignment marks, and clean mating surfaces, the assembler proceeds to solvent-weld the 4″ PVC joints using the correct primer and cement for Schedule 40 or 80 pipe.
The primer is applied to socket and spigot, followed by an even coat of cement on both surfaces. Parts are joined with a quarter-turn twist to spread adhesive, aligning marks quickly before set. Excess cement is wiped away.
Hold pressure for the manufacturer’s suggested tack time, then support the assembly until full cure.
Work in well-ventilated conditions, wear appropriate gloves and eye protection, and follow local code for pressure or buried runs.
How to Repair a Bad Cut or Damaged 4″ End
When a 4″ PVC end is nicked, crushed, or cut unevenly, the damaged section must be assessed and restored before solvent welding to guarantee a reliable seal and mechanical fit.
First, mark damage, remove burrs with a deburring tool or utility knife, and square the end with a fine file or sanding block.
If crushed, cut back to sound material using a straightedge guide and saw; for deep nicks, sand to smooth.
Test fit the pipe and fitting; repeat trimming in small increments until uniform.
Clean with PVC cleaner and dry before priming and gluing.
- Inspect for cracks and compression.
- Trim to solid material.
- File and sand for roundness.
- Re-test fit before solvent application.
Cutting 4″ PVC in Hot or Cold Weather
In very hot or very cold weather, temperature greatly affects 4″ PVC behavior and the cutting process: heat softens and expands the plastic, increasing the risk of deforming or having ragged, compressed cuts, while cold makes the material brittle and prone to cracking or chipping. Operators should adjust technique: slow, steady sawing in heat; sharper blades and lighter pressure in cold. Allow conditioning time when moving pipe between environments. Use supports and clamps to minimize flex.
| Condition | Risk | Recommended action |
|---|---|---|
| Hot | Deformation | Secure, cool pipe |
| Cold | Cracking | Sharp blade, gentle feed |
| Moderate | Ideal | Standard procedure |
Material‑Saving Cutting Strategies for 4″ PVC
For projects where every inch of 4″ PVC matters, careful planning and precise cutting reduce waste and cost. Material-saving strategies focus on measuring, nesting, and orientation to maximize usable lengths. Mark cuts clearly, group repeat pieces to minimize kerf loss, and plan joints to use offcuts.
Cutting technique should preserve square ends and consistent wall thickness so scraps remain useful for smaller runs or fittings. Store and label leftovers for future projects to avoid premature disposal.
- Lay out full cuts before sawing to minimize end scraps
- Use a thin-blade saw or scoring tool to reduce kerf
- Align fittings to use offcuts efficiently
- Keep offcuts organized by length
When to Hire a Pro Instead of Cutting Yourself?
Consider hiring a professional if the project involves complex fittings, structural connections, pressurized systems, or precise tolerances that exceed basic DIY skills.
A pro brings experience diagnosing unforeseen issues, ensuring proper bonding, alignment, and support to meet code and safety requirements.
Engage contractors for embedded or overhead runs, potable water lines where contamination risk or certification matters, and multi-branch systems requiring flow calculations.
When access is constrained, cuts must be hidden, or restoration and testing are required, professional tools and warranties reduce liability.
If time, local codes, or confidence are limiting factors, hiring a qualified plumber is prudent.
Tools and Workflows to Speed Repetitive 4″ Cuts
A dedicated cutting station organizes tools, clamps, and measuring aids in a fixed layout to reduce setup time and improve repeatability.
A simple batch cutting jig holds multiple pipes or indexes the same length, allowing several identical cuts with a single clamp and saw movement.
Together they minimize handling and measurement errors when many 4″ sections are required.
Dedicated Cutting Station
Centered around efficiency and repeatability, a dedicated cutting station transforms 4‑inch PVC pipe work from ad hoc sawing into a streamlined production step. It consolidates tools, fixturing, dust control, and safety into one repeatable layout.
Workers set pipe stops, align blades, and use clamps to make certain consistent square cuts without measuring each piece. Quick access to deburring tools and a vacuum reduces cleanup time.
Routine checks on blade sharpness and fence alignment preserve accuracy across runs.
- Fixed stop and fence for consistent length
- Clamped platform to prevent pipe rotation
- Local dust collection and waste chute
- Dedicated sharpening and spare blades
Batch Cutting Jig
Speeding repetitive 4‑inch PVC cuts, a batch cutting jig combines a simple fence, adjustable stops, and multiple clamping points to feed several pipes through a single cut with consistent length and squareness.
The jig mounts to a stable base and indexes tubing with repeatable stops; clamps hold each workpiece square to the saw or blade guide.
Spacers or segmented trays speed loading and maintain alignment.
Safety features include blade guards and clear sightlines for mark verification.
For production runs, the jig reduces setup time, minimizes measurement error, and yields uniform parts.
Materials are plywood, hardwood rails, bolts, and quick‑release clamps.
Maintenance Tips to Keep Your Cutting Tools Sharp
Regularly inspecting blades and cutting edges prevents dulling before it compromises cuts.
The article advises routine cleaning, proper storage, and timely sharpening to maintain tool performance.
Removing resin and PVC debris extends blade life; light oiling prevents rust.
Use manufacturer-recommended sharpening angles and replace blades when wear reduces accuracy.
Track service intervals based on frequency of use rather than calendar time.
- Clean blades after each session with a soft brush and solvent
- Store tools in a dry case or hang them to avoid edge contact
- Sharpen with the correct file or stone, following angle specifications
- Replace blades at first sign of chipping or uneven cutting
Quick Pre‑Cut Checklist for 4″ PVC Jobs
Before cutting 4″ PVC, a quick pre‑cut checklist guarantees accurate, safe, and efficient work. The technician verifies measurements, selects the right blade, inspects the pipe for cracks, clears the workspace, and confirms PPE. Marking the cut line and clamping the pipe guarantees stability. A brief functionality check on tools prevents delays. Materials and fittings are staged nearby to confirm compatibility. Finally, waste disposal and cleanup plans are noted.
| Item | Action | Status |
|---|---|---|
| Measurement | Confirm length and square mark | ✅/❌ |
| Blade | Choose correct blade type | ✅/❌ |
| Pipe | Inspect for defects | ✅/❌ |
| Safety | PPE and guards in place | ✅/❌ |
| Setup | Clamp and test tool | ✅/❌ |
Troubleshooting Common 4″ PVC Cutting Problems
Common cutting issues include blade dulling and burr formation, which compromise edge quality and require prompt blade maintenance.
Uneven or jagged cuts often indicate alignment or feed-rate problems and call for technique adjustments or fixturing.
Pipe deformation and crushing point to improper clamping or excessive pressure and should be corrected by using proper supports and gentler cutting forces.
Blade Dulling And Burrs
Blade dulling and the formation of burrs are frequent issues when cutting 4-inch PVC, reducing cut quality and increasing effort. Dull blades tear rather than slice, heating the PVC and creating ragged edges and raised burrs around the cut.
Regular inspection of blade teeth and prompt replacement restore clean, fast cuts. Deburring with a file, deburring tool, or a utility knife smooths internal and external edges for proper fittings. Lubrication and controlled feed rates reduce melting and chipping.
- Inspect blade teeth before each session
- Replace or sharpen at first sign of wear
- Use a dedicated deburring tool
- Control speed and cooling
Uneven Or Jagged Cuts
Dull teeth and burrs often lead into problems with uneven or jagged cuts on 4″ PVC, but other factors can produce the same result.
Uneven feed rate, lateral blade wobble, and unstable pipe support create irregular edges. Incorrect blade type or improper saw speed tears material rather than shearing it. Misaligned guides or clamped pipe shifting mid-cut cause stepped surfaces.
To correct this, inspect alignment, secure the pipe with firm but gentle clamps, maintain consistent feed pressure, and use a blade suited for plastic at recommended speed.
Light sanding or a deburring tool cleans minor irregularities for a smooth finish.
Pipe Deformation And Crushing
Crushing or ovalization of 4″ PVC during cutting often stems from excessive clamping pressure, unsupported spans, or using cutting methods that compress rather than shear the wall. The problem presents as flattened sections, tight fits, or cracks when pressure is released. Solutions focus on even support, softer clamping interfaces, and tools that remove material cleanly. Inspect the pipe before and after cutting; correct ovalization by gently reshaping with heat or by trimming and replacing the damaged segment. Prevent recurrence with proper jigs and cutting technique.
- Use padded clamps or V-blocks for support
- Employ sharp rotary or fine-tooth saws
- Avoid squeezing with pliers
- Re-seat pipe after minor reshaping
Conclusion
Cutting 4″ PVC becomes routine with proper preparation and the right tools; measure twice and cut once guides steady hands and efficient workflows. Professionals and DIYers alike benefit from safety gear, sharp blades, and correct clamps to prevent tear-out and splintering. Regular tool maintenance and simple jigs speed repetitive work while reducing errors. When problems arise, return to basics—secure, steady, and clean—and the project will finish neatly and reliably.