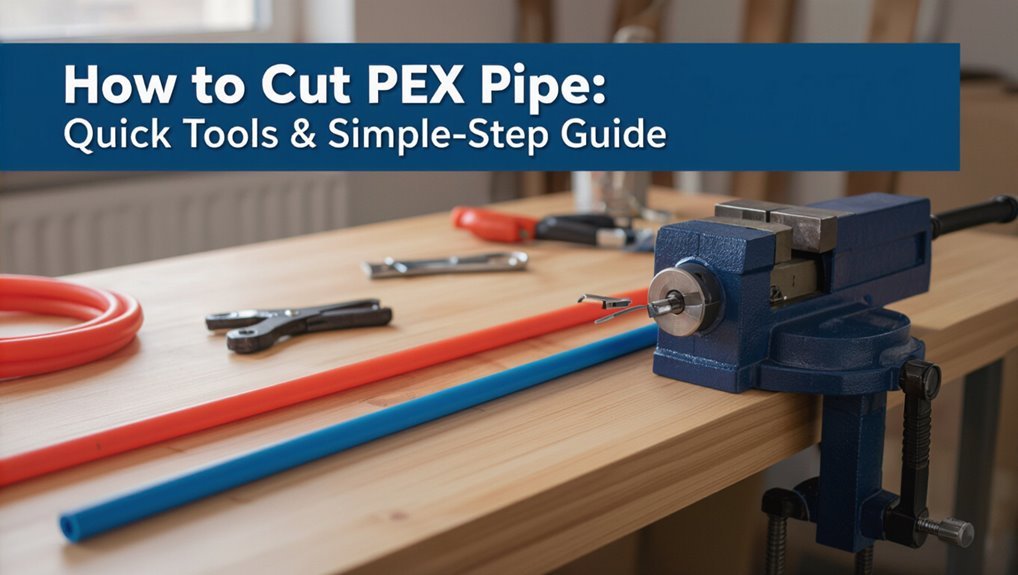
How to Cut PEX Pipe: Quick Tools & Simple Step-by-Step Guide
To cut PEX pipe cleanly and effectively, follow these key steps:
- Gather the Right Tools: Use a ratcheting cutter for larger or multilayer PEX, and opt for a straight tubing cutter or PEX scissors for thinner walls or tight spaces.
- Measure and Mark: Measure twice and mark once to ensure accuracy.
- Secure the Pipe: Use non-marring clamps to hold the pipe steady while cutting.
- Make the Cut: Cut squarely with even pressure to achieve a clean edge.
- Deburr and Chamfer: After cutting, deburr the end and chamfer it to prepare for fitting.
- Inspect for Roundness: Check the cut end for roundness before proceeding with installation.
- Maintain Your Tools: Proper maintenance of your cutters will help prevent ragged edges.
By following these steps, you can ensure a clean and precise cut on PEX pipe, making your plumbing projects smoother and more efficient.
How to Cut PEX Pipe : Quick Steps
Begin by measuring and marking the PEX pipe where the cut is needed, then secure the pipe to prevent movement.
The person selects an appropriate cutter, aligns the blade with the mark, and applies steady pressure for a straight, clean cut.
Deburr or square the end if required, inspect the cut for roundness, and remove any debris.
Test fit fittings to confirm proper length and fit; trim slightly if necessary.
Maintain steady support to avoid crushing or ovaling the tube.
Clean the cut surface and proceed with chosen joining method, ensuring dimensions meet manufacturer tolerances and installation standards.
Which PEX Types Change How You Cut
Having covered the cutting process, attention turns to how different PEX formulations affect tool choice and technique. The polymer, wall thickness, and outer layers determine stiffness and cutting ease; knowing the type prevents ragged cuts and tool damage.
Common distinctions include PEX-A, PEX-B, and multilayer variants:
- PEX-A: more flexible, forgiving with ratchet cutters; heat expansion may matter when scoring.
- PEX-B: slightly stiffer, benefits from sharper blades and more firm clamp support.
- Multilayer (PEX-AL-PEX): includes aluminum; requires blades suitable for metal and care to avoid crushing.
Select cutters and approach based on composition, not habit.
Essential Tools to Cut PEX Quickly
A small set of purpose-built tools makes cutting PEX fast, clean, and repeatable: a quality ratchet cutter for diameters up to 1 1/4″, a straight tubing cutter for precise perpendicular cuts on thinner walls, and a hacksaw or metal-capable rotary cutter when aluminum layers are present.
Complementary items include a deburring tool or chamferer to remove burrs and prevent seal damage, a tape measure and marker for accurate layout, and a clamp or vise to stabilize pipe during cuts.
Personal protective equipment—safety glasses and gloves—reduces injury risk. Keeping blades sharp and spare cutting wheels guarantees consistent, reliable results.
Best PEX Cutters Compared
A comparison of top PEX cutters highlights compact ratcheting designs for confined spaces, evaluates blade materials and longevity, and weighs price against real-world performance.
Professionals assess whether higher-cost models deliver noticeably cleaner cuts and longer service life.
The following section presents side-by-side considerations to help match cutter features to project needs.
Compact Ratcheting Design
Compact ratcheting PEX cutters condense powerful cutting action into a small, easy-to-handle body, making them ideal for tight spaces and frequent use. The mechanism multiplies user force, producing clean, square cuts with less hand strain.
Compact models favor maneuverability and often include safety locks and ergonomic grips. They suit installers working in confined cabinets, near studs, or overhead.
- Enhanced leverage reduces exertion and improves control.
- Small footprint enables access where larger tools cannot reach.
- Safety locks and textured handles increase reliability during repetitive tasks.
Design trade-offs typically involve fewer accessory features but greater portability and efficiency.
Blade Quality Comparison
Moving from form factor to the cutting edge itself, blade quality is the defining factor in cutter performance and longevity.
Hardened steel alloys resist nicking and maintain a razor-sharp edge for repetitive PEX cuts, minimizing deformation and burrs. Coatings such as titanium or Teflon reduce friction and corrosion, extending service life and easing cuts.
Blade geometry—bevel angle and thickness—affects force required and cut cleanliness: acute angles slice cleaner but dull faster, while robust profiles endure torque.
Replaceable blades balance peak performance with maintenance ease. Evaluate heat treatment, coating, and replaceability when comparing the best PEX cutters.
Price Versus Performance
Cost-effectiveness is the practical metric by which contractors and DIYers balance tool investment against job performance. Evaluation weighs upfront price, durability, and cutting consistency.
Higher-cost cutters often offer hardened blades, ergonomic grips, and ratcheting mechanisms that reduce fatigue and waste. Budget models can suffice for occasional use but may require more frequent replacement.
- Mid-range options: best compromise of longevity and value for regular projects.
- Premium cutters: ideal for professionals needing speed, repeatability, and warranty support.
- Economy tools: acceptable for light, infrequent tasks but factor replacement cost into total ownership.
Select based on frequency, warranty, and required precision.
When to Use a Ratcheting PEX Cutter?
A ratcheting PEX cutter is recommended when the size and reach of the tool must match the job, as larger models handle bigger diameters more comfortably.
It is especially useful for cutting thick or multi-layer tubing where a single squeeze might not suffice.
The mechanism also reduces hand fatigue during repetitive cutting tasks, improving speed and consistency.
When Choosing Tool Size
When selecting a PEX cutter, size and mechanism determine suitability for different pipe diameters and user strength. Ratcheting cutters are best for larger-diameter PEX or repeated cuts because the gear-assisted action reduces hand force and delivers cleaner, straighter cuts.
Tool selection should balance blade reach, handle length, and portability. Compact manual snips suit occasional cuts on small-diameter tubing, while heavier ratcheting models handle frequent work with less fatigue.
Consider workspace constraints and storage. Maintenance and blade replacement affect long-term performance.
- Choose by pipe diameter and frequency of use.
- Match handle ergonomics to user strength.
- Prioritize replaceable blades and sturdy construction.
For Thick Or Multiple Layers
Reach for a ratcheting PEX cutter any time tubing is thick, multi-layered (such as oxygen-barrier PEX), or when several layers of insulation or protective sheathing must be cut cleanly. A ratcheting cutter provides controlled incremental pressure, reducing hand strain and crushing, producing consistent square cuts through denser construction. It excels where a single-pass shear might bind or deform material. Use it when blade engagement must be progressive to avoid tearing inner barriers. Maintenance of sharp blades and correct jaw alignment guarantees reliable performance. Consider accessibility and clearance; ratcheting heads vary in profile for tight spaces.
| Advantage | Consideration |
|---|---|
| Controlled pressure | Requires periodic blade replacement |
| Cleaner cuts on thick walls | Slightly bulkier than simple cutters |
| Less user fatigue | More expensive upfront |
| Good for layered sheaths | Not ideal for extremely tight angles |
During Repetitive Cutting Tasks
Opt for a ratcheting PEX cutter for repetitive cutting tasks where consistency and reduced hand fatigue are priorities.
It delivers uniform, square cuts with less effort than single-stroke cutters, speeding production and lowering injury risk.
Ideal on job sites and long runs, it maintains blade pressure across cycles and suits thicker or slightly stiff PEX.
Consider blade sharpness, ratchet mechanism quality, and handle ergonomics when selecting a model.
- Consistent, repeatable cuts for fittings and runs
- Less hand strain during extended use
- Faster throughput with fewer re-cuts
Maintenance prolongs life: clean, lubricate, replace blades.
When to Use PEX Tubing Scissors?
Although PEX tubing scissors are not required for every job, they become the preferred tool whenever clean, square cuts are needed on soft PEX or when working in tight spaces where a straight blade cannot be aligned. They suit short runs, final trimming, and installations near fittings where control matters. Scissors reduce deformation and produce consistent ends for crimp or push-fit connections. They’re less useful on very thick or rigid PEX, where dedicated cutters perform better.
| Best Use Cases | Limitations |
|---|---|
| Tight spaces | Thick/rigid PEX |
| Final trimming | Not for long continuous cuts |
| Soft PEX | Limited mechanical advantage |
| Push-fit prep | Not for large-diameter tubing |
Using a Rotary Cutter for PEX
When a cleaner, straighter cut is required on thicker or larger-diameter PEX than scissors can handle, a rotary cutter offers the needed leverage and blade control. It rotates around the pipe, delivering even pressure and a consistent slice, reducing deformation and guaranteeing a true square end.
Proper clamping and steady rotation are essential; the operator should score progressively rather than force through in one pass. Blade sharpness matters—replace dull wheels promptly. After cutting, inspect for burrs and verify the endface is perpendicular to the pipe axis before fitting.
- Use a firm clamp for stability
- Rotate smoothly, multiple light passes
- Change dull blades immediately
Utility Knife, Deburrers, and Chamfers for PEX
Selection of a sharp, sturdy utility knife is critical for clean PEX cuts when a tubing cutter is unavailable.
Proper use of deburring tools and chamfers removes burrs and rounds edges to guarantee secure fittings and prevent seal damage.
Attention to blade condition and correct chamfer size reduces leaks and simplifies assembly.
Choosing The Right Utility Knife
A durable utility knife with a sharp, replaceable blade is essential for scoring and trimming PEX cleanly; it reduces the risk of ragged edges that can compromise fittings. The right knife balances control, safety, and blade quality.
Prefer models with comfortable grips, a reliable blade-lock, and easy blade changes. Lightweight designs improve maneuverability in tight spaces. Replace blades at the first sign of nicks to maintain clean cuts and consistent fitment.
- Comfortable ergonomic handle for steady control
- Secure blade-lock mechanism to prevent slips
- Compatibility with common replaceable blades for easy maintenance
Using Deburrers And Chamfers
Several small, precise steps make deburring and chamfering PEX ends critical before installing fittings. A utility knife trims the cut; a deburrer removes raised edges and loose particles. Chamfering creates a slight bevel to ease insertion and prevent seat damage. Proper prepping guarantees secure crimps and prevents leaks. Work slowly, rotate the tool, inspect the bore, and remove any sleeve fragments. Clean with a cloth before fitting. The simple process improves alignment and reduces installation force.
| Tool | Purpose |
|---|---|
| Deburrer | Remove edge burrs |
| Chamferer | Create insertion bevel |
Safety Gear for Cutting PEX
Proper personal protective equipment (PPE) reduces injury risk when cutting PEX pipe. The writer recommends sturdy gloves to prevent cuts and improve grip, safety glasses to shield from flying fragments, and hearing protection when using powered tools.
Foot protection and long sleeves minimize incidental contact. Inspect gear before use and replace damaged items. Keep a first-aid kit accessible and work in a well-lit, ventilated area.
Follow manufacturer guidance for power tool PPE. Regularly clean and store equipment to maintain effectiveness. Use appropriate PPE consistently to reduce accidents and guarantee a safer cutting process.
- Cut-resistant gloves
- Impact safety glasses
- Ear protection
Measure and Mark PEX Accurately
Measure twice and mark once to confirm PEX cuts fit plumbing runs and fittings without waste or rework. Practitioners verify line runs, accounting for bends, fittings, and insertion depths before marking.
Use a tape measure for overall length and a caliper or depth gauge to validate fitting insertion requirements. Mark the cut location with a fine-tip permanent marker or scribe; place marks on the pipe’s outer curve to remain visible after bending.
Recheck measurements from fixed reference points and allow for expansion or trimming tolerance specified by the fitting manufacturer. A clear, single mark reduces alignment errors and confirms consistent, reliable cuts.
How to Secure PEX Before Cutting
Clamp the PEX firmly in place before cutting to prevent slipping, twisting, or kinking that can produce an uneven edge or damage the tubing. A stable hold improves accuracy and safety.
Use non-marring clamps or a vise with protective pads to avoid deforming the pipe. Support long runs with temporary blocks to maintain alignment. Keep hands clear of the blade path and check that fixtures or fittings nearby are secured.
- Use padded clamps or soft-jaw pliers to protect the PEX surface.
- Add wooden blocks or straps beneath long sections for consistent support.
- Verify the pipe is straight and immobile before making the cut.
Position the Cutter Correctly
One steady hand aligns the cutter perpendicular to the PEX, with the blade centered on the planned mark to ascertain a square, burr-free cut.
The other hand stabilizes the pipe just behind the cutting point to prevent twisting or slipping. The cutter’s jaws should fully encircle the pipe without pinching insulation or fittings.
Verify the cutting tool’s pivot and blade are clean and functioning; a dull blade or loose pivot alters alignment.
Position so sightlines are unobstructed, allowing a straight approach. Confirm alignment from multiple angles before applying pressure, maintaining steady, even force until the blade seats.
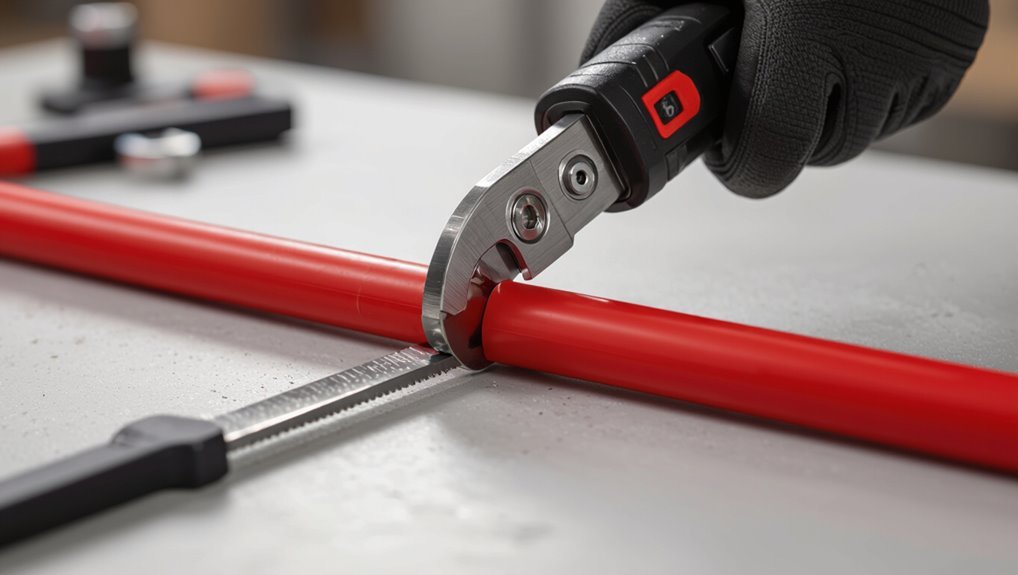
Make a Clean, Square Cut
With the cutter aligned and the pipe stabilized, the operator applies steady, even pressure to drive the blade through the PEX in a single smooth motion; hesitation or rocking will produce a ragged edge. The goal is a square face perpendicular to the tube axis.
Proper stance, a controlled grip, and a single decisive cut reduce deformation. If using a ratcheting cutter, allow the mechanism to complete its cycle without forcing. After cutting, confirm alignment visually before releasing the pipe.
Helpful reminders:
- Keep blade sharp and clean for consistent slicing
- Support pipe close to the cut for minimal flex
- Maintain cutter at 90° throughout the cut
Inspect the Cut End for Burrs
Examine the freshly cut PEX end for burrs and rough edges before proceeding.
The inspector looks along the circumference, rotating the pipe under good light to spot raised nubs, uneven fibers, or jagged fragments.
Visual and tactile checks confirm whether the surface is smooth and square; any irregularity could impair fitting engagement or sealing.
Attention focuses on the interior lip as well as the exterior rim where extrusion or cutting tools may leave residue.
If the cut meets smoothness and uniformity criteria, the pipe is ready for connector installation.
Document any defects and retake the cut if needed.
Deburr and Chamfer PEX Ends
After cutting, the installer removes any sharp edges to prevent damage to fittings and seals.
A chamfer tool is used to lightly bevel the pipe end for smoother insertion.
Finally, the end is inspected to guarantee no burrs remain before assembly.
Remove Sharp Edges
Deburr and chamfer the cut ends of PEX to remove burrs and create a smooth, slightly angled edge that eases fitting and prevents seal damage.
The technician inspects the cut for raised plastic, sharp fragments, or irregular edges that could compromise connections. Attention to this step reduces leaks and extends fitting life.
- Remove loose burrs with a deburring tool, file, or utility knife, working gently around the circumference.
- Lightly chamfer the outer edge to guide fittings and O-rings without shaving material away unnecessarily.
- Wipe the pipe end clean of particles and recheck for sharpness before assembly.
Use A Chamfer Tool
Use a chamfer tool to create a clean, slightly angled bevel on PEX ends that guides fittings and O-rings into place without distorting the tube.
The tool is placed over the cut end and rotated or actuated to shave a minimal chamfer, removing the sharp edge left by cutting tools. This small bevel eases installation, prevents O-ring pinching, and reduces the chance of extrusion damage during insertion.
Chamfering should be gentle and uniform; excessive material removal weakens the connection.
After chamfering, confirm the tube end remains round and straight before proceeding to fitting assembly and compression steps.
Inspect For Burrs
Inspect the freshly cut PEX ends immediately for any burrs or jagged edges that could compromise a seal or damage O-rings during assembly. A quick visual and tactile check prevents leaks and fitting damage.
If imperfections exist, remove them with a proper deburring tool or chamferer, rotating gently to preserve tubing roundness. Ascertain cuts remain square and clean before fitting.
- Run a finger lightly around the inside and outside edges to feel for snags.
- Use a small file or dedicated deburr tool to smooth edges; remove only minimal material.
- Reinspect and wipe the ends clean of debris before assembly.
Cutting PEX Behind Walls and in Tight Spots
Cutting PEX behind walls or in cramped spaces requires deliberate preparation and the right compact tools to guarantee a clean, square cut without damaging surrounding materials.
Work from an access point; remove insulation or backing to expose sufficient pipe length. Use a mini tubing cutter, flush-cut PEX scissors, or a ratcheting cutter designed for tight clears.
Stabilize the pipe with one hand or a small clamp to prevent wobble. Score and rotate cutters smoothly to avoid deformation. Clear debris and deburr lightly.
Verify squareness with a small square or visual check before fitting. Restore insulation and wall material carefully.
Cutting PEX Near Fittings and Fixtures
When cutting PEX near fittings and fixtures, assess clearance and access to guarantee the tool can reach the pipe without stressing nearby components.
Take steps to protect existing fittings and finished surfaces from nicks, tool slips, and debris.
If space is limited, use compact cutters or temporary shielding to prevent damage.
Clearance And Access
Near fittings and fixtures, sufficient clearance and unobstructed access are essential to make precise, square cuts and to position tools without stressing the connection.
The technician assesses space, removes obstructions, and plans tool approach to avoid angling the tubing or bending the fitting. Small adjustments improve outcomes: rotate the pipe for a better grip, use extension handles when necessary, and steady the fitting with one hand while cutting with the other.
Consider access panels or temporary fixture removal when space is too tight. Proper posture and lighting reduce mistakes and speed work in confined areas.
- Clear line of sight
- Tool reach and orientation
- Stable support and steadying
Protecting Existing Fittings
A careful approach is required around existing fittings and fixtures to prevent damage to connectors, seals, and finished surfaces while cutting PEX. The worker measures twice, marks cuts away from fittings, and stabilizes the pipe. Protective padding shields chrome, and a small clamp holds the PEX steady. Use a compact cutter to avoid striking nearby brass or plastic parts. Deburring and inspecting the cut end before reassembly preserves seal integrity. When space is tight, a mini hacksaw with controlled strokes can replace bulky tools. If unsure, isolate water and replace a compromised fitting rather than risk a leak.
| Tool | Purpose |
|---|---|
| Pad | Surface protection |
| Clamp | Pipe stabilization |
| Marker | Accurate placement |
Cutting Long PEX Runs Quickly and Evenly
Because long PEX runs require consistent, square cuts to seat fittings properly, planning and using the right tools speeds the process and reduces rework.
Technicians measure and mark at intervals, use a quality PEX cutter or portable tubing cutter, and stabilize the pipe to prevent bending. Cut method and workflow matter when dozens of cuts are needed.
- Use a tape measure and permanent marker to sequence cuts evenly.
- Clamp or rest PEX on a straight edge to keep cuts square.
- Employ a ratcheting or quick-action cutter to maintain speed and consistency.
Efficient setup minimizes fatigue and maintains uniform fitting performance.
Cutting PEX for Crimp, Clamp, and Expansion
The discussion shifts to cutting PEX specifically for crimp, clamp, and expansion fittings, focusing on tool selection, measurement, and setup.
Choosing the right cutter guarantees a square, burr-free end suitable for the chosen connection method.
Proper marking, accurate measuring, and preparing the pipe and fitting differ slightly between crimp, clamp, and expansion and must be followed to guarantee a secure joint.
Choosing The Right Cutter
Select a cutter that matches the PEX joining method and pipe size to confirm clean, square cuts essential for reliable crimp, clamp, or expansion connections.
The right tool reduces deformation, guarantees proper seating of fittings, and speeds installation. Consider durability, blade replacement, and ease of use for confined spaces.
- Ratcheting PEX cutters: deliver controlled, straight cuts for multiple layers and larger diameters.
- Single-action tubing cutters: compact and fast for softer PEX but require steady pressure to avoid squaring errors.
- PEX expansion tools with cutting heads: integrate expansion and trimming for systems using expansion fittings.
Marking And Measuring Correctly
Accurate measuring and clear marking are essential steps before any PEX cut to guarantee fittings seat properly and joints remain leak-free. One person measures twice: note insertion depth per fitting type, mark square to the pipe, and allow for deburring or expansion tool engagement. Use a permanent marker or grease pencil and a square for perpendicular marks. Confirm measurements against the actual fitting before cutting. Keep marks visible after handling. Measure from fixed reference points; avoid relying on bent or compressed pipe lengths. Consistent marking reduces rework and prevents leaks.
| Item | Purpose |
|---|---|
| Insertion depth | Guarantees correct joint depth |
| Perpendicular mark | Promotes square cut |
| Reference point | Maintains consistent lengths |
| Visible marking | Prevents misalignment during install |
| Double-check | Avoids costly mistakes |
Preparing For Each Method
With measurements and square marks confirmed, attention turns to preparing cuts specific to the chosen joining method—crimp, clamp, or expansion. The installer guarantees pipe ends are clean, deburred, and free of deformation.
Each method demands small adjustments before fitting: ring placement for crimp, correct clamp position, and allowance for sleeve expansion. Inspect tools and fittings for defects, and maintain consistent pipe insertion depths.
Follow manufacturer specs for gap or overlap. Prepare a tidy workspace and keep a spare segment for practice or testing. Essential checks reduce leaks and speed assembly.
- Verify tool calibration and blade sharpness
- Deburr and square the cut face
- Measure insertion depth and mark
How Much Pipe to Leave for Each Fitting
When preparing PEX for connections, allow enough straight pipe beyond the fitting to guarantee a secure grip and proper insertion depth without crowding adjacent fittings.
Measure and mark insertion depth specified by the fitting manufacturer; typical crimp or clamp fittings require leaving that full depth exposed plus 1/8–1/4 inch for seating and inspection.
For expansion fittings follow the tool’s guidelines, making certain the pipe extends fully into the fitting shoulder.
When multiple fittings are close, leave slightly more length to enable tool access.
Trim squarely, deburr lightly if needed, and recheck measurements before assembling to make certain consistent, leak-free joints.
Common Cutting Mistakes and How to Avoid Them
Several common errors during PEX cutting—uneven cuts, crushed ends, incorrect length, and failure to deburr—are responsible for the majority of joint failures. Awareness and simple practice prevent leaks and fitting issues. Proper tool choice, stable clamping, and measuring twice reduce mistakes.
- Use a sharp PEX cutter; dull blades cause crushing and uneven edges.
- Mark and measure from the fitting stop; cut straight and confirm length before trimming.
- Support the pipe firmly and cut perpendicular to avoid ovalization.
Consistent technique and routine inspection of cuts guarantee reliable connections and reduce rework.
Fixing a Rough or Jagged PEX Cut
A jagged or rough PEX cut compromises sealing surfaces and can lead to leaks or poor fit; repairing the edge quickly and correctly restores a reliable connection.
Trim a small amount with a sharp PEX cutter to create an even, square end, removing any burrs. If tool marks remain, gently file or deburr with a fine file or sandpaper wrapped around a dowel for uniformity.
Inspect the inner and outer edges for melted or crushed material; correct minor deformities by re-trimming. Clean the tube end with a cloth to remove debris before fitting.
Test fit fittings to confirm a smooth seal.
When a Cut PEX End Needs Replacing
When a cut PEX end shows fraying, crushing, or irregularities, the damaged section should be cleanly cut back to sound material.
The remaining end is inspected for cracks, splits, or embedded debris that could compromise the seal.
If damage extends beyond the immediate cut, replacing the end or a short section of tubing is recommended to guarantee reliable connections.
Cleanly Cutting Back
Trim the damaged or irregular end back to a clean, square cut so the new fitting seats properly and creates a reliable seal.
The operator measures, marks, and stabilizes the pipe, ensuring a perpendicular cut. Use a sharp PEX cutter or fine-tooth tubing saw for control; make one smooth action or light, even strokes to avoid crushing.
Deburr or square the edge with a reamer or utility blade, removing loose particles. Confirm the cut faces are uniform before proceeding.
- Use proper PPE and steady support.
- Avoid twisting the pipe during cutting.
- Recheck length after trimming.
Checking For Damage
Inspection of the cut end is essential before fitting a replacement; the technician should look for splits, kinks, crushing, or delamination that compromise sealing surfaces or the pipe’s structural integrity.
Damaged sections prevent reliable compression or crimp connections and can cause leaks under pressure or temperature changes. If defects extend beyond the visible end, measure back to sound material and mark a new cut line.
Use proper cutters to remove the compromised length, then deburr and square the face. Reinspect the fresh end for uniform wall thickness and roundness; only undamaged, true-profile ends should receive fittings.
How Temperature Affects Cutting and Pipe Behavior
Although PEX remains flexible across a broad range of conditions, temperature markedly influences how it responds to cutting and handling: cold PEX stiffens and may crack or produce jagged edges if cut with standard tools, while warm or hot PEX becomes more pliable and can deform or compress under blade pressure, requiring different cutter techniques and allowances for thermal expansion when measuring and joining.
Cold, ambient, and hot states change recommended clearances, clamping, and cutting speed. Consider these effects when preparing cuts:
- Cold: risk of brittle fracture and uneven edges; use sharp, steady cuts.
- Ambient: standard technique and minimal adjustments.
- Warm: allow for compression, slower blade action, and expansion margins.
Cutting PEX in Cold or Hot Conditions
When cutting PEX under extreme temperatures, the same material responses described earlier become more pronounced and demand adjusted technique and tool choice. In cold, PEX stiffens and may crack if bent; warm, it softens and deforms. Technicians should warm pipes slightly before cutting in cold weather and cool or brace them when hot. Use sharp, purpose-built cutters and steady, single-pass cuts. Inspect ends for burrs and ovality. Avoid excessive force or repeated sawing.
| Condition | Risk | Adjustment |
|---|---|---|
| Cold | Brittle, cracks | Warm gently |
| Hot | Deforms | Brace and cool |
| Variable | Ovality | Re-round before fitting |
Cutting PEX‑AL‑PEX and Multilayer Pipes
Cutting PEX‑AL‑PEX and other multilayer pipes requires attention to the layered construction: a thin aluminum core bonded between PEX layers changes how the pipe responds to cutting and joining.
Practitioners should use tools that score cleanly without crushing, then deburr and straighten the slight springback from the metal layer. Clean cuts guarantee proper sealing with crimp, clamp, or compression fittings designed for multilayer tubing.
- Use sharp ratcheting cutters or fine-toothed tubing saws with steady support.
- Remove burrs and aluminum shavings gently; avoid fraying the inner PEX.
- Check fitment depth and overlap for the chosen connector type.
Storing and Transporting Cut PEX Safely
After cutting, properly storing and transporting PEX prevents damage that can compromise fittings and system integrity.
Cut lengths should be deburred, labeled by size and application, and coiled without kinks. Use protective end caps to keep debris out and avoid crushing.
Store coils horizontally on racks or shelves away from sunlight and heat sources; indoor, climate-controlled spaces are ideal.
When loading for transport, secure bundles with straps or soft ties to prevent shifting and abrasion. Pad contact points and separate different diameters to avoid deformation.
Inspect lengths before installation for nicks, flat spots, or contamination.
Quick Tips to Speed Up Multiple Cuts
For repeated cuts, setting up a dedicated batch measurement station saves time and reduces marking errors.
A prepped cutting jig guarantees consistent lengths and faster cycling between pieces.
Together they streamline workflow and improve accuracy on multi-piece jobs.
Batch Measurement Stations
A simple batch measurement station organizes repeat cuts into a fast, consistent workflow by combining a marked stop block, secured rail or board, and a designated cutting tool position.
It minimizes measuring time and reduces variation across dozens of PEX lengths. Components are clamped for stability and calibrated once; operators feed pipe to the stop, mark or snip, then move to the next piece without remeasuring.
Safety positioning prevents fingers near the blade. Use durable, clear markings and a non-slip base for repeatability. Periodic checks guarantee continued accuracy and straight cuts.
- Clamp-mounted stop block for consistent lengths
- Fixed cutting location for safety
- Clear, durable measurement markings
Prepped Cutting Jig
Set up a prepped cutting jig to turn repetitive PEX cuts into a fast, repeatable operation: secure a short length of rail to a stable base, mount an adjustable stop block for exact lengths, and position the cutter so the operator only advances the pipe to the stop and makes a single, clean cut.
The jig guarantees uniform lengths, reduces measuring time, and minimizes handling errors. Use clamping pads to protect tubing and quick-release mounts for tool swapping.
Mark common lengths on the rail for rapid visual reference. Periodically verify stop position with a caliper. Store the jig near the work area for continuous workflow.
Choose the Right Cutter for Your Budget
Although budget affects options, selecting a PEX cutter should prioritize cut quality and durability over price alone.
The writer recommends balancing cost with expected use: occasional homeowners need affordable, reliable cutters; professionals should invest in long-lasting tools.
Consider warranties and reviews when comparing price tiers. Cheaper models may suffice for small jobs, midrange offers better blades and ratchets, while premium cutters deliver consistent performance under heavy use.
- Occasional use: simple, low-cost cutter with replaceable blade
- Regular homeowner: midrange with sturdier grips and alignment
- Professional: premium cutter with warranty and durable mechanics
Features to Look for in PEX Cutters
Look for features that directly affect cut quality, ease of use, and longevity: a sharp, replaceable blade for clean, burr-free cuts; a ratcheting mechanism or compound leverage for consistent pressure with minimal effort; ergonomic, non-slip grips to reduce hand fatigue; clear alignment guides or a built-in stop for square cuts; and corrosion-resistant materials or a warranty that indicates build durability.
Additionally, lightweight construction improves maneuverability in tight spaces. A captive blade or safety latch prevents accidents. Compatibility with common PEX sizes and fittings guarantees versatility.
Inspect joint tolerances and spring action for smooth operation and reliable repeatable performance.
How to Maintain and Sharpen PEX Cutters
After selecting a cutter with the right features, maintaining its blade, springs, and pivots preserves cut quality and prolongs tool life.
Regular inspection removes nicks and burrs; light honing with a fine diamond file restores edge geometry. Lubricate pivots and spring points sparingly with a drop of machine oil and wipe excess. Store in a dry pouch to prevent corrosion.
- Clean blades after each use with a soft cloth and mild solvent.
- Hone only along the original bevel to avoid changing the cutting angle.
- Tighten fasteners to maintain alignment but avoid over-torquing.
When to Replace Your PEX Cutter
When should a PEX cutter be retired? Signs include worn or nicked blades that no longer produce clean, square cuts despite sharpening.
Replace if handles loosen, springs fail, or cutting action becomes inconsistent or requires excessive force.
Corrosion, bent jaws, or misaligned blades that cannot be corrected indicate end of life.
If the tool slips, binds, or damages pipe even with proper technique, replacement is safer than repair.
For professionals, replace before critical jobs to avoid downtime; for homeowners, replace when performance degrades noticeably.
Prioritize safety, consistent cuts, and reliable operation over extended tool life.
Troubleshooting: Cut Doesn’t Fit the Fitting
Measure and inspect the cut immediately if a PEX pipe does not seat into its fitting; misalignment, burs, ovalization, or an uneven end are the most common causes.
The observer should verify squareness, remove burrs, and confirm diameter. Recut shorter if deformation persists.
- If ovalized, compress gently with pliers then reshape before attempting seating.
- For burrs or knife marks, file or re-cut with a fresh blade; guarantee a clean, straight face.
- Confirm the fitting and pipe types match and that the pipe is fully inserted to the required depth; use a marker for consistent insertion.
Corrective steps prevent leaks and failed connections.
Conclusion
In closing, the guide leaves the reader equipped and confident: cutting PEX becomes a small, precise chore rather than a gamble. Like a steady hand guiding a needle, the right tool and technique turn awkward cuts into clean, reliable joints. By matching cutter type to PEX, keeping blades sharp, and replacing worn tools, installers avoid leaks and wasted fittings. Careful maintenance and correct technique repay patience with durable, professional results.