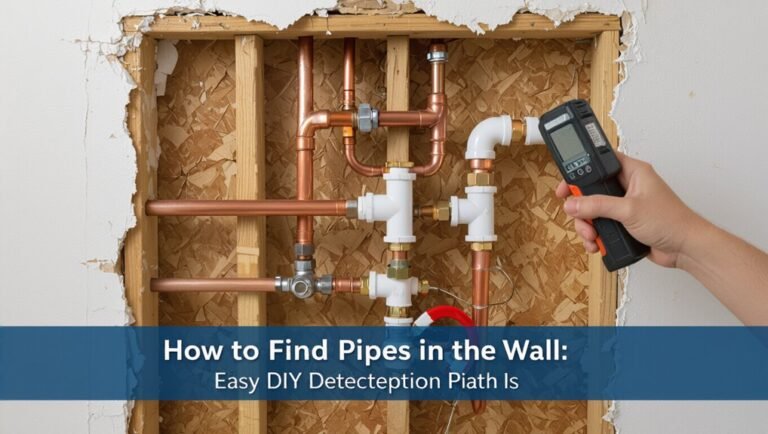
How to Connect PVC Pipe: Step-by-Step Guide for DIY Plumbing
To connect PVC pipe effectively, follow these key steps:
- Prepare Materials: Gather your PVC pipes and fittings, ensuring they are clean and free of debris.
- Measure and Mark: Measure the insertion depths for each fitting and mark them accurately on the pipe.
- Cut and Deburr: Cut the pipe squarely using a pipe cutter and remove any burrs from the ends for a smooth fit.
- Dry-Fit: Assemble all pieces without adhesive to check alignment and slope before final assembly.
- Prime and Cement: If required, prime the surfaces, apply solvent cement to both the pipe and fitting, then insert the pipe with a quarter-turn and hold it in place to set.
- Threaded Joints: For threaded connections, use PTFE tape and avoid over-torquing to prevent leaks.
- Cure and Test: Allow the connections to cure properly, conduct a pressure test for leaks, and ensure compliance with local plumbing codes.
By following these steps, you can ensure a secure and reliable connection for your PVC plumbing project.
Quick 5‑Step Guide: Connect PVC Pipe in Minutes
Five straightforward steps will guide a user through connecting PVC pipe quickly and correctly.
The process begins by measuring and cutting pipe to length, guaranteeing square ends.
Deburr and dry-fit all pieces to confirm alignment.
Apply primer to mating surfaces, then spread PVC cement evenly on both pipe and fitting.
Insert the pipe into the fitting with a quarter-turn twist, hold for the manufacturer’s recommended set time, and wipe excess cement.
Allow the joint to cure fully before pressurizing.
Inspect each connection for uniform glue coverage and proper seating to prevent leaks and assure long-term reliability.
Which PVC Pipe Type Is Right for Your Project?
Choosing the correct PVC type starts with understanding pressure-rated options and how they match system demands.
The distinction between schedule (thicker-walled) and thinwall (lighter) pipe affects strength, pressure capacity, and fitting compatibility.
Selecting the right one guarantees safe, long-lasting connections for the designated application.
Pressure-Rated PVC Types
Pressure-rated PVC refers to pipes manufactured and labeled according to the maximum internal water pressure they can safely handle, and selecting the right type depends on application pressure, temperature, and chemical exposure.
Common pressure-rated classes include PVC-U and CPVC variants with ratings like 150, 200, or 300 PSI; higher ratings mean thicker walls and greater structural strength.
Cold-water distribution, irrigation, and pressurized drainage require specific ratings; CPVC offers better heat resistance for warmer fluids.
Always match pipe rating to system test and operating pressures, apply appropriate fittings and adhesives, and follow manufacturer specifications to guarantee safety and longevity.
Schedule vs. Thinwall
After covering pressure-rated varieties, the conversation shifts to wall thickness: schedule (thicker-walled) versus thinwall PVC, a distinction that affects strength, weight, cost, and fitting compatibility. The guide explains uses: schedule pipe suits pressure, buried runs, and mechanical stress; thinwall fits low-pressure, drainage, and lightweight assemblies. Installation notes cover solvent-weld compatibility, required supports, and fitting types. Choice depends on code, load, and budget. A simple comparison clarifies selection.
| Feature | Recommendation |
|---|---|
| Strength/pressure | Schedule for high-pressure or buried lines |
| Cost/weight | Thinwall for budget and lighter installations |
| Fittings | Match pipe type to fittings and code |
Pick the Right Schedule and Wall Thickness
Pipe schedule and wall thickness determine strength, pressure capacity, and suitability for a given application.
The writer explains that schedule numbers (such as Schedule 40 or 80) indicate standardized wall thickness: higher schedules mean thicker walls and greater pressure ratings.
Match schedule to system demands—potable water, irrigation, or industrial use—considering temperature and potential mechanical loads.
Thicker walls resist impact and abrasion; thinner walls save cost and weight where pressures are low.
Measure pipe outside diameter against fittings and verify pressure ratings stamped on the pipe.
Selecting proper schedule reduces leaks, failures, and unnecessary expense over the system lifetime.
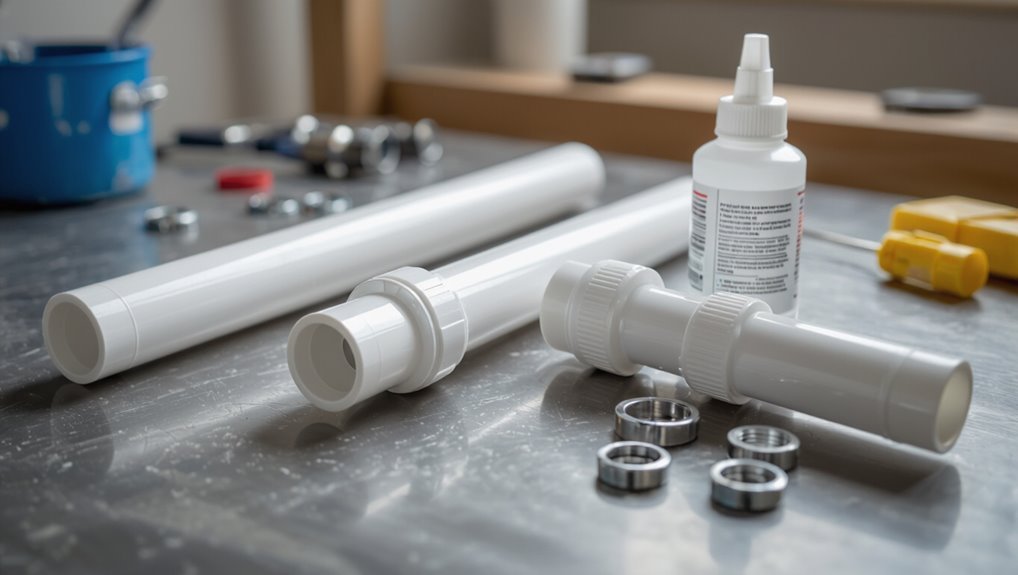
Choosing the Correct Fittings for Your Connection
How should one select fittings that match both function and material? The choice hinges on pipe diameter, pressure rating, chemical exposure and joint type.
Fittings must match the PVC schedule and be rated for the system’s pressure and temperature. Use solvent-weld fittings for permanent joints, threaded or mechanical fittings for serviceable connections, and connector fittings where PVC meets other materials.
Confirm compatibility with potable water if needed and select reinforced or specialty fittings for buried or high-stress runs.
- Match fitting size and schedule to pipe
- Choose solvent-weld for permanent joins
- Use threaded for removable connections
- Select connector fittings for mixed materials
- Pick pressure-rated fittings for system demand
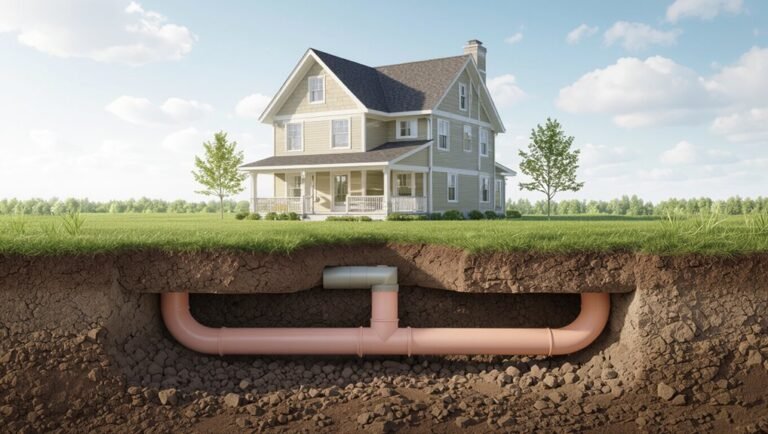
Tools You’ll Need Before You Start
Before beginning the connection, the necessary hand tools—pipe cutter, deburring tool, and adjustable wrench—should be assembled.
The correct adhesives and solvents for the PVC type must be on hand and used according to manufacturer instructions.
Appropriate safety gear, such as gloves and eye protection, is required to prevent injury and chemical exposure.
Essential Hand Tools
A basic set of hand tools makes PVC work faster and more reliable: a PVC cutter or fine-tooth saw for clean cuts, a deburring tool or utility knife to remove burrs, a measuring tape and marker for accurate lengths, and slip-joint pliers or a strap wrench to hold fittings without damage.
Essential tools guarantee straight cuts, smooth edges, and secure assemblies. A small level checks alignment; a ratcheting box cutter speeds scoring; masking tape holds pieces during dry fits; a file refines tight fits; and a work glove protects hands.
Proper hand tools reduce mistakes and save time on each joint.
- PVC cutter
- Deburring tool or utility knife
- Measuring tape and marker
- Slip-joint pliers or strap wrench
- Small level
Adhesives And Solvents
Select appropriate adhesives and solvents to guarantee strong, lasting PVC joints and safe work conditions.
The guide recommends PVC cement formulated for the pipe schedule (DWV, schedule 40, CPVC when applicable) and matching primer where local code requires it.
Choose a medium-bodied cement for general plumbing; use fast-setting formulations for small-diameter runs and heavy-bodied cements for larger fittings.
Confirm compatibility markings on cans and check shelf life.
Include a small applicator brush or dauber, and have clean, lint-free rags to remove excess.
Store products upright, capped, and away from heat or open flames per manufacturer instructions.
Safety Gear Essentials
Several essential pieces of personal protective equipment (PPE) and preparatory tools help guarantee safe handling of PVC, adhesives, and solvents: chemical-resistant gloves, eye protection, a respirator or mask rated for organic vapors if working in enclosed spaces, long sleeves, and work boots.
Practitioners should also have a well-ventilated workspace, proper lighting, and a sturdy work surface. Inspect gear before use and replace damaged items. Keep a fire extinguisher nearby when solvent use creates flammable vapors. Store adhesives closed and upright. Follow manufacturer safety data sheets and local regulations to minimize exposure and accidents.
- Chemical-resistant gloves
- Safety goggles or face shield
- Respirator rated for organic vapors
- Long-sleeve clothing and work boots
- Fire extinguisher (Class B or ABC)
Safety Steps and Workspace Prep
Before beginning work, confirm that the workspace is well-ventilated, clean, and free of trip hazards so cutting, solvent welding, and primer fumes do not endanger anyone.
The operator should isolate the work area, post warnings, and restrict access to nonessential persons.
Verify adequate lighting and a stable, level surface for cutting and assembly.
Arrange tools and materials within easy reach to avoid awkward movements.
Keep a fire extinguisher and first-aid kit nearby.
Protect surrounding surfaces with drop cloths and mask nearby vents or openings.
Dispose of solvent-soaked rags in a sealed metal container to prevent unplanned combustion.
Measure and Mark PVC for a Clean Fit
Accurate measurement and clear marking are essential to achieve a snug, leak-free connection when fitting PVC pipe. Using a tape measure, square, and a fine-tip marker, the installer notes cut lengths and accounts for socket depths and fitting insertion allowances.
The installer verifies run lengths, marks reference lines for alignment, and transfers dimensions to each pipe end. Marks indicate how far each piece will enter a fitting, and additional layout lines help maintain consistent orientation for elbows and tees. Measurements are double-checked before any cutting to prevent waste and misalignment.
- Measure twice, mark once
- Note socket depth per fitting
- Mark insertion line
- Use a square for perpendicular marks
- Label each piece
Cut PVC Pipe Straight Every Time
A clear, square mark at the cutting line guarantees the blade meets the pipe at the correct angle.
A guide clamp holds the pipe steady and aligns the saw for a straight, repeatable cut.
Together, these steps minimize burrs and the need for excessive sanding.
Squarely Mark the Cut
Squarely marking the cut guarantees the pipe seats correctly in fittings and prevents leaks caused by uneven edges. The installer measures, aligns a square tool or combination square, and scribes a clear line around the circumference. A visible, consistent mark guides the saw for a perpendicular cut, reducing wobble and uneven ends.
Marking also shows orientation for later alignment during dry-fitting. Clean, thin lines avoid ambiguity while contrasting with pipe color aids visibility.
- Use a fine-tip marker or pencil for a precise line
- Rotate the pipe to keep the mark continuous
- Mark both ends if cutting multiple pieces
- Keep the line perpendicular to the axis
- Verify measurements before marking
Use A Guide Clamp
Clamping a guide to the pipe guarantees each cut runs perfectly straight, eliminating wobble and misalignment when sawing.
A guide clamp—adjustable, low-profile—locks over the marked line and seats against the pipe, converting freehand cuts into controlled passes. The installer aligns the guide with the mark, tightens securely without crushing, then uses a fine-tooth saw or tubing cutter along the guide’s edge.
Periodically check the clamp’s position to prevent drift. For repeat cuts, set stops or use a miter box with clamp attachment.
Clean burrs after cutting to verify proper fit and reliable joints.
Deburr and Chamfer Cut Pipe Ends
Remove sharp edges and internal burrs from the cut PVC to guarantee a proper fit and reliable solvent welds. The technician uses a deburring tool or utility knife to remove raised plastic and a file or sandpaper to smooth the outer edge.
Chamfer the pipe end at a shallow angle to ease insertion and prevent pushing joint cement into the bore. Clean dust and shavings before priming. Proper deburring prevents misalignment, improves adhesive contact, and extends joint life.
- Use a rotary deburring tool for speed
- Trim internal burs with a reamer
- File outer bevel to 15–30 degrees
- Wipe away debris
- Inspect for cracks
Dry‑Fit Pieces to Check Alignment First
Before applying any primer or cement, the technician dry-fits all PVC pieces to verify alignment, fit, and orientation.
Sections are assembled without adhesive to confirm lengths, angles, and clearance around fixtures and supports. Joints slide easily and sockets accept pipe to the proper depth; any mismatch is addressed by recutting or using an appropriate coupling.
Threaded adapters and fittings are tested for correct engagement. The layout is checked against the plan to guarantee slopes for drainage and accessibility for future maintenance.
Once satisfied, the technician marks reference lines on pipe and fitting to preserve orientation during final assembly with solvent.
When to Use Primer: PVC vs. CPVC
The next section explains when primer is required and how requirements differ between PVC and CPVC.
It notes common exceptions and acceptable alternatives where codes or materials allow.
Readers are guided to check local code and manufacturer instructions before omitting primer.
When Primer Is Required
Many plumbing codes and manufacturers require purple primer for PVC water and drainage systems but not always for CPVC or certain press-fit and solventless fittings; the distinction depends on pipe material, system pressure, temperature, and local regulations.
The primer cleans and softens PVC to guarantee a reliable solvent weld; inspectors often expect visible purple application on buried or exposed connections.
CPVC sometimes omits primer per manufacturer instructions. Press-fit and mechanical systems eliminate solvent use.
Always consult local code and product instructions before proceeding to avoid failed joints or denied inspections.
- Primer recommended for pressure-rated PVC potable systems
- Required by some codes for DWV PVC
- CPVC may follow manufacturer guidance
- Mechanical fittings often primerless
- Inspectors look for visible priming evidence
Differences Between PVC And CPVC
A clear material distinction separates PVC and CPVC: PVC (polyvinyl chloride) is formulated for cold-water and drain applications, while CPVC (chlorinated polyvinyl chloride) withstands higher temperatures and is commonly specified for hot-water pressure systems.
The solvent-welding process is similar, but CPVC’s altered chemistry requires compatible cement and often stronger joint preparation.
Code and manufacturer instructions determine primer use for each material; some jurisdictions mandate primer for pressure systems, others allow primeless cements listed for the application.
Installers should match pipe, fittings, primer (if required), and cement by material type and designated service temperature to guarantee reliable, code-compliant joints.
Primer Alternatives And Exceptions
Although primers are standard practice for solvent-welded plastic pipe, exceptions and approved alternatives exist depending on material, local code, and listed cement.
Installers must know when primer is required for PVC or CPVC and when primerless systems are permitted.
Guidance varies: many jurisdictions require primer for pressure systems and CPVC; some UPC/IPC codes allow listed primerless cements on certain PVC sizes and schedule types.
Manufacturers’ listings and local amendments govern acceptable practice.
Where primer is omitted, use only approved primerless cements and follow manufacturer instructions and code references to guarantee joint integrity.
- CPVC: primer usually required for potable hot water
- PVC pressure lines: primer commonly mandated
- Primerless cements: use listed products only
- Local code: overrides manufacturer claims
- When uncertain: consult authority having jurisdiction
How to Apply Solvent Cement Correctly
Begin by cleaning and dry-fitting the parts to guarantee proper alignment before any cement is applied.
The installer then applies primer if required, letting it dry briefly.
Solvent cement is stirred, not shaken, and applied with an appropriate applicator: a dauber for small fittings, a brush for larger surfaces.
Coat the pipe end and fitting socket evenly, ensuring full coverage without pooling.
Immediately assemble with a quarter-turn twist to distribute cement and align parts.
Hold or brace per manufacturer cure time to prevent stress.
Wipe excess cement, observe recommended ventilation, and allow full cure before testing or pressurizing the joint.
Join Plain‑End PVC With a Solvent Weld
To join plain‑end PVC with a solvent weld, the installer dry‑fits, marks alignment, and prepares surfaces by cleaning and priming where required.
The installer applies a liberal, even coat of cement to the pipe end and inside the fitting, then immediately inserts the pipe fully while twisting a quarter turn to distribute cement.
Alignment marks are checked and held for the specified set time. Excess cement is wiped away. Allow full cure before pressure testing per manufacturer instructions.
- Pipe and fitting surfaces clean, dry, and primed if needed
- Apply cement to both surfaces
- Insert and twist quarter turn
- Hold to set time
- Wipe excess and cure before testing
Connect PVC With Threaded Fittings
After solvent-weld joints are described, attention turns to threaded fittings, which provide a removable connection for short runs, valves, and equipment attachments. Threaded PVC requires matching male and female threads, clean cut ends, and PTFE tape or pipe thread sealant. Hand-tighten then quarter- to half-turn with a wrench; avoid over-torquing to prevent cracking. Use thread adapters for changes to metal or different plastics. Inspect for leaks under pressure and re-tighten or reseal if needed. Threaded fittings suit portable or serviceable sections but are not recommended for buried, high‑stress, or permanent long runs.
| Feel | Sight | Sound |
|---|---|---|
| Relief | Clean threads | Click |
| Confidence | Neat seals | Tighten |
| Caution | Match parts | Leak test |
| Pride | Proper fit | Quiet system |
| Frustration avoided | Smooth flow | Satisfied |
Use PVC Couplers for Repairs and Extensions
A PVC coupler provides a simple, reliable way to repair a broken section or extend an existing run by joining two plain-ended pipes of the same diameter. The coupler slips over clean, cut pipe ends; alignment is checked, and solvent-weld or push-fit types secure the connection.
Proper pipe preparation—square cuts, deburring, and cleaning—ensures a tight joint. Couplers suit straight repairs, mid-run splices, and temporary extensions. Selection depends on pressure rating and pipe schedule; size match is critical.
Installation is quick, minimizes fittings, and preserves flow characteristics when executed correctly.
- Cut damaged section squarely
- Deburr and clean ends
- Test fit before final assembly
- Use matching diameter coupler
- Confirm pressure rating
Glue PVC Elbows and Tees Without Leaks
Joining elbows and tees requires the same careful pipe preparation used with couplers—square cuts, deburring, and clean surfaces—but adds attention to socket depth and alignment to prevent leaks.
Mark insertion depth on the pipe, apply primer to both pipe and fitting, then a uniform layer of PVC cement. Insert pipe fully with a quarter-turn twist to spread cement and guarantee full contact.
Hold parts steady for the manufacturer’s set time; support until cure. Check joints visually for gaps or excess cement.
After curing, pressure-test the assembly at low pressure first, then normal operating pressure to confirm watertightness.
Install PVC Adapters to Metal and PEX
Install PVC adapters to metal and PEX using fittings rated for the specific materials and system pressure, ensuring proper conversion between dissimilar pipes.
The installer selects threaded or compression adapters for metal, and crimp, clamp, or push-fit adapters for PEX. Surfaces are cleaned, threads sealed with tape or compound, and PEX connections secured per manufacturer torque or crimp specifications.
Pressure-tested connections reveal leaks before insulation. Changeover joints are supported to prevent stress on fittings.
- Choose adapter type compatible with pipe material and pressure rating
- Prepare and deburr pipe ends
- Apply thread sealant or use proper crimp rings
- Support and align changeover joints
- Perform low-pressure leak test
Join Multiple Pipes for Long Runs
Plan pipe runs so sections join with minimal fittings and consistent flow characteristics.
For long runs, align pipe lengths to reduce joints and use solvent-weld couplings rated for the system pressure.
Batch-cut and deburr pieces, dry-fit assemblies, mark orientation, then apply primer and cement evenly within working time.
Incorporate expansion allowances and two-degree sloping for drainage where required.
Use support hangers at recommended intervals to prevent sagging and stress at joints.
Pressure-test the completed run before insulation or burial.
Document joint locations and materials for future maintenance and comply with local code throughout the process.
Cut Out and Replace a Damaged Section
Cut out the damaged section by first isolating and depressurizing the line. Then measure and mark a replacement length that provides clean square cuts on sound pipe.
The damaged portion is removed with a pipe cutter or saw; deburr and chamfer ends. Dry-fit replacement piece with appropriate solvent-weld fittings or slip couplings, ensuring alignment and proper insert depth.
Clean and primer both mating surfaces, apply PVC cement, assemble quickly and hold until set. Restore pressure and inspect for leaks.
- Measure twice, cut once for accurate fit
- Use a square cut for full sealing
- Remove burrs to prevent misfit
- Apply primer evenly
- Test under normal pressure before finishing
Use Mechanical Couplings for Faster Repairs
After removing a damaged section and preparing clean, square ends, a mechanical coupling offers a faster alternative to solvent-weld joins for many repair situations.
The technician selects a coupling sized to the pipe, verifies internal sleeves and gaskets are intact, then slides the halves over each pipe end. Compression bolts are tightened evenly to manufacturer torque, creating a watertight seal without curing time.
Mechanical couplings accommodate slight misalignment and different materials when specified. They are ideal for emergency repairs and confined spaces but require correct sizing and periodic inspection to confirm seals remain tight and corrosion has not compromised hardware.
Support and Space PVC Pipe Hangers
When installing PVC pipe, proper hangers and spacing prevent sagging, stress on joints, and noise transmission. The installer selects corrosion-resistant hangers sized to the pipe, supports at manufacturer-recommended intervals, and isolates piping from structural vibration.
Hangers should cradle without deforming pipe, allow slight movement, and avoid overtightening. Vertical risers need clips to restrain downward movement; long horizontal runs require mid-span supports; and hangers near fittings prevent torque on joints.
- Use plastic-coated metal straps for indoor runs
- Space supports per pipe diameter guidelines
- Cushion with rubber inserts where metal contacts PVC
- Secure to solid structure, not drywall alone
- Inspect periodically for loosened fasteners
Allow for Thermal Expansion in Outdoor Runs
Outdoor PVC runs must accommodate thermal movement to prevent stress and joint failure.
Install movement joints or expansion couplings and consider forming expansion loops where space allows.
Maintain specified gaps at fixed supports so the pipe can expand and contract freely.
Allow Movement Joints
Several inches of clearance and a few strategically placed movement joints prevent PVC runs from buckling as temperatures change.
The guide notes that movement joints isolate thermal expansion, reduce stress on fittings, and extend service life. Install joints at regular intervals, near fixed supports, and where pipes cross structures. Use flexible couplings rated for outdoor use and secure adjacent pipe with sliding supports to allow axial shift.
- Place joints every 12–20 feet depending on exposure
- Use compression or rubber bellows designed for PVC
- Keep joints accessible for inspection
- Allow 1/4–1/2 inch sliding play at supports
- Avoid rigid clamps at joint locations
Use Expansion Loops
Introduce expansion loops to give long outdoor PVC runs a controlled path for thermal movement, preventing stress at fittings and supports. The writer explains measuring expected expansion, planning gentle S- or U-shaped loops, and spacing loops every few meters where pipe is unsupported. Anchors remain fixed at ends; loops allow movement without twisting joints. Use medium-radius bends, avoid sharp kinks, and secure loops to stable supports to prevent sagging. Regular inspection catches deformation.
| Loop Shape | Typical Spacing | Notes |
|---|---|---|
| S-curve | 3–6 m | Flexible, compact |
| U-curve | 4–8 m | Greater travel |
| Offset | 2–5 m | For obstacles |
| Multiple | As needed | Combine shapes |
Leave Proper Gaps
After planning expansion loops, the installer must also leave deliberate gaps between pipe ends and fixed structures to accommodate linear movement from temperature changes.
Proper spacing prevents stress, joint failure, and misalignment in outdoor runs. Gaps depend on pipe length, temperature range, and pipe diameter; manufacturers’ tables guide exact values.
Protective sleeves or foam pads can be used where pipes pass through walls to maintain clearance. Regular inspection guarantees gaps remain unobstructed and debris-free.
Consider anchoring points to control where movement occurs, preventing unpredictable flexing and reducing wear at fittings and hangers.
- 1/8″ per foot for short runs in cool climates
- greater spacing for long, sun-exposed runs
- use sleeves at wall penetrations
- inspect annually and after storms
- anchor near fittings to control movement
Prevent Sag and Clogs in Horizontal Lines
Proper support and correct slope are essential to prevent sagging and clogs in horizontal PVC lines. The installer should use hangers at recommended intervals, maintain a continuous 1/4 inch per foot fall for drainage, and avoid long unsupported spans. Slight dips collect debris; gentle, consistent grade moves flow. Bedding near fittings and securing joints prevents movement that leads to misalignment. Cleanouts at changes of direction allow access for clearing blockages without disturbing piping.
| Item | Recommendation |
|---|---|
| Hanger spacing | Follow pipe diameter chart |
| Slope | 1/4 in/ft standard |
| Cleanouts | At direction changes |
Test Glued PVC Joints for Leaks
Begin by allowing the solvent-welded joints to cure for the manufacturer’s recommended time before applying pressure or water.
Then perform a controlled pressure or water test to confirm integrity. Observe all fittings and joints, noting any dampness, beads, or softened solvent cement. Document results and isolate sections showing signs of leakage for later attention.
Use only moderate pressure within code limits and avoid rapid thermal or mechanical stresses during testing.
- Close downstream valves and slowly introduce test water or air
- Inspect each joint visually and by touch
- Check nearby fittings and supports
- Record pressure and timing
- Mark any suspect locations
Troubleshoot Common Bonding Failures
Common bonding failures often stem from improper surface preparation, such as dirt, oil, or unremoved burrs that prevent solvent from penetrating the PVC.
Incorrect cement application — too little, too much, or unevenly applied — can also leave joints weak or porous.
Identifying these root causes helps pinpoint corrective steps for reliable re-bonding.
Improper Surface Preparation
Although often overlooked, inadequate surface preparation is a leading cause of PVC bonding failures; residues, oil, dirt, or uneven cut ends prevent solvent cement from chemically fusing the joint, producing weak or leaky connections.
The technician inspects surfaces before assembly, removing burrs, chamfering pipe ends, and cleaning with appropriate solvent to expose fresh PVC. Dirt or grease left in the socket obstructs primer and cement penetration. Proper drying time after cleaning and using clean, lint-free cloths reduce contamination.
Even small irregularities concentrate stress and cause premature joint failure, so consistent preparation techniques are essential for durable bonds.
- Burrs from sawing or scoring
- Oil or grease films
- Dust and dirt in sockets
- Moisture trapped in fittings
- Uncut or irregular pipe ends
Incorrect Cement Application
Apply solvent cement with care: incorrect application—too little, too much, or improperly timed—compromises the fusion between pipe and fitting and is a frequent cause of leaks and weak joints.
The installer should evenly coat the male end and the fitting socket with the appropriate primer and cement, avoiding puddles that prevent full insertion or cause slippage.
Allow the solvent to soften surfaces briefly, then assemble with steady rotation to distribute the adhesive.
Observe recommended working and cure times; moving or pressurizing joints prematurely reduces strength.
Excess cement should be wiped away; rework failed joints by cutting out and rejoining with proper technique.
What to Do If Solvent Cement Drips or Blobs
If solvent cement drips or forms blobs on a PVC joint, the excess should be removed promptly before it cures to prevent weakened bonds, cosmetic flaws, or clogged fittings.
Using a clean rag or paper towel, wipe away fresh drips; for tacky cement, gently peel or roll material off.
For cured blobs, carefully score with a utility knife and scrape with a plastic scraper to avoid scratching pipe.
After removal, re-clean surfaces with a cloth dampened by PVC primer where needed, then reapply cement correctly.
Dispose of solvent-soaked rags safely to prevent ignition hazards.
- Wipe fresh drips immediately
- Peel tacky blobs gently
- Score and scrape cured residue
- Re-prime cleaned surfaces
- Safely discard solvent rags
UV‑Proofing and Painting Exterior PVC Pipe
Before painting, the pipe surface should be wiped clean of dirt, oil, and grease and lightly sanded to promote adhesion.
Exterior-grade, UV-resistant primers and paints formulated for PVC are recommended, with acrylic latex or specialty PVC coatings offering the best durability.
Application should follow manufacturer directions—priming first if required, using thin even coats, and allowing full cure between layers.
Prep And Clean Surface
Preparing the PVC surface begins with removing dirt, grease, and any loose material so primers and coatings can adhere properly. The area is rinsed and allowed to dry; stubborn residues are wiped with a cloth dampened by a mild detergent, then rinsed again.
Light sanding with fine-grit paper scuffs glossy surfaces to promote mechanical adhesion. Any burrs or flashing are removed, and joints are inspected for cracks or imperfections that could impede coating. Final dust removal uses a tack cloth or compressed air before priming.
- Rinse with clean water and air-dry
- Degrease with mild detergent
- Lightly sand glossy spots
- Remove burrs and flashing
- Wipe with tack cloth
Paint Types And Application
With the surface cleaned, dried, and lightly scuffed, the next step is selecting appropriate coatings and applying them to protect exterior PVC from UV degradation and weathering.
Use primers or adhesion-promoting cleaners if recommended by paint manufacturers. Choose exterior-grade acrylic latex or polyurethane paints formulated for plastics; solvent-based paints may cause swelling.
For maximum UV resistance, select paints with UV inhibitors or a dedicated UV-stable topcoat. Apply thin, even coats with a brush, roller, or spray, allowing full drying between coats per label directions. Lightly sand between coats for smoothness.
Inspect periodically and recoat when chalking, fading, or cracking begins.
Join PVC for Pressurized Systems Versus Drain Systems
Many PVC installations require different joining methods depending on whether the line will carry pressurized water or gravity-driven drainage.
The materials, fittings, and techniques differ: solvent-weld connections and pressure-rated fittings are essential for potable or pressurized lines, while larger-diameter, sloped gravity systems use hub-and-spigot or ABS/PVC connector fittings designed for flow and trap integrity.
Installation emphasizes leak resistance and pressure ratings for water lines; drainage focuses on slope, venting, and accessible cleanouts. Proper gasketed joints or primer-and-cement welds are chosen per function to guarantee longevity and safety.
- Pressure-rated sockets and threaded adapters
- Primer and solvent cement for permanent seals
- Mechanical couplings for repair
- Hub gaskets for drainage mains
- Slope and vent considerations
Check Local Code Requirements Before You Start
Before any cutting or gluing begins, the installer should verify local plumbing and building codes, because regulations dictate acceptable materials, joint types, pressure ratings, venting, slope, and permit requirements that affect the entire project.
Code checks identify approved PVC types (e.g., Schedule 40, DWV), solvent cements, primer rules, and allowable fittings. They clarify required pipe sizing, fixture unit calculations, burial depth, freeze protection, and testing procedures.
Local authorities may require permits and inspections; failure risks fines and rework. Consulting municipal codes or a building department prevents noncompliance, guarantees safety, and preserves warranty and resale value.
When to Call a Plumber Instead of DIY
When should a homeowner call a plumber instead of attempting PVC work themselves? A professional is warranted when complexity, risk, or code compliance exceed DIY capability.
Scenarios include concealed mains, gas or pressurized systems, or repeated failures suggesting systemic issues. If permits, inspections, or specialized tools are required, licensed expertise prevents costly mistakes.
Emergency leaks, water damage already occurring, or lack of confidence justify calling a plumber. Below are common triggers to illustrate when to stop and seek professional help:
- Hidden or inaccessible piping behind walls or under slabs
- Involvement of pressurized or gas lines
- Repeated leaks after DIY repairs
- Required permits or inspections
- Ongoing water damage or mold risk
Cost Estimate: Materials and Time Per Connection
Because labor, fittings, and materials vary by joint type and local prices, estimating the cost per PVC connection requires breaking expenses into discrete components: pipe length, fittings (elbows, couplings, tees), primer and solvent cement, any seals or thread tape, and the time to cut, fit, glue, and cure.
Typical material cost ranges from $1 to $10 per connection for basic residential sizes; specialty fittings raise that. Primer and cement add roughly $0.50–$3 per joint when apportioned.
A DIY connection often requires 10–30 minutes active work plus 15–60 minutes cure time; professional labor increases total cost substantially.
Eco‑Friendly Disposal and Recycling Tips
The article now addresses eco-friendly disposal and recycling tips for PVC pipe, focusing on identifying local recycling options and appropriate drop-off facilities.
It also outlines safe disposal methods for damaged or chemically contaminated pipe to prevent environmental harm.
Readers are directed to check municipal regulations and approved waste-handling services before discarding PVC materials.
Local Recycling Options
Many communities offer specific programs or facilities for recycling PVC pipe, so homeowners and contractors should first check local waste-management resources to learn accepted materials and drop-off locations.
Information portals, municipal recycling centers, and building-material reuse stores commonly publish guidelines. Contractors may arrange bulk pickups or bring sorted materials to transfer stations.
Labels, length limits, and contamination rules determine acceptance. Tracking local options reduces landfill volume and supports material recovery networks.
- Municipal recycling centers accepting rigid PVC
- Construction and demolition (C&D) transfer stations
- Building-material reuse or salvage stores
- Scheduled bulky-waste or contractor collection services
- Private recyclers specializing in plastic pipe
Safe Disposal Methods
Proper disposal preserves both safety and the environment, so homeowners and contractors should prioritize reuse, recycling, and responsible waste handling when retiring PVC pipe.
Unused lengths can be cleaned, cut to manageable sizes, and offered to community tool libraries, construction reuse centers, or neighbors.
When recycling is available, separate fittings and remove contaminants; confirm local facilities accept rigid PVC and follow sorting rules.
Contaminated or painted pipe requires disposal at designated construction waste sites or hazardous-waste programs.
Avoid burning PVC due to toxic emissions.
Document disposal for projects and choose suppliers offering take-back or recycling programs to minimize landfill impact.
Common Mistakes DIYers Make and How to Avoid Them
Why do seemingly simple PVC jobs often end with leaks, misalignments, or wasted materials? Common DIY errors stem from rushed prep, improper fit, and misunderstanding adhesives and pressure ratings. Attention to detail prevents rework and failures.
- Cutting unevenly or leaving burrs that prevent proper seating
- Using wrong solvent cement type or insufficient application time
- Forcing joints misaligned instead of re-cutting for correct fit
- Neglecting to deburr and clean surfaces before gluing
- Ignoring pipe size, wall thickness, or pressure/class requirements
Avoidance requires measured cuts, correct materials, and patience during assembly.
Quick Checklist for a Successful PVC Connection
A concise checklist keeps every PVC connection consistent and leak-free by covering measurements, fit, surface prep, adhesive selection, curing time, and pressure verification.
Verify pipe length and chamfer edges; confirm socket depth markings. Dry-fit components to guarantee proper alignment and gap.
Clean and solvent-weld contact areas with approved cleaner; remove dust, grease, and moisture. Apply primer where required, then solvent cement evenly to both surfaces.
Assemble quickly with correct rotation, holding alignment until set. Allow manufacturer-recommended cure time before testing.
Pressurize gradually while inspecting joints for seepage. Document materials and cure times for future reference.
Advanced Tips for Working With Large‑Diameter PVC
Working with large‑diameter PVC requires attention to handling, joining, and support to prevent damage and guarantee longevity.
Proper techniques for moving heavy sections and aligning oversized fittings reduce stress on joints.
Adequate support spacing and secure anchors are essential to maintain alignment and accommodate thermal movement.
Handling Heavy Sections
Lift heavy PVC sections with deliberate technique and proper gear to prevent strains, damage, and alignment problems. The worker assesses weight, plans movements, and uses two‑person lifts or mechanical aids. Supports and slings protect pipe from point loads; padded stands prevent rolling.
Movement is slow and controlled, keeping pipe close to the body and avoiding twisting. When staging long runs, intermediate supports preserve straightness and ease final positioning.
- Two‑person lifts or a hoist reduce individual strain
- Use wide, padded slings to distribute pressure
- Place adjustable stands every few feet for support
- Secure ends to prevent rolling during transport
- Keep pathways clear and communicate movements
Joining Large Fittings
Begin by inspecting mating surfaces and verifying fit tolerances: for large‑diameter PVC, even small gaps or misalignments can compromise seals and joint strength.
Clean and chamfer pipe ends; remove burrs and cleaning solvent residue.
Use primer and heavy‑bodied solvent cement designed for large diameters, applying evenly to socket and spigot.
Align parts squarely and insert with steady, controlled rotation to distribute adhesive.
Hold or brace until initial set; avoid movement during cure.
For gasketed fittings, inspect gaskets for defects and lubricate with manufacturer‑approved lubricant.
Pressure‑test assemblies per code before burying or commissioning to confirm leak‑free joints.
Ensuring Proper Support
After confirming fit and cure of large‑diameter joints, attention shifts to supporting the assembly to prevent sag, stress, and misalignment under load.
The installer assesses span, expected loads, thermal expansion, and burial depth, then selects hangers, saddles, or concrete cradles rated for pipe diameter and fluid weight.
Support spacing follows manufacturer tables; intermediate supports reduce deflection. Fasteners isolate pipe from metal edges to avoid abrasion.
Flexible anchors accommodate movement while maintaining alignment. Regular inspection points are noted for future settlement or joint fatigue.
- Use saddles with vibration pads
- Install mid‑span supports per table
- Provide continuous cradle for burial
- Isolate metal clamps with neoprene
- Allow expansion loops or sliding supports
Conclusion
Successful PVC connections save time and prevent leaks when the right materials and methods are used. For example, a homeowner repairing a garden irrigation line avoided costly landscaper fees by matching schedule 40 pipe with solvent-weld fittings, properly chamfering edges, and allowing full cure time—resulting in a leak-free system through a summer of heavy use. Small, careful choices and correct technique consistently yield durable, professional-like results for DIY plumbing projects.