Stop Water Hammer in Pipes: Simple Fixes Every Homeowner Can Do
Key Takeaway: To stop water hammer in pipes, homeowners can take several simple actions.
- Tighten Loose Pipe Straps: Check and secure any loose straps holding the pipes in place.
- Control Valve Operation: Open and close valves slowly to minimize shock.
- Drain and Refill Lines: Clear trapped air by draining and refilling the pipes.
- Install Air Chambers or Arrestors: Adding or replacing these devices at noisy fixtures can significantly reduce water hammer.
- Adjust Nearby Valves: Partially closing a nearby valve may temporarily lessen surges.
Many of these tasks require only basic hand tools. For those seeking more detailed solutions or long-term upgrades, further steps are available below.
Quick Fixes To Stop Water Hammer Now
Address the problem immediately by identifying simple, temporary measures that reduce or stop the loud banging caused by water hammer.
One effective step is to shut off the main water, drain lines, then reopen to clear trapped air pockets.
Install or reposition water hammer arrestors at high-impact fixtures; small, inexpensive arrestors cushion shock.
Secure loose pipes with straps or clamps to eliminate movement that amplifies noise.
Partially open a valve near the affected area to slow flow when shutting off appliances.
For gas or electric water heaters, reduce inlet pressure briefly.
These measures offer immediate relief until permanent plumbing corrections can be scheduled.
How Water Hammer Sounds And What To Listen For
The plumbing system often produces a sharp knocking sound when water hammer occurs.
Observers should note when the noise happens—after valves close, when pumps stop, or during fixture use—to help pinpoint the source.
Attention to the pitch and duration of the knock can distinguish a loose pipe from pressure surge issues.
Recognize The Knock
A sharp, metallic knocking or a series of rapid thuds in pipes often signals water hammer—audible when valves close suddenly or pumps stop, producing distinct rhythms depending on pipe length and pressure.
The sound can be singular, repeated, or rhythmic; higher-pitched clicks suggest small-diameter piping, while deeper bangs indicate larger mains.
It typically manifests near fixtures, along walls, or inside cabinets; listening during valve operation clarifies source direction.
Consistent timing with taps or appliance cycles links noise to hydraulic shock.
Note intensity, frequency, and location to prioritize fixes and communicate clearly with a plumber if professional help is needed.
Identify When It Happens
When does the noise occur relative to taps, appliance cycles, or valve operation? The sound typically follows rapid shutoff events: faucet closure, washing machine or dishwasher fill valves stopping, or toilet fill valves snapping closed.
Listeners should note whether banging happens immediately after a fixture is turned off or during appliance cycling. It may repeat with each valve action or occur only with specific fixtures.
Observe time of day, simultaneous fixtures, and whether multiple fixtures amplify the effect. Record which devices trigger the noise, how often it happens, and whether it coincides with pressure changes elsewhere in the house plumbing.
Note Pitch And Duration
How loud and how long does the knock last? The observer listens for short, sharp bangs indicating a high-pressure, quick valve closure, or prolonged rumbling that suggests trapped air or resonance. Pitch and duration help locate pipe size, material, and the offending fixture. A metallic, high-pitched clang often means small-diameter metal pipes; a dull thud points to larger, plastic lines or loose supports. Record patterns: single impacts denote isolated events; repeating beats indicate sustained pressure oscillation. Compare sounds room-to-room to triangulate the source before trying simple fixes or calling a professional.
| Sound character | Likely cause |
|---|---|
| Sharp, high pitch | Small metal pipe, fast valve closure |
| Dull, low thud | Large or plastic pipe, loose support |
| Repeating beats | Pressure oscillation, air pocket |
| Prolonged rumble | Resonance, systemic surge |
Why Water Hammer Happens In Home Plumbing
Although sudden changes in water velocity are the immediate cause, water hammer in home plumbing arises from the interaction of moving fluid, confined pipe space, and abrupt valve closures that send pressure waves through the system.
Those pressure surges reflect off fittings, dead-ends, and closed fixtures, producing shock waves that stress pipes and joints.
Pipe material, length, and support spacing affect wave speed and damping. High flow rates and quick-closing valves amplify impacts.
Air pockets, trapped compressible volume, or weak anchoring change how energy dissipates.
Understanding these physical factors guides effective remedies like cushioning devices, anchors, or modified valve operation.
Common Signs Your House Has Water Hammer
What does water hammer look and feel like in a home?
Sudden, loud banging or knocking in pipes when faucets or appliances shut off is the hallmark.
Vibrations travel along walls or floors; fixtures may rattle.
Intermittent thumps occur with quick-closing valves—dishwashers, washing machines, or showers.
Pressure spikes can cause brief jerks in flow, sputtering faucets, or taps that slam shut.
Homeowners sometimes notice metal-on-metal clanks near pipe runs or hear noise only when certain fixtures operate.
Recurrent, predictable noises tied to water use patterns strongly indicate water hammer rather than random plumbing creaks or external sounds.
Risks Of Leaving Water Hammer Unaddressed
Neglecting water hammer invites progressive damage and increasing repair costs.
Repeated pressure spikes stress pipe joints, fittings, and valves, accelerating fatigue and causing leaks. Fast-closing valves and appliances suffer premature wear; seals and washers degrade sooner.
Loose pipes and hangers can loosen further, provoking noisy, vibrating runs and structural harm where pipes contact framing.
Over time, small leaks may evolve into burst pipes, water damage, mold growth, and compromised insulation.
Persistent shocks strain municipal supply connections, meters, and pressure-reducing devices.
Addressing water hammer promptly reduces the likelihood of costly emergency repairs, property damage, and shortened plumbing component lifespans.
How To Safely Recreate The Bang For Diagnosis
To diagnose water hammer, recreate the characteristic bang in a controlled, safe manner so the source and location can be identified. The homeowner closes a quick-acting valve (shower or washing machine) briefly, observes the noise, and notes timing and affected fixtures. Use ear protection and avoid repeated rapid tests to prevent damage. Document which actions produce the loudest impacts and whether sound travels through walls or ceilings. If unsure, enlist a plumber for pressure-safe testing.
| Action | Observation |
|---|---|
| Close valve quickly | Listen for sharp bang |
| Repeat once | Note location and frequency |
| Stop if loud or risky | Call professional |
Where To Check First: Visible Pipes And Valves
Begin inspection at all exposed runs of piping and at visible shutoff and appliance valves, since these locations most often reveal loose mounts, worn straps, or partially closed valves that cause water hammer.
The inspector notes mounting brackets, pipe hangers, and valve handles for play, corrosion, or misalignment. Tightening loose supports, replacing degraded straps, and fully opening or cycling suspect valves often removes noise sources.
Visual checks, gentle manual movement, and listening while an assistant cycles fixtures help localize issues before more invasive fixes. Record locations and visible defects to prioritize repairs or to show a plumber.
- Check hanger spacing and condition
- Inspect valve positions and handles
- Look for pipe-to-structure contact
- Note corrosion, cracks, or loosened straps
How To Test Fast‑Closing Fixtures (Washing Machine, Dishwasher)
How can a homeowner determine whether a washing machine or dishwasher is causing water hammer? The homeowner observes the appliances during fill and drain cycles, noting loud, sharp bangs or thuds timed with valve closures.
With other water off, run one appliance through a short fill cycle; repeated impact noises implicate its solenoid or rapid shutoff. Inspect inlet hoses and valves for secure mounting and minimal slack to reduce momentum.
If available, temporarily run the appliance with a pressure gauge on the supply to watch for sudden spikes. Document which appliance, cycle stage, and frequency before pursuing repairs or installing arrestors.
Testing Faucets And Shower Valve Response
The tester observes single‑handle faucets for abrupt shutoff or catch that could trigger a pressure pulse.
Multi‑valve faucets and shower valves are cycled to compare timing between hot and cold shutoffs.
Any sudden pressure spikes or hammer sounds are noted for further diagnosis.
Check Single-Handle Response
Why does a single-handle faucet or shower valve sometimes cause a loud bang when shut off? A worn cartridge or quick internal closure can abruptly stop water, sending a pressure pulse through rigid piping.
To check response without plumbing dismantling, operate the handle slowly, then briskly, noting noise and vibration. If impact occurs only during rapid closure, internal valve damping or cartridge replacement is likely.
Record which fixtures respond badly and whether hot or cold side differs; this helps diagnose cartridge wear versus supply-side issues.
- Test slow versus fast shutoff
- Note hot/cold difference
- Listen for pipe vibration
- Record affected fixtures
Test Multi-Valve Timing
Start a sequence of tests by opening and closing each valve in the set in controlled steps to observe timing differences and resulting pressure effects.
The inspector notes how paired faucets, shower diverters, and twin-handle assemblies interact when one is moved slightly before another. Time intervals of a second or two can reveal cumulative surges or dampening.
Record which combinations produce vibration, noise, or transient flow loss. Repeat at varied flow rates to simulate real use.
Use these observations to prioritize repairs: replace worn cartridges, adjust stops, or install arrestors where simultaneous operations consistently create harmful pulsations.
Note Sudden Pressure Spikes
Inspectors should watch for sudden pressure spikes when operating individual faucets and shower valves, noting any instant jerks, loud bangs, or brief flow interruptions that occur as handles move through their ranges.
They systematically open and close fixtures, observing sound, vibration, and transient flow changes to localize problem valves. Rapid tests at full and partial openings reveal whether cartridges, washers, or valve seats cause abrupt stoppages.
Recorded observations guide targeted repairs: replace worn cartridges, secure loose pipes, or install arrestors. Consistent documentation prevents missed patterns and supports prioritizing repairs to reduce water hammer risk and prolong plumbing life.
- Note sound type and timing
- Test full and partial openings
- Check neighboring fixtures
- Record and compare runs
How To Locate Loose Pipe Straps And Supports
When diagnosing water hammer, a systematic scan of visible pipe runs quickly reveals loose straps and supports; the inspector should follow the line from fixtures and appliances toward the main, checking every strap for movement and every hanger for missing or degraded cushioning. Visual cues include sagging runs, audible rattles when valves operate, and pipe contact with framing. Access crawlspaces, basements, and attics; shine a light into concealed areas. Note locations and strap types for later repair. Use the table below to record findings efficiently.
| Location | Issue | Accessibility |
|---|---|---|
| Kitchen sink | Rattle | Easy |
| Water heater | Sag | Moderate |
| Bathroom | Contact | Tight |
Tighten Loose Pipe Straps To Stop Water Hammer
A targeted tightening of loose pipe straps and hangers often eliminates the rattling and shock that characterizes water hammer. The technician should move along the identified runs, securing each strap so the pipe is held firmly but not crushed.
Attention is paid to spacing, alignment, and hardware condition. Worn or missing fasteners are replaced, and straps are adjusted to allow thermal expansion while preventing movement.
After work, fixtures are cycled to confirm reduction of banging. Record locations serviced for future inspection.
- Check each strap for corrosion or damage
- Tighten, don’t over-compress, the pipe
- Replace missing or stripped screws
- Test fixtures for remaining noise
Add Cushioning: Install Foam Pipe Insulation
Foam pipe insulation provides a simple cushion that reduces shock when valves close suddenly.
The installer should choose the correct insulation type and diameter to match pipe material and operating temperatures.
Once fitted, insulation must be held firmly in place so pipes cannot shift and transmit impact.
Choose Proper Insulation
Install closed-cell foam sleeves around exposed piping to add cushioning and reduce the sudden pressure spikes that cause water hammer.
One should select insulation with appropriate thickness, durable material, and a snug fit to maximize shock absorption.
Consider temperature range, moisture resistance, and compatibility with pipe material when choosing products. Properly sized sleeves minimize gaps that let pipes strike framing during pressure surges.
- Choose closed-cell foam for water resistance and compressive strength
- Match sleeve inner diameter to pipe outside diameter
- Prefer UV- and mildew-resistant materials in exposed areas
- Replace degraded insulation promptly to maintain effectiveness
Secure Pipes Firmly
Following selection of proper closed-cell sleeves, the next step is to secure pipes so they cannot move and strike framing during pressure surges. Homeowners are advised to fasten insulated pipes with cushioned straps or padded clamps, avoiding tight metal contact. Foam insulation absorbs shock, reduces noise, and fills gaps where pipes pass through joists. Proper spacing of supports every few feet prevents sagging while allowing thermal expansion. Regular inspection guarantees insulation and fasteners remain intact and moisture-free, preserving effectiveness and preventing corrosion.
| Item | Benefit |
|---|---|
| Foam sleeve | Shock absorption |
| Padded clamp | Prevents metal-on-metal |
| Spacing | Supports load |
| Inspection | Maintains performance |
| Sealant | Blocks moisture |
Add Rubber Or Felt Pads To Pipe Clamps
Adding rubber or felt pads to pipe clamps cushions metal-to-metal contact and reduces the shock that causes water hammer. A simple retrofit isolates pipes from hard clamp surfaces, absorbing vibration and lowering noise.
Install pads where clamps grip horizontal runs, bends, and near fixtures; replace worn padding periodically. Selection should match pipe diameter and temperature range; adhesive-backed options ease placement. Properly cushioned clamps complement secure mounting without blocking thermal expansion.
- Choose dense rubber or felt rated for plumbing use
- Cut pads to fit snugly inside clamp saddles
- Clean clamp surfaces before applying adhesive pads
- Inspect and replace pads annually
Adjust Shutoff Valves To Reduce Water Momentum
Partially closing existing shutoff valves near fixtures and appliances slows the sudden rush of water and reduces the momentum that creates water hammer.
Homeowners may turn in-line angle or gate valves slightly until flow softens; small adjustments often stop banging without noticeable pressure loss.
Work on one valve at a time, test the faucet or appliance, and fine-tune to balance performance and suppression.
Use a wrench when handles are stiff, but avoid over-tightening.
Note valve condition: corroded or leaking valves should be replaced rather than forced.
If banging persists after adjustments, proceed to other mitigation measures.
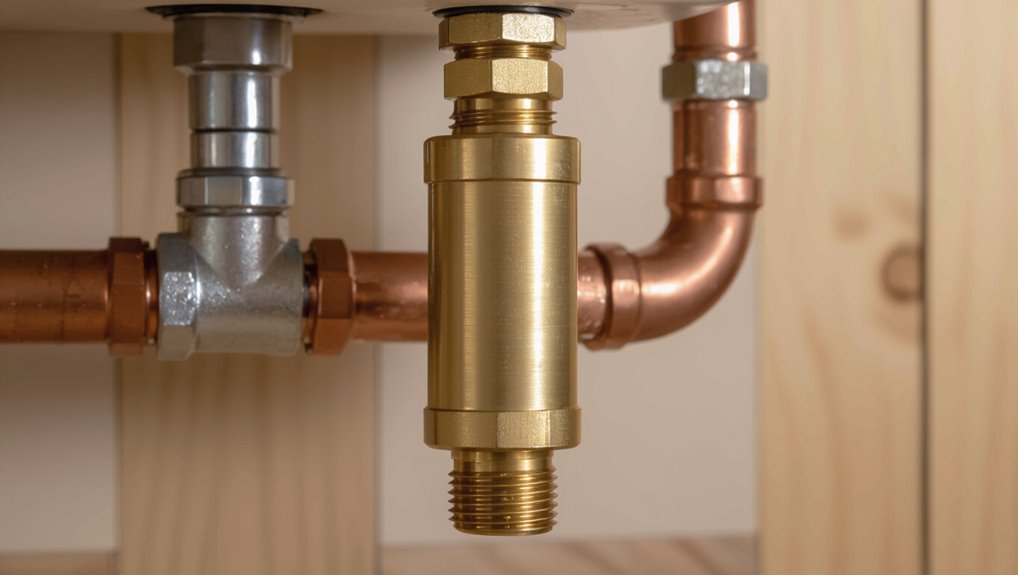
Install Or Replace An Air Chamber (DIY)
If adjusting shutoff valves does not stop the knocking, installing or replacing an air chamber is a straightforward DIY next step. An air chamber cushions pressure surges: a capped vertical pipe near fast-closing valves traps air, absorbing shock.
Over time chambers can waterlog and lose effectiveness; replacement restores the pocket. Typical steps include shutting water, cutting pipe, fitting a new capped riser sized to the system, and testing for leaks.
Safety includes draining local lines and using proper fittings.
- Verify local codes and pressure ratings before work
- Use compatible pipe materials and solvent or threaded fittings
- Confirm the chamber is vertical and unobstructed
- Test carefully after restoring water
When To Drain And Refill Air Chambers Safely
Routine maintenance dictates draining and refilling air chambers only when signs of waterlogging appear or after system work that introduces trapped water; performing the task promptly prevents recurring water hammer and protects fittings.
Homeowners should inspect for banging noises, reduced cushioning at quick‑closing valves, or visible leaks before acting.
Shut off local supply, relieve pressure at a downstream faucet, and open the chamber cap slowly to vent trapped air and drain water into a bucket.
Refill by restoring supply and cycling the valve to allow air pockets to reform.
If corrosion, inaccessible chambers, or persistent hammer persist, consult a plumber for evaluation.
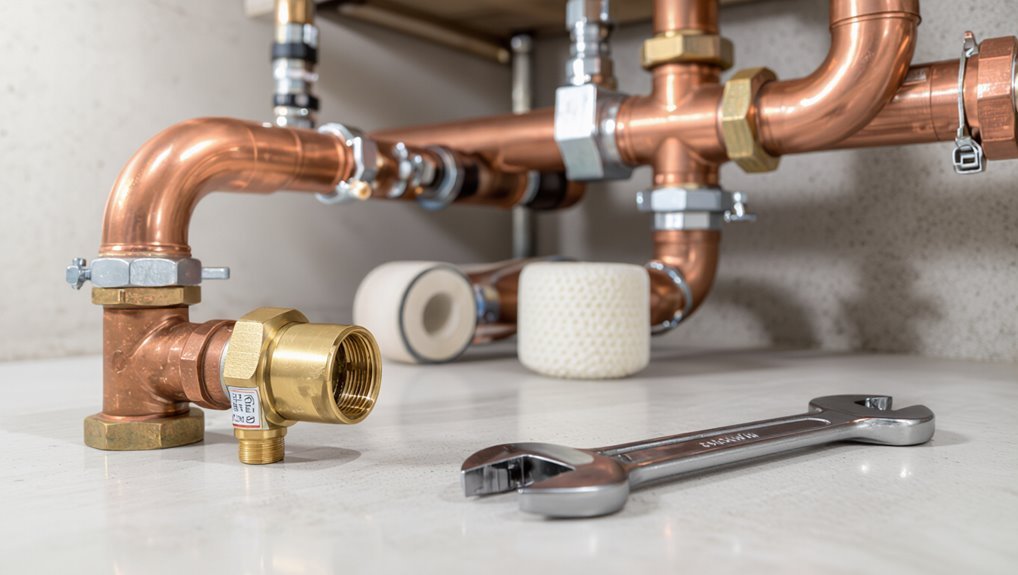
Install A Water Hammer Arrestor (Step‑By‑Step)
After draining and refilling air chambers has failed to stop intermittent banging or when chambers are corroded or inaccessible, a water hammer arrestor can be installed to provide reliable long‑term protection.
The procedure: shut off supply, relieve pressure, locate accessible pipe near the noisy valve, and choose a mounting orientation that keeps the arrestor upright if required.
Cut and deburr the pipe, fit the arrestor using compatible fittings or adapters, then tighten and check for leaks.
Restore pressure slowly and operate fixtures to confirm silence. If leaks or noise persist, recheck connections or consult a plumber.
- Shut off and depressurize
- Cut, deburr, fit
- Tighten and test
- Restore and verify
Choosing The Right Type And Size Of Arrestor
Selection starts with matching the arrestor type to the system’s flow characteristics and pressure.
Next, sizing the unit to the pipe diameter and expected surge volume guarantees effective absorption.
Finally, mounting orientation and location are checked to maintain operability and prevent air or water trapping.
Match Arrestor To Flow
Choosing the correct arrestor requires evaluating the system’s flow characteristics—peak velocity, normal operating flow, and transient surge magnitude—to verify the device can absorb impulses without creating excess pressure drop or cavitation.
The homeowner should match arrestor type (air chamber, piston, or spring-damped) to typical flow patterns and transient energy. Consider materials, mounting orientation, and responsiveness.
Verify compatibility with water quality and temperature. Install where flow direction and access allow inspection. Periodic checks verify continued performance as usage changes.
- Select type by transient profile
- Verify minimal permanent pressure loss
- Confirm material and temperature ratings
- Place for easy inspection
Choose Correct Arrestor Size
Sizing an arrestor correctly guarantees it absorbs surge energy without restricting normal flow or introducing undue pressure loss.
The homeowner evaluates pipe diameter, typical flow rate, and operating pressure to select an arrestor with compatible port size and pressure rating. Manufacturers provide sizing charts correlating flow and pipe schedule to required arrestor volume and damping characteristics; consulting these avoids undersized units that gas-out or oversized units that underperform.
For mixed fixtures, pick the largest expected flow scenario. Verify inlet/outlet thread or compression fittings match existing plumbing to prevent adapters that alter internal flow and performance.
Consider Mounting Orientation
Proper mounting orientation affects an arrestor’s ability to dampen water hammer and maintain long-term reliability. The unit must be installed upright or as manufacturer specifies so the internal air cushion or piston operates correctly.
Incorrect positioning can trap moisture, cause valve sticking, or reduce cushioning effectiveness. Secure mounting near the source of shock, with accessible service clearance, preserves performance. When retrofitting, match orientation guidance to pipe layout and local codes.
- Install vertically if piston-style; observe arrow direction.
- Avoid horizontal mounting unless designed for it.
- Keep clear access for inspection and replacement.
- Anchor solidly to prevent vibration transfer.
Best Locations To Install Arrestors In A Home System
When selecting locations for water hammer arrestors, priority should be given to points where fast-closing valves create sudden flow stoppage—such as washing machines, dishwashers, and solenoid-controlled outdoor hose bibs—because arrestors work best when placed as close as possible to the offending fixture to absorb the pressure spike before it travels through the system.
Additional ideal locations include toilets (especially those with fill valves that close quickly), ice makers, and instant hot-water dispensers.
Place arrestors at branch lines near fixtures and at the ends of long runs or dead-ends.
In multi-story homes, install near fixtures on upper floors to prevent transmitted shock.
Use A Pressure‑Reducing Valve To Cut Surge Risk
Alongside targeted arrestors at fast-closing fixtures, reducing overall system pressure lowers the energy available for any water hammer event. A pressure‑reducing valve (PRV) installed where the supply enters the home limits peak pressure, decreasing shock intensity and protecting pipes, fittings, and appliances.
Selection favors a rated residential model with a built‑in gauge and isolation valves for maintenance. Professional installation guarantees correct siting and avoids creating new flow restrictions. Periodic inspection and occasional adjustment maintain effectiveness without overcompensation.
- Install at main supply entry for whole‑house protection
- Choose a durable, adjustable PRV with gauge
- Include shutoff valves for servicing
- Inspect annually for performance
How To Check And Set House Water Pressure Correctly
Before adjusting any valves, a quick pressure check establishes a baseline and reveals whether the system requires reduction or only minor tuning.
A homeowner should attach a simple pressure gauge to an outdoor hose bib or washing machine supply, open the valve fully, and record static pressure. Typical household pressure ranges 40–60 psi; readings above 60 suggest adjustment.
To set pressure, locate the pressure‑reducing valve near the main shutoff, loosen the locknut, and turn the adjustment screw clockwise to increase or counterclockwise to decrease pressure in small increments.
Recheck pressure after each change and secure the locknut when finished.
Troubleshooting High Incoming Water Pressure From The Street
To address water hammer caused by high mains pressure, the incoming pressure at the property connection should be measured with a gauge to confirm if it exceeds recommended limits.
If pressure from the street is too high, installing a pressure-reducing valve at the service entrance is the standard corrective step.
Proper PRV selection and correct installation will protect the house plumbing and reduce shock from abrupt valve closures.
Check Incoming Pressure
If water hammer recurs despite internal fixes, the incoming street pressure should be measured and evaluated for excessive levels that can transmit shock into the home’s piping.
A quick pressure check at the service line reveals whether municipal supply or a malfunctioning regulator is to blame. Readings above 80 psi commonly worsen hammer and stress fittings.
Document multiple readings at different times to account for supply variation. If high pressure is confirmed, contact the utility or a licensed plumber for next steps. Safety and code compliance guide any alterations; homeowners should avoid adjusting the street-side equipment themselves.
- Measure pressure at the service valve
- Log readings over a day
- Compare to local code limits
- Notify the water utility or plumber
Pressure-Reducing Valve Installation
When high incoming pressure is confirmed and the utility cannot or will not lower supply pressure, installing a pressure-reducing valve (PRV) at the service entrance is the standard corrective measure.
A PRV reduces mains pressure to a safe, stable level for the home, preventing water hammer, fixture damage, and pipe stress. Selection considers flow demand, pressure range, and commercial-grade durability.
Installation is best done at the main shutoff with adequate bypass and isolation valves for maintenance. Proper adjustment and occasional inspection guarantee consistent performance.
If symptoms persist after installation, check for downstream issues, incorrect sizing, or failing internal components.
Fixing Fast‑Closing Solenoids On Appliances
Because many household appliances use solenoid valves that snap shut, a sudden stop in flow can create the pressure surge known as water hammer; addressing fast-closing solenoids requires identifying whether the valve itself, its wiring/controls, or the system’s pressure dynamics are causing the shock.
A homeowner should inspect the solenoid for wear, test electrical timing, and observe operation under typical loads.
Simple remedies often suffice: replace worn coils or plungers, add a slow‑close device or orifice, install a small water hammer arrestor near the appliance, or adjust upstream pressure with a regulator.
Professional help is advised for complex electrical or plumbing changes.
- Inspect valve components for wear
- Test and adjust electrical timing
- Fit slow‑close orifice or device
- Add localized arrestor or regulator
When Appliance Maintenance Stops The Banging
Routine appliance upkeep can prevent water hammer by ensuring washing machine hoses are securely clamped and free of wear.
Regular inspection and replacement of dishwasher inlet valves can stop sudden shutoffs that cause banging.
Addressing these items reduces shock waves in the plumbing and lowers the chance of pipe damage.
Secure Washing Machine Hoses
Secure washing machine hoses firmly to the water supply and appliance to eliminate movement that transmits pressure surges into the plumbing.
The homeowner inspects hose condition, replacing cracked or bulging rubber with braided stainless steel to reduce vibration and sudden closure shock.
Properly route hoses to avoid kinks and secure with clamps or straps to nearby studs or brackets.
Tighten fittings to prevent leaks without over-torquing.
Regular checks after cycles guarantee connections remain snug.
These measures minimize the mechanical impulse that contributes to water hammer, protecting valves and pipe supports while extending appliance and plumbing lifespan.
- Inspect hoses regularly
- Replace aging rubber hoses
- Secure with straps or clamps
- Tighten fittings properly
Maintain Dishwasher Valves
After checking and securing washing machine hoses, attention should turn to the dishwasher’s inlet and drain valves, which are common sources of water hammer when they start to stick or slam shut. The homeowner inspects valves for corrosion, debris, and worn diaphragms, cleans screens, and replaces faulty solenoids. Quick fixes like tightening connections and installing water hammer arrestors at appliance lines reduce shock. Regular maintenance prevents noisy slamming and extends appliance life. Professional service is recommended for internal valve replacement or complex electrical issues.
| Task | Frequency | Tools |
|---|---|---|
| Inspect valves | Quarterly | Flashlight |
| Clean screens | Biannually | Pliers |
| Tighten fittings | As needed | Wrench |
| Replace solenoid | When faulty | Multimeter |
| Install arrestor | One-time | Arrestor kit |
Pipe Re‑Routing And Layout Changes That Reduce Hammer
Reconfiguring pipe runs and altering valve placement can greatly reduce water hammer by minimizing rapid momentum changes and pressure wave reflections.
Strategic rerouting shortens long straight runs, avoids abrupt direction changes, and spaces valves to prevent simultaneous closure surges. Placing shutoff valves where flow inertia is lower reduces shock.
Routing away from anchor points that amplify vibration and using gradual bends instead of sharp elbows lessens reflected waves. Careful planning balances accessibility and hydraulic performance, often solving hammer without added devices.
- Shorten long straight runs to reduce stored momentum
- Replace sharp elbows with gentler bends
- Space valves to avoid simultaneous closures
- Move valves to lower-inertia locations
When To Add Vertical Runs Or Loops For Air Cushions
Understanding when to add vertical runs or loops for air cushions hinges on recognizing flow conditions and system geometry that trap or concentrate compressible pockets to absorb pressure surges.
Vertical sections or looped rises placed near quick‑closing valves, long horizontal runs, or branch takeoffs create intentional pockets of air that compress instead of transmitting shock.
Installations should be high enough to retain air and sized to match expected surge volume. Avoid low points where air will migrate and cause noise or flow restriction.
Periodic inspection guarantees air remains; drained or waterlogged cushions lose effectiveness and require recharging or design adjustment.
When To Call A Plumber (Don’t Ignore These Signs)
If unusual noises, repeated pressure spikes, persistent leaks, or visible pipe damage occur despite basic troubleshooting, a licensed plumber should be contacted promptly.
Professional assessment prevents escalating damage, identifies hidden failures, and guarantees safe repairs. Homeowners should not delay when signs suggest systemic issues or safety concerns.
- Sudden loss of water pressure after hammering sounds
- Recurrent leaks at fittings or joints after tightening
- Discolored water or rusty stains near pipes
- Cracks, bulging, or corrosion visible on pipe surfaces
Timely intervention reduces repair costs and guards against structural or mold problems.
What A Pro Will Do Differently Than A DIY Fix
A professional brings diagnostic tools, code knowledge, and practical experience that go beyond common DIY fixes: they can measure pressure transients, locate and repair hidden failures, and implement permanent solutions such as installing or sizing arrestors, adjusting system pressure regulators, or reworking pipe supports to eliminate water hammer rather than masking symptoms.
A pro performs systematic testing, identifies root causes (pipe layout, valve wear, thermal expansion), and applies code-compliant materials and methods. They secure permits when required, prevent collateral damage, and document repairs.
Specialized skills reduce recurrence risk and protect warranties and insurance coverage, offering a durable, verifiable outcome.
Typical Costs: DIY Parts Versus Professional Repairs
After outlining what a professional brings to a water-hammer repair, cost differences between DIY and pro approaches become a key consideration for owners weighing options.
DIY parts—cushioning clips, arrestors, basic valves—often run $10–$80; tools may add one-time expense.
Professional service typically costs $150–$600, reflecting labor, travel, diagnostics, and warranty.
Complex plumbing, hidden access, or systemic issues push prices higher.
Homeowners should compare itemized estimates, factor in time, skill level, and risk of damage.
Budgeting for a pro can prevent repeated fixes; choosing DIY saves money when scope is simple and confidence is high.
- Typical DIY parts: $10–$80
- Pro service: $150–$600
- Hidden costs: extra parts, access
- Decision factors: time, skill, warranty
Preventive Maintenance Schedule To Avoid Recurrence
A simple preventive maintenance schedule helps prevent water hammer from returning.
It calls for monthly inspection of valve operation, periodic testing of water hammer arrestors, and quarterly flushing to remove sediment.
Adherence to these steps reduces pressure surges and extends system service life.
Inspect Valves Monthly
Routine valve inspections form the backbone of a preventive maintenance schedule to prevent recurring water hammer.
Monthly checks guarantee valves operate smoothly, packing and stems remain tight, and minor leaks or corrosion are caught early.
Documentation of findings guides timely repairs or replacements and helps spot trends indicating system stress.
A clear checklist speeds inspections and supports homeowner safety by recommending shutoff procedures when needed.
Consistent attention reduces sudden closures that trigger pressure spikes and prolongs valve life, lowering the chance of noisy, damaging water hammer events.
- Visually inspect for corrosion, leaks, and wear
- Operate each valve fully to test movement
- Tighten packing nuts and lubricate stems as needed
- Record condition, actions, and next inspection date
Test Water Hammer Arrestors
Following valve inspections, attention should turn to testing water hammer arrestors to confirm they are functioning and properly sized for the system.
A technician or homeowner should activate fixtures one at a time—particularly fast-closing valves like dishwasher and washing machine inlets—listening for knocking and feeling for excessive vibration.
Inspectors should check arrestor orientation, mounting firmness, and signs of corrosion or gas-charge loss in piston or diaphragm types.
Replace undersized, waterlogged, or damaged units with models matched to line pressure and flow.
Record test dates and actions in a maintenance log and schedule retests annually or after any plumbing modifications.
Flush Sediment Quarterly
Quarterly flushing of sediment from traps, strainers, and pressure-reducing valves prevents buildup that can contribute to water hammer and flow restriction.
A homeowner schedules a quarterly rinse to clear debris, improving valve response and reducing pressure spikes. Simple tools—bucket, wrench, gentle hose—are used; service records note dates and observations.
If sediment returns rapidly, the system is inspected for corrosion or supply issues. Regular flushing complements checks of arrestors and supports long-term system stability, lowering repair frequency and preserving flow efficiency.
- Clear traps and strainers on a fixed quarterly schedule
- Flush PRVs gently to remove settled particles
- Record outcomes and any unusual debris
- Seek inspection if sediment recurs rapidly
Seasonal Checks: Air Chambers, Straps, And Pressure Tests
When seasons change, homeowners should inspect air chambers, pipe straps, and system pressure to prevent water hammer and related damage.
Air chambers can lose trapped air; tapping or draining a short vertical capped stub may restore cushioning, or briefly opening faucets can recharge air pockets.
Check straps and hangers for looseness, corrosion, or shifted insulation; secure supports to reduce movement when valves close.
Measure static and dynamic pressure with a gauge at an outlet; note readings above 60 psi and consider pressure-reducing actions.
Record findings and repeat seasonally to catch gradual deterioration before pipes vibrate or fittings fail.
Upgrades That Eliminate Water Hammer Long‑Term
Consider permanent fixes that remove the shock at its source rather than masking symptoms. Long‑term solutions address pressure dynamics and valve behavior, providing reliable silence and reduced wear.
Professional installation is often required but yields durable results that protect plumbing and appliances. Key upgrades target air absorption, pressure control, and flow stabilization for lasting effectiveness.
- Install water hammer arrestors sized for specific fixtures and pressure conditions.
- Replace worn fast‑acting solenoid or ball valves with slow‑closing or cushioned versions.
- Fit a pressure‑reducing valve to lower and stabilize incoming pressure.
- Add a variable‑speed pump or soft‑start control where applicable.
Safety Tips And Tools For DIY Plumbing Fixes
After completing upgrades to eliminate water hammer, a homeowner who opts for DIY adjustments should prioritize safety and the right tools before touching pipes or valves.
The article recommends shutting off water, draining lines, and relieving pressure; wearing gloves and eye protection; and ensuring electrical circuits near work areas are off.
Essential tools include adjustable wrenches, pipe wrenches, Teflon tape, a basin wrench, tubing cutter, and a pressure gauge. A flashlight and bucket help manage leaks.
If corrosion, soldering, or gas lines are involved, or if uncertainty exists, professional assistance is advised to prevent injury and property damage.
Common Mistakes Homeowners Make Fixing Water Hammer
Homeowners often use inappropriate pipe supports that allow movement and worsen water hammer.
Many ignore air chambers or assume they are irrelevant, letting trapped air dissipate and removing a simple shock absorber.
Over-tightening valves is a common mistake that restricts flow and increases pressure spikes.
Using Wrong Pipe Supports
When pipe supports are too rigid, improperly spaced, or made from incompatible materials, they can transfer shock and amplify water hammer rather than dampen it; incorrect clamps or hard metal brackets hold pipes too tightly, creating stress points where pressure surges produce loud banging and accelerated wear.
A detached observer notes that choosing flexible hangers, proper spacing, and vibration-isolating pads reduces transmitted force. Retrofitting should prioritize cushioning, corrosion-compatible materials, and secure but not constraining attachment. Improperly supported pipes also fatigue fittings and solder joints over time.
- Use rubber-lined clamps or cushioned straps
- Maintain manufacturer spacing guidelines
- Avoid metal-on-metal contact
- Match support materials to pipe type
Ignoring Air Chambers
Ignoring air chambers is a common mistake that undermines attempts to fix water hammer: many assume the problem is purely mechanical and replace valves or add supports without checking whether built-in air cushions are waterlogged or missing.
Homeowners often overlook simple vertical stubs near fixtures designed to trap air; over time they fill with water and lose cushioning effect.
Before costly interventions, these chambers should be drained or replaced with mechanical arrestors.
Professionals also note that retrofitting arrestors at strategic points restores protection more reliably than relying on old, degraded chambers.
Proper diagnosis prevents repeated repairs and reduces noise and pipe stress.
Over-Tightening Valves
Although trying to stop a leak by tightening a valve may seem logical, over-tightening frequently creates new problems: warped seats, damaged stems, and accelerated wear that worsen water hammer instead of curing it.
Homeowners often assume more torque equals a permanent fix, but distorted components change flow dynamics and introduce rapid pressure spikes. A measured approach prevents harm: inspect, hand-tighten, test, and consult a plumber if resistance persists.
Routine maintenance and correct replacement parts restore proper sealing without overstress. Follow safe tightening practices to avoid turning a minor leak into a repetitive banging problem.
- Inspect valve operation before forcing
- Hand-tighten, then test
- Replace worn seals, don’t overtighten
- Call a pro for stubborn leaks
Quick Checklist To Stop Water Hammer Today
If water hammer has started to rattle pipes, a quick, focused checklist helps identify and fix the most common causes before damage occurs.
Inspect visible pipes for loose mounts and secure with straps or brackets.
Listen for banging when valves close; replace worn washer-type shutoffs or install slow-close valves.
Check for air chambers; drain system and refill to purge trapped air, or fit proper air chambers/accumulators.
Verify pressure regulator settings; reduce if above 60 psi.
Ascertain valve stems move smoothly; lubricate or replace sticky valves.
If uncertain, consult a licensed plumber to prevent hidden damage and confirm remedies.
Conclusion
Like a sudden knock echoing through empty rafters, water hammer jars a house’s calm. Simple taps — tightening straps, closing fast valves gently, fitting air chambers or a pressure-reducing valve — quiet the clatter and return pipes to a steady heartbeat. Left alone, the banging invites leaks and strain; addressed, plumbing settles into the hush of reliable flow. With small, careful fixes, the home’s pipes breathe quietly again, steadied and sure.