How to Remove a Sink Drain Pipe Without Damaging Plumbing
To remove a sink drain pipe without damaging plumbing, one must first gather necessary tools such as a pipe wrench and adjustable pliers. Next, turn off the water supply and clear the area under the sink for safe access. It is essential to inspect the drain pipe connections for any potential damage. After carefully loosening the P-trap and tailpiece, reassemble the components securely to prevent leaks. Further details on ensuring a successful removal can be explored.
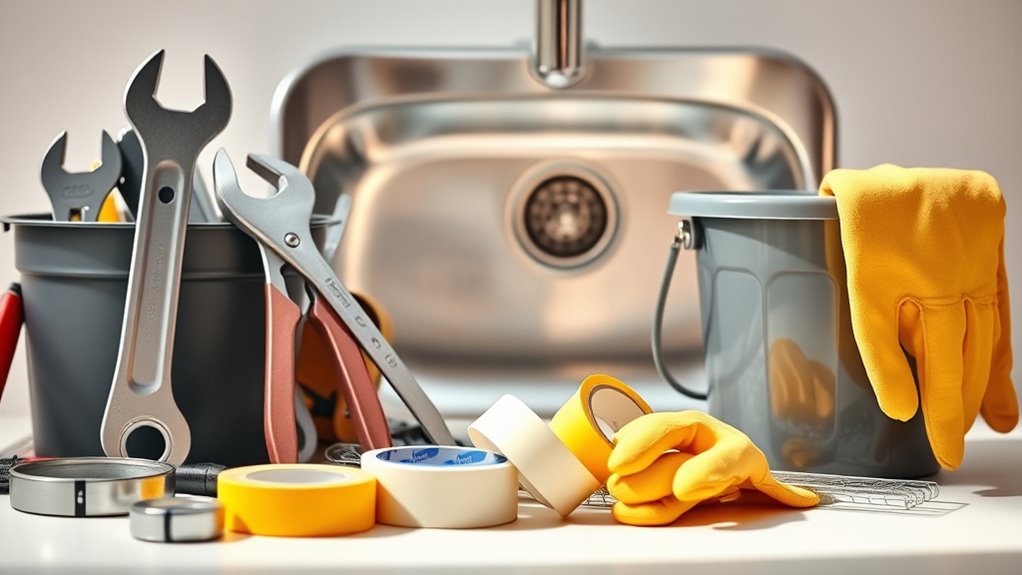
Gather Necessary Tools and Materials
Before beginning the task of removing a sink drain pipe, it is essential to gather all necessary tools and materials. This preparation guarantees a smooth and efficient process.
A pair of adjustable pliers will be vital for loosening and tightening fittings. A bucket or container is needed to catch any residual water that may spill during the removal. Additionally, a pipe wrench can provide the necessary grip on stubborn pipes.
Having a towel or rag on hand is useful for wiping up any mess. Finally, it may be beneficial to have replacement washers or seals available in case they need to be replaced.
Turn Off the Water Supply
Turning off the water supply is an essential step before removing a sink drain pipe. This precaution prevents any unexpected water flow that could cause a mess or damage.
Typically, the water supply valves are located under the sink; there are usually two valves: one for hot water and one for cold. Both should be turned clockwise to shut them off completely.
If the valves are difficult to turn or show signs of corrosion, it may be necessary to use a wrench. In cases where the valves are inaccessible or malfunctioning, shutting off the main water supply for the home is a viable alternative.
Ensuring the water supply is off guarantees a safer and more manageable pipe removal process.
Clear the Area Under the Sink
Before starting the process of removing a sink drain pipe, it is essential to clear the area under the sink. This involves removing any items and debris that may obstruct access to the plumbing.
Additionally, protecting surrounding surfaces from potential damage during the task is vital for a smooth operation.
Remove Items and Debris
Clearing the area under the sink is an essential first step in removing a sink drain pipe. The individual should begin by carefully removing any items stored beneath the sink, such as cleaning supplies, spare dish towels, or other personal belongings. This guarantees a safe working environment and prevents any accidental spills or damage to these items.
Once the larger items are removed, it is advisable to clear away any debris, such as dust or food particles, that may have accumulated in the space. This not only improves visibility but also contributes to a more organized workspace. A clean area allows for easier access to the plumbing components, facilitating a smoother process when disconnecting the sink drain pipe.
Protect Surrounding Surfaces
To guarantee that surrounding surfaces remain undamaged during the removal of the sink drain pipe, it is essential to take protective measures.
First, the individual should clear the area under the sink, removing any items, cleaning supplies, or small appliances that may be in the way.
Next, placing a drop cloth or old towels on the floor and nearby surfaces can catch any drips or debris that may occur during the process.
Additionally, using painter’s tape to cover adjacent walls or cabinetry can prevent scratches.
Place a Bucket or Container Beneath the Pipe
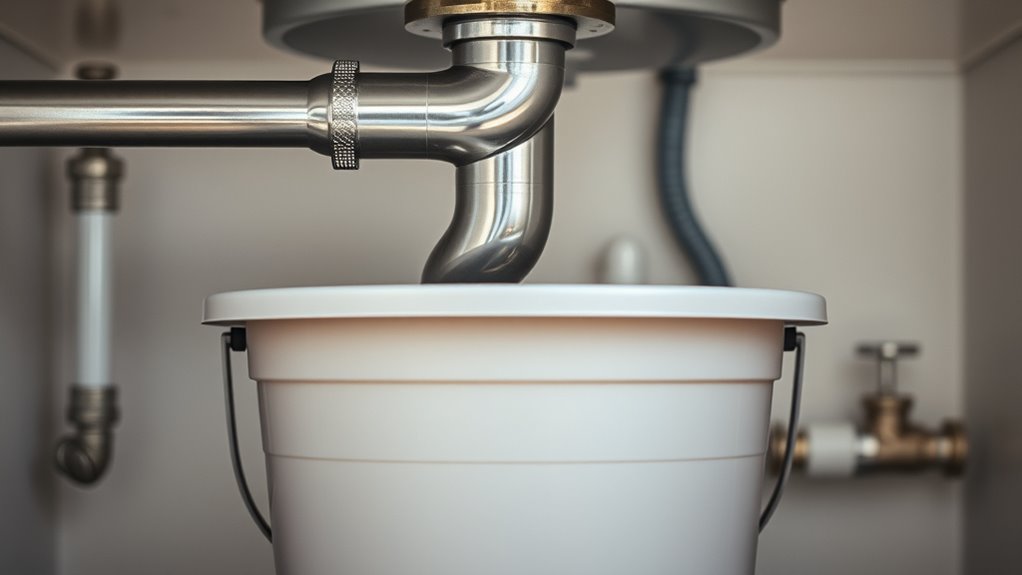
A bucket or container is essential for catching any water and debris that may spill during the removal of a sink drain pipe. Placing the bucket directly beneath the drain area guarantees that any unexpected leaks or residual water do not cause a mess. Choosing an appropriately sized container can help accommodate the amount of liquid that may drain out.
| Bucket Size | Material | Purpose |
|---|---|---|
| Large | Plastic | For significant water containment |
| Medium | Metal | For durability and sturdiness |
| Small | Disposable | For quick clean-up |
Using a suitable bucket or container aids in maintaining a clean work area and simplifies the removal process without damaging adjacent plumbing features.
Inspect the Drain Pipe Connections
Inspecting the drain pipe connections is essential before proceeding with any removal.
This involves identifying the types of connections used, such as slip joints or threaded fittings, to guarantee proper disassembly.
Additionally, checking for any signs of leaks can prevent further complications during the process.
Identify Connection Types
Understanding the various types of connections in a sink drain pipe is essential for a successful removal process.
Typically, sink drain pipes are connected using slip joints, compression fittings, or glued connections.
Slip joints feature a threaded design that allows easy disassembly with a simple twist.
Compression fittings utilize a nut that tightens around the pipe, creating a watertight seal; loosening this nut will free the connection.
Glued connections, often found in PVC pipes, require careful cutting of the pipe to avoid damage to surrounding structures.
Recognizing these connection types not only aids in planning the removal but also guarantees that appropriate tools and techniques are employed, minimizing the risk of damage during the process.
Check for Leaks
Before removing a sink drain pipe, checking for leaks at the connections is a prudent step. This inspection helps identify any existing issues that could complicate the removal process.
The individual should examine each connection point, including the P-trap and any joints, for signs of moisture or water stains. A flashlight can be useful for illuminating hard-to-see areas.
If leaks are detected, it is advisable to address them before proceeding with the removal. This may involve tightening loose fittings or replacing worn washers.
Ensuring that all connections are leak-free not only simplifies the disassembly but also prevents potential water damage during the removal process. A thorough inspection sets the stage for a successful and damage-free sink drain pipe removal.
Loosen the P-Trap
To loosen the P-trap, one must locate the slip nuts that secure the trap to both the sink drain and the waste line. These nuts are typically made of plastic or metal and can be found at the ends of the P-trap.
Using a pair of adjustable pliers or a basin wrench, the individual should grip the slip nuts and turn them counterclockwise. Care should be taken to avoid overtightening, which can damage the fittings.
If the nuts are corroded or stuck, applying a penetrating lubricant may help ease their removal. Once the slip nuts are sufficiently loosened, the P-trap can be separated from the sink drain and waste line, paving the way for further disassembly.
Remove the P-Trap From the Drain
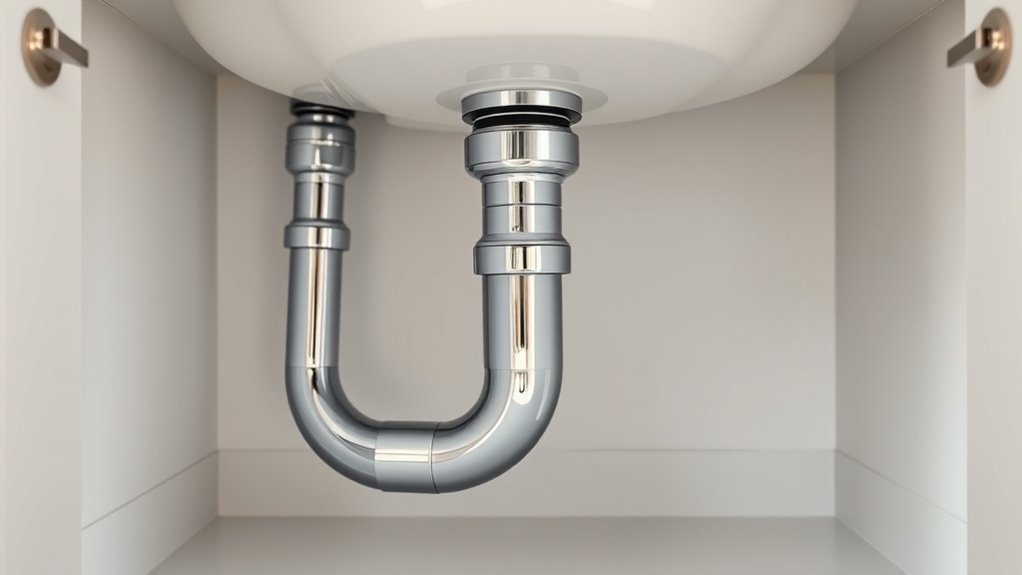
Removing the P-trap from the drain involves a few straightforward steps. First, make certain a bucket or towel is placed underneath to catch any residual water.
Next, locate the nuts securing the P-trap to both the drain and the waste pipe. Using adjustable pliers, carefully unscrew these nuts, turning them counterclockwise. It is essential to apply even pressure and avoid overtightening to prevent damage.
Once the nuts are loosened, gently pull the P-trap away from the drain and the waste pipe. If any resistance is felt, double-check that all connections are fully loosened.
After removal, inspect the P-trap for blockages or debris before proceeding with further plumbing tasks, ensuring a clean workspace for the next steps.
Unscrew the Tailpiece
Next, the tailpiece must be unscrewed to facilitate the removal of the sink drain pipe. The tailpiece is the vertical section of the plumbing that connects the sink to the P-trap assembly.
To begin, one should locate the slip nut that holds the tailpiece in place. Using a pair of adjustable pliers or a wrench, the slip nut can be carefully turned counterclockwise. It is essential to apply steady pressure to avoid damaging the plumbing fittings.
Once the slip nut is loosened, the tailpiece can be gently pulled away from the drain. If any resistance is felt, additional adjustments to the slip nut may be necessary. Ensuring a smooth removal will aid in the subsequent detachment of the drain assembly.
Detach the Drain Assembly
To successfully detach the drain assembly, one must first gather the necessary tools, such as a pipe wrench and bucket.
Next, identifying the connection points will facilitate a smoother disassembly process.
Employing proper techniques is essential to avoid damage to both the plumbing and surrounding fixtures.
Gather Necessary Tools
Gathering the right tools is essential for efficiently detaching the drain assembly from a sink. Having the necessary equipment on hand streamlines the process and reduces the risk of damage to the plumbing. The following table highlights the critical tools required for this task:
| Tool | Purpose |
|---|---|
| Adjustable Wrench | To loosen and tighten fittings |
| Pliers | For gripping and twisting nuts |
| Bucket | To catch any residual water |
| Towels | For cleaning up spills |
| Screwdriver | To remove any screws present |
With these tools, an individual can approach the task with confidence, ensuring that the drain assembly can be detached smoothly and effectively.
Identify Connection Points
Identifying the connection points of the drain assembly is a crucial step in the removal process. This involves examining the various components that connect the drain pipe to the sink and the plumbing system.
Typically, the assembly includes the sink strainer, tailpiece, P-trap, and wall or floor connection. Each part may be secured with nuts or slip joints. A careful inspection will reveal whether these connections are threaded, slip-fit, or secured with adhesive.
Noting these points allows for a more organized disassembly, minimizing the risk of damage. Marking the connections or taking photographs can also aid in reinstallation.
Understanding the layout and securing methods guarantees a smoother and more efficient removal process without harming the plumbing infrastructure.
Use Proper Techniques
With the connection points clearly identified, the next step involves detaching the drain assembly from the sink and plumbing system. This process requires careful attention to guarantee no damage occurs to the plumbing. A pair of adjustable pliers or a basin wrench can be utilized to loosen the slip nuts. It is essential to turn them counterclockwise gently.
| Step | Description |
|---|---|
| 1. Loosen Slip Nuts | Use pliers to turn counterclockwise. |
| 2. Remove Tailpiece | Detach the tailpiece from the sink. |
| 3. Check for Residue | Guarantee no debris is left in the pipes. |
Following these techniques will facilitate a smooth disassembly of the drain assembly.
Check for Additional Fasteners
How can one guarantee that all components are effectively removed when tackling a sink drain pipe?
Before proceeding with disassembly, it is vital to check for additional fasteners that may be securing the pipe in place. These fasteners could be screws, brackets, or other types of hardware that are not immediately visible.
A thorough inspection of the connection points will identify any hidden attachments that need to be loosened or removed. Additionally, one should consider the type of plumbing materials used, as certain setups may employ specialized fasteners.
Ensuring all fasteners are accounted for not only aids in a smoother removal process but also minimizes the risk of damaging surrounding plumbing fixtures. Attention to detail is essential in this step.
Clean the Pipe Threads
After guaranteeing all fasteners are removed, the next step involves cleaning the pipe threads to facilitate a smooth disconnection. This process is essential to prevent damage during removal and guarantee a proper seal when reassembling.
To effectively clean the pipe threads, one should consider the following steps:
- Use a wire brush: This helps remove any debris or corrosion from the threads.
- Apply a cleaning solvent: A suitable solvent can break down grease or grime.
- Rinse with water: Thorough rinsing guarantees no cleaning agents remain on the threads.
- Dry thoroughly: A dry surface helps prevent rust and prepares the threads for a better connection later.
Inspect for Damage
Inspecting the sink drain pipe for damage is an essential step before proceeding with disconnection. This careful examination helps to identify any signs of wear, corrosion, or leaks that could complicate the removal process.
A damaged pipe may lead to further issues during disassembly, potentially causing additional repairs or replacements. Attention should be given to visible cracks, rust, or weakened joints that might indicate structural integrity problems.
If any damage is found, it is advisable to address these issues before continuing. Taking the time to inspect thoroughly not only protects the plumbing system but also guarantees a smoother removal process, minimizing the risk of unexpected complications.
Proper assessment can ultimately save time and resources in the long run.
Follow Proper Disposal Guidelines
When removing a sink drain pipe, it is vital to adhere to local disposal regulations to guarantee compliance and safety.
Understanding hazardous waste protocols is important, as certain materials may require special handling.
Additionally, exploring recycle or reuse options can contribute to environmental sustainability.
Local Disposal Regulations
Although removing a sink drain pipe may seem straightforward, it is essential to follow local disposal regulations to guarantee proper waste management.
Adhering to these regulations safeguards that materials are discarded responsibly and minimizes environmental impact. Homeowners and DIY enthusiasts should be aware of specific guidelines concerning the disposal of sink drain components.
- Check Local Ordinances: Review local laws regarding plumbing waste disposal.
- Separate Materials: Sort metal, plastic, and rubber components for appropriate recycling.
- Utilize Designated Facilities: Transport waste to approved recycling or waste management centers.
- Avoid Curbside Disposal: Do not place sink parts in regular trash unless explicitly permitted.
Following these steps helps maintain community standards and protects local ecosystems.
Hazardous Waste Protocols
Proper disposal of hazardous waste is crucial for guaranteeing safety and environmental protection during the removal of a sink drain pipe. Homeowners must identify any hazardous materials, such as old plumbing sealants or chemical cleaners, that could pose risks if not handled correctly.
It is essential to follow local regulations regarding hazardous waste disposal, as improper disposal can lead to legal consequences and environmental harm. Typically, this involves taking such materials to designated collection points or participating in community hazardous waste disposal events.
Additionally, individuals should use appropriate personal protective equipment, like gloves and masks, to prevent exposure during handling. Adhering to these protocols guarantees the safe and responsible management of hazardous waste generated from plumbing tasks.
Recycle or Reuse Options
Before disposing of a sink drain pipe, homeowners should consider recycling or reusing the materials to minimize waste and promote sustainability.
Many components of the drain pipe can serve new purposes or be recycled, reducing environmental impact.
Homeowners can explore the following options:
- Metal Pipes: Recycle metal pipes at local scrap yards for cash or credit.
- PVC Pipes: Repurpose PVC pipes for garden projects, such as planters or watering systems.
- Gaskets and Seals: Keep gaskets for future plumbing repairs or DIY projects.
- Fittings and Connectors: Store unused fittings for potential future plumbing needs, avoiding the need to buy new materials.
Prepare for Reinstallation
Preparing for reinstallation of a sink drain pipe requires careful attention to detail to assure a seamless process. Before beginning, it is essential to gather the necessary tools and materials. A checklist can help streamline this preparation phase and guarantee nothing is overlooked.
| Tool/Material | Purpose | Notes |
|---|---|---|
| Pipe Wrench | To tighten or loosen fittings | Use with caution to avoid damage |
| Plumber’s Tape | To seal joints and prevent leaks | Use on threaded connections |
| Bucket | To catch any residual water | Place under the sink |
| Cleaning Cloth | To wipe surfaces | Keep handy for clean installation |
| Safety Goggles | To protect eyes | Always wear during installation |
Following this guide will facilitate a successful reinstallation.
Reassemble the Drain Pipe Securely
Reassembling the drain pipe securely is essential to guarantee proper functionality and prevent leaks.
After confirming that all components are clean and undamaged, the installation process should be approached with care. Properly aligning the pipes and fittings is vital to achieve a tight seal.
The following steps can help confirm a successful reassembly:
- Reconnect the P-trap: Align the trap to the sink’s drain and the wall pipe.
- Tighten the nuts: Use hand-tightening first, then a wrench for additional security, making sure not to overtighten.
- Check the washers: Make certain rubber washers are in place to avoid leaks.
- Run water: Test for leaks by running water and inspecting all joints.
Conclusion
In summary, with careful consideration and cautious creativity, the task of removing a sink drain pipe can be a smooth and successful endeavor. By gathering the right tools, turning off the water supply, and meticulously maneuvering through the process, one can avoid damaging delicate plumbing. This diligent approach guarantees a seamless separation, setting the stage for a successful reinstallation. Embracing this method not only protects plumbing but also promotes plumbing prowess, paving the way for future repairs.