How to Measure Pipe Fittings Accurately for Plumbing Projects
Accurate measurements of pipe fittings are crucial for successful plumbing projects. To ensure precision, use a tape measure and a digital caliper. Start by measuring the outside diameter of the pipe to ensure compatibility with fittings. Don’t forget to consider wall thickness for internal measurements. Be mindful of fitting types, like elbows and tees, as they can affect overall lengths. Finally, always double-check your measurements and compare them with industry standards for best results. Following these steps will help you achieve a seamless plumbing setup.
Understanding Pipe Fitting Types

Pipe fittings are crucial in plumbing systems, as they connect, redirect, or terminate pipes.
Here’s a quick overview of common types and their functions:
- Elbows: Change the flow direction.
- Tees: Allow branching from a main pipe.
- Couplings: Join two pipe ends.
- Reducers: Adjust pipe diameters for compatibility.
- Caps and Plugs: Securely terminate pipe ends.
Choosing the right fitting type is essential for the efficiency of your plumbing system.
Familiarity with these fittings ensures proper installation and optimal functionality in your plumbing projects.
Essential Tools for Measuring
Accurate measurements are crucial when selecting pipe fittings to avoid installation issues. To ensure precision, use these essential tools:
- Tape Measure: For measuring lengths and widths of pipes and fittings.
- Digital Caliper: For precise readings on smaller dimensions, like wall thickness.
- Measuring Wheel: Ideal for longer distances.
- Level: Ensures proper alignment of fittings during installation.
- Marking Tool: A pencil or chalk for marking measurements on materials.
Having these tools on hand will enhance measurement accuracy, leading to a successful plumbing project and minimizing costly mistakes.
Measuring Pipe Diameter
Measuring pipe diameter is essential for any plumbing project.
To ensure accuracy, use specific tools designed for this purpose. Familiarity with pipe sizing standards is crucial, as it guarantees correct measurements for system compatibility.
Accurate pipe diameter measurements prevent costly errors and improve the efficiency of plumbing installations. For precise results, always refer to the appropriate tools and standards during your measurements.
Tools for Measuring Diameter
Measuring the diameter of pipe fittings accurately is crucial for plumbing projects. Here are the best tools to achieve precise measurements:
| Tool | Description | Best Use |
|---|---|---|
| Caliper | Measures the distance between two sides of an object | Ideal for small pipe fittings |
| Tape Measure | Flexible tape for longer measurements | Best for larger pipes |
| Pipe Gauge | Specialized tool for measuring pipe diameter | Great for quick checks |
| Micrometer | Precision instrument for thin measurements | Best for exact diameter readings |
Choosing the right tool ensures accurate measurements for a proper fit in your plumbing work.
Understanding Pipe Sizing Standards
Understanding pipe sizing standards is crucial for plumbing professionals.
These standards, including the nominal pipe size (NPS) used in North America and the diameter nominal (DN) system utilized in Europe and internationally, ensure consistent pipe measurements.
Both systems require measuring the outside diameter, which is essential for fitting compatibility.
It’s also important to consider wall thickness and material type, as these factors impact the internal diameter.
Familiarity with these sizing standards enables plumbers to choose the right materials for their projects, enhancing the efficiency and effectiveness of plumbing installations.
Importance of Accurate Measurements
Accurate measurements of pipe diameter are crucial for ensuring proper fit and function in plumbing systems. If measurements are incorrect, it can result in leaks, reduced water flow, and increased pressure, which can compromise the integrity of the system. Using properly sized pipes enhances performance and extends the lifespan of plumbing installations.
| Measurement Aspect | Importance | Consequences of Inaccuracy |
|---|---|---|
| Diameter | Ensures optimal flow | Decreased efficiency |
| Fit | Prevents leaks | Water damage |
| Compatibility | Works seamlessly with fittings | Higher repair costs |
Investing time in accurate pipe diameter measurement can save you time and money in the long run. Attention to detail in this area is essential for a successful plumbing installation.
Measuring Pipe Length
Measuring pipe length accurately is crucial for any plumbing project to ensure proper fitting and connections.
Use a tape measure or ruler to measure from one end of the pipe to the other, keeping in mind any bends or angles that may affect the total length.
Ensure the pipe is straight and unobstructed, and mark your measurement clearly on the pipe to avoid cutting errors.
Always double-check your measurements before purchasing or cutting the pipe to ensure a successful installation.
Determining Thread Size
When determining the correct thread size for plumbing projects, accurately measure the pipe diameter to ensure a proper fit.
It’s also crucial to identify the thread type to guarantee compatibility with your fittings.
Using thread gauges can help you obtain precise measurements, making it easier to select the right components for your project.
Measuring Pipe Diameter
To accurately determine the thread size of pipe fittings for plumbing projects, measuring the pipe diameter is crucial.
Follow these steps for precise measurements:
- Measure the Outer Diameter: Use a caliper or measuring tape to measure the pipe’s outer diameter accurately.
- Check Multiple Locations: Measure at several points along the pipe to account for any irregularities.
- Document Your Findings: Record the measurements for easy comparison with fitting specifications.
Identifying Thread Type
To accurately identify the thread type of pipe fittings, follow these steps:
- Examine the Thread Shape: Check if the threads are tapered (NPT) or parallel (BSP). NPT threads have a noticeable taper, while BSP threads are uniform in diameter.
- Measure Diameter and Thread Count: Use a caliper to measure the thread diameter and count the number of threads per inch. This information helps differentiate between types.
- Look for Markings: Inspect the fitting for any markings that may indicate the thread type.
Using Thread Gauges
To accurately measure thread size on pipe fittings, using thread gauges is essential. These tools ensure compatibility and prevent leaks in plumbing projects.
Here’s a concise guide to help you understand how to use them effectively:
- Types of Thread Gauges: Use pitch gauges to measure the distance between threads and caliper gauges for overall thread diameter, depending on your specific needs.
- Measurement Process: Simply place the gauge against the threads to quickly identify the size and pitch, allowing for an efficient assessment.
- Importance of Accuracy: Accurate measurements are crucial for selecting the right fittings. This ensures a proper seal and helps avoid future plumbing issues.
Measuring Bend Radius
Understanding bend radius is essential for effective plumbing, especially when working with pipe fittings that change direction. Proper measurement of the bend radius ensures smooth flow and minimizes the risk of pressure loss or damage.
Here’s a quick reference table for common pipe sizes and their recommended bend radii:
| Pipe Size (inches) | Recommended Bend Radius (inches) |
|---|---|
| 1 | 5 |
| 1.5 | 7 |
| 2 | 10 |
| 3 | 12 |
| 4 | 16 |
Use this table to select the right bend radius for your plumbing needs.
Understanding Fitting Angles
Understanding Fitting Angles in Plumbing
Measuring fitting angles accurately is crucial for ensuring proper alignment and flow in plumbing systems. Here’s what you need to know:
- Common Angle Types: Familiarize yourself with 90-degree, 45-degree, and 22.5-degree fittings. These are essential for effective pipe layouts.
- Angle Measurement: Use precise measuring tools to ensure accurate cuts and fittings, which helps prevent misalignment.
- Impact on Flow: Incorrect angles can increase friction, hindering water flow and placing unnecessary strain on your plumbing system.
Mastering fitting angles is vital for a successful plumbing project, leading to better efficiency and fewer leaks.
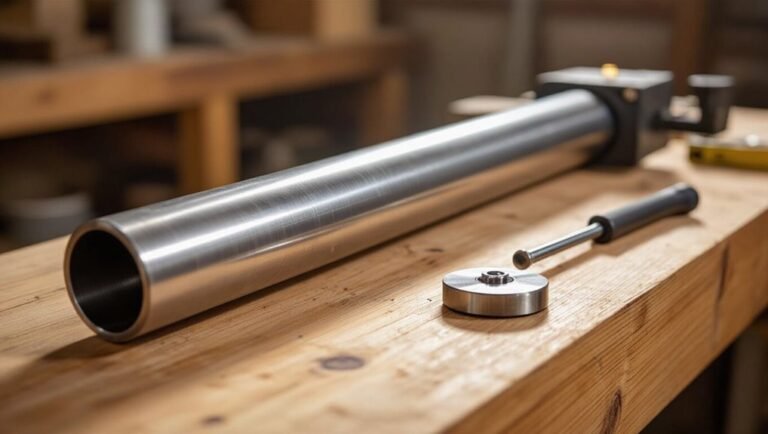
Using a Caliper for Precision
When measuring pipe fittings, using a caliper is crucial for achieving precise results.
Different types of calipers are available, each designed for specific measuring tasks.
To ensure accuracy in your plumbing projects, familiarize yourself with how to use calipers properly and be aware of common mistakes to avoid.
This knowledge will enhance the precision of your measurements and improve your overall project outcomes.
Types of Calipers
Calipers are crucial for ensuring precise measurements in plumbing projects. Here’s a quick overview of the types of calipers you might consider:
- Vernier Calipers: Ideal for measuring both internal and external dimensions accurately, thanks to their sliding scale.
- Digital Calipers: These provide fast, error-free readings with an electronic display, making measurements straightforward.
- Dial Calipers: Offering a manual method for measurement, they feature a dial gauge for easy readability.
Choosing the right caliper is essential for achieving accuracy in your plumbing tasks, helping ensure successful installations.
Understanding these options will aid in selecting the best tool for your specific needs.
Measuring Techniques Explained
Accurate measurements are crucial for plumbing projects, and using a caliper can significantly improve precision.
To measure pipe fittings effectively with a caliper, follow these steps:
- Calibration: Ensure the caliper is properly calibrated before use.
- External Measurements: Place the caliper’s jaws around the fitting, applying a snug but gentle grip to measure the external diameter.
- Internal Measurements: Insert the caliper’s inside jaws into the fitting and expand until they touch the inner walls for an accurate internal measurement.
- Reading the Scale: Carefully read the measurement on the caliper’s scale to ensure accuracy for a perfect fit in your plumbing installation.
Common Mistakes to Avoid
When measuring pipe fittings with calipers, avoiding common mistakes is crucial for accurate results.
Here are key pitfalls to watch out for:
- Incorrect Calibration: Always zero your caliper before measuring. Failure to do so can lead to skewed measurements and incorrect fitting sizes.
- Improper Technique: Avoid applying too much pressure while measuring, as this can compress the fitting material and result in misleading readings.
- Neglecting Angles: Ensure you measure at the correct angle. Overlooking this can significantly affect the accuracy of your dimensions.
Measuring Wall Thickness
To measure the wall thickness of pipe fittings accurately, use a caliper or micrometer. This ensures proper fitting and functionality in plumbing. Take measurements at multiple points along the fitting to identify any variations.
Here’s a quick reference table for common pipe materials and their typical wall thicknesses:
| Pipe Material | Wall Thickness (inches) |
|---|---|
| PVC | 0.090 |
| Copper | 0.032 |
| Steel | 0.120 |
| ABS | 0.100 |
| PEX | 0.090 |
Knowing these measurements will help you choose the right fittings for your plumbing projects.
Taking Measurements of Elbows and Tees
When measuring elbows and tees for plumbing projects, precision is vital.
Ensure you measure the angles of elbows and the dimensions of tee fittings to confirm they will fit your existing pipes. This knowledge is key for effective planning and installation, helping you avoid costly mistakes.
For the best results, use a reliable measuring tool and double-check your measurements to ensure compatibility.
Measuring Elbow Angles
Measuring elbow angles in plumbing is crucial for ensuring proper alignment and flow. Here’s what you need to know:
- Determine the Angle: Identify the elbow angle, typically 45°, 90°, or 180°.
- Centerline Measurement: Measure from the center of one end to the center of the other for accurate alignment.
- Pipe Diameter: Note the pipe diameter for compatibility with fittings.
These steps help prevent leaks and maintain system efficiency.
Tee Fitting Dimensions
Tee fittings are essential in plumbing systems, enabling the connection of three pipe segments for effective water flow branching.
To ensure a proper fit, accurately measure the diameter of each inlet and the overall height of the fitting. Standard sizes include ½ inch, ¾ inch, and 1 inch, though variations may exist.
Additionally, measure the length from end to end for compatibility with existing pipes. When choosing tee fittings, consider the material as it affects durability and performance.
Proper measurements ensure efficient plumbing installations and repairs.
Measuring for Slip Joints
Accurate measurements are crucial for successfully installing slip joints in plumbing. Here’s how to ensure a proper fit:
- Measure Pipe Diameter: Ensure the pipe’s diameter matches the slip joint for compatibility.
- Determine Slip Joint Length: Measure the length needed, factoring in any bends or turns in the piping.
- Account for Insertion Depth: Measure how far the pipe will extend into the slip joint.
Taking these precise measurements helps select the right fittings and reduces leak risks during installation, ensuring a smooth plumbing project.
Importance of Accurate Measurements
Accurate measurements are crucial in plumbing projects.
Even minor miscalculations can lead to leaks and structural failures. Ensuring precise measurements allows fittings and pipes to fit together correctly, which prevents costly rework and project delays.
Proper sizing also optimizes water flow and pressure, essential for system functionality. Inaccurate measurements can waste materials and increase expenses.
Therefore, taking the time to measure accurately is vital for a successful plumbing installation and creates a reliable, durable plumbing system.
Common Measuring Mistakes to Avoid
Measuring pipe fittings accurately is crucial for any plumbing project.
To help you avoid common mistakes that can lead to wasted materials and time, here are key points to keep in mind:
- Account for Fittings: Always include the dimensions of elbows, tees, and couplings in your measurements, not just the straight sections of pipe.
- Use the Right Tools: Ensure you’re using appropriate measuring tools, such as calipers, for precise measurements instead of rulers.
- Double-Check Your Measurements: Take a moment to review your measurements before proceeding to catch any potential errors.
How to Record Your Measurements
To effectively record your plumbing measurements, follow these steps:
- Use a Dedicated Tool: Choose a notebook or digital device specifically for documenting measurements to keep all data organized.
- Label Clearly: For each measurement, include clear labels indicating the specific pipe fitting or location.
- Include Units: Always note the units of measurement (inches, millimeters) to prevent confusion.
- Date Your Measurements: Recording the date helps track progress, especially on larger projects.
- Maintain Consistent Formatting: Consistency improves readability and makes it easier to reference your notes later.
Tips for Re-measuring and Verification

To ensure accuracy in plumbing projects, re-measuring and verifying dimensions is critical. Here are essential tips to help you achieve precise measurements:
- Consistent Measuring Techniques: Always use the same method for measuring to ensure reliable and uniform results.
- Cross-Check Measurements: Regularly compare your new measurements with previous ones to catch any discrepancies early.
- Get a Second Opinion: Having someone else verify your measurements can help identify potential errors and enhance overall accuracy.
Conclusion
Accurate measurement of pipe fittings is essential for successful plumbing projects. Here’s how to do it effectively:
- Measure Pipe Diameter: Use a tape measure to find the outer diameter of the pipe. This is crucial for selecting the right fitting.
- Length of Pipe: Measure the length of the pipe you intend to connect to ensure it fits within your space.
- Check Fitting Type: Identify the type of fitting you need (elbow, tee, etc.) and measure the angles and dimensions accordingly.
- Consider Material: Different materials have different thicknesses, which can affect measurements. Make sure to account for this when measuring.
- Use a Caliper: For more precise measurements, especially with smaller pipes, consider using a caliper.
By following these steps, you can ensure that your pipe fittings will fit correctly, facilitating a smooth plumbing installation.