How to Install a Pellet Stove Pipe: Step-by-Step Guide & Tips
To install a pellet stove pipe safely and effectively, start by confirming the stove’s vent type, required diameter, and compliance with local codes. Follow these key steps:
- Plan the Route: Aim for a short, mostly vertical path for the pipe.
- Select the Right Pipe: Choose from listed single‑, double‑, or triple‑wall pipe, or a Class A liner for masonry chimneys.
- Maintain Clearances: Ensure proper clearances are observed to prevent fire hazards.
- Support the Sections: Use appropriate supports for every section of the pipe.
- Seal Joints: Use approved gaskets or high‑temp sealant to seal all joints securely.
- Install Flashing and Collars: Use flashing, storm collars, and a proper termination cap to prevent leaks and downdrafts.
For a successful installation, ensure you have the right tools and follow inspection tips for safety and compliance.
Your Goal: A Safe, Code‑Compliant Pellet Stove Vent
When planning a pellet stove installation, the primary objective is a vent system that meets local building codes and minimizes fire and carbon monoxide risks; achieving this requires correct pipe type, clearances, terminations, and sealing.
The installer must guarantee proper routing, maintain required distances from combustibles, and provide secure support for every section.
Vent termination should prevent backdrafts, water ingress, and animal entry while meeting height and location rules.
Seals and joints require approved gaskets or high‑temperature sealants to prevent leaks.
Documentation, permits, and inspections confirm compliance and validate safe operation before regular use.
Do You Need a Direct Vent, Liner, or Single‑Wall Pipe?
A choice among direct vent, chimney liner, or single‑wall pipe affects efficiency, safety, and code compliance.
Direct vent systems offer sealed combustion and predictable performance, chimney liners provide a smooth, insulated path when using an existing flue, and single‑wall pipe is a simpler option best suited to short, well‑cleared runs with proper clearances.
The installer should weigh these tradeoffs against local codes and the stove manufacturer’s requirements.
Direct Vent Advantages
How should one choose between a direct vent, a chimney liner, or single‑wall pipe for a pellet stove installation?
Direct vent systems offer sealed combustion, drawing outdoor air and exhausting directly outside. This reduces drafts, prevents indoor air contamination, and improves combustion efficiency.
They typically require less maintenance than open flues and can be installed where existing chimneys are unsuitable.
Installation often uses concentric or dual‑wall components designed for balanced flow and heat management. Code compliance and manufacturer requirements favor direct venting in tight or modern homes.
Upfront cost is higher, but operational safety, efficiency, and air quality benefits justify the investment.
Chimney Liner Use
Choosing the correct venting method depends on the stove model, the existing chimney condition, local codes, and homeowner priorities for efficiency and indoor air quality.
A stainless steel chimney liner often restores draft, contains combustion products, and protects masonry from acidic condensate created by pellet stoves.
When an existing chimney is sound but oversized or deteriorated, a liner sized to the appliance improves performance and meets many codes.
Direct-vent systems remain an option where through-wall installations are preferred, but liners enable use of an existing flue without exterior alterations.
Professional inspection determines liner necessity, material, diameter, and termination requirements.
Single‑Wall Considerations
When evaluating venting options for a pellet stove, homeowners must weigh whether a direct-vent system, a lined existing chimney, or single‑wall pipe best suits the installation constraints, appliance requirements, and local code.
Single‑wall pipe can be acceptable for short, interior runs on room-sealed units but often fails code for exterior wall exits or long horizontal sections.
Corrosion, heat transfer, and clearances exceed those of double or class A systems.
A lined chimney preserves draft and protects masonry.
Local regulations and manufacturer instructions dictate choices; a professional inspection guarantees compliance and safe performance.
- Check manufacturer requirements.
- Verify local codes.
- Prefer lined or double-wall for exterior runs.
How Codes Affect Pellet Stove Venting Decisions
In considering pellet stove venting, local building codes and manufacturer specifications serve as the primary constraints that determine acceptable pipe types, clearances, terminations, and clearance-to-combustibles. Authorities having jurisdiction may require listed double‑wall or triple‑wall vent, specify minimum distances from walls and ceilings, and mandate approved terminations and cap types.
Codes also dictate when masonry chimneys, prefabricated chimneys, or direct‑vent systems are allowed and whether permits and inspections are required. Compliance guarantees safety, insurance validity, and warranty coverage.
Before installation, the installer should verify applicable code editions, reconcile them with the stove manual, and document approvals.
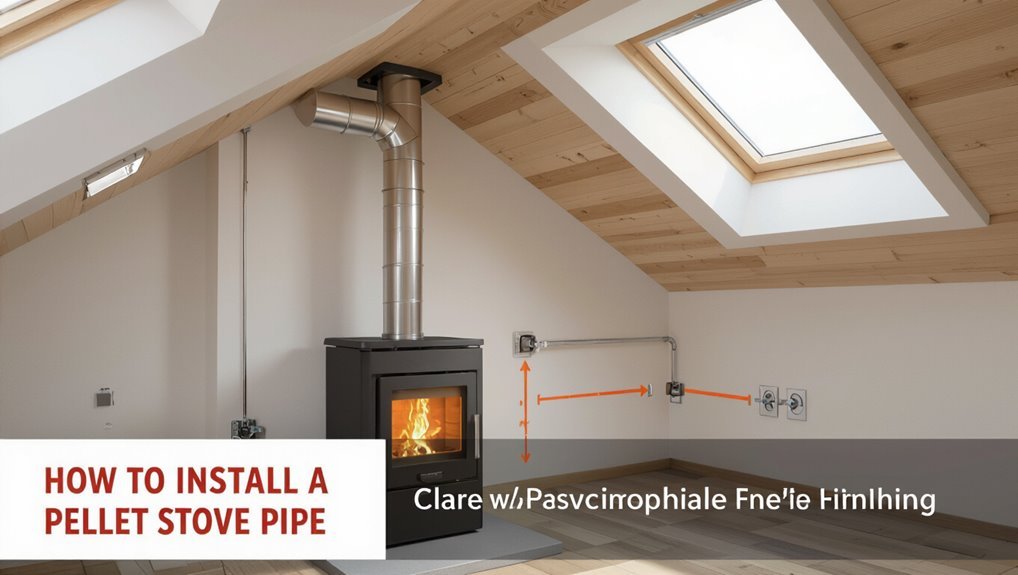
Measure and Plan Your Pellet Stove Pipe Route
Before any cutting or assembly, measurements of ceiling and wall clearances must be recorded to make certain safe distances from combustible materials.
The planned venting route should be mapped to minimize bends and maintain proper rise and fall requirements.
The chimney location and termination point need to be identified to confirm accessibility, code compliance, and aesthetic impact.
Measure Ceiling And Wall Clearances
Standing at the stove, the installer measures required clearances to walls and ceilings, confirming pipe routing will meet manufacturer and code specifications.
Measurements include horizontal and vertical distances, clearances from combustibles, and offsets for pipe joints.
Accurate marking prevents rework and guarantees safe operation.
The installer records dimensions, notes framing locations, and verifies ceiling box placement for through-ceiling termination.
Any deviations trigger consultation of installation instructions and local code.
Clear labeling of measured points simplifies later cutting and drilling.
- Record wall and ceiling clearance distances precisely.
- Mark framing and obstruction locations.
- Verify clearance against manufacturer and code.
Plan Venting Route Path
With a clear picture of clearances and framing, the installer lays out the venting route on paper and on the structure, noting each pipe length, elbow, and termination point to guarantee proper draft, access, and code compliance.
The plan identifies straight runs, required rise, and any lateral offsets while minimizing unnecessary elbows to preserve draft.
It marks service access locations, fastener points, and support spacing per manufacturer instructions.
Penetration paths through walls or ceilings are sketched with framing members avoided.
Materials, clearances to combustibles, and required air gaps are noted.
The final route is reviewed against local codes before cutting.
Locate Chimney And Termination
Positioning the chimney and termination begins by measuring from the stove’s exhaust outlet to the proposed exterior exit, accounting for vertical rise, lateral offsets, and the clearances shown on the plan.
The installer verifies roof or wall penetration locations, checks for obstructions, and confirms termination meets code height, distance from openings, and wind exposure requirements.
Pipe length, elbows, and support points are tallied; draft expectations and manufacturer limits are reviewed.
Create a clear route diagram and mark mounting points.
Arrange components to minimize bends and maintain required clearances for safe, efficient operation.
- Verify measurements and clearances
- Map penetration and supports
- Minimize bends and handoffs
Choose the Right Pellet Stove Pipe Type (Single/Double/Triple)
How should one decide between single-, double-, or triple-wall pellet stove pipe? The choice depends on installation location, clearance needs, and budget.
Single-wall pipe suits interior, venting into a masonry chimney or plenum where clearances permit; it’s economical but transfers more heat.
Double-wall pipe offers improved insulation, reduced clearance to combustibles, and better draft stability—common for through-wall or short exterior runs.
Triple-wall provides maximum insulation and lowest clearances, useful near combustible materials or when code requires enhanced protection.
Compatibility with the stove’s exhaust outlet, local codes, and manufacturer recommendations must guide final selection.
How to Size Pipe Diameter and Equivalent Length
Why does pipe diameter matter? Proper diameter guarantees correct draft, prevents backflow, and matches the stove’s exhaust port. Manufacturers specify a pipe size—usually 3 or 4 inches—based on output and fan capacity. Equivalent length accounts for elbows, tee’s and offsets by converting fittings to straight-pipe length, affecting resistance and draft.
- Confirm stove’s required diameter and match all sections to avoid losses.
- Calculate equivalent length: add specified feet per fitting to straight-run length; compare with manufacturer’s max.
- If equivalent length is excessive, reduce fittings, increase diameter only if manufacturer permits, or shorten run.
Tools and Materials for a DIY Pellet Stove Vent
A concise inventory of tools and materials sets the foundation for a safe, code-compliant pellet stove vent installation.
Essential hand tools, the specific vent pipe components required, and appropriate safety gear are outlined before work begins.
Clear preparation reduces mistakes and speeds the installation.
Basic Hand Tools
Gathering the right hand tools early streamlines installation and reduces mistakes. A concise kit increases safety and speed when routing, cutting, and fastening ventwork.
Essential hand tools enable accurate measurements, secure connections, and safe handling of metal parts without repeating component descriptions covered later.
- Tape measure, combination square, and marker for precise layout and alignment.
- Cordless drill with assorted bits, screwdriver set, and nut driver for fasteners and brackets.
- Tin snips, utility knife, and work gloves for cutting, scoring, and hand protection during sheet-metal handling and seal preparation.
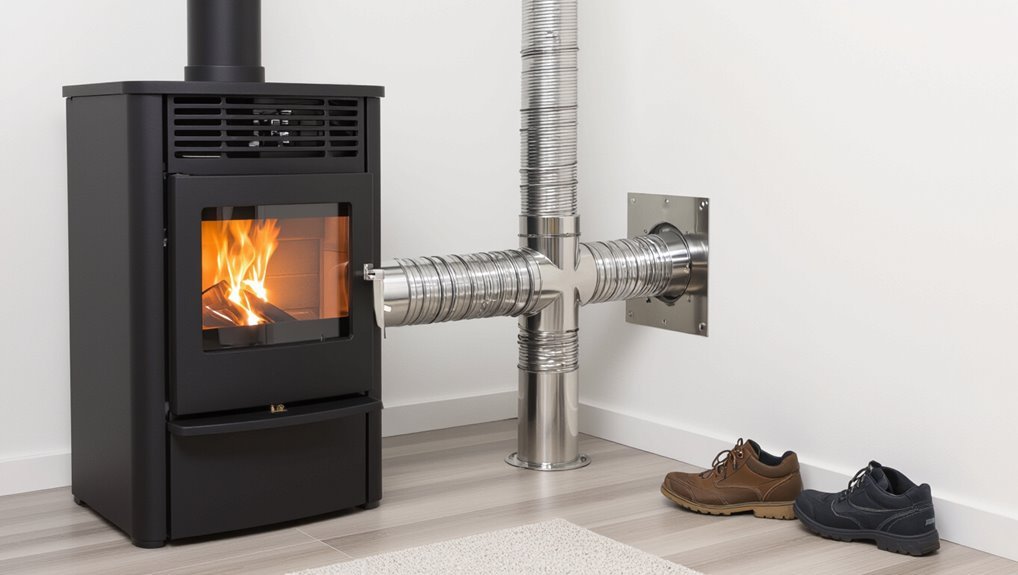
Vent Pipe Components
Several specific components are required to create a safe, code-compliant pellet stove vent: sectioned pipe, adaptor pieces, wall or roof thimbles, support brackets, storm collars and flashing, termination caps or chimneys, and high-temperature gaskets or sealant.
Pipe sections typically lock together and must match stove outlet diameter and clearances.
Adapters bridge between stove and pipe or between pipe sizes.
Thimbles protect structure where the vent penetrates walls or roofs.
Support brackets sustain vertical runs and offsets.
Storm collars and flashing prevent water intrusion.
Termination caps resist downdrafts and animal entry.
High-temperature gaskets or sealant guarantee airtight, heat-resistant joins.
Safety Gear Essentials
With the vent components identified, attention turns to the personal protective equipment, hand tools, and specialty materials required to assemble them safely.
Essential PPE includes heat-resistant gloves, safety glasses, a dust mask or respirator, and ear protection for power tools.
Hand tools: a tape measure, metal snips, and a cordless drill with screwdriver bits.
Specialty materials: high-temperature silicone sealant, stove pipe high-temp tape, and approved chimney straps or support brackets.
Proper gear protects against sharp edges, hot surfaces, and particulates.
Inspect equipment before use, replace worn items, and follow manufacturer safety instructions for all tools and materials.
- Personal protective equipment
- Hand tools
- Specialty materials
When a Class A Liner Is Required for Pellet Stoves
A Class A liner becomes necessary when a pellet stove vents through an existing masonry chimney that is deteriorated, oversized, or has combustible clearances that cannot be maintained; it also is required when local codes or the chimney manufacturer mandate relining to guarantee proper draft, prevent creosote and moisture damage, and protect surrounding structures from heat transmission.
A liner is required when chimney size exceeds appliance outlet, when masonry flue integrity is compromised, or when previous use produced heavy deposits. Installation may be specified for multi-story runs, factory-built chimney conversions, or insurance compliance.
Verification with local code and a qualified inspector determines final necessity.
Cutting and Fitting Pellet Stove Pipe Sections
Before cutting begins, the installer measures the run precisely and marks each pipe section for length, accounting for overlap at joints and any required clearances or offsets.
The installer cuts with appropriate tools, deburrs edges, and verifies fit before assembly.
Each joint is oriented so the male end faces the stove to shed condensate, and connectors, crimps, or screws are used per manufacturer instructions.
Sealing with high-temperature sealant is applied where specified; gaps are avoided.
Final alignment is checked for pitch and clearance to combustibles.
- Confirm measurements twice.
- Use correct cutting tools.
- Test-fit before sealing.
Install a Horizontal Pellet Stove Vent Through an Exterior Wall
Before cutting, the installer measures the wall thickness and required clearances to locate the vent and avoid hidden wiring or studs.
A correctly sized hole is cut, the vent collar is secured, and all seams are sealed to prevent drafts and water intrusion.
After testing the draft, the installer insulates around the pipe and verifies the assembly meets clearances and local codes.
Measure Wall And Clearances
Measure the wall and clearances precisely to guarantee the horizontal pellet stove vent will fit, function safely, and meet manufacturer and code requirements. The installer records wall thickness, exterior siding depth, and interior finish dimensions.
Clearance to combustibles around the vent pipe, stove location, and nearby furnishings is verified against the stove manual and local code. Vertical and horizontal alignment are checked to avoid strain on pipe sections.
Any insulation, wiring, or plumbing inside the planned route is identified and marked. Final measurements inform selection of vent components, offsets, and required clearances before cutting begins.
- Confirm wall thickness and siding depth
- Verify clearances to combustibles
- Mark internal obstructions and alignments
Cut Hole And Install Collar
With wall thickness, siding depth, and obstruction locations recorded, the installer marks the exterior and interior hole centers and lays out the cut lines for the vent. A pilot hole is drilled through both marks, then the installer cuts the opening with appropriate tools, maintaining square edges. Debris is removed, framing inspected, and any blocking trimmed. The collar is inserted from outside, secured to the sheathing with screws, and flashings aligned to siding. Final fasteners and exterior trim are applied to hold collar plumb while interior pipe alignment is prepared.
| Step | Action |
|---|---|
| 1 | Mark centers |
| 2 | Drill pilot |
| 3 | Cut hole |
| 4 | Inspect framing |
| 5 | Install collar |
Seal, Test, And Insulate
Once the collar and interior pipe are aligned, the installer seals joints, tests for leaks, and insulates the assembly to guarantee a safe, efficient vent penetration.
High-temperature silicone or approved gasket sealant is applied to every seam; screws are checked and capped. A smoke or incense test confirms airtightness; any drafts indicate adjustment.
Rigid insulation or mineral wool fills the annular gap, then a noncombustible trim plate covers the exterior. Flashing and exterior sealant prevent water intrusion.
Documentation of clearances and materials completes the job, ensuring code compliance and reliable operation of the pellet stove vent.
- Seal seams thoroughly
- Test for leaks
- Insulate and finish
Install a Vertical Pellet Stove Vent Through the Roof
When routing a vertical pellet stove vent through the roof, precise alignment and proper clearances are essential to guarantee safe operation and prevent leaks.
The installer locates the roof penetration above the stove centerline, checks framing, and chooses a straight chimney path minimizing offsets.
A support bracket and roof flashing kit rated for pellet vents are positioned; the vent pipe is assembled per manufacturer instructions with locking seams upward.
Interior and attic clearances must meet code; insulation and fire stops are maintained around the pipe without compressing required air gaps.
Final connections are tightened, the system is visually inspected, and draft is verified.
Flash and Seal a Roof Penetration Correctly
After the vent stack is set and interior clearances verified, attention shifts to flashing and sealing the roof penetration to prevent water intrusion and resist wind-driven forces.
Proper flashing uses a prefabricated roof flashing sized to the pipe diameter and roof pitch; installer fits the flashing under upper shingles and over lower shingles, securing with corrosion-resistant fasteners.
Sealant beads of high-temperature, UV-resistant silicone applied at flashing seams and pipe collar guarantee a watertight bond.
Final steps include tightening storm collars and adding a metal cap or boot to shed water.
- Inspect flashing fit and roof compatibility.
- Fasten and seal all seams.
- Verify watertight integrity.
Using Elbows, Tees, and Cleanouts Safely
Although changes in direction are sometimes unavoidable, elbows, tees, and cleanouts must be chosen and installed to preserve draft, prevent creosote buildup, and allow safe maintenance access.
Use long-radius elbows when possible; sharp bends reduce flow and increase deposits.
Position tees with cleanout caps at the lowest accessible point to collect ash and condensate.
Secure every joint with manufacturer-approved connectors and high-temperature sealant where specified.
Maintain slope toward the stove in horizontal runs to prevent pooling.
Minimize the number of fittings and avoid unnecessary offsets.
Inspect and clean cleanouts regularly, and replace damaged components promptly to guarantee safe, efficient venting.
Install the Termination Cap and Prevent Back‑Drafts
At the roofline or wall exit, the termination cap must be installed to protect the flue from weather and to prevent back‑drafts that can push smoke or combustion gases back into the home.
The cap should match pipe diameter and type, sit level, and allow proper clearance from combustibles.
Wind and pressure differentials require a cap design that vents vertically and resists downdrafts.
Periodic inspection confirms screens are clear and fastenings remain secure.
Incorrect caps undermine draft and safety.
- Choose a cap rated for the stove and pipe system.
- Position to maintain manufacturer clearances and orientation.
- Inspect and clean annually.
Secure Joints: Fasteners and High‑Temperature Sealants
The section explains proper fastener selection and placement to ensure pipe sections remain tight under thermal cycling and vibration.
It then compares high‑temperature sealant types and their suitable application points to prevent leaks and corrosion. Readers are guided to match fastener methods with compatible sealants for a durable, code‑compliant joint.
Fastener Types And Placement
Select fasteners and sealants that match pellet stove pipe materials and operating temperatures to guarantee safe, long-lasting joints. The installer should use corrosion-resistant sheet metal screws or rivets sized to penetrate overlapping sections without distorting the pipe.
Fasteners are typically placed on the lower half of horizontal runs and every 90–120° around vertical joints to resist shear and moment loads. Avoid overdriving screws or using washers that trap creosote. Pre-drill where necessary and maintain manufacturer-specified spacing. Use clamps or straps at roof and wall penetrations per code. Inspect all fasteners for tightness after initial firing.
- Sheet metal screws (self-tapping)
- Blind rivets
- Clamps and straps
High‑Temp Sealant Options
Which sealant suits a given pellet stove pipe joint depends on substrate, temperature range, and exposure to combustion byproducts.
Recommended options include high-temperature silicone (rated to ~600°F) for gasketing non-direct-flame areas, and ceramic-based or refractory sealants (rated 2000°F+) where heat and soot contact is direct.
Aluminum-based furnace cement can be used on steel joints but may crack with thermal cycling.
Make sure sealants are labeled for flue or chimney use and compatible with metal.
Apply per manufacturer curing instructions, avoiding overapplication that impedes fit.
Inspect seals annually, replacing degraded compound to maintain draft integrity and prevent leaks.
Test Draft and Troubleshoot Weak or Smoky Vents
How well does the stove draw when running at normal heat—strong, steady draft is essential for safe, efficient operation. Inspect connections, seals, and vent termination; feel airflow at register or use a manometer. If smoke or weak draft appears, check for obstructions, excessive pipe length, or improper rise.
- Measure draft: use a gauge or smoke test at appliance adapter to quantify negative pressure.
- Eliminate blockages: clean pellets, ash, and creosote; inspect cap and vent pipe for nests or debris.
- Correct installation issues: shorten runs, add rise, reseal joints, or consult a technician if problems persist.
Common Code Violations to Avoid on Pellet Stove Vents
When installing pellet stove vents, adherence to code prevents safety hazards, poor performance, and failed inspections.
Common violations include improper clearances to combustibles, incorrect termination heights, and use of single-wall pipe where listed double-wall or insulated pipe is required.
Unsealed or poorly supported joints, vents passing through unprotected combustible ceilings or walls, and improper use of chimney liners also appear frequently.
Failure to follow manufacturer installation instructions and local venting diagrams leads to noncompliance.
Neglecting required roof flashings, storm collars, or spark arrestors invites citations and hazards.
Inspectors often flag unauthorized modifications and absence of required permits or documentation.
When to Call a Pro: Complex Jobs and Red Flags
At what point should a homeowner defer to a professional? Complex installations, unclear vent routes, or structural penetrations that affect framing or roofing warrant licensed intervention. Unfamiliar wiring, gas connections, or multi-story chimney work increases risk and liability.
- Structural or roof penetrations requiring flashing, framing alterations, or permits.
- Combustion air, vent sizing, or manufacturer conflicts needing calculations or code interpretation.
- Signs of heat damage, persistent smoke backflow, or recurring leaks indicating hidden faults.
A professional guarantees code compliance, safe clearances, correct materials, and warranty protection, reducing fire, carbon monoxide, and insurance issues.
Routine Inspection and Maintenance Checklist
Regularly scheduled inspections and maintenance keep a pellet stove operating safely and efficiently; this checklist outlines the essential tasks, suggested frequencies, and signs that require immediate attention.
Inspect stove exterior, pipe joints, and seals monthly for leaks, corrosion, or loose connections.
Clean ash pan and burn pot weekly; remove clinker buildup.
Vacuum interior and vent termini every one to three months, depending on use, to prevent obstruction.
Check hopper feed and auger operation monthly for jams or irregular feed.
Annually, hire a qualified technician for thorough chimney/doop inspection, motor lubrication, gasket replacement, and combustion efficiency testing.
Address unusual noises, smells, or soot immediately.
Safety Checklist: CO, Clearance, and Creosote Risks
Often overlooked hazards associated with pellet stoves include carbon monoxide buildup, insufficient clearances to combustibles, and creosote accumulation in venting. The installer should verify CO detectors are installed and functioning, maintain manufacturer-specified clearances from walls and furniture, and inspect the flue for tarry deposits. Regularly scheduled vent cleaning prevents ignition of deposits; proper sealing and correct pipe slope reduce leaks and condensation that promote creosote.
Combustion air supplies must remain unobstructed. If any concern arises—unusual odors, soot, or detector alerts—stop use and seek qualified service. Document checks and corrective actions for safety compliance.
- Confirm CO detectors and alarms
- Measure and maintain clearances
- Inspect and clean venting
Typical Cost and Time Breakdown for an Installation
After completing safety checks for CO, clearances, and vent cleanliness, installers and homeowners should consider the typical cost and time breakdown for a pellet stove pipe installation. Costs vary by pipe type, roof or wall penetration, and local labor rates; expect materials $100–$600 and labor $150–$800. Simple through-wall installs take 2–4 hours; roof-penetration with flashing and storm collar adds 4–8 hours. Permits and inspections add time and modest fees.
| Item | Typical Range |
|---|---|
| Materials | $100–$600 |
| Labor | $150–$800 |
| Time | 2–8 hours |
| Permits/Fees | $20–$200 |
Conclusion
A properly planned pellet stove vent keeps a home safe, efficient, and code‑compliant, and the installer should follow manufacturer instructions and local regulations to the letter. When in doubt about liners, clearances, or roof penetrations, bring in a qualified professional rather than cutting corners. Routine inspection and timely maintenance prevent most problems, and forethought during installation will repay itself many times over — an ounce of prevention, as they say.