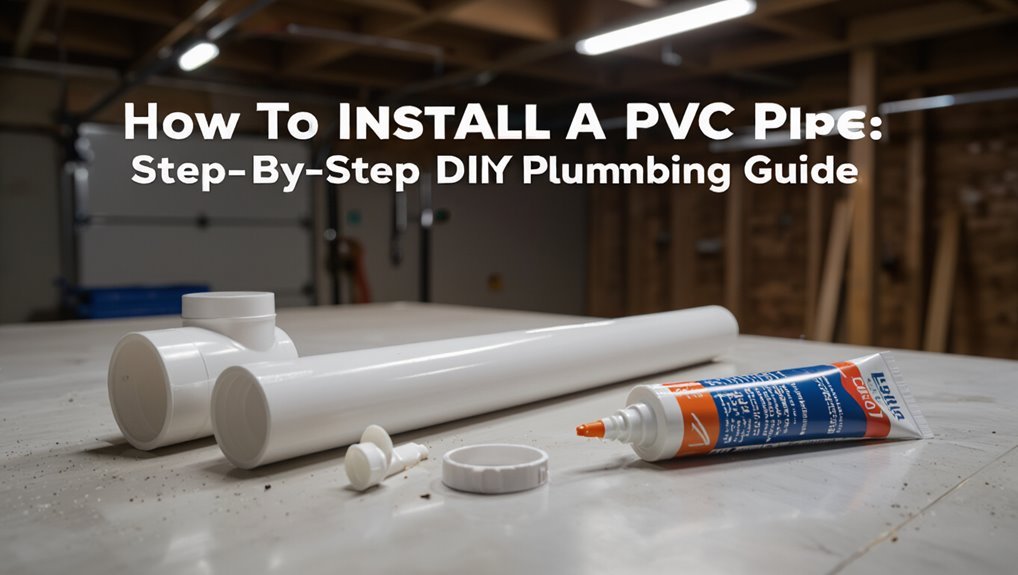
How to Install a PVC Pipe: Step-by-Step DIY Plumbing Guide
How to Install a PVC Pipe: A Step-by-Step Guide
To successfully install a PVC pipe, follow these key steps:
- Select the Right PVC Type and Schedule: Choose the appropriate PVC pipe suited for your project.
- Plan Your Route: Ensure the pipe route avoids obstacles and includes the necessary slope for proper drainage.
- Take Accurate Measurements: Measure straight runs and account for equivalent lengths of fittings and socket depths.
- Make Clean Cuts: Cut the pipe cleanly, chamfer the edges, and prepare for joining.
- Join Pipes: Use the correct solvent or threaded fittings to connect the pieces securely.
- Support the Pipe: Ensure the pipe is supported according to code spacing requirements.
- Test for Leaks: After installation, check for leaks to ensure a secure fit.
- Finish Accordingly: Depending on your installation, add insulation or burial protection as needed.
By following these steps, you’ll ensure a successful PVC pipe installation. For detailed instructions, tips, and troubleshooting advice, continue reading.
Which PVC Type Suits Your Project?

When selecting PVC for a job, the project’s purpose and the fluid, pressure, temperature, and exposure conditions determine the appropriate type. The installer evaluates potable water, drainage, irrigation, chemical transfer, or venting to decide among CPVC, PVC-U, PVC-O, or chlorinated variants. Chemical compatibility charts guide choices for corrosive fluids; UV-stabilized formulations suit outdoor use.
Temperature limits and pressure ratings dictate suitable material and joint methods. Planned burial, seismic conditions, or mechanical stress influence wall thickness and reinforcement. Appropriate selection reduces leaks, failures, and maintenance, ensuring code compliance and long service life without overengineering.
Which PVC Schedule (40 Vs 80) Should You Choose?
Choose a schedule based on required pressure rating, wall thickness, and application constraints: Schedule 80 has thicker walls and higher pressure capacity for smaller-diameter runs or abrasive/underground services, while Schedule 40 is lighter, less expensive, and sufficient for most residential water, drainage, and low-pressure applications.
The installer evaluates operating pressure, pipe diameter, temperature, and code requirements. Schedule 80 suits exposed pressurized lines, industrial or high-pressure systems, and locations needing impact resistance.
Schedule 40 fits potable water, irrigation, and typical drain, waste, and vent. Cost, weight, and joint compatibility also influence selection; always confirm local regulations.
How to Plan the PVC Run and Slope
The installer should map the pipe run, noting walls, foundations, and other obstacles that affect routing and support placement.
Next, calculate the required slope based on pipe diameter and flow needs to guarantee proper drainage and prevent standing water.
Final routing decisions combine obstacle avoidance with the slope calculations to minimize fittings and maintain continuous fall.
Run Layout And Obstacles
Before laying pipe, a clear run layout should be drafted that shows start and end points, route, fittings, and grade requirements.
The layout should mark obstacles: foundations, joists, existing utilities, trees, and paved areas.
Identify access points for future maintenance and avoid locations that complicate cutting or joint access.
Note required clearances from electrical and gas lines and permit-related setback zones.
Plan shifts around structural members using offsets or reroutes rather than excessive fittings.
Sketch multiple route options, compare material and labor implications, and select the path that minimizes obstructions while preserving required slope continuity and accessibility.
Required Slope Calculations
With the route established and obstacles mapped, slope calculations determine how to grade the PVC run so wastewater flows by gravity and complies with code.
The installer measures total elevation drop available and run length, then applies standard slopes: 1/4 inch per foot for 3-inch and smaller lines, 1/8 inch per foot acceptable for 4-inch mains where permitted.
Calculate required drop = slope × length.
Account for fittings, offsets, and trap-keeper elevations; round up to guarantee minimum velocity.
Verify against local plumbing codes and revise layout to increase slope or shorten run if required.
Record calculations on the plan for inspection.
How to Measure the PVC Run Accurately
Measurements should be taken from fixture to fixture to establish the base run length.
The installer must add length for each fitting and bend to guarantee sufficient pipe and avoid gaps.
For long or irregular runs, a taut string laid along the planned route provides an accurate guide for measuring.
Measure From Fixture To Fixture
For an accurate PVC run, measure the straight-line distance between each fixture center, noting any offsets for elbows or fittings; measure along walls or joists as the pipe will follow these surfaces.
Record distances sequentially, labeling start and end points.
Use a rigid tape measure for longer runs and a folding rule in tight spaces.
Verify elevations with a level or laser to guarantee proper slope where required.
Double-check measurements before cutting.
Cross-check against the plan to confirm fixture locations.
Keep a running total and mark measurements on the layout to simplify cutting and assembly during installation.
Account For Fittings And Bends
Having recorded straight-line distances and elevations between fixtures, the installer must next factor in fittings and bends that change the effective length of the run.
Each elbow, tee, coupler and trap adds equivalent length; manufacturers provide equivalent pipe length (EPL) for common fittings.
Sum EPL values with straight measurements to determine total required pipe.
For compound angles, break the turn into consecutive fittings or use long-radius elbows and apply corresponding EPL.
Account for solvent-weld socket depths or threaded engagement when cutting pipe.
Round up for cutting tolerance and spare pieces.
Record the computed total for material ordering and layout.
Use String For Long Runs
When laying out long PVC runs, a taut string provides the most reliable guide for measuring true path length over uneven terrain and around obstacles. The installer secures the string at endpoints, pulls it tight along the planned route, and records measurements at regular intervals. This method reveals deviations from straight-line estimates, accounts for fittings, and simplifies slope checks. After measuring, the string is transferred to the pipe-cutting plan so cuts and couplings match the real-world run. Care is taken to keep the string level where necessary and to mark obstacles that require offsets or additional fittings.
| Item | Purpose |
|---|---|
| String | Guide |
| Stakes | Anchor |
| Tape | Measure |
| Marks | Reference |
| Notes | Adjustments |
How to Choose Fittings for Your Layout
Which fittings best suit a given layout depends on pipe function, flow direction, and available space. The installer evaluates system purpose — drainage, venting, or pressurized conveyance — then selects fittings that preserve flow, minimize turbulence, and fit clearances. Material compatibility and pressure ratings guide choices; use sweep elbows for smooth turns, tees where branch distribution is needed, and couplings for straight joins.
Consider access for future maintenance and alignment tolerances to avoid strain.
- Use long-radius elbows for gentler flow.
- Choose solvent-weld or threaded fittings per system pressure.
- Pick tees versus wyes for branch angle.
- Allow service clearance at unions.
How to Estimate Materials and Cost for a PVC Job
The next step is to quantify materials by measuring required pipe lengths and noting any waste or overlaps.
From those measurements, the number and types of fittings can be calculated to complete the layout.
Finally, a labor estimate is added to material costs to produce a project budget.
Measure Pipe Lengths
To estimate materials and costs accurately, a plumber first translates the system layout into measured pipe runs and counts of fittings, accounting for straight lengths, offsets, and any waste from cuts or joints.
Measurements proceed from fixed connection points, noting elevations and bends.
Continuous runs are favored to reduce joints.
Allowances for cutting kerfs, solvent-cement overlap, and missed cuts are added as contingency.
Measurements are recorded on the plan and totaled by pipe size to match available stock lengths.
Typical considerations include:
- Measure along centerline for bends and offsets
- Add 10% for waste and errors
- Record lengths by nominal pipe size
- Note required stock lengths
Calculate Fittings Needed
Count fittings by mapping each joint type to the plan’s measured runs and connection points, translating elbows, tees, couplings, adapters, caps, and specialty pieces into quantities by size and function.
Inspect the layout for direction changes, branches, and terminations; note required socket or slip types and any adapter fittings for differing materials.
Tally spare pieces for cuts, misalignments, and primer/solvent joints that may need replacement.
Convert counts into lengths and sizes for ordering, group like items to check package quantities, and consult supplier catalogs for part numbers and unit prices to produce a concise parts list and material subtotal.
Estimate Labor Costs
Estimate labor costs by breaking the PVC job into discrete tasks—layout, cutting and fitting, solvent welding, supports and anchoring, pressure testing, and cleanup—and assigning realistic time per task based on crew skill and site conditions.
The estimator multiplies task times by hourly rates, adds travel and supervision allowances, and includes contingency for delays or rework. Complexity, access, and permit requirements increase rates.
Present a clear labor line-item summary and compare to total material cost to judge job viability. Typical adjustments reflect overtime, hazardous conditions, or expedited schedules.
- Hourly crew rates
- Estimated task hours
- Travel and supervision
- Contingency allowance
How to Find and Follow Local Codes and Permits
How should a homeowner make sure a PVC pipe installation meets local requirements? A homeowner should first identify jurisdictional authorities—city, county, or state—and review their plumbing codes online or at the building department.
Verify whether the project is permitted, noting classifications, application steps, fees, and inspection stages.
Ask about licensed contractor rules, approved materials, and required certifications.
Obtain permits before work begins and schedule inspections at prescribed milestones. Keep copies of permits and inspection reports.
If unclear, consult the building official or a licensed plumber to confirm compliance and avoid fines, rework, or voided insurance coverage.
Essential Tools for Cutting, Joining, and Testing PVC
When preparing to cut, join, and test PVC piping, a homeowner should assemble a compact set of reliable hand tools and safety gear: a PVC cutter or fine-tooth saw for clean cuts, a deburring tool or utility knife to remove burrs, proper solvent cement and primer with applicators sized for the pipe, appropriate fittings and primer wipers, measuring tape and a square for accurate layout, and a pressure test kit (gauge, pump, and test plugs) to verify system integrity.
Safety equipment—gloves, eye protection, and a respirator for solvent fumes—completes the essential list.
- PVC cutter or saw
- Deburring tool and square
- Solvent cement, primer, applicators
- Pressure test kit (gauge, pump, plugs)
Tools should be maintained, matched to pipe diameter, and used per manufacturer instructions to guarantee reliable joints and leak-free systems.
PPE: How to Protect Yourself During PVC Work
Wearing appropriate personal protective equipment (PPE) is essential for anyone working with PVC to prevent chemical exposure, cuts from sharp edges, and eye injuries from flying debris.
Gloves resistant to solvents and abrasion protect skin during handling and cementing. Safety goggles or a face shield guard against splashes and chips when cutting or deburring. A NIOSH-approved respirator or at least a chemical cartridge mask is recommended when solvent cement or primer is used in confined spaces. Long sleeves and durable work pants reduce cuts and irritation. Non-slip, closed-toe footwear prevents foot injuries.
Proper PPE reduces risk and supports safe, efficient PVC work.
How to Shut Off and Drain Existing Plumbing Lines
The technician first locates the main water valve to stop supply to the work area.
Individual fixture shutoffs are then closed to isolate specific lines.
Finally, the system is drained and pressure relieved by opening faucets and draining low points.
Locate Main Water Valve
Before beginning any work on household plumbing, identify and access the main water shutoff valve so the supply can be stopped and lines drained safely.
The main valve location varies: near the water meter, where the service enters the foundation, or in a utility area. Confirm valve type (gate, ball, or curb) and make certain the handle or wheel moves freely. Notify occupants before turning off water.
After closing the valve, open faucets at low points to drain lines and relieve pressure.
- Check near the street meter or sidewalk box
- Inspect basement or crawlspace entry points
- Look by the water heater
- Verify outdoor hose bibs are off
Shut Off Individual Fixtures
Locate and close each fixture’s shutoff valve to isolate the work area and prevent water flow.
Confirm valves are fully seated by turning clockwise until resistance is felt; quarter-turn ball valves should be perpendicular to the pipe.
For older multi-turn valves, close until the stem stops.
Check both hot and cold supplies where applicable.
Label closed valves with tape or a marker to avoid accidental reopening.
If a fixture lacks a local valve, note its connection and avoid disturbing it until the main supply is addressed.
Verify isolation visually by observing that nearby fixtures show no movement when tested.
Drain And Relieve Pressure
After shutting off individual fixtures, proceed to drain and relieve pressure in the isolated lines by opening nearby faucets and any high-point bleed valves to allow trapped water and air to escape.
The technician makes sure system pressure is released before cutting or disassembling pipe. Residual water is captured with buckets and rags; air vents prevent vacuum locks.
Confirm zero flow and check pressure gauges where available. If mains control is used, reopen briefly to flush debris, then reseal.
- Open lowest faucets to drain lines fully
- Open highest bleed valves to expel air
- Capture drained water safely
- Verify no residual pressure before cutting
How to Mark and Cut PVC Cleanly
Measure and mark each cut precisely, then use the proper tools and steady technique to produce square, burr-free ends.
The worker measures twice, marks with a fine permanent marker or scribe, and accounts for socket depth when cutting.
For small diameters, a PVC tubing cutter yields quick, straight cuts; for larger pipe, a miter saw with a fine-tooth blade or a hacksaw on a miter box gives control.
Secure the pipe in a vise or clamp to prevent twist.
Cut slowly, letting the blade do the work to avoid melting.
After cutting, check fit by dry-assembling joints and re-mark if adjustment is needed.
How to Deburr and Chamfer PVC Ends Properly
Before finishing a PVC installation, the cut ends are inspected for cracks, uneven edges, and remaining burrs that could impede fit or cause leaks.
Burrs are removed with a deburring tool, utility knife, or fine file, working carefully around the circumference to create a smooth interior and exterior.
A slight chamfer is then applied to the outer edge to ease insertion into fittings and guarantee proper seating without damaging solvent-weld surfaces.
Cut End Inspection
Inspects the cut ends of PVC pipe for smoothness, roundness, and the absence of burrs or sharp edges that can interfere with fittings or create flow turbulence. The inspector evaluates each end visually and by touch, confirming concentricity and consistent wall thickness. Ends that show deformation, cracks, or irregularities are flagged for recut.
Measurements guarantee proper insertion depth and seal reliability. Clean, even edges support solvent or mechanical joints and prevent leaks.
- Verifies roundness against a template or coupling
- Checks for micro-cracks near the rim
- Confirms uniform wall thickness around circumference
- Guarantees end face is perpendicular to the pipe axis
Burr Removal Techniques
With cut ends verified for roundness, wall thickness, and the absence of cracks, attention turns to removing any remaining burrs and creating a chamfered edge that guarantees proper seating and seal of fittings.
Burrs are scraped from inside and outside edges using a deburring tool, half-round file, or utility knife, progressing evenly around the circumference to avoid flats.
Internal burs are removed with a slightly angled motion.
Edges are lightly rounded to eliminate sharp ridges but not excessively trimmed.
After deburring, surfaces are wiped clean of plastic shavings and inspected to confirm smooth, continuous edges ready for joining.
Chamfering For Fit
Chamfer the cut PVC end to a smooth, angled bevel that guides the pipe into fittings and prevents the edge from cutting the sealant or O‑ring.
A proper chamfer eases insertion, guarantees even solvent-weld contact, and reduces stress on seals.
Remove burrs, then use a utility knife, deburring tool, or file to create a 15–30° bevel.
Lightly round the outer edge without thinning the wall.
Clean swarf and dust before assembly.
- Inspect the cut for unevenness and remaining burrs
- Cut a shallow, consistent bevel around the circumference
- Deburr inner and outer edges for smooth mating
- Wipe clean before gluing or seating
How to Dry‑Fit PVC Pieces for Alignment
Before solvent is applied, each PVC piece should be seated together without glue to verify fit, orientation, and rotational alignment.
Components are assembled dry from one end to the next, confirming sockets fully accept pipe depth and fittings match marked positions.
Elbows, tees, and adapters are rotated to align flow direction and access for future maintenance.
Joints are marked with a pencil or marker to record orientation.
Any interference, miscut length, or debris is corrected now.
After successful dry fitting, disassemble in the same order, keeping pieces clean and organized for final solvent-weld assembly.
How to Calculate and Allow for Thermal Expansion
After dry fitting and marking orientations, attention should turn to thermal expansion: PVC lengthens with temperature changes and must be accommodated to prevent buckling, joint stress, or leaks.
Calculate expected expansion by using the coefficient of thermal expansion (approximately 3.6×10^-5 in/in/°F), pipe length, and temperature swing.
Provide allowance at each run end, use offsets or expansion loops where space permits, and select proper anchor and slide points.
Consider insulation and buried depth to reduce swings.
Typical practice allows 1/4 to 3/4 inch per 10 feet for moderate temperature ranges; verify with local codes.
- Calculate ΔL = α·L·ΔT
- Use sliding supports
- Include expansion loops
- Anchor strategically
Primer: How to Apply It the Right Way
Primer is explained as the step that softens and cleans PVC surfaces to guarantee a strong solvent weld, and its purpose is stated clearly.
The proper application technique—using even, circular strokes, avoiding excess, and allowing appropriate dwell time—is summarized.
Safety and ventilation precautions, including working in a well-ventilated area and using gloves and eye protection, are noted.
Why Use Primer
When joining PVC, applying a solvent primer prepares the pipe and fitting surfaces by softening and cleaning the material so the cement can create a strong fusion bond. It removes contaminants, slightly melts the PVC to increase surface area, and guarantees consistent chemical welding.
Using primer reduces the risk of weak joints, leaks, and premature failure in pressurized or buried systems. It also speeds curing by promoting solvent exchange between parts. Primer selection should match pipe type and local codes.
Benefits include:
- Improved adhesion and bond uniformity
- Reduced joint failures and leaks
- Enhanced long-term durability
- More predictable curing behavior
Proper Application Technique
For a reliable solvent-weld joint, the applicator must follow a systematic technique that guarantees full, even coverage and proper drying time before cementing.
Begin by cutting and deburring pipe ends, then dry-fit components to confirm alignment.
Apply primer to the pipe outside and fitting inside using steady strokes; work quickly to avoid rewetting.
Make certain primer contacts the entire bonding surface without pooling.
Allow the primer to become tacky per product directions—typically a few seconds—before applying cement.
Once primed, immediately coat both surfaces with cement and assemble with a quarter-turn twist to distribute adhesive evenly.
Hold until set.
Safety And Ventilation
Why is ventilation essential during solvent application? Adequate airflow prevents fume buildup, reduces inhalation risk, and speeds solvent evaporation for reliable bonding. The installer should evaluate conditions and control exposure.
- Open windows and doors to create cross-ventilation when working indoors.
- Use a fan or exhaust to direct vapors away from the breathing zone.
- Wear a respirator rated for organic vapors if ventilation is limited.
- Keep ignition sources away; solvents are flammable and require grounded work areas.
Following these precautions preserves health and bond quality, ensuring solvent use is effective without compromising safety.
How to Glue PVC Joints Step‑by‑Step
Begin by gathering the correct primer, PVC cement, a clean rag, and the pipe and fitting cut to length; proper preparation makes the joint reliable and watertight.
Deburr and dry-fit parts, marking alignment.
Apply primer to both pipe end and fitting socket, allowing brief drying time.
Brush a uniform coat of cement inside the socket and around the pipe end.
Insert the pipe fully with a quarter-turn twist to spread cement evenly and align marks.
Hold pressure for 15–30 seconds to prevent push-out.
Wipe excess cement, allow recommended cure time before pressure testing, and follow manufacturer cure tables.
How to Join PVC With Mechanical Couplings
Use mechanical couplings when solvent welding is impractical or when a removable, flexible, or repairable connection is needed.
A plumber selects the proper coupling size and type (rigid, flexible, or repair sleeve) for PVC, PVC-to-metal, or misaligned runs.
Installation steps are straightforward: clean pipe ends, insert into coupling until stops, and tighten fasteners evenly to manufacturer torque. Pressure test after installation.
- Verify pipe OD and coupling compatibility.
- Remove burrs and debris; confirm smooth contact.
- Center pipes to avoid shear on seals.
- Tighten clamps evenly and retest for leaks before burying or concealing.
How to Install Threaded PVC Connections
The section outlines selection of compatible threaded fittings rated for the purposeful pressure and chemical exposure.
It explains how to prepare pipe threads by cleaning, chamfering, and applying appropriate thread sealant or tape.
It also covers correct tightening techniques to guarantee a leak-free joint without over-stressing the PVC.
Choosing Threaded Fittings
When connecting PVC pipes with threads, selecting the correct threaded fittings is essential to guarantee a secure, leak-free joint and compatibility with existing plumbing; attention should be paid to thread type (NPT vs. BSP), material compatibility, pressure rating, and size match.
The installer evaluates fittings for application, noting whether male or female ends are required and confirming taper direction. Use of adapters is considered when joining dissimilar materials. Proper selection reduces stress and corrosion potential.
Typical considerations include:
- Thread standard and taper (NPT or BSP)
- Correct nominal pipe size and fit
- Pressure and temperature ratings
- Material (PVC, CPVC, or plastic-metal adapters)
Preparing Pipe Threads
Before assembly, threaded PVC connections require careful preparation to make certain a tight, leak-free seal and to prevent damage to the plastic threads.
Inspect male and female threads for cracks, burrs, or deformities; discard damaged fittings.
Clean threads with a dry cloth to remove dust, grease, and machining residue.
Lightly chamfer the first thread on the male end with a utility knife to ease engagement without reducing thread contact.
Confirm compatibility of thread types (NPT vs BSP) and material ratings.
Dry-fit components to verify alignment and full thread engagement before any sealing compound or final tightening is applied.
Sealing And Tightening
Starting with a clean, dry thread surface, apply an appropriate sealant and tighten to specified torque to guarantee a leak-free joint without overstressing the PVC.
The methodical approach assures reliable threaded connections: select compatible thread sealant, avoid overapplication, and use proper tools.
After hand-starting threads, employ a torque-limited wrench where feasible.
Final inspection confirms alignment and absence of gaps.
- Use PTFE tape wrapped clockwise three to five turns
- For paste sealants, apply evenly on male threads only
- Tighten until snug, then add manufacturer’s specified turns
- Recheck after initial pressure test for any seepage
How to Assemble PVC Elbows, Tees, and Wyes
Assembling PVC elbows, tees, and wyes requires careful alignment and proper solvent-welding technique to guarantee leak-free joints and correct flow direction. Components are dry-fitted, marked for orientation, cleaned with primer, and solvent applied; parts are joined with a quarter-turn twist and held briefly. Elbows set direction, tees split flow, and wyes merge or divert with smoother angles. Allow full cure time before pressure testing. Fit checks prevent stress and misalignment. Use compatible socket sizes and pressure ratings. Clean excess cement, inspect joints, and support assembled fittings per code to maintain integrity and longevity.
| Fitting | Purpose | Tip |
|---|---|---|
| Elbow | Change direction | Align before welding |
| Tee | Split/branch | Mark orientation |
| Wye | Smooth merge/divert | Use for angled joins |
How to Cut and Fit a Saddle/Branch for a PVC Main
When adding a saddle or branch to a PVC main, the installer measures and marks the exact tap location, ensuring the new outlet won’t intersect fittings, supports, or high-stress zones.
The installer cuts a clean hole sized to the saddle, deburrs edges, and dry-fits the saddle clamp or branch fitting to confirm alignment. Adhesive or mechanical fasteners are applied per manufacturer instructions, taking care to maintain pipe roundness and avoid solvent pooling.
After curing, the branch is pressure-tested at working pressure to confirm a leak-free joint before backfilling or re-clamping.
- Measure twice, cut once
- Deburr and clean
- Follow adhesive cure times
- Pressure-test thoroughly
Installing PVC for DWV Systems
In residential and light-commercial buildings, PVC for DWV (drain, waste, and vent) systems must be installed to provide smooth flows, prevent traps from siphoning, and maintain proper venting. Installers select DWV-rated PVC and fittings, lay pipes with continuous downhill slope (generally 1/4″ per foot for horizontal runs), and support them at code-specified intervals.
Joints are cleaned, primed, and solvent-welded following manufacturers’ directions; testing occurs after cure. Vents rise without horizontal runs longer than allowed and connect above the flood rim. Penetrations are sealed, offsets minimized, and cleanouts provided for access and maintenance.
Installing PVC for Pressurized Water Lines
Installers must use pressure-rated PVC (typically Schedule 40 or 80, or CPVC for hot water) and follow piping codes and manufacturer limits for pressure, temperature, and solvent-cement procedures.
Installation of pressurized lines requires careful support, correct fittings, and leak-proof joints. Tests and isolation valves are integral, and thermal expansion must be accommodated.
Typical practices include:
- Measure and cut squarely; deburr and chamfer ends before joining.
- Use primers and solvent cement specified for the material; allow proper cure time.
- Install supports at manufacturer-recommended intervals and include expansion loops where needed.
- Pressure-test system per code before covering or insulating.
How to Transition Between PVC and Other Pipe Materials
Shifting between PVC and other pipe materials requires correct surface preparation and bonding techniques, with primer and cement specified for compatible joint types.
Where solvent welding is not appropriate, adapters and shift fittings provide mechanical connections that maintain pressure ratings and prevent leaks.
Proper selection and installation of the correct primer, cement, or fitting type guarantees a reliable, code-compliant shift.
Primer And Cement Use
When joining PVC to dissimilar materials, proper use of primer and cement guarantees a durable, leak-free connection.
The surface must be clean, dry, and free of paint, oil, or corrosion; mechanical fittings may require removal of burrs.
Apply PVC primer to the PVC socket and pipe end to soften and clean the surface, then apply solvent cement evenly.
Insert promptly with a quarter-turn twist and hold briefly for initial set.
Allow full cure per cement manufacturer before pressure testing.
Consider compatibility of solvents with other materials and use only approved primers and cements for mixed-material joints.
- Clean surfaces
- Apply primer
- Add solvent cement
- Insert and hold
Adapters And Transition Fittings
Adapters and transitional fittings bridge PVC to other pipe materials by providing compatible mechanical, solvent, or threaded connections that maintain flow integrity and pressure ratings. Installers select adapters based on material pairing, size, pressure, and temperature. Use solvent-weld adapters for PVC-to-PVC or PVC-to-CPVC, threaded brass adapters for metal interfacing, and flexible couplings for joining dissimilar diameters or vibrations. Always match pressure ratings and use appropriate sealants or thread tape on metal joints. Test thoroughly under pressure and inspect for galvanic risks when joining dissimilar metals.
| Transition Type | Typical Use | Notes |
|---|---|---|
| Solvent-weld | PVC–PVC/CPVC | Permanent, strong |
| Threaded brass | PVC–metal | Use tape/sealant |
| Flexible coupling | Dissimilar sizes | Allows movement |
| Dielectric union | Copper–steel | Prevents corrosion |
How to Install PVC Pipe Hangers and Supports
Properly placed hangers and supports prevent sagging, reduce stress at joints, and extend the life of PVC piping runs. The installer selects hangers sized to pipe diameter, spacing supports per code and load, and allows slight lateral movement for thermal expansion. Use cushioned clamps where vibration or friction could wear the pipe. Secure to sound framing or blocking; avoid over-tightening which can deform PVC.
- Match hanger type to pipe size and application
- Typical horizontal spacing: small-diameter closer, large-diameter farther
- Allow 1/8–1/4″ of vertical play for expansion
- Inspect supports periodically for corrosion or loosening
How to Secure PVC in Walls and Ceilings
After securing hangers and supports along open runs, attention turns to fastening PVC within walls and ceilings where access is limited and movement must be controlled.
Install sleeves at wall penetrations to protect pipe and allow thermal expansion. Use insulated clips or cushioned straps anchored to studs or joists every 4–6 feet for horizontal runs, and within 3 feet of changes in direction. Secure vertical stacks with straps at each floor level. Maintain slight slope for drainage on waste lines. Avoid overtightening fasteners that deform pipe. Test for movement and adjust supports before closing walls or installing drywall.
How to Route PVC Under Slabs and in Crawlspaces
When routing PVC under slabs and through crawlspaces, plan the path to minimize bends and crossings while keeping pipe above the slab subgrade and clear of high-load areas; maintain proper slope for drainage, provide continuous bedding of clean, compactable fill or sand to support the pipe, and protect runs with conduit or sleeves where they penetrate footings or meet foundation walls.
Careful placement reduces stress, permits inspections, and eases future repairs.
Consider access points, venting, and thermal movement. Use durable fittings and secure shifts at walls. Follow local codes and document locations for as-built records.
- Provide continuous bedding and backfill
- Use sleeves at penetrations
- Maintain clearance from structural elements
- Install access/cleanouts where practical
How to Slope PVC Drains for Proper Flow
Proper drainage requires a consistent slope, typically 1/4 inch per foot for 2–3 inch PVC drains, to maintain flow and prevent backups.
Installers measure pipe pitch with a level and tape, checking fall over each run and at fittings. Supports and hangers are then adjusted to hold that pitch steadily while allowing for thermal movement.
Required Slope Rate
A drain’s slope determines how effectively wastewater and solids move through PVC piping, so installers must guarantee specific grades to prevent backups or slow flow.
For typical residential drains, a minimum fall guarantees self-cleaning velocity while avoiding excessive speed that can leave solids behind. Code and best practice specify rates by pipe diameter; compliance prevents clogs and maintains venting performance.
Consider run length, fixture load, and cleanout placement when choosing slope.
- 1/4 inch per foot for pipes 3 inches or smaller
- 1/8 inch per foot for 4-inch drains
- Avoid slopes steeper than 1/2 inch per foot
- Follow local plumbing code requirements
Measuring Pipe Pitch
Having established the required slope rates, installers must next learn how to measure and set the pipe pitch accurately on-site. Measurement begins with a level, tape, and stringline; calculate drop over run (e.g., 1/4″ per foot), mark endpoints, then measure vertical difference. Use a laser level or water level for long runs. Confirm pitch by placing a small amount of water to observe flow toward the outlet. Record measurements and adjustments before fastening. Below is a quick reference:
| Tool | Purpose | Typical Use |
|---|---|---|
| Level | Detects slope | Short runs |
| Laser | Precise alignment | Long runs |
| Tape | Measure run | Calculate drop |
Adjusting Supports and Hangers
With the pitch verified, installers must now adjust supports and hangers so the pipe maintains a consistent slope from inlet to outlet.
Careful placement prevents sagging, standing water, and stress at fittings. Supports should cradle the pipe without compressing it; hangers must allow thermal movement while preserving gradient. Verify slope with a level and adjusters, then secure once uniform.
- Position supports at recommended intervals (per pipe diameter).
- Use slotted hangers or cushioned saddles for alignment.
- Leave small gaps at expansion points for movement.
- Recheck gradient after tightening to assure uninterrupted flow.
How to Test PVC Joints for Leaks
Begin by pressurizing the newly assembled PVC system and inspecting each joint for signs of leakage.
Visually scan fittings for drips, wetness, or solvent-weld squeeze-out gaps.
Wipe joints dry, then recheck after a few minutes to catch slow weeps.
Apply a soapy water solution to threaded or compression-style connections; look for steady bubbles indicating air or gas leaks.
For concealed joints, feel for moisture and listen for hissing.
Tighten accessible fittings slightly if dye, soap, or moisture suggests a minor leak; otherwise mark faulty joints for disassembly and reassembly with fresh primer and cement.
Record findings and retest after repairs.
How to Pressure‑Test a PVC Water Line
After correcting any leaks identified during the joint inspection, the installer should perform a controlled pressure test on the PVC water line to verify integrity under operating conditions.
The procedure uses water pressure only, isolates the section with test caps, and employs a calibrated gauge.
Fill the line slowly to expel air, then pressurize to the specified working pressure plus safety margin.
Monitor for a fixed duration, noting any pressure drop.
If stable, depressurize and restore service; if not, locate and repair leaks before retesting.
- Use approved test caps and a reliable gauge
- Fill slowly to avoid water hammer
- Hold pressure for the required time
- Record results and corrective actions
How to Air‑Test a DWV PVC System
Before testing, the system is secured by capping openings, seating clean fittings, and isolating stacks to ensure accurate pressure readings.
A regulated air source and calibrated gauge are then used to pressurize the DWV network to the specified test pressure while monitoring for pressure loss over the required hold time.
Any pressure drop or audible leaks are noted and located so repairs can be made and the test repeated until the system holds.
Preparing The System
In preparing a DWV PVC system for an air test, the installer isolates the portion of the system to be tested, seals all openings, and connects an appropriate pressure gauge and air source.
The preparatory phase emphasizes safety, documentation, and system integrity prior to pressurization. Valves, cleanouts, and temporary plugs receive inspection for proper seating. Accessible test points are identified and labeled. The installer records baseline conditions and notifies occupants.
- Verify fittings and joints are fully cured per manufacturer recommendations.
- Make certain all vents above test level remain open unless specified.
- Use compatible test plugs and gauges.
- Post signage indicating test in progress.
Performing The Air Test
Begin pressurizing the isolated DWV PVC section slowly with a calibrated air source while monitoring the gauge for a steady increase to the required test pressure.
Once reached, close the supply and observe the gauge for the mandated hold period without adding air.
Inspect visible joints, fittings and exposed pipe runs for audible leaks or escaping air.
Use a soapy water solution sparingly on suspect joints to reveal bubbles; rinse and dry afterward.
Make certain vents and traps are properly capped and any test plugs are secured.
Record starting pressure, hold duration, and final pressure before depressurizing and removing test equipment.
Interpreting Test Results
After the hold period ends, the technician reviews the pressure readings and visual/aural observations to determine compliance with required tolerances.
Results are compared to the test standard; acceptable systems show negligible pressure loss and no audible leaks.
Any deviation triggers isolation of sections, reinspection of joints, and repeat testing until criteria are met.
Documentation records initial and final pressures, duration, temperature, and corrective actions.
Clear conclusions guide repair or acceptance.
- Record initial and final pressures with timestamps.
- Note visible defects or moisture.
- Log ambient temperature and test duration.
- Describe corrective steps taken and retest outcomes.
How to Cut Out and Splice In a New PVC Section
To remove a damaged section of PVC and splice in a new one, the technician first isolates the line, measures and marks the cut lines, then uses the appropriate cutting tool to create square ends; accuracy at this stage guarantees clean joints, correct fit of fittings or couplings, and a leak-free repair.
The damaged piece is cut out, ends deburred and chamfered, then cleaned with solvent cleaner. Dry-fit the replacement pipe and couplings, confirm alignment and correct insertion depth, mark solvent weld locations, apply primer where required, swap to cement, assemble quickly with proper rotation, hold until set, and pressure-test the splice.
How to Replace a Damaged PVC Joint
Replace the damaged joint by isolating the section, disconnecting adjacent fittings if necessary, and removing the defective coupling or fitting without disturbing sound pipe runs.
Then measure and prepare replacement parts, ensuring matching diameter, socket depth, and material.
Clean and dry mating surfaces; apply primer where required.
Use appropriate solvent cement or mechanical coupling following manufacturer directions, seat parts fully, and allow cure time before restoring flow.
- Confirm system is depressurized and drained.
- Verify alignment to prevent stress on adjacent joints.
- Use proper tools and replacement fittings.
- Test quietly for leaks after curing.
How to Repair a Cracked or Leaking PVC Section
Having isolated and replaced a damaged joint, attention turns to repairing a cracked or leaking section of PVC pipe.
The technician first shuts off water, drains the line, and marks the damaged area.
For small hairline cracks, they clean, sand, and apply solvent cement or a two-part epoxy, wrapping with fiberglass tape for reinforcement.
For larger or fractured sections, they measure and cut out the affected length, deburr ends, and dry-fit a replacement piece with slip couplings or a repair coupling.
After solvent-welding or tightening the coupling per manufacturer instructions, tests for leaks before restoring full water pressure.
How to Winterize Exposed PVC Pipes
During late fall, exposed PVC pipes require straightforward preparations to prevent freeze damage: a technician inspects for cracks and loose fittings, drains and isolates the line where possible, and applies insulation or heat tape according to pipe location and local freeze risk.
The technician secures joints, seals penetrations at walls, and makes sure proper slope for drainage.
Outdoor valves are closed and drained; exterior spigots are winterized. Routine checks continue during cold snaps to spot ice buildup or tape failures.
- Verify access points are clear
- Use weatherproof connectors for temporary covers
- Protect adjacent fixtures from cold
- Label winterized lines
How to Insulate PVC to Prevent Freezing
The guide explains selecting insulation rated for outdoor use and sized to fit the pipe diameter to guarantee effective thermal protection.
It also recommends wrapping or covering elbows and T-fittings with foam or insulating tape to prevent heat loss at vulnerable joints.
Properly sealed seams and weatherproof outer layers are advised to maintain insulation performance through freezing conditions.
Choose Proper Insulation
When temperatures approach freezing, selecting the right insulation for PVC pipes is essential to prevent brittle failure and costly water damage. The choice depends on pipe location, exposure, and budget.
Foam sleeve insulation provides quick coverage and thermal resistance for above-ground runs. Fiberglass wrap suits irregular shapes and offers higher R-values where space permits. Self-sealing rubber insulation resists moisture and compresses around fittings but avoid discussing fittings here. For exposed outdoor lines, add weatherproof jackets.
Consider insulating tape for gaps and seal edges to prevent drafts. Evaluate R-value, moisture resistance, UV stability, and ease of installation before purchasing.
- Foam sleeve insulation
- Fiberglass wrap
- Self-sealing rubber insulation
- Insulating tape
Protect Joints And Fittings
Around vulnerable connections and fittings, extra attention must be paid because these points lose heat faster and are more likely to freeze than straight pipe runs. Apply foam insulation sleeves cut to fit each joint, sealing gaps with waterproof tape.
For irregular shapes, use pipe wrap or closed-cell foam pads secured with zip ties or aluminum foil tape. Insulate elbows, tees, and unions individually, overlapping adjacent insulation by at least one inch.
In exposed areas add heat tape rated for PVC, following manufacturer spacing and thermostat guidelines. Finally, test for snugness and weatherproof exposed ends with silicone sealant to prevent moisture intrusion.
Common PVC Installation Mistakes and How to Avoid Them
Frequently, installers overlook small errors that later cause leaks, joint failures, or system inefficiencies; this section outlines the most common PVC installation mistakes—incorrect cutting and deburring, inadequate solvent welding, improper support and slope, using incompatible fittings or pipe types, and exposing PVC to excessive stress or UV—then explains straightforward practices to prevent each one.
- Cut square, deburr, and chamfer to guarantee full socket engagement and uniform glue distribution.
- Follow manufacturer solvent-welding steps: clean, primer if required, apply solvent evenly, assemble within tack time.
- Provide correct supports, maintain recommended slope, and avoid long unsupported spans.
- Match pipe and fitting types, protect from UV and mechanical stress with insulation or shielding.
How to Troubleshoot Slow Drains and Backups
Diagnose slow drains and backups methodically by starting at fixtures and progressing toward the main line: check for localized clogs in sinks, tubs, or toilets using a plunger or hand auger, inspect accessible P-traps and clean debris, then test flow at nearby fixtures to determine whether the problem is isolated or system-wide. If multiple fixtures are slow, check the main cleanout and venting. Use enzyme drain cleaner for organic buildup; avoid harsh chemicals on PVC. When unsure, call a professional to camera-inspect lines.
| Symptom | Likely cause | Quick check |
|---|---|---|
| Single sink slow | Local clog | Plunge/augur |
| Multiple fixtures slow | Main line or vent | Inspect cleanout |
How to Identify Primer vs. Glue Failures
A visual inspection of joints can reveal faded primer coloration, uneven solvent cement beads, or gaps that point to installation issues.
Evaluating smell and texture helps distinguish primer-rich residue from tacky, uncured glue.
Patterns of leaks — such as seepage at the joint face versus along the socket — offer additional clues to whether primer application or adhesive curing failed.
Visual Joint Inspection
Inspectors examine solvent-weld PVC joints for distinct visual cues that differentiate primer-related problems from adhesive failures. They scan joint edges, color consistency, and bead formation to attribute flaws accurately. Primer issues typically show incomplete softening or uneven coloration; adhesive failures present as poor fillets or separation. Photodocumentation supports assessment and repair planning.
- Pale or streaked material at the socket indicates inadequate primer penetration.
- Thin, absent glue beads suggest insufficient adhesive application.
- Radial cracks near the interface point to solvent action failure.
- Visible gaps or displacement along the seam suggest mechanical or adhesive deficiency.
Smell And Texture
Smelling and feeling the joint provides immediate, practical clues: primer failures often leave a lingering solvent odor and a softened, tacky surface, while adhesive failures tend to smell faint or unlike solvent and produce a dry, brittle seam or rough texture at the bond line.
The installer should sniff near the joint, then lightly press and run a finger along the seam; tackiness indicates insufficient primer or over-thinning, whereas powdery residue, flaking, or cracking implies adhesive cure problems or improper mixing.
Consistent texture around the circumference suggests uniform application; inconsistent spots point to localized application errors that require rework.
Leak Pattern Clues
Tracing leaks by their pattern offers clear differentiation between primer and adhesive failures. Observation of residue, location, and spread reveals likely causes without dismantling joints. Visual cues guide diagnosis and targeted repair.
- Radial seepage at joint edges often indicates insufficient primer penetration, leaving unreacted surfaces.
- Surface beads or stringy residue along the seam suggest adhesive pooling or improper cure.
- Intermittent weeping under pressure points to incomplete solvent welding contact rather than glue breakdown.
- Staining or softened pipe material beyond the joint signals chemical attack from excess solvent, not mere adhesive failure.
Accurate reading of patterns directs efficient corrective action.
How to Remove Hardened PVC Cement Safely
When hardened PVC cement bonds must be removed, the safest approach combines mechanical methods with appropriate solvents and proper protective gear to avoid damage to the pipe and harm to the user. The technician works slowly: scrape with plastic chisels, use fine-grit sanding, and apply minimal solvent like PVC cleaner or adhesive remover tested on a scrap. Ventilate the area, wear gloves and eye protection, and avoid heat or aggressive tools that can deform plastic. After removal, rinse thoroughly and inspect the joint for scoring or thinning before reassembly.
| Method | Tool | Precaution |
|---|---|---|
| Scrape | Plastic chisel | Gentle strokes |
| Sand | 220-grit sandpaper | Even pressure |
| Solvent | PVC cleaner | Test first |
| Detail | Cotton swab | Avoid excess |
| Inspect | Visual | Look for damage |
How to Speed Up a Multi‑Run PVC Installation
After removing old adhesive and ensuring fittings are undamaged, the crew shifts focus to efficiency on multi‑run PVC layouts.
Work is planned to minimize cuts and joints, tubing is measured with templates, and staging areas hold prepped lengths and labeled fittings. Teams use consistent marking and one‑pass solvent and primer application to reduce rework. Coordination keeps runs parallel and accessible for testing.
- Premeasure and group cuts by run
- Assemble dry to verify alignment before gluing
- Use color‑coded labels for each branch
- Employ two‑person teams for simultaneous priming and setting
How to Choose Between DIY and Hiring a Plumber
Which projects truly suit a homeowner’s skill set and which require a licensed plumber depends on scope, code requirements, and risk tolerance.
Small repairs, simple replacements, and non‑pressurized outdoor runs often fit competent DIYers with proper tools.
Complex tasks—main service lines, concealed junctions, gas connections, work requiring permits, or anything affecting structural integrity—should involve a licensed professional.
Consider time, warranty, insurance, and local code enforcement; mistakes can be costly.
Obtain multiple quotes, verify credentials and references, and weigh cost against potential liability.
When in doubt, prioritize safety and compliance by hiring a qualified plumber.
How to Document Your PVC Installation for Permits
Moving from deciding whether to DIY or hire a pro, homeowners preparing a PVC installation must document the work clearly to satisfy permit authorities. Documentation should be concise, accurate, and organized for plan reviewers and inspectors.
Essential elements include scope, materials, routing, and code references. Photographic records and simple diagrams support written descriptions. Provide signed declarations if required.
- Site plan showing pipe routing and connected fixtures
- Materials list with pipe, fittings, and joint types specified
- Stepwise work log and inspection timestamps
- Clear photos of key stages: rough-in, joints, and final connections
Keep copies for permit files and future maintenance.
How to Confirm Final Compliance and Handover
How can a homeowner be sure the completed PVC installation meets code and is ready to hand over to the authority having jurisdiction? A final compliance checklist is followed: verify fittings, slope, support spacing, joint quality, primer/cement use, and correct venting.
Compare installation to approved plans and permit conditions. Conduct a pressure or water test per local requirements, record results, and photograph critical areas.
Prepare documentation packet: permit, inspection reports, test certificates, materials receipts, and photos. Notify the inspector, schedule final inspection, and provide access.
After inspector sign-off, retain copies and hand original documents to the authority having jurisdiction.
Working Around Electrical and Gas Lines Safely
Once final inspections and documentation are completed, attention shifts to coordinating PVC work near existing electrical and gas lines to prevent damage and hazards.
Work proceeds only after verifying line locations with utility maps and physical markers.
Qualified electricians or gas technicians supervise shutdowns or isolations when required.
Hand digging methods replace power tools within safety radii.
Maintain clear communication with occupants and contractors, and document all protective measures taken.
- Verify buried utilities with 811 or local service.
- Use non-conductive tools and insulated barriers.
- Establish exclusion zones and signage.
- Require lockout/tagout and certified escorts for live work.
How to Handle Common Site Constraints and Obstacles
Faced with tight site conditions, installers assess constraints—such as limited access, nearby structures, slopes, wetlands, and unexpected subsurface obstructions—then prioritize interventions that preserve line routing, safety, and schedule. They adapt trench depth, use compact fittings, employ short-radius bends, or switch to aboveground runs where allowed. Temporary shoring, erosion controls, and staged excavation limit disturbance. When subsurface utilities or rock appear, advance with vacuum excavation or hand-digging and adjust alignment. Communication with stakeholders and permits guides choices. Contingency materials and flexible connectors reduce delays; decisions favor minimal rework and documented deviations for inspection.
| Constraint | Typical Response | Priority |
|---|---|---|
| Limited access | Smaller equipment | High |
| Wet soils | Dewatering | High |
| Rock/obstruction | Vacuum dig | Medium |
| Nearby structures | Offset alignment | High |
How to Secure Final Connections and Finishes
After traversing site constraints and completing precise routing, installers focus on securing final connections and finishes to guarantee system integrity and long-term performance.
They verify fit, chamfer edges, and apply solvent or primer per manufacturer instructions to form leakproof joints. Mechanical fittings receive correct torque without over‑tightening.
Exposed runs are supported and isolated from vibration; wrap linkages with appropriate tape or collar to prevent abrasion.
Surfaces are cleaned and painted or insulated where required to match environment and code. Final pressure testing confirms integrity before backfill or concealment.
- Verify joint alignment and proper solvent application
- Torque fittings to specification
- Install supports and vibration isolates
- Protect and finish exposed pipe surfaces
Long‑Term PVC Maintenance Checklist
Regularly scheduled inspections and simple preventive tasks preserve PVC piping performance and extend service life.
Inspect joints, fittings, and visible runs quarterly for cracks, soft spots, discoloration, or solvent-weld failures.
Check hangers and supports for sagging, corrosion, or loose fasteners and adjust spacing per code.
Verify seals at penetrations and valves for drips; exercise valves and replace worn washers.
Clear nearby debris and vegetation to prevent abrasion and UV exposure; apply protective coatings where sunlight is unavoidable.
Monitor system pressure and flow for gradual declines indicating blockages.
Document findings, repairs, and replacement schedules to guide proactive maintenance.
Quick Install Checklist: What to Do Before You Start
Before any cuts or solvent welds are made, a brief preparatory checklist guarantees the PVC installation proceeds safely and efficiently.
The installer confirms measurements, inspects pipe and fittings for defects, and verifies material compatibility with system pressure and temperature.
Safety gear and proper tools are organized within reach.
Permit requirements and shutoff locations are identified, and the work area is cleared and lit.
Final confirmation of adhesive type and cure times prevents mismatches.
- Measure twice; mark cuts clearly
- Verify pipe type and pressure rating
- Gather PPE, primer, cement, saw, deburring tool
- Shut off and drain the affected system
Conclusion
In closing, the guide leaves the reader ready to tackle PVC installation with confidence, having weighed types, schedules and fittings, planned accurate runs and slopes, and learned how to handle obstacles and finish connections. Attention to measurement, secure joints and routine upkeep keeps systems reliable for years. By following the quick checklist before starting, the job will be a breeze rather than a headache — one solid plan prevents a world of trouble down the line.