Quick Fixes for Leaky Pipes: Easy DIY Repair Tips & Tools
Key Takeaway: Quick Fixes for Leaky Pipes
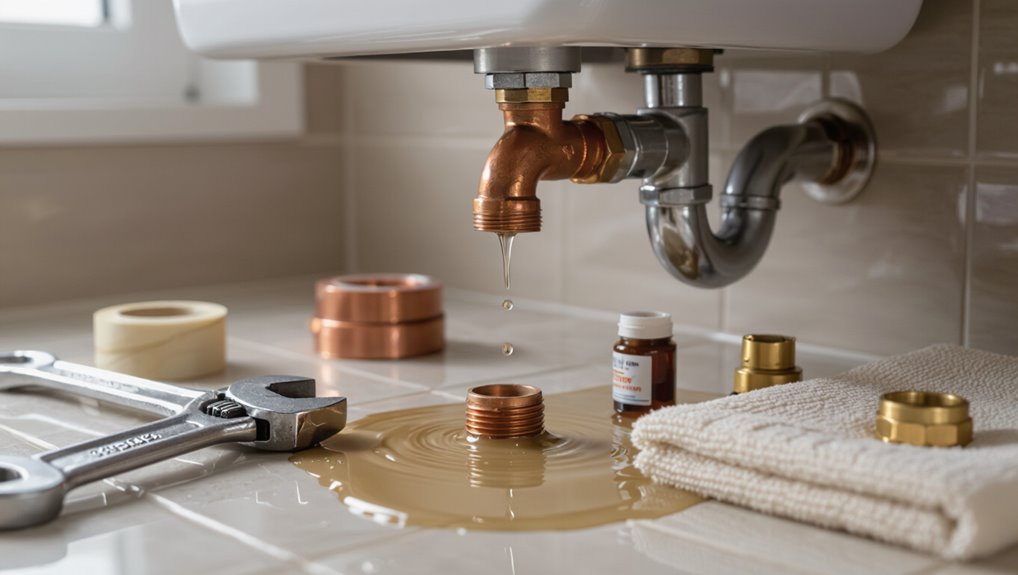
If you’re dealing with a leaky pipe, you can take immediate action to stop the leak temporarily by following these steps:
- Shut Off the Main Water Supply: Prevent further water damage.
- Drain the Line: Open faucets to release remaining water.
- Protect the Area: Use towels or buckets to catch any dripping water.
- Use Repair Materials:
- Plumber’s Tape: For threaded joints.
- Epoxy Putty: Ideal for small pinhole leaks.
- Rubber Patch with Stainless Repair Band: Effective for larger holes.
Additionally, keep basic tools handy and use a pressure gauge to test the repair at working pressure, documenting the results. If leaks persist or you notice corrosion, it may be time to consult a professional for replacement options.
Quick Fixes Now : When to Call a Plumber
When should a homeowner attempt a temporary repair, and when is a professional required? A homeowner may apply a temporary fix for minor, accessible drips—using pipe tape, rubber patches, hose clamps, or shutting the localized valve—when water flow is limited and structural risk is low. Temporary measures stabilize conditions until permanent repair can occur.
A professional is required for persistent leaks, bursts, leaks within walls or ceilings, sewage contamination, compromised gas lines, recurring repairs, or when the homeowner lacks tools or confidence. Plumbers provide diagnostics, code-compliant replacements, and permanent solutions that prevent water damage and mold.
Identify the Leaky Pipe: Spot, Severity, and Signs
How can a homeowner quickly distinguish a simple drip from a developing failure? Observers check leak location, rate, and pattern: steady streams, spreading stains, or bulging ceilings signal escalation; occasional slow drips from accessible joints often indicate minor wear.
Inspect surrounding materials for discoloration, mold, soft spots, or musty odors. Listen for hissing or continuous water sounds when fixtures are off.
Note water pressure changes and meter movement with all valves closed. Trace pipes visually from source to affected area; document size and progression with photos.
Accurate identification guides appropriate temporary fixes and informs whether professional assessment is warranted.
Can You DIY This Safely? 3 Checks to Decide
A few quick checks help determine whether a homeowner can safely tackle a leak or should call a pro: assess accessibility (visible, reachable pipe sections and straight fittings are easier to repair), evaluate severity (slow drips or small pinhole leaks are more suitable for DIY temporary fixes than active sprays or large flows), and consider system complexity and consequences (pipes carrying gas, hot water at high pressure, or located behind structural elements or HVAC/electrical components require professional intervention).
Next, examine material and age: brittle or corroded pipes, unknown alloys, and older joints often resist reliable DIY repair.
Finally, weigh skills, tools, and liability before proceeding.
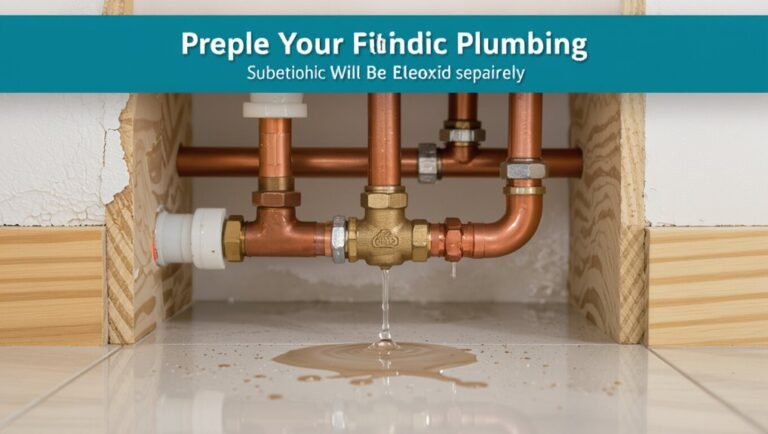
Shut Off Water and Protect the Area (Fast Steps)
The homeowner should stop the flow immediately by closing the main water valve to prevent further damage.
Next, remove nearby items and furniture from the affected area to create a clear workspace.
Finally, place towels, buckets, or a waterproof tarp to contain leaks and protect floors and belongings.
Turn Off Main Valve
Before any repairs begin, locate and shut off the home’s main water valve to stop flow and limit damage. The homeowner confirms valve type, turns it clockwise (or closes the lever perpendicular), and watches pressure drop. Notes the meter or taps to verify stoppage. Keeps tools ready and notifies occupants.
| Step | Action |
|---|---|
| 1 | Find valve (basement, crawlspace, or exterior) |
| 2 | Turn to closed position; use wrench if stiff |
| 3 | Verify by opening a faucet |
| 4 | Record valve condition for later reopening |
Proceed only when flow is fully stopped.
Clear And Protect Area
Once water is shut off, clear the immediate work area and protect nearby surfaces to prevent damage and keep the space safe.
Remove loose items, rugs, and electronics; relocate valuables.
Lay down absorbent towels, plastic sheeting, or a tarp to catch drips and debris.
Use painter’s tape to secure coverings and prevent slipping.
Place a bucket beneath the leak and surround it with rags to control splashes.
Make certain adequate lighting and ventilation.
Keep tools organized on a tray and maintain a clear exit path.
These steps minimize water damage, simplify repairs, and reduce the risk of slips or accidental harm.
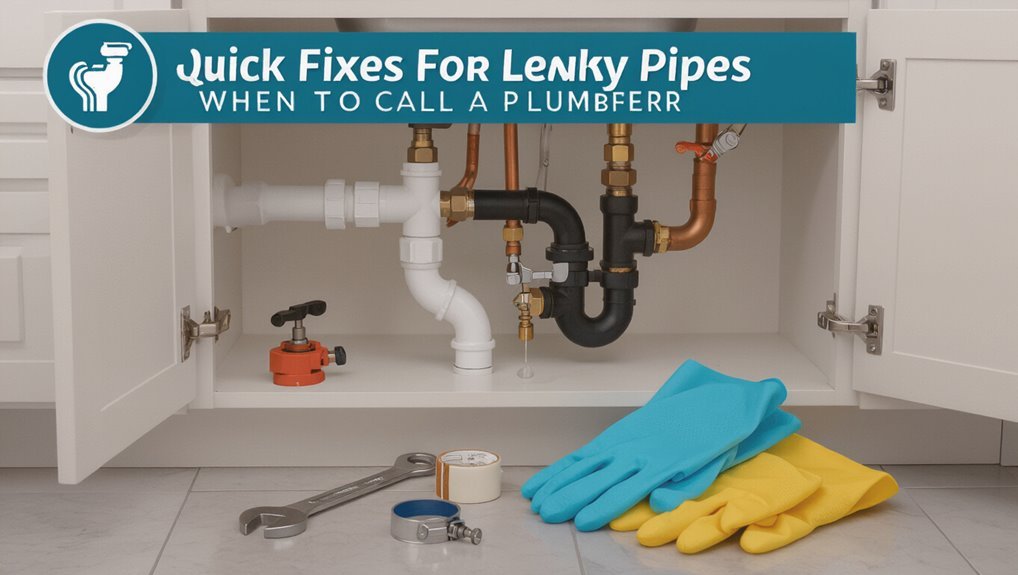
Tools and Emergency Supplies to Keep on Hand
For quick, effective responses to a leaking pipe, a compact kit of basic tools and emergency supplies is essential. Include adjustable wrench, slip-joint pliers, pipe cutter, and a flashlight with fresh batteries.
Add plumber’s tape, rubber repair tape, hose clamps in assorted sizes, and a roll of heavy-duty tarp or plastic sheeting to protect surroundings.
Keep absorbent towels, a bucket, nitrile gloves, and safety goggles for personal protection. A small caulking gun with silicone sealant and a multi-tool add versatility.
Store items in a labeled waterproof container and check inventory periodically to replace used or expired supplies.
Patch Pinholes With Epoxy Putty
When a small pinhole appears in a water pipe, epoxy putty provides a durable, water-tight repair without soldering or replacement.
The area should be shut off, drained, and dried; remove rust and scale with a wire brush.
Knead the two-part putty until uniform, then press it over the defect, shaping a smooth, overlapping patch.
Allow recommended cure time before restoring pressure.
Epoxy adheres to metal and many plastics, resisting vibration and temperature changes.
Inspect the repair for seepage after initial use and periodically thereafter.
Replace the section if corrosion spreads or the patch fails.
Seal Leaking Joints With Tape and Sealant
In tackling a leaking joint, wrapping thread seal tape and applying joint compound or silicone sealant provide quick, reliable barriers against seepage without cutting pipework.
First, drain and dry the area; inspect threads or a saddle joint for corrosion or debris.
Wrap PTFE tape clockwise for threaded fittings, covering threads evenly without overlayering.
For compression or push-fit joints, remove old sealant, apply a thin bead of silicone or joint compound around the joint, and tighten fittings to manufacturer torque.
Allow cure time per product instructions.
Recheck for leaks under normal pressure.
These steps suit small joint weeps; larger breaches need different methods.
Temporary Clamp + Rubber Patch for Larger Holes
For larger holes, a temporary rubber patch applied directly over the breach and held by a sturdy clamp can stop leaks long enough to arrange a permanent repair.
The rubber patch should be cut to fully cover the hole with some overlap and secured tightly to prevent seepage.
When choosing a clamp, the reader should match clamp width and pressure capacity to the pipe diameter and leak severity to avoid further damage.
Quick Rubber Patch Steps
Using a temporary clamp and a rubber patch provides a fast, effective stopgap for larger holes that cannot be sealed with tape alone.
Surface must be cleaned and dried; remove loose corrosion, paint, or debris so the patch seats evenly.
Cut a rubber piece larger than the hole, with rounded edges to prevent stress points.
Center the patch, then position the clamp over it and tighten incrementally until leaks stop, avoiding over-tightening.
Check alignment and re-tighten after a short test run.
Label the repair and schedule a permanent replacement or professional inspection to guarantee long-term safety.
Choosing A Proper Clamp
Which clamp fits the job depends on pipe size, damage type, and pressure conditions.
For larger holes paired with a rubber patch, a stainless steel repair clamp with a saddle-style band is preferred; it distributes pressure and seals evenly.
Make certain clamp diameter matches pipe outer measurement and allows overlap over intact pipe on both sides of the hole.
Bolts should provide even torque without crushing the pipe; use a torque-limited driver if available.
For high-pressure lines, choose clamps rated above system pressure.
Inspect rubber gasket compatibility with conveyed fluid and replace any corroded hardware before installation to secure a reliable temporary repair.
Replace a Short Pipe Section With a Slip Coupling
When a short section of damaged pipe needs removal, a slip coupling provides a quick, reliable repair that restores flow without replacing an entire run.
The process begins by shutting off water and draining the line. Cut out the damaged segment squarely, deburr edges, and clean the pipe ends.
Measure and select a coupling sized for pipe material and diameter; for shifting tolerance, a slip coupling slides over one end before positioning between pipes.
Apply primer and solvent for PVC or thread sealant for threaded metal, then seat the coupling fully.
Allow cure time or torque recommendations before restoring water and checking for leaks.
Test Your Repair on a Leaky Pipe & Prevent Repeats
After completing a repair, always pressure-test the line to confirm the leak is sealed and to catch any weak spots before restoring normal use. The technician slowly restores water, watches fittings and joints, and inspects for dampness or pressure drops.
Record pressure readings and duration to guarantee stability. Implement preventive measures to reduce recurrence: secure pipes, replace corroded sections, and maintain proper insulation.
- Test at working pressure for several minutes.
- Use a pressure gauge and visual inspection.
- Tighten or reseat any suspect connections.
- Document findings and schedule routine checks.
Troubleshooting: When Temporary Fixes Fail and Next Steps
If pressure testing reveals continued seepage or a sudden drop in readings despite tightened fittings and replaced sections, the homeowner should treat the repair as temporary and move to systematic troubleshooting.
Begin by isolating zones and rechecking valves, joints, and visible run lengths for hairline cracks. Use dye or food coloring in standing water and a faucet-to-valve method to localize leaks. Inspect hidden areas—behind walls, under floors, and around appliances—with a moisture meter or infrared camera.
If the source remains unclear, shut off water, document findings, and contact a licensed plumber for diagnostic pressure testing, pipe replacement, or specialty repairs.
Conclusion
When a drip becomes a flood, act quickly; when a joint weeps, inspect closely; when a burst appears, shut water off. Gather tools, apply clamps, wrap rubber, or cut and slip in a coupling. Test firmly, watch patiently, and tighten where needed. Call a plumber when corrosion spreads, when damage is extensive, or when safety is uncertain. Save supplies, learn basic steps, and replace temporary fixes with permanent solutions to prevent future leaks.