How to Fix Kitchen Sink Drain Pipe Fast: DIY Repair Guide
To quickly fix a leaking kitchen sink drain pipe, follow these key steps:
- Shut off the water supply to prevent further leaks.
- Clear the cabinet under the sink for easy access and place a bucket beneath the trap to catch any water.
- Inspect the components: Check slip nuts, washers, and the P-trap for cracks or loose fittings by running the faucet and looking for drips on a dry towel.
- Tighten any loose fittings: Hand-tighten the nuts, then use pliers to snug them a quarter turn.
- Replace worn parts: If washers are hardened or if the trap section is damaged, replace them.
- Use temporary fixes: If immediate repairs aren’t possible, apply plumber’s tape or a rubber patch for a temporary stop.
If the problem persists after these steps, it’s advisable to call a professional plumber for further assistance.
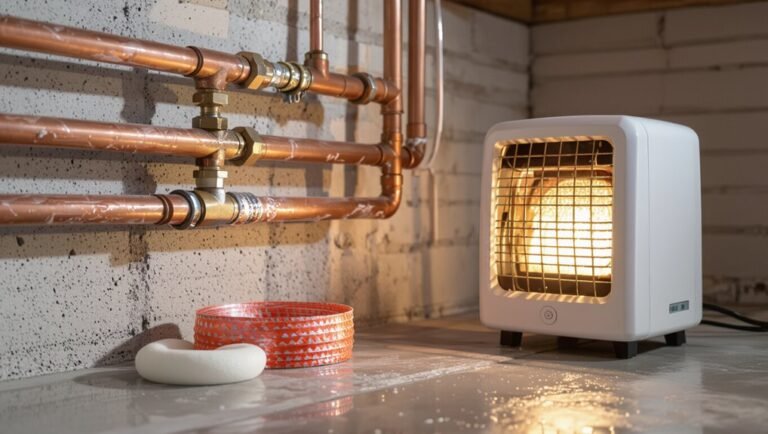
Immediate 2-Step Actions to Stop the Leak Now
How should the homeowner stop a leaking kitchen sink drain immediately? First, shut off the water supply valves beneath the sink or the home’s main shutoff to prevent further flow.
Second, contain the leak: place a bucket under the drain, spread absorbent towels, and if the leak is from a joint, tighten slip nuts by hand then snug gently with pliers to avoid damage.
If the leak originates from a crack, temporarily wrap the area with plumber’s tape or a rubber patch secured with hose clamps. These actions limit water damage and provide time to plan a proper repair or call a professional.
Tools and Parts for Fast Sink Drain Repair
A compact kit of basic tools and a few common replacement parts lets a homeowner stop most sink drain leaks quickly and prepare for a permanent fix.
Essential hand tools include an adjustable wrench, slip-joint pliers, and a screwdriver; these enable nut loosening, seal removal, and part replacement.
Common parts to keep on hand are replacement rubber gaskets, a tailpiece or trap adapter, and plumber’s putty or thread seal tape for temporary sealing.
Quality and correct sizing matter to avoid repeated disassembly.
Spare parts simplify fast fixes and reduce time spent sourcing items during an active leak.
- Adjustable wrench, slip-joint pliers, screwdriver
- Rubber gaskets, trap adapter, tailpiece
- Plumber’s putty or thread seal tape
Shut Off Water and Prep the Sink
Before beginning any work, the homeowner should locate and shut off the cold and hot water valves beneath the sink to prevent leaks while the drain is handled. After confirming the water is off by running the faucet briefly, they should clear the area under the sink of personal items and removable shelves.
A bucket and towels should be placed under the drain to catch residual water.
Turn Off Water Supply
Shut off the water supply at the shutoff valves under the sink or at the home’s main valve, and confirm both hot and cold lines are fully closed by turning the faucet on briefly until flow stops.
The area should be dry and pressure-free before loosening fittings. Relieve residual water by opening the faucet and placing a bucket beneath the trap. Wear gloves and eye protection; small spills are likely when joints are opened. Keep tools and replacement parts within reach to minimize faucet cycles. Note valve stiffness—do not force corroded valves; consider shutting the main if under-sink valves fail.
- Verify both valves visually and by feel
- Collect towels and a bucket
- Prepare replacement washers and tape
Clear Under-Sink Area
With the water confirmed off and residual pressure relieved, clear the cabinet under the sink to create an unobstructed workspace.
Remove cleaning supplies, trash bins, and loose items; place them elsewhere to prevent contamination and obstruction.
Lay down a towel or shallow pan to catch drips and protect the cabinet base.
Position a flashlight or work light for visibility.
Keep a small bucket, adjustable wrench, pliers, and replacement parts within reach.
If chemicals or sharp objects are stored below, relocate them safely before starting.
Organizing tools and clearing hazards reduces delays and minimizes the chance of accidental spills or injury.
Find the Leak in 5 Quick Checks
The next step is a quick inspection to locate the source of the leak.
Start by checking visible connections under the sink for loose fittings or corrosion.
Then inspect the P-trap seal for cracks, misalignment, or a deteriorated washer.
Check Visible Connections
Standing beneath the sink, inspect every visible joint and fitting for drips, corrosion, or mineral buildup that indicate a failing seal.
The examiner notes loose slip nuts, hairline cracks at threaded connections, and dampness where washers sit.
Tighten connections gently, wipe surfaces dry, and apply a tissue to catch renewed seepage.
Corrosion or pitting suggests replacement rather than repair.
Record locations and severity before disassembly to prioritize parts.
Avoid disturbing the P-trap seal until the next step.
Documented observations speed parts ordering and reduce repeated visits.
- Photograph suspect joints for reference
- Check metal and plastic fittings separately
- Note odor or discoloration near leaks
Inspect P-Trap Seal
Having noted and photographed suspect joints above, attention moves to the P-trap seal as the most common under-sink leak source.
The inspector first places a dry paper towel beneath the trap, then runs water and watches for fresh dampness.
Visual inspection targets the slip-nut threads, washer condition, and trap alignment; corrosion, cracks, or a twisted washer indicate replacement.
Tighten slip nuts by hand then a quarter turn with pliers—avoid overtightening.
If leaking persists, remove the trap, clean mating surfaces, install a new washer or trap assembly, and retest.
Document findings and parts used for future reference.
Clear Minor Clogs Safely (No Disassembly)
Begin by running hot tap water for a minute to loosen grease and soften debris before attempting any unclogging method.
The homeowner then tries simple, safe techniques that avoid disassembly: use a plunger over the drain with a tight seal and several firm pumps; pour a measured mixture of baking soda followed by vinegar, wait five minutes, then flush with hot water; employ a wire coat hanger with a small hook to pull visible debris near the drain entrance.
If flow improves, continue monitoring for recurrence.
If obstruction persists or odors remain, escalate to tools or professional service.
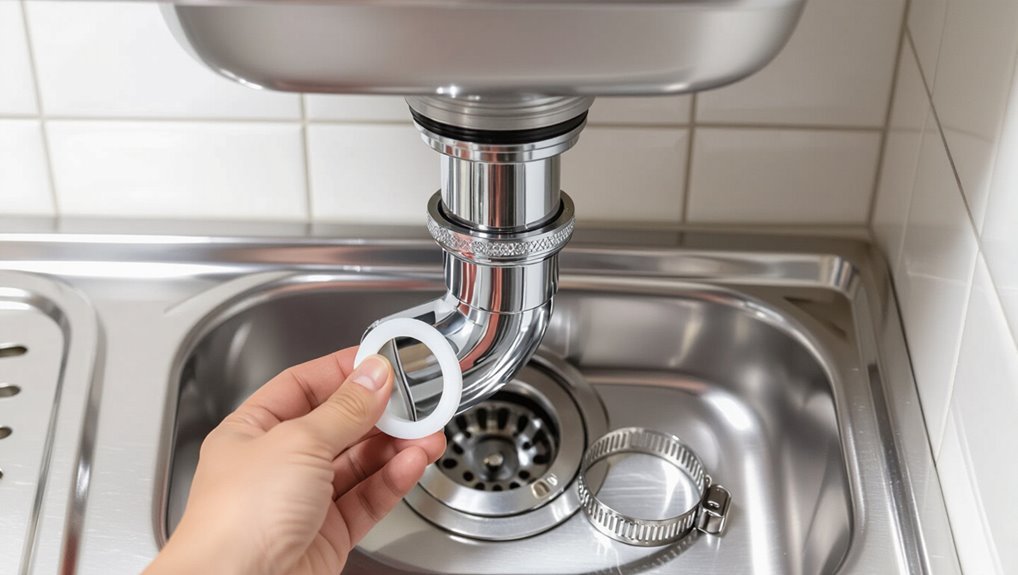
Tighten or Replace P‑Trap Slip Nuts
The P‑trap slip nuts and their washers should be inspected for wear, cracking, or mineral buildup before any reassembly.
If washers are intact, tightening the nuts often stops leaks; if nuts are corroded or stripped, they should be replaced to guarantee a reliable seal.
Replacement parts are inexpensive and straightforward to install with basic hand tools.
Inspect Nut And Washer
Inspect the slip nuts and washers on the P‑trap for tightness, cracks, or deformation before reassembling the drain. A careful visual and tactile check helps identify worn seals that cause leaks. Remove the trap, compress washers to test elasticity, and note any flattened or brittle sections.
Make certain threads align and spin smoothly; cross‑threading suggests replacement. If tightening cures minor seepage, retest after running water. Keep a record of washer size and nut type for accurate replacement if needed.
- Check washer elasticity and uniform thickness.
- Confirm nut threads are undamaged and seat evenly.
- Test reassembled joint under running water.
Replace Corroded Slip Nuts
When slip nuts show corrosion, tightness loss, or rounded flats, they should be tightened carefully or replaced to restore a reliable seal; using channel-lock pliers or a proper-sized wrench, turn the nut clockwise until snug but avoid over-torquing which can crack plastic fittings or strip threads.
Corroded metal nuts or deformed plastic ones often fail to compress the washer evenly, causing leaks.
Remove the P-trap, inspect washers and threads, and fit new slip nuts of matching size and material.
Reassemble by hand-starting threads, then snug with a wrench.
Test for leaks and retighten minimally if needed.
Remove and Replace a Worn P‑Trap Section
Before loosening any fittings, confirm the water supply is off and a bucket is in place to catch residual water.
The worn P‑trap section is unscrewed at slip nuts, drained, and inspected for cracks, deformation, or persistent odors.
Measure trap arm and inlet diameters, buy a matching replacement (PVC or metal), and transfer any washers or gaskets that remain serviceable.
Reassemble by hand-tightening slip nuts, align joints to avoid stress, then snug with pliers a quarter turn.
Test for leaks by running water and checking joints. Replace washers or nuts if seepage appears.
- Inspect for hair, debris, and mineral buildup
- Measure lengths and diameters precisely
- Keep spare washers and a bottle brush on hand
Seal Small Tailpiece or Trap-Adapter Leaks
Often a slow drip at the tailpiece or trap adapter reveals a loose connection, a hardened gasket, or a small scratch that compromises the seal. The procedure begins by drying the area and hand-tightening slip nuts; if persistent, disassemble, clean mating surfaces, and inspect washers for cracks or compression.
Replace old rubber or foam gaskets with correctly sized parts, applying plumber’s grease to ease seating. For minor scratches, wrap seal tape (thread sealant or plumber’s tape) sparingly or use a thin smear of silicone plumber’s compound before reassembly. Recheck for leaks after running water and retighten gently as needed.
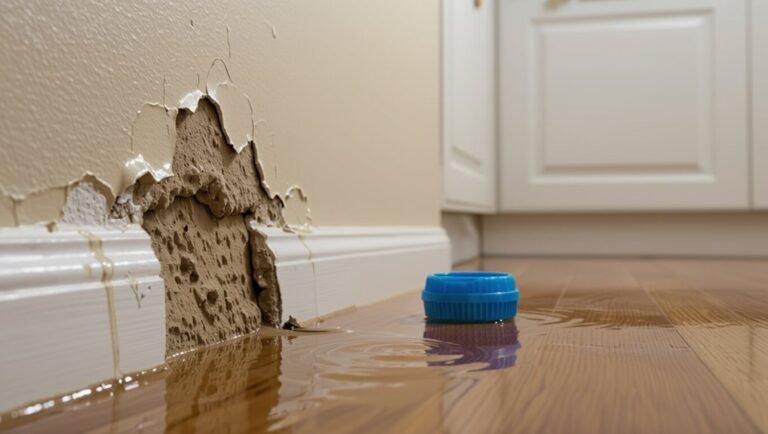
When to Replace the Drain Pipe Instead of Patching
Decide to replace the drain pipe when recurring leaks, extensive corrosion, multiple failed repairs, or structural damage indicate the problem is systemic rather than localized. Replacement is recommended if pipes are brittle, pitted, or have hidden hairline fractures; temporary patches only mask progressive failure.
Consider age, water quality (mineral corrosion), and visible deformation: replacement reduces future downtime and prevents water damage to cabinets and flooring. A full replacement also allows upgrading to better materials and fittings.
Weigh cost and disruption against long-term reliability; call a professional if access or sewer connections complicate the job.
- Recurrent leaks despite patches
- Visible corrosion or deformation
- Pipes older than 20 years
Common Mistakes That Waste Time (And How to Avoid Them)
Frequently, homeowners lose hours on kitchen sink repairs by repeating avoidable mistakes that stall progress. They rush diagnosis, treating symptoms instead of locating the true leak, leading to repeated work.
Using wrong tools or mismatched fittings causes stripped threads and slow troubleshooting. Skipping basic prep—clearing cabinet space, turning off water, placing a bucket—creates delays.
Overreliance on sealants when parts are corroded postpones proper replacement. Ignoring manufacturer instructions for connectors and adapters results in improper seals.
To avoid wasted time, follow systematic inspection, gather correct tools and parts beforehand, and prioritize durable fixes over quick makeshift solutions.
Test the Repair and When to Call a Plumber
Regularly verify the repair by running water through the sink, checking all joints and connections for drips, and observing under-cabinet areas for slow seeping or dampness.
After several fill-and-drain cycles, inspect for odors, discoloration, or movement in fittings.
Tighten fittings if minor leaks appear; replace seals when deterioration shows.
If leaks persist, water damage appears, or drainage remains slow despite cleaning, escalation is prudent.
Persistent odors, recurring clogs, or visible corrosion warrant professional assessment to prevent hidden damage and code violations.
- Immediate steps to confirm a successful fix
- Signs that indicate escalation is needed
- What a plumber will check and why
Conclusion
A sudden puddle beneath the sink taught the homeowner the value of quick, sensible fixes: shut the water, tighten the nut, or slip in a replacement washer. By following the checklist—tools ready, leaks pinpointed, clogs cleared, seals renewed—the repair often ends before dinner. Coincidentally, the very drip that revealed the problem also provided a clear deadline, turning procrastination into prompt action and saving both time and a costly plumber’s visit.