How to Fix Galvanized Pipe: Easy DIY Repair Guide & Tips
Key Takeaway: To fix small leaks in galvanized pipes, you can use clamps, epoxy putty, or self-fusing silicone tape after isolating and draining the line.
Steps:
1. Identify the Pipe: Use a magnet and visual inspection to confirm it’s galvanized.
2. Clean the Area: Remove any rust and debris.
3. Repair Options:
- For minor leaks, apply clamps or epoxy putty.
- Use self-fusing silicone tape for a quick fix.
4. For More Extensive Damage: Rethread or replace sections with proper tools, using PTFE tape or pipe dope for sealing.
5. Caution: Avoid overtightening fittings, using incompatible materials, or disturbing leaded scale.
If you encounter major corrosion or systemic failures, it’s best to consult a licensed plumber. Further detailed techniques are available below.
Who Should Attempt DIY Galvanized Pipe Repairs : Homeowner vs Pro
Evaluating whether a homeowner should tackle galvanized pipe repairs requires weighing skill level, tool access, and the scope of the problem. A competent DIYer with plumbing experience, proper tools, and clear, limited corrosion or a localized leak may safely perform patching, section replacement, or fitting swaps.
Complex scenarios—extensive corrosion, hidden systemic deterioration, compromised structural elements, or lead concerns—favor hiring a licensed plumber to guarantee code compliance and long-term reliability. Time, warranty considerations, and access to replacement parts also influence the decision. Risk-averse homeowners should consult a professional rather than attempt uncertain or invasive repairs.
How to Tell If a Pipe Is Galvanized or Another Material
Identification begins with visual cues: galvanized pipe typically has a dull, spangled gray finish, while copper, PVC, and black steel look distinctly different.
A magnet test and a feel for weight help confirm metal type—galvanized (steel) is magnetic and heavier than aluminum or copper. Threading style and stamped age marks or manufacturer codes provide additional evidence of material and installation era.
Visual Appearance And Finish
Frequently, a quick visual inspection provides the clearest clues to whether a pipe is galvanized: galvanized steel typically shows a dull, spangled gray finish with a slightly rough, crystalline pattern from the zinc coating, whereas bare steel appears darker and smoother, copper has a reddish-brown tone that patinates to green, and PVC or CPVC present uniform plastic surfaces without metallic luster. Visual cues: color, texture, and corrosion type indicate material. Use clean, dry lighting and wipe surfaces to reveal true finish. Compare suspected sections with known samples.
| Feature | Appearance |
|---|---|
| Color | Gray / dark / reddish / white |
| Texture | Spangled / smooth / flaky / smooth |
Magnet Test And Weight
After visual cues have narrowed the possibilities, simple physical tests quickly confirm whether a pipe is galvanized steel. A strong magnet will stick firmly to ferrous metals; consistent attraction along the length indicates steel beneath zinc coating. Non-ferrous pipes like copper or brass show little or no magnetic response.
Weight offers a secondary check: galvanized steel feels noticeably heavier than aluminum or PVC of the same size. When comparing samples, steel’s density makes it feel solid and substantial in hand. Combined, magnetism and comparative heft provide a reliable, fast field assessment to distinguish galvanized steel from other materials.
Threading And Age Marks
When examining pipe ends, the presence and style of threads offer clear clues to material and age. Thread form, spacing, and wear indicate manufacturing standards and whether zinc coating was applied. Galvanized iron often shows coarse, tapered National Pipe Thread (NPT) with visible galvanic residue; newer stainless or brass display finer, uniform threads and stamped heat or grade marks. Age marks, factory stamps, or date codes near threads help confirm era and compatibility for fittings. Examine thread damage for previous rethreading which may reveal inner material.
- Coarse tapered threads suggest older galvanized iron.
- Fine uniform threads indicate newer metals.
- Stamps/date codes confirm manufacture.
Common Galvanized Pipe Failures: Pinholes, Rust, Low Flow
Galvanized pipes commonly develop pinhole leaks where the zinc coating has worn away and underlying steel corrodes.
Surface rust typically begins as speckling and spreads into pitting that compromises wall thickness.
Corrosion and scale buildup also narrow passages, causing reduced water flow and pressure.
Pinhole Leak Causes
Pinhole leaks develop in galvanized pipe as localized corrosion eats through the thin zinc coating and underlying steel, creating tiny but persistent perforations that often begin at joints, fittings, or bends where protective layers wear fastest.
Factors include stagnant water promoting oxygen concentration cells, abrasive particulate in supply causing mechanical wear, and acidic or soft water accelerating zinc dissolution.
Stress from thermal cycling or overtightened connections can crack protective layers, exposing bare steel.
Detection is often slow due to minute flow.
Remediation targets source conditions and isolated repair.
- Stagnant water and oxygen differentials
- Abrasive particulates and mechanical wear
- Chemical attack from low pH or soft water
Surface Rust Progression
Surface rust on galvanized pipe begins as a fine, powdery oxidation of the zinc layer that darkens and roughens the surface before exposing the underlying steel.
Over time the corrosion advances from superficial discoloration to localized pitting as protective zinc is consumed.
Moisture, oxygen, and salts accelerate breakdown, creating flaky scale that traps water and promotes deeper metal loss.
Early-stage surface rust often indicates limited structural compromise but signals increased vulnerability where coatings or zinc are thin.
Inspection should document extent, thickness loss, and pitting locations to prioritize repair, cleaning, or replacement before perforation occurs.
Reduced Water Flow
As rust advances from a powdery film to flaky scale and pitting, it often constricts internal passages and leads to noticeably reduced water flow. The homeowner observes weaker taps, longer fill times, and uneven pressure between fixtures. Internally accumulated corrosion narrows diameter, while loose rust fragments create intermittent blockages.
Inspecting supply lines, measuring pressure, and testing individual fixtures help isolate affected sections. Replacement of severely scaled segments or full repiping restores capacity; short runs may be cleaned with mechanical brushing or chemical descalers when compatible. Prompt action prevents further deterioration and avoids pressure-related stress on appliances.
- Perform pressure tests
- Inspect visible joints
- Consider targeted replacement
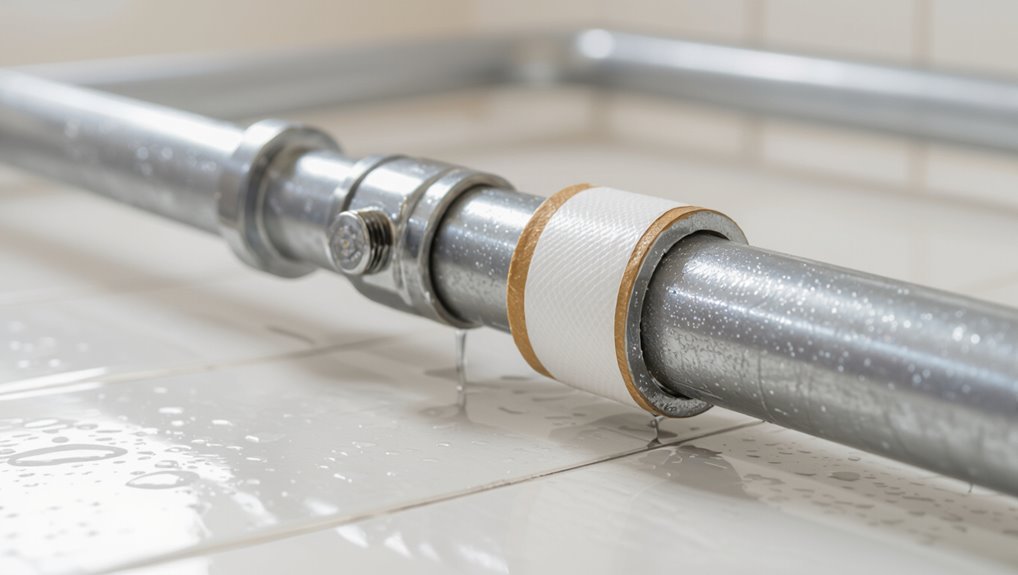
Immediate Emergency Fixes: Stop a Leak Now
In an urgent leak situation, the goal is to stop water flow quickly and safely to prevent further damage. The person locates the leak, towels or a bucket catch runoff, and applies pressure with a rubber patch and hose clamp or pipe repair tape to temporarily seal gaps.
For small pinholes, wrap self-fusing silicone tape tightly, overlapping layers. For larger cracks, slide a rubber piece under a repair clamp or use epoxy putty molded around the breach and allowed to cure per instructions.
After a temporary seal holds, the person arranges a permanent repair or professional replacement as soon as possible.
Safety Prep for Galvanized Pipe Repairs (PPE & Shut‑Offs)
After a temporary seal holds, attention must shift to proper safety preparation before attempting repairs or replacements on galvanized pipe.
The worker assesses risks, isolates water at main and localized shutoffs, and ventilates the area to limit dust and fumes from corrosion or old coatings.
Personal protective equipment is selected: gloves, eye protection, and a respirator for disturbed rust or lead-containing scale.
Clear signage and a helper or spotter improve safety during isolation and handling.
Verify zero water pressure before cutting or joint work.
- Confirm shutoff and depressurize lines
- Wear gloves, goggles, respirator
- Mark work area and use a spotter
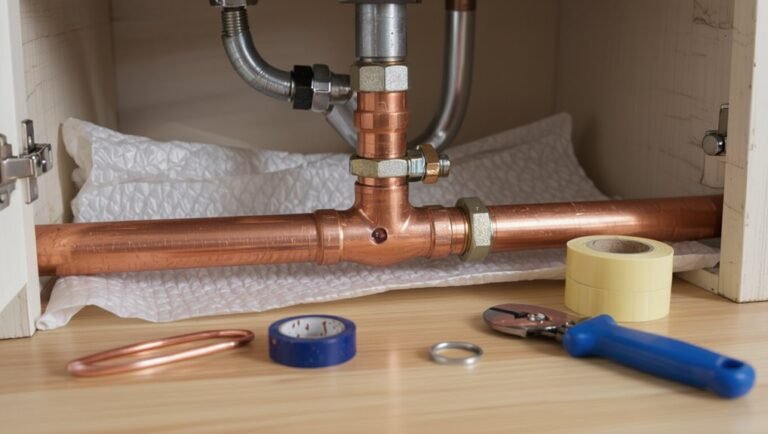
Tools and Materials for Galvanized Pipe Fixes
A concise inventory of tools and materials sets the stage for successful galvanized pipe repairs. Essential hand tools such as pipe wrenches, tubing cutters, and rethreading kits are complemented by sealants and compounds like PTFE tape, pipe dope, and epoxy putty for leak-proof joints.
Appropriate safety gear and accessories—gloves, eye protection, pipe supports, and a basin for water capture—round out the list.
Essential Hand Tools
For tackling galvanized pipe repairs, a concise set of reliable hand tools enables accurate cuts, secure fittings, and leak-free joints. Essential items include cutting, threading, gripping, and deburring tools designed for the toughness of galvanized steel.
Proper selection reduces damage, speeds work, and improves final connections. Safety tools—gloves and eye protection—are integral. Tools should be maintained: clean, lubricate threads, and replace worn jaws or blades.
Portability and a compact tool kit benefit confined plumbing spaces. Select corrosion-resistant or heavy-duty versions to match galvanization thickness and project scale.
- Pipe cutter or hacksaw
- Pipe wrench and adjustable wrench
- Reamer/threader set
Sealants And Compounds
When working on galvanized pipe repairs, choosing the correct sealants and compounds guarantees durable, leak-free joints and prevents corrosion at connections. Thread sealant tape (PTFE) offers a clean, flexible seal for threaded fittings; use appropriately rated tape and wrap clockwise.
Pipe joint compound (pipe dope) creates thicker seals and can be compatible with galvanized steel—select a non-acidic formulation labeled for metal pipes. Anaerobic thread sealants cure in absence of air for permanent joints but may complicate future disassembly.
For small leaks, epoxy putty or metallic repair paste provides quick patches; follow cure times and surface prep instructions carefully.
Safety Gear And Accessories
Proper safety gear and the right accessories protect technicians and preserve pipe integrity during galvanized pipe repairs.
Essential personal protective equipment includes gloves rated for cut resistance and chemical exposure, eye protection against debris and splashes, and a respirator when sanding or cutting to avoid inhaling zinc dust.
Accessories reduce risk and improve outcomes: pipe supports prevent stress on joints, non-marring clamps secure fittings without damaging galvanizing, and wire brushes designed for galvanized surfaces remove corrosion without excessive abrasion.
Choosing quality items minimizes contamination, preserves coating where possible, and helps guarantee a durable, code-compliant repair.
- Cut-resistant gloves
- Safety goggles and respirator
- Non-marring clamps and pipe supports
How to Patch Small Holes and Pinhole Leaks in Galvanized Pipe
Repairing small holes and pinhole leaks in galvanized pipe requires prompt, targeted action to prevent water damage and corrosion from worsening.
First, shut off water and drain the affected section.
Clean and dry the area; remove rust and scale with a wire brush or sandpaper.
For temporary fixes, apply epoxy putty or a pipe repair clamp per manufacturer instructions.
For a more durable patch, use self-fusing silicone tape wrapped tightly or cut out the damaged section and install a copper or PVC repair sleeve with appropriate couplings.
Test the repair under pressure and monitor periodically for signs of failure.
How to Repair Threaded Joint Leaks on Galvanized Fittings
The technician first locates the exact source of a leak at the threaded connection, checking for wetness, corrosion, or loose fittings.
Once identified, the joint is disassembled, cleaned of old sealant and corrosion, and inspected for damaged threads.
Proper reassembly uses stacked pipe dope or PTFE tape applied in the correct direction and amount to guarantee a reliable seal.
Identify Leak Location
Start by isolating the suspected section and drying it thoroughly so any active seepage is visible and not masked by condensation. The technician inspects threaded fittings, testing joints under normal pressure and slightly increased pressure to reveal slow leaks. Visual cues—mineral stains, rust trails, or wetness at the thread root—indicate origins. Listen for hissing when possible and feel for moisture with a clean finger. Confirm whether the leak is at the male or female engagement, or along the pipe body, before disassembly.
- Check fittings under system pressure
- Look for corrosion patterns at thread roots
- Use touch and auditory cues to confirm location
Seal Threads Properly
Begin by preparing the joint: shut off water, relieve pressure, and dry the fittings so thread sealant can adhere properly.
For threaded joint leaks on galvanized fittings, disassemble the joint, clean threads with a wire brush and solvent to remove rust, old tape, and debris.
Inspect threads for damage; replace severely corroded fittings.
Apply plumber’s PTFE tape clockwise on male threads (two to three turns) or use pipe joint compound rated for galvanized steel, spreading evenly.
Reassemble hand-tight, then wrench to snug without overtorquing.
Pressurize and check for leaks; retighten or reapply sealant if necessary.
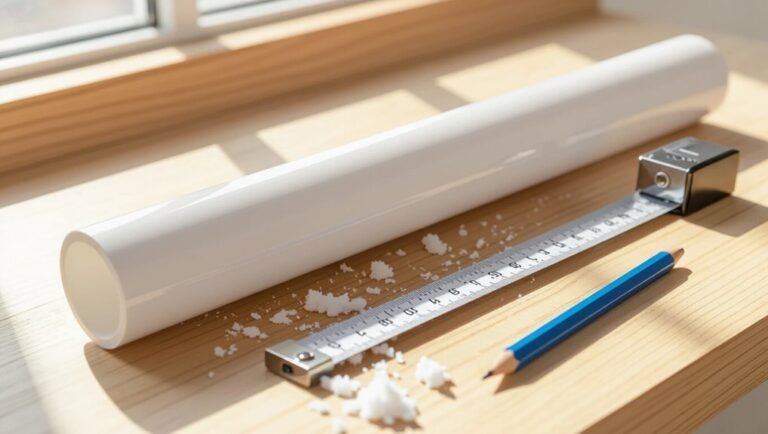
How to Replace a Short Section of Galvanized Pipe (Slip‑In Repair)
When a short galvanized pipe segment shows corrosion or leaks but the fittings and adjoining lengths remain sound, a slip‑in repair lets a technician replace only that section quickly and with minimal disturbance; this method uses a short replacement nipple or coupling that slips inside the existing pipe after cutting and deburring, restoring continuity without rethreading the entire run.
The technician measures the removed length, selects a slightly shorter internal nipple or sleeve, cleans and fluxes contact surfaces if soldered joints are nearby, and secures the repair with threaded couplings or approved mechanical fittings to assure a leak‑free connection.
- Measure twice; cut once for precise fit.
- Deburr and clean interior edges before insertion.
- Use compatible materials and tested sealing methods.
How to Cut Out Corroded Pipe and Install New Fittings
The corroded section is cut out to sound, clean metal using a pipe cutter or reciprocating saw, taking care to leave square ends.
The replacement fitting is test-fitted, aligned, and secured with the appropriate connector type (threaded, compression, or soldered) and proper sealant or tape. Final connections are tightened and the line is pressure-tested for leaks before restoring service.
Cut Out Corroded Section
To remove a corroded section, the technician first isolates the affected run by shutting off water supply and draining the line, then marks the cut points beyond visible rust to guarantee clean metal for fitting.
The technician uses a pipe cutter or reciprocating saw to make straight cuts, deburrs edges, and inspects remaining pipe for hairline corrosion.
Threads or pipe ends are cleaned to bright metal; measurements are verified for replacement length.
Waste and removed sections are disposed of properly.
Safety gear is worn throughout.
- Use proper cutting tool for pipe diameter
- Deburr and clean cut ends
- Verify straight, square cuts before proceeding
Fit And Secure Replacement
After isolating and preparing the run, the technician dry-fits replacement pieces to confirm alignment, length, and thread engagement before applying any sealant or solder.
Once satisfied, fittings are removed, threads cleaned, and appropriate pipe dope or PTFE tape applied for threaded joints; for sweat fittings, surfaces are fluxed.
New sections are installed, tightened to proper torque without over-stressing threads, or soldered with even heat and flowing filler.
Supports and hangers are repositioned to eliminate strain.
After curing or cooling, the system is pressurized incrementally and inspected for leaks.
Final adjustments and insulation restore serviceable, secure piping.
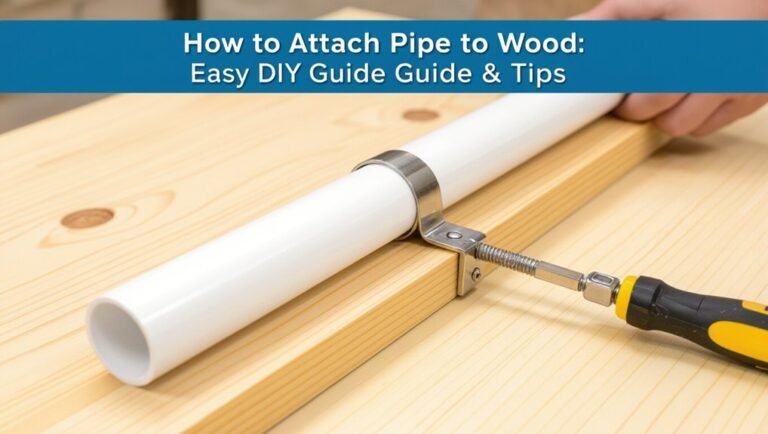
How to Use Connectors & Transition Fittings to Join Materials
When joining galvanized pipe to other materials, proper use of connectors and adapter fittings guarantees a secure, corrosion-resistant connection. The installer selects compatible fittings—threaded, compression, or dielectric—matches pipe diameters, and uses appropriate sealant or tape.
Preparation includes cleaning threads, removing burrs, and applying anti-seize where metals differ. Proper torque prevents leaks without damaging galvanization.
Inspect joints for alignment and support them with straps to reduce stress. For dissimilar metals, dielectric unions stop galvanic corrosion.
- Use threaded male/female adapters for metal-to-metal joins.
- Choose compression fittings for copper to galvanized coupling.
- Install dielectric unions for steel-to-copper interfaces.
Convert Galvanized to Copper or PEX (Permanent Option)
Moving from connector selection and proper joins, the permanent conversion of galvanized pipe to copper or PEX involves cutting out the old sections and replacing them with compatible new piping and fittings that eliminate corrosion risks and improve system longevity. The process requires evaluating pipe condition, measuring runs, choosing copper or PEX, and installing supports and shutoffs. Proper soldering or crimping guarantees leak-free joints; pressure testing verifies integrity. Permit checks and local code compliance are necessary. Routine inspection after conversion confirms performance and detects issues early.
| Step | Material | Tool |
|---|---|---|
| 1 | Copper | Torch |
| 2 | PEX | Crimp tool |
| 3 | Both | Pipe cutter |
Prevent Galvanic Corrosion When Joining Different Metals
How can different metals be joined without inviting galvanic corrosion? Proper prevention isolates dissimilar metals, limits electrical contact, and minimizes moisture exposure. Use dielectric unions or fittings designed to separate metals electrically. Apply approved thread sealants or nonconductive tape to block metal-to-metal contact. Make sure connections stay dry and accessible for inspection.
- Install dielectric unions or plastic couplings where copper meets galvanized steel.
- Use anti-corrosion paste on threads and avoid bare-metal contact.
- Maintain drainage and ventilation to prevent persistent wetting at joints.
Regular inspection verifies integrity and catches early galvanic activity before failures occur.
How to Deal With Heavy Corrosion and Rusted Threads
After preventing galvanic contact, attention turns to fittings and piping already compromised by heavy corrosion and rusted threads. Assessment determines whether restoration, replacement, or isolation is safest. Cut out severely pitted sections, use compatible replacement fittings, and clean salvageable threads with a wire brush and penetrating oil. Recut or chase threads with appropriate dies if metal remains sound. Apply pipe dope rated for galvanizing and reassemble with dielectric unions where needed. Inspect for leaks and pressure-test after repairs. Dispose of removed corroded pieces properly.
| Action | When to use |
|---|---|
| Clean threads | Light-to-moderate rust |
| Chase threads | Salvageable deformation |
| Cut out section | Severe pitting |
| Replace fitting | Threads destroyed |
| Use dielectric union | Different metals joining |
How to Stop a Leak Temporarily (Alternate Quick Fixes)
Stop leaks quickly with temporary measures designed to buy time until a permanent repair can be made. The guide outlines safe, short-term fixes that reduce water damage and allow scheduling proper repair or replacement. Each option suits different leak types and access constraints; users should shut off water and dry the area before applying any method.
- Wrap the leak with rubber and hose clamps: compress rubber patch material over the hole and secure tightly with clamps or stainless steel straps.
- Use epoxy putty: knead and press into the leak, allow cure time per instructions.
- Apply pipe repair tape: stretch and wrap overlapping layers until sealed.
How to Test Repairs for Leaks and Water Pressure
Begin testing repairs by restoring water flow slowly and observing both the repaired area and downstream fixtures for signs of leakage or pressure change.
The person checks joints, fittings, and patched surfaces for drips, dampness, or weeping after a few minutes and again after a longer period.
They operate multiple fixtures to verify consistent pressure and use a pressure gauge where available to compare pre-repair and post-repair psi.
Any sudden drops, sputtering, or air in lines prompt re-inspection.
If leaks persist, tighten or redo the repair and retest.
Document results and only return to normal use when readings and visual checks are stable.
Restoring Water Quality After Repairing Galvanized Lines
After repairs to galvanized lines are completed, the plumbing system should be flushed thoroughly to remove dislodged rust, solder, and trapped debris.
Once flushing is finished, water quality should be tested for clarity, odor, pH, and metal levels to confirm contaminants have been reduced to safe limits.
If tests indicate elevated metals or persistent discoloration, additional flushing, filtration, or professional treatment should be pursued.
Flush Pipes Thoroughly
Frequently, flushing the system thoroughly is the essential final step to restore safe, clear water after repairing galvanized lines. After repairs, professionals recommend isolating affected sections, opening all fixtures, and running cold water until clarity returns and particles clear.
Flow should be steady; check aerators and screens for debris. Flush water heaters separately if connected to repaired lines. Record duration and any discoloration observed. If sediment persists, repeat flushing and clean fixture filters. Proper flushing prevents staining, removes loosened rust, and reduces particulate exposure while preparing the system for subsequent water quality testing.
- Open taps sequentially, starting lowest to highest
- Run cold water 10–20 minutes per zone
- Clean aerators and strainers before finishing
Test Water Quality
With visible clarity restored, the next step is to verify water quality to confirm safety and detect any lingering contaminants mobilized during repairs. The homeowner or technician samples water after flushing and uses test kits or sends samples to a lab. Key parameters include turbidity, pH, and iron or lead levels; remedial actions depend on results. If contaminants exceed guidelines, repeat flushing, install filters, or consult a professional. Record results for future reference and confirm control measures work. Regular monitoring after repairs guarantees long-term safety and helps identify corrosion or sediment reoccurrence promptly.
| Parameter | Acceptable Range | Action if High |
|---|---|---|
| Turbidity | <1 NTU | Flush/filter |
| Metals | Below EPA limits | Treat/notify |
Cost Breakdown: DIY Repair vs Hiring a Plumber vs Repipe
How much will fixing galvanized pipe actually cost depends on the chosen approach: patching a small leak with DIY materials, hiring a licensed plumber for targeted repairs, or replacing entire galvanized runs with modern piping.
Costs vary: a DIY patch may run $10–$100 for clamps, epoxy, or primers; a plumber’s repair typically costs $150–$600 depending on access and parts; full repiping to copper or PEX often ranges $1,500–$7,000 for a typical home.
Homeowner priorities—budget, longevity, and disruption—determine the best value.
- DIY: low upfront, limited lifespan
- Plumber repair: moderate cost, professional assurance
- Repipe: high cost, long-term solution
When to Call a Pro: Safety, Code & Complexity Triggers
In situations involving structural damage, potential health hazards, or legal requirements, a professional should be engaged rather than relying on a homeowner fix.
Call a licensed plumber when leaks affect load-bearing elements, mold or sewage contamination exists, or galv pipe failure risks potable water safety.
Permit-triggering work, gas-line proximity, or multi-story plumbing runs require code knowledge and inspections.
Complex corroded networks, unknown pipe materials, or repeated failures signal need for assessment and possible repipe.
Emergency situations—major bursts, flooding, or inability to shut water off—demand immediate professional response to mitigate damage and make certain compliance.
Maintenance Tips to Extend Repaired Galvanized Pipe Life
Regularly scheduled inspections and simple preventive steps markedly prolong the life of repaired galvanized pipe systems. Owners should check for new corrosion, persistent dampness, and pressure changes; early detection prevents small issues from becoming failures. Keeping pipes clean, insulating exposed sections, and controlling water chemistry reduces degradation. Records of repairs and observations help track trends and decide when replacement is preferable.
- Flush lines periodically to remove sediment and minimize internal corrosion.
- Apply approved external coatings or wraps to sealed repairs to block moisture intrusion.
- Maintain stable water pressure and address leaks promptly to limit stress on joints and fittings.
Common DIY Mistakes When Fixing Galvanized Pipe
After routine inspections and preventive measures, many homeowners attempt repairs themselves but often make mistakes that shorten a repair’s lifespan or create hazards.
Common errors include using incompatible fittings or sealants that accelerate corrosion, overtightening threads which cracks galvanizing or pipe, and failing to fully drain and depressurize lines before cutting.
Poorly cleaned surfaces prevent proper seals; hidden pinhole leaks remain if joints aren’t pressure-tested.
Improper thread tape application and relying on temporary clamps for permanent fixes cause failures.
Neglecting local codes or skipping professional consultation for complex corrosion risks safety and can increase long-term costs.
Pre‑Finish Checklist Before Closing Up a Galvanized Pipe Repair
Before sealing walls or reinstalling finishes, the technician runs a concise pre‑finish checklist to confirm the galvanized repair is secure, leak‑free, and compliant with code: verify pressure holds under a calibrated test, inspect all joints and fittings for proper thread sealant and torque, confirm corrosion barriers and protective coatings are intact, make certain water lines are fully flushed and air‑free, document the repair and materials used, and restore any insulation or supports removed during work.
The technician additionally verifies fixture operation, checks nearby drains for contamination, and confirms permits and inspection sign‑offs are satisfied.
- Verify test pressure and leak absence
- Confirm protective coating and insulation
- Complete documentation and permit closure
Conclusion
Repairing galvanized pipe demands judgment, care, and attention: homeowners can patch small leaks, mitigate corrosion, and restore flow, while professionals handle structural failure, hazardous conditions, and code compliance. Wear protective gear, shut off water, and follow stepwise repairs; use temporary clamps for emergencies, proper fittings for lasting fixes, and regular maintenance to slow decay. Avoid shortcuts, recognize limits, and call a licensed plumber when safety, complexity, or regulations exceed DIY scope.