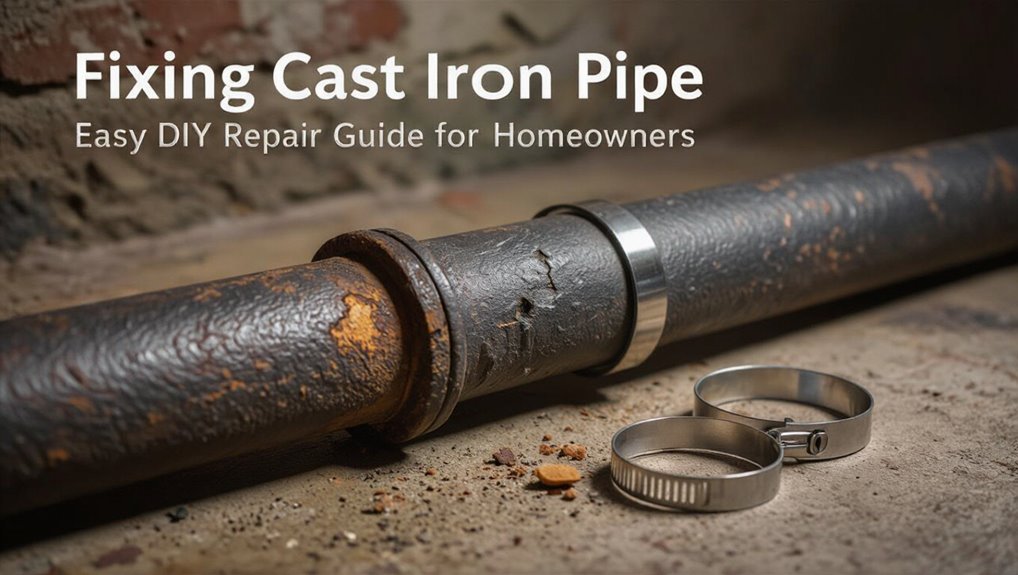
Fixing Cast Iron Pipe: Easy DIY Repair Guide for Homeowners
If you’re dealing with failing cast-iron pipes, look for signs like rust, flaking, slow drains, gurgling fixtures, or sewer odors. Here’s a quick guide to help you address the issue:
Key Takeaways for Fixing Cast Iron Pipes:
- Safety First: Always shut off main and local valves, drain the system, confirm zero pressure, and wear gloves, eye protection, and a respirator.
- Minor Repairs: For small holes, use rubber patches or bolted clamps.
- Section Replacement: If a short section is damaged, cut it out and replace it with no-hub couplers.
- Extensive Damage: For larger runs, buried lines, or slab work, hire a licensed plumber.
For detailed step-by-step instructions, tools, materials, and troubleshooting tips, continue reading.
How to Tell If Your Cast-Iron Pipe Is Failing
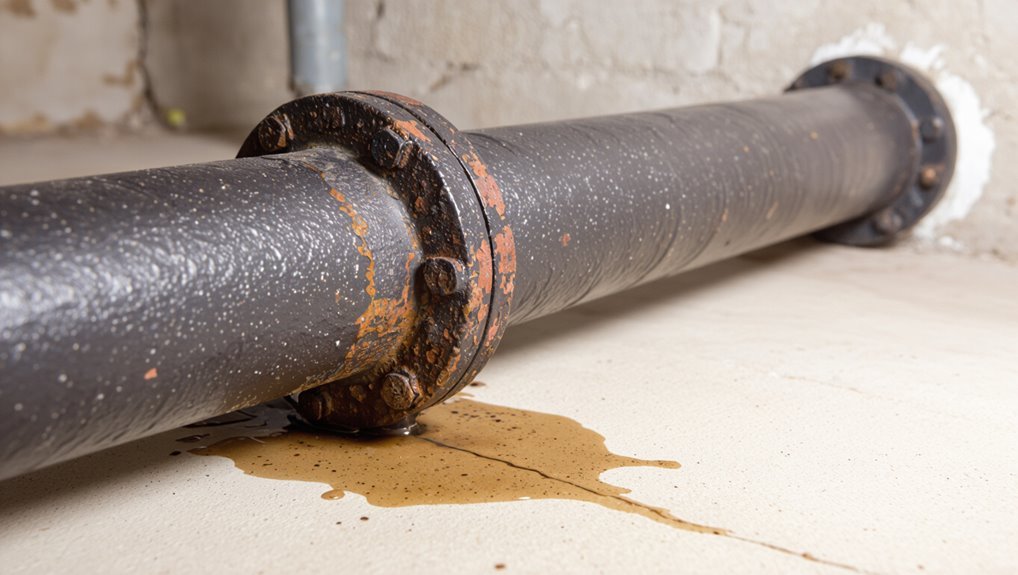
Homeowners can detect failing cast-iron pipes by observing a combination of visual, auditory, and performance signs: rusty or flaking exterior, visible corrosion at joints, recurring slow drains, gurgling or bubbling in fixtures, foul sewer odors, and unexplained wet spots or sinkholes near the foundation.
Additional indicators include hairline cracks, mottled discoloration where moisture collects, and sound changes—pipes emitting thuds or hollow echoes when water runs.
Repeated clogs that clear briefly, persistent dampness in basements, and increased water bills without usage changes suggest leaks.
Professional inspection confirms deterioration when multiple signs coincide, indicating repair or replacement is needed.
Prep Safely: Shutoffs, Drainage, and Protective Gear
Before beginning any repair, the water supply to the affected section should be shut off to prevent further flow.
Remaining water must be drained and system pressure relieved to avoid spills and sudden bursts.
Appropriate protective gear—gloves, eye protection, and a mask—should be worn to guard against contaminants and sharp edges.
Shut Off Water Supply
Shut the water at the appropriate valves and assure pressure before touching the cast iron pipe to prevent flooding and reduce injury risk. The homeowner locates main and local shutoffs, closes valves methodically, and tags them if others are present. Confirmation by running fixtures ensures isolation. Protective gloves and eye protection remain worn while valves are operated. If a valve is seized, professional help is sought rather than forcing it. Clear communication with household members prevents accidental reopening. Record valve positions and time closed for reference during repairs.
| Item | Action |
|---|---|
| Main shutoff | Close and verify |
| Local valves | Tag and confirm |
| Seized valve | Call pro |
Drain And Relieve Pressure
With valves secured and pressure isolation confirmed, the system must be drained and residual pressure relieved to prevent unexpected discharge when the cast iron is disturbed. The worker opens downstream drains and fixtures methodically, allowing trapped water and air to escape. Air admittance or a temporary vent speeds full depressurization; confirm with gauges or by observing steady, drip-free flow. After drainage, cap or plug exposed openings to prevent contamination and odor. Verify zero pressure before cutting or unthreading pipe joints.
- Open lowest drain points first to evacuate bulk water.
- Bleed high fixtures and vents to remove trapped air.
- Use a bucket and rag at joints to catch residual seepage.
Wear Proper Protective Gear
Always wear appropriate personal protective equipment when preparing to cut or handle cast iron pipe to minimize injury from sharp edges, falling debris, and hazardous materials. Workers should use cut-resistant gloves, safety goggles or a face shield, hearing protection, and a dust-rated respirator when sawing or grinding.
Wear long sleeves, sturdy footwear, and a hard hat if overhead hazards exist. Dispose of asbestos or lead-contaminated material only after testing and following local regulations; use specialized PPE for those hazards.
Inspect gear before use, replace damaged items, and keep a first-aid kit nearby. Proper PPE reduces accidents and long-term health risks.
Tools & Materials for Cast-Iron Pipe Repair
A concise inventory of tools and replacement materials sets the stage for effective cast-iron pipe repair.
Common hand tools include pipe wrenches, hacksaws, chisels, and sealant applicators for cutting, cleaning, and fitting joints.
Replacement materials typically cover couplings, lead-free connectors, gaskets, and approved sealants or epoxy.
Essential Hand Tools
For tackling cast-iron pipe repair, a compact set of hand tools provides the foundation for safe, effective work. The right tools allow accurate cutting, secure fittings, and controlled rust removal without overreliance on power tools.
Safety items and measuring devices guarantee proper alignment and leak-free joints. Recommended essentials include:
- Pipe wrench and adjustable wrench for gripping and turning fittings.
- Hacksaw or reciprocating saw with metal blade, and a file for deburring.
- Wire brush, cold chisel, and hammer for corrosion cleaning and seat preparation.
These tools support precise, repeatable repairs while minimizing damage to surrounding plumbing and finishes.
Replacement Materials
With the basic hand tools in place, attention shifts to the replacement materials that will restore function and longevity to cast-iron pipe runs. Appropriate choices include ABS or PVC for waste lines, no-hub stainless couplings for connections, and epoxy putty for small sealing tasks. Material selection depends on local code, pipe location, and desired lifespan. Proper gaskets and stainless hardware prevent corrosion and leaks. Consider sound-deadening insulation when replacing in living spaces. Quality adhesives and primer for plastic joins guarantee durability. Below is a quick comparison of common replacement options:
| Material | Use | Advantage |
|---|---|---|
| PVC/ABS | Drain runs | Lightweight, inexpensive |
| No-hub couplers | Connections | Durable, code-friendly |
| Epoxy putty | Sealing small cracks | Quick, temporary fix |
Temporary Fixes for Cast-Iron Pipes (Rubber Patches, Repair Clamps)
In urgent situations where a full replacement is impractical, rubber patches and repair clamps provide a fast, temporary seal for damaged cast-iron pipes. These fixes stop leaks, limit water damage, and buy time until professional repair or replacement is scheduled. Selection depends on hole size, pipe curvature, and access. Proper surface cleaning and drying improve adhesion and clamp sealing.
Inspect regularly; corrosion or spreading cracks mean the patch is only a stopgap. For safety, avoid exposure to sewer gases and wear gloves.
- Small pinholes: self-adhesive rubber patches
- Longitudinal cracks: wrap-style patches
- Larger breaches: bolted repair clamps
Replace a Short Section With a Coupler : Step-by-Step (Time & Cost)
When access allows and damage is confined to a short run, replacing that section with a coupler is a practical, durable alternative to full-pipe replacement. The process: isolate water, remove damaged length, prepare mating ends, fit a rubber or stainless repair coupler, and torque clamps to specification. Typical time: 1–3 hours for a homeowner with basic tools; cost: $30–150 for parts plus possible $100–200 in tool rental. Verify seals and test under pressure. For cast spigots, use appropriate adapters; guarantee proper slope and support before backfilling.
| Step | Time | Typical Cost |
|---|---|---|
| Prep | 30–60 min | $0–10 |
| Cut & remove | 15–45 min | $0 |
| Install coupler | 15–30 min | $30–100 |
| Test & finish | 10–20 min | $0–50 |
Long-Run Replacements : Why and When to Hire a Pro
For extensive runs of corroded or fractured cast iron pipe, the scale and complexity of the job usually exceed DIY practicality and demand a professional contractor.
A pro assesses structural consequences, maps hidden lines, obtains permits, and coordinates safe excavation or access. Long-run replacement minimizes repeated patching and reduces risk of property damage or code violations.
Homeowners should hire licensed plumbers or pipe restoration specialists when multiple joints fail, sections run beneath foundations or slabs, or when asbestos and lead risks appear.
Typical professional tasks include:
- full system inspection and scope planning
- trenching, pipe removal, and proper disposal
- installation, pressure testing, and code compliance
Preventing Corrosion: Maintenance for Cast-Iron Pipes
Regularly scheduled inspections and simple preventive steps markedly slow corrosion in cast-iron piping, extending service life and reducing costly repairs.
Homeowners should check accessible runs for rust, moisture, and leaks every six months. Keep surrounding areas dry and well-ventilated; eliminate sources of persistent condensation.
Apply compatible rust-inhibiting primers and paints to clean, bare metal after light abrasion.
Protect buried sections with approved coatings and guarantee proper drainage to avoid standing water. Replace failed hangers and insulation that holds moisture.
Maintain water chemistry by avoiding highly acidic cleaners.
Document inspections and address minor defects promptly to prevent accelerated deterioration.
Common Post-Repair Problems and How to Troubleshoot Them
Following completed repairs, a distinct set of issues can emerge that undermine performance or require follow-up work. The homeowner should inspect joints, test flow, and monitor odors to catch problems early.
Common signs include leaks at seals, reduced drainage, and lingering smells; each demands targeted troubleshooting. For leaks, tighten clamps, replace gaskets, or reseal with approved compounds.
For slow drains, snake the line or check for residual debris from the repair.
For odors, verify venting and seal any gaps. If problems persist, consult a licensed plumber to avoid worsening damage or code violations.
- Leaks at seals: tighten or reseal
- Slow drainage: snake or clear debris
- Persistent odors: check vents and seals
Conclusion
A homeowner once found a penny lodged atop a failing cast-iron elbow — a small coin keeping bigger trouble from falling through. Like that penny, timely attention to cracks, proper prep, and the right clamp or coupler can buy time and prevent collapse: studies show localized fixes extend service life months to years. For lasting peace of mind, use temporary repairs judiciously and call a pro when corrosion or multiple failures signal systemic decline.