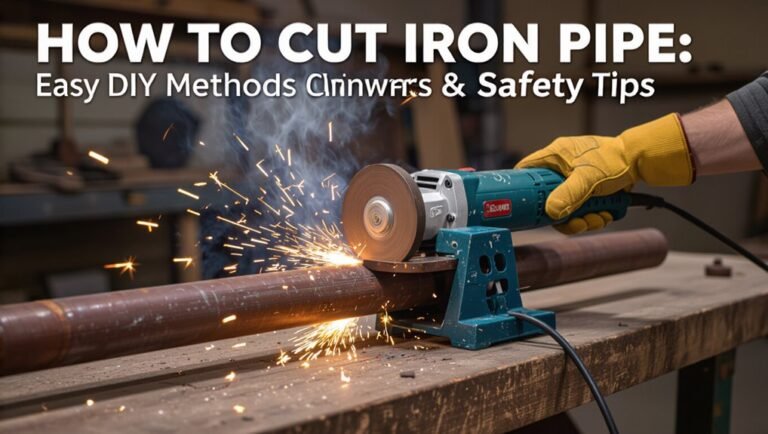
How to Fix a Cracked PVC Pipe Fast: DIY Repair Guide
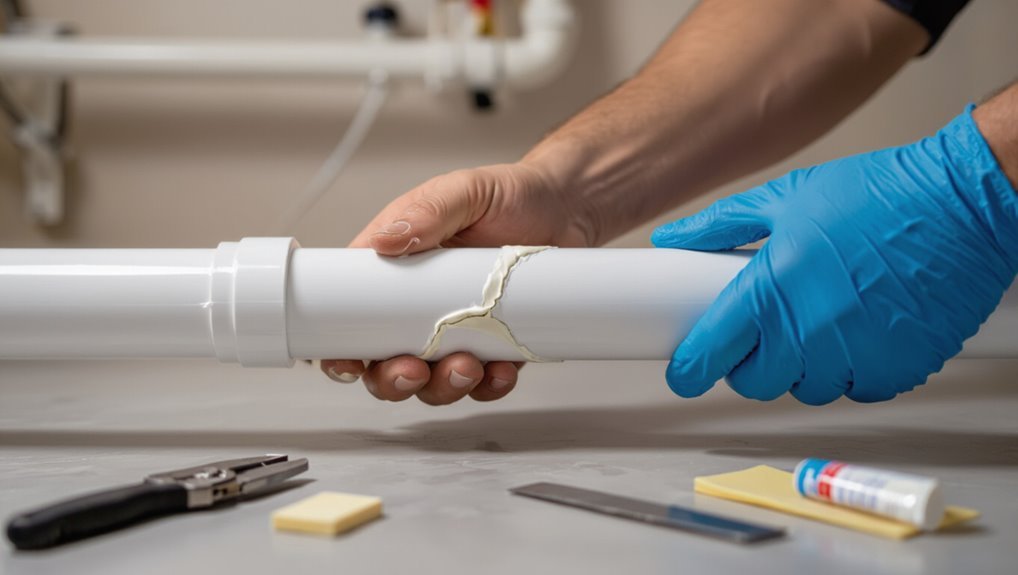
To quickly fix a cracked PVC pipe, first shut off the water and relieve pressure in the system. Then, clean and dry the damaged area. For a temporary solution, wrap a rubber sleeve or waterproof repair tape tightly around the crack and secure it with stainless-steel hose clamps. Alternatively, you can use epoxy putty or fiberglass wrap for small splits. Remember, these fixes are only temporary—it’s best to replace the damaged section with a solvent-weld coupling or perform a cut-and-replace for a permanent solution. After the repair, inspect and pressure-test the pipe to ensure it’s secure. For long-term solutions and safety tips, continue learning about proper PVC pipe repair methods.
Fast Fixes for a Leaking Cracked PVC Pipe
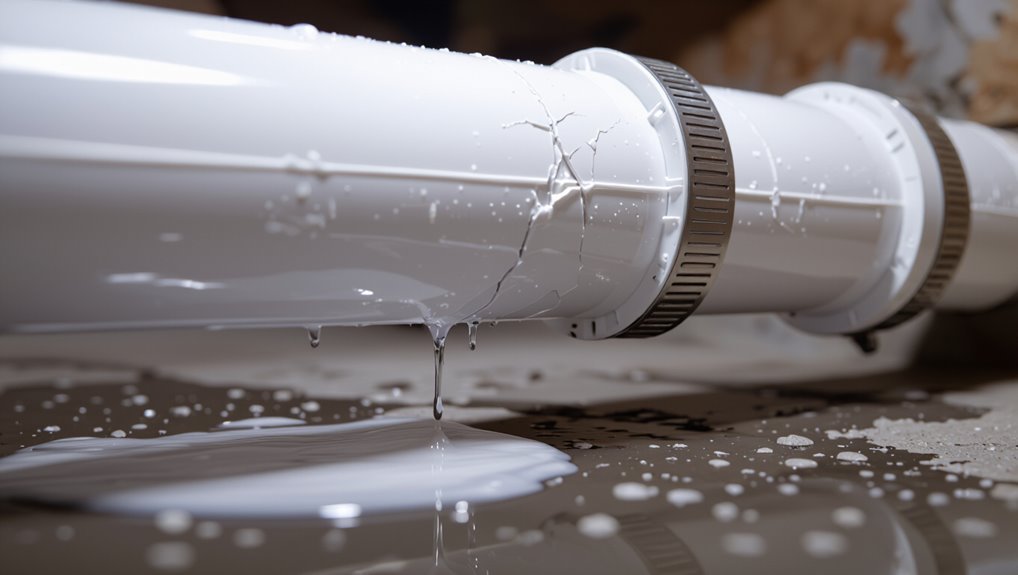
Apply temporary measures immediately to limit water damage while planning a permanent repair.
A leaking cracked PVC pipe can be managed quickly with a few effective temporary fixes: wrap the crack with rubber and secure with hose clamps, apply waterproof repair tape (self-fusing silicone), or use epoxy putty molded over the breach.
For larger splits, slip a rubber sleeve or a cut section of garden hose over the area and clamp firmly.
Dry the surface where possible for better adhesion.
These measures restore function briefly and reduce moisture harm but are not substitutes for proper replacement or glued PVC fittings.
Shut Off Water and Safety Checklist
Before any repair begins, shut off the water supply and follow a brief safety checklist to prevent injury and further damage.
The homeowner confirms the main valve position, relieves line pressure, and notifies household members. Electricity near the work area is evaluated and turned off if necessary.
Protective gear is donned before handling tools or chemicals. A clear workspace is established with towels and a bucket to control residual water.
- Locate and close the appropriate shutoff valve(s)
- Open nearby faucets to drain pressure
- Wear gloves and eye protection
- Turn off nearby electrical sources if wet
- Keep a flashlight and phone nearby
Locate the Crack and Assess Leak Severity
The homeowner should inspect the pipe to find the exact location and size of the crack, starting with a visual sweep for hairline fractures, wet spots, or white mineral streaks.
Next, feel along the length of the pipe for moisture or warmth.
Then, mark the crack and note whether water drips, sprays, or only seeps; categorize severity as minor (slow seep), moderate (steady drip), or severe (streaming leak).
Check adjoining joints, fittings, and supports for damage or movement that may have caused stress.
Estimate access difficulty and required parts or replacement length to plan the repair approach and tools needed.
Immediate Containment: Pipe Repair Tape
For urgent stops, pipe repair tape offers a fast way to contain leaks until a permanent fix is made.
The surface must be cleaned and dried thoroughly to guarantee the tape adheres and seals properly.
Selecting a tape rated for PVC and the operating pressure prevents failure and extends the temporary repair’s life.
Quick Leak Containment
Wrap pipe repair tape tightly around the damaged area to create an immediate, temporary seal that slows or stops water flow. The tape should overlap layers, conform to contours, and be stretched per manufacturer instructions to bond and harden.
This method is a short-term measure to reduce damage until permanent repair is possible. Monitor the area and replace the tape if seepage returns.
- Use waterproof, self-fusing silicone or vulcanizing tape
- Apply pressure while wrapping for better adhesion
- Cover several inches beyond the crack on both sides
- Avoid relying on tape for high-pressure lines
- Label the repair for future replacement
Proper Surface Preparation
Proper surface preparation guarantees pipe repair tape adheres and forms an effective temporary seal. The area must be dry, clean, and free of loose debris, oil, grease, and old adhesive.
Water should be blotted and allowed to evaporate or wiped with a clean rag; solvent cleaning is acceptable if compatible with PVC and ventilation is adequate. Lightly roughening glossy PVC with fine-grit sandpaper improves mechanical grip without weakening the pipe.
Edges of the crack should be trimmed of sharp fragments. A quick inspection confirms no sharp pressure points remain.
Prepared surfaces enable tape to conform, bond, and resist immediate pressure until permanent repair.
Choosing Right Tape
Selecting the correct pipe repair tape determines how effectively a temporary seal will hold under pressure and environmental stress. The technician evaluates tape adhesion, flexibility, and water resistance before applying.
Silicone-based tapes conform to irregular surfaces; rubberized options offer strong adhesion to wet areas. Heat-activated or self-fusing tapes can create seamless, pressure-resistant barriers when applied correctly.
Consider temperature range, chemical exposure, and expected repair duration when choosing tape.
- Self-fusing silicone: conforms, waterproof
- Rubberized adhesive: strong initial stick
- Fiberglass cloth: structural reinforcement
- Aluminum foil: heat resistance
- PVC-specific tape: chemical compatibility
How Long Tape Stopgaps Usually Last
Because tape stopgaps are a temporary fix, their lifespan is measured in hours to months rather than years.
Typical duct or silicone-coated repair tapes often hold for a few days under moderate pressure and dry conditions, while specialty self-fusing or PVC repair tapes can last several weeks to a few months if applied correctly and the pipe is not under constant high pressure or extreme temperature.
Longevity depends on tape quality, surface preparation, overlap thickness, and environmental factors.
Constant immersion, UV exposure, chemical contact, or thermal cycling shortens performance.
Regular inspection is essential, and tape should be considered a bridge until a proper repair is completed.
Fastest Permanent Fix: PVC Repair Coupling
When a permanent repair is needed, the size and location of the crack determine whether a repair coupling is appropriate.
The cracked area must be cleaned and abraded to guarantee a solid bond. The coupling is then fitted and secured according to manufacturer instructions to restore full service.
Assess Damage Size
A clear assessment of the crack’s length, location, and relation to nearby fittings determines whether a PVC repair coupling is the fastest permanent solution. The inspector measures crack extent, notes proximity to joints, and checks access for coupling installation.
Criteria guide the decision: short, straight cracks away from threaded fittings favor coupling use; long or branching fractures may require pipe replacement. Record findings and select coupling size accordingly.
- Measure crack length and mark endpoints
- Note distance from nearby fittings and valves
- Check for branching or multiple fractures
- Verify access for cutting and coupling placement
- Confirm pipe diameter and wall thickness
Prep Pipe Surface
Prepare the pipe surface by removing dirt, corrosion, and any softened PVC to ascertain a secure seal with the repair coupling.
Use a wire brush or coarse sandpaper to expose clean, undamaged material around the crack, extending at least one inch beyond both ends. Wipe with a rag and apply a PVC cleaner or primer to dissolve oils and lightly etched surfaces; allow it to flash dry per product instructions.
Inspect for remaining soft spots or irregularities; repeat sanding if needed. Ascertain the pipe is dry and free of dust before proceeding.
Proper surface prep prevents leaks and assures long-term adhesion.
Install Repair Coupling
With the cleaned and primed pipe surface ready, the installer selects a PVC repair coupling sized to match the pipe diameter and pressure rating. The coupling is fitted over the crack, alignment checked, and the installer verifies sockets fully seat on both ends before solvent cement application.
Quick, firm rotation spreads cement evenly and removes air pockets. After assembly, excess cement is wiped and the joint is allowed to cure per manufacturer time.
- Verify coupling type and pressure rating.
- Dry-fit to confirm alignment and depth.
- Apply solvent cement to pipe and coupling sockets.
- Push together with a quarter-turn.
- Respect full cure time before pressurizing.
Use a Rubber Sleeve and Hose Clamps
Cut a length of rubber sleeve slightly longer than the crack, then center it over the damaged area before fastening with two stainless-steel hose clamps spaced a few inches apart.
The pipe should be dry and clean; wipe away debris and rough edges for a snug seal.
Slide the sleeve over the crack, align evenly, and tighten clamps alternately to compress the rubber without deforming the pipe.
For pressurized lines use two clamps per end when possible.
Inspect for leaks under normal pressure and retighten if needed.
This method provides a durable, removable patch suitable for straight runs and modest splits.
Epoxy Putty for Small Surface Cracks
After using a rubber sleeve for larger splits, smaller surface cracks are best handled with epoxy putty designed for PVC. A clean, dry surface and light sanding improve adhesion.
The putty is kneaded, pressed into the crack, and smoothed; curing time varies by product. Once set, it accepts light sanding and paint. Proper application restores pressure resistance for minor leaks and extends pipe life when replacement isn’t immediate.
- Clean and dry the area thoroughly
- Sand lightly to roughen the surface
- Mix and knead to uniform color
- Press firmly into the crack, smooth edges
- Allow full cure before testing
Fiberglass Wrap: When and How to Use It
Fiberglass wrap is recommended for larger cracks, longitudinal splits, or damaged sections where epoxy putty alone cannot restore strength.
The technique involves cleaning and drying the pipe, cutting the resin-soaked cloth to size, and tightly wrapping the area with overlapping turns.
After curing, the wrap forms a rigid reinforcement that can be sanded and painted if needed.
When To Use Fiberglass
When a PVC pipe has a localized hairline crack or a small section has been crushed but the pipe remains structurally aligned, a fiberglass wrap provides an efficient, low-profile repair that restores strength and resists leaks without replacing the entire run.
It suits situations where access is limited, pressure is moderate, and the pipe material is intact around the damage.
Consider fiberglass when:
- damage is short in length and surface-accessible
- the pipe is not fractured or separated
- internal pressure is within the wrap’s rated capacity
- environmental exposure requires corrosion resistance
- a semi-permanent, paintable fix is acceptable
How To Apply Wrap
Begin by cleaning and drying the damaged area thoroughly, because proper adhesion and resin curing depend on a contaminant-free surface.
Remove loose paint, dirt, grease, and any rough edges with a utility knife or fine-grit sandpaper. Then wipe with solvent and allow the pipe to evaporate fully before mixing the wrap resin.
Cut fiberglass cloth to overlap the damaged zone by at least 1–2 inches each side.
Mix resin per manufacturer directions. Saturate cloth, wrap tightly around the pipe with consistent overlap, smoothing out bubbles and wrinkles.
Allow full cure, then sand and topcoat if needed for UV or abrasion resistance.
Cut and Replace a PVC Section in Under an Hour
Cut out the damaged section and install a replacement in roughly an hour by preparing tools, measuring carefully, and using solvent-weld joints for a fast, reliable seal.
The process focuses on speed and reliability: isolate water, remove the bad segment, dry fittings, and use primer and cement per instructions. Tight workspace planning saves time.
After curing, test under low pressure before full use.
- Shut off water and drain the line
- Measure and mark the replacement length
- Remove the damaged pipe segment
- Prime and solvent-weld the new couplings and pipe
- Allow brief cure time, then pressure-test
How to Cut PVC Cleanly and Squarely
After the damaged section is removed and fittings are dry, attention turns to creating a clean, square cut that guarantees a snug fit and reliable solvent bond.
Measure and mark the cut line with a fine-tip marker; wrap a piece of masking tape over the pipe to improve line visibility and prevent splintering.
Use a ratcheting PVC cutter for small diameters or a fine-tooth hacksaw for larger pipe, cutting steadily perpendicular to the axis. Support the pipe to avoid flexing.
Deburr and chamfer the inside and outside edges with a utility knife or file, then wipe away shavings and inspect the end for true squareness.
Prepare Pipe Ends: Primer and PVC Cement
Prepare both mating surfaces by applying PVC primer to the outside of the pipe and the inside of the fitting, ensuring any remaining dirt, grease, or moisture is removed first.
The primer softens and cleans the PVC, promoting solvent weld action. After a brief evaporation period, apply an even coat of PVC cement to both primed surfaces, rotating the pipe into the fitting to spread adhesive evenly.
Hold alignment firmly until initial set. Follow cure time before pressurizing the line.
Key reminders:
- Use primer sparingly, cover only the joint areas
- Apply cement quickly but evenly
- Rotate for full distribution
- Wipe excess immediately
- Respect ventilation and safety
Best Primers and Cements for Fast Bonding
When rapid, reliable solvent welding is required, choosing primers and cements formulated for quick set times and strong chemical compatibility is essential.
Fast-setting PVC primers remove surface contaminants and swell the material for penetration; look for purple or clear solvents labeled “fast” or “quick.”
Pair with medium- to high-viscosity PVC cement rated for pressure piping and advertised cure times under five minutes for tack.
Low-VOC options reduce odor without sacrificing bond strength.
Brands with ASTM D2564 compliance and clear tube size recommendations minimize mismatch.
Always match cement type to pipe material (PVC, CPVC) and ambient temperature for predictable, durable joints.
Bonding Tricks When the Pipe Is Wet
When a PVC pipe is wet, preparation shifts from sanding to wiping and rapid drying of the joint area to remove loose debris and surface film.
The writer recommends using quick-setting adhesives formulated for damp conditions and working in short, controlled steps to guarantee a reliable bond.
Temporary mechanical clamps or straps can hold the joint in alignment while the adhesive cures.
Surface Prep When Wet
Any effective repair begins with proper surface preparation even if the PVC is wet: remove loose debris, wipe away standing water with clean cloths, and roughen the bonding area lightly to promote adhesive grip.
The technician prioritizes drying, contamination control, and creating a keyed surface to help temporary seals adhere until a permanent fix is applied.
- Blot excess water; avoid spreading contamination
- Use isopropyl wipes to remove oils and residue
- Lightly scuff with fine-grit sandpaper for texture
- Clean again after sanding to remove dust
- Mask surrounding areas to prevent adhesive fouling
Surface prep maximizes bond reliability under damp conditions.
Quick-Setting Adhesives
With the surface prepared and moisture minimized, attention shifts to adhesives formulated to bond in wet or damp conditions. Quick-setting, water-tolerant PVC cements and epoxy putties offer reliable adhesion where standard solvents fail.
Choose products labeled for wet applications; read cure times and temperature limits. Apply sparingly to avoid runoff; press mating surfaces together with steady pressure for the recommended setting period.
Epoxy putties can fill gaps and cure underwater, while specialty cements chemically weld PVC when surfaces are only damp. After curing, test the joint under low pressure before restoring full service and follow manufacturer safety guidance.
Temporary Mechanical Clamps
Clamp the damaged section firmly before adhesive sets by using temporary mechanical clamps designed for wet repairs.
A technician-like observer notes that these clamps stabilize joints, reduce leak flow, and allow sealants to cure under compression. Proper placement and gentle tightening prevent further cracking.
Consider these practical tips:
- Choose corrosion-resistant clamps sized to the pipe diameter.
- Clean loose debris; do not over-dry when using water-tolerant adhesives.
- Apply uniform pressure; avoid distorting the pipe shape.
- Monitor for slippage; retighten incrementally as needed.
- Remove clamps only after the adhesive manufacturer’s minimum cure time elapses.
Safely Depressurize Pressurized PVC Lines
Before attempting repairs, the pressurized PVC line must be depressurized to eliminate the risk of sudden bursts or fluid ejection. One quiet, methodical approach is recommended: shut the upstream valve, open a downstream faucet or bleed valve, and verify zero pressure with a gauge. Wear eye protection and gloves. If valves are seized, isolate the section and consult a pro. Confirm that nearby electrical equipment is safe from fluid exposure. Record valve positions for restoration. Only proceed when gauges show atmospheric pressure and no flow exists.
| Step | Action |
|---|---|
| 1 | Close upstream valve |
| 2 | Open downstream bleed |
| 3 | Verify gauge reads 0 |
| 4 | Wear PPE |
| 5 | Tag valves for restore |
Repairing Cracks Near Fittings and Threads
When cracks occur near fittings and threads, the condition of the threaded joint must be inspected for stripped threads, cracks, or deformation.
Appropriate repair materials—thread sealant, PTFE tape, epoxy putty, or replacement fittings—should be selected based on the damage and pressure requirements.
After repair or replacement, the connection must be secured and pressure-tested for leaks before returning the line to service.
Inspect Threaded Joint Damage
If a crack appears near a threaded joint, assess both the pipe and the fitting for hairline fractures, stripped threads, or deformation that can prevent a watertight seal.
Inspect externally under bright light, then feel for roughness or gaps with a gloved finger. Rotate the fitting gently to detect looseness or binding. Note any corrosion, cross-threading, or mismatched materials that stress the joint.
Record damage location and severity before disassembly to guide repair or replacement decisions.
- Check thread integrity visually and by touch
- Look for radial cracks at thread roots
- Verify proper alignment of joint
- Assess sealing surface flatness
- Document findings with photos
Choose Appropriate Repair Materials
Selecting repair materials for cracks near fittings and threads requires matching mechanical strength, chemical compatibility, and sealing ability to the pipe’s service conditions.
Suitable choices include solvent cement for clean, non-pressurized threaded PVC where threads are intact, and low-profile epoxy putty for small hairline cracks adjacent to fittings.
For pressurized lines or damaged threads, reinforce with a PVC-compatible wrap or replace the fitting; use thread-compatible sealants (PTFE tape or pipe dope) only when threads remain serviceable.
Avoid incompatible adhesives that soften PVC or resistants that degrade conveyed fluids.
Material selection should prioritize durability, proper cure time, and rated pressure.
Secure And Test The Connection
After choosing materials that match the pipe’s strength and chemical requirements, attention shifts to securing the repair and verifying its integrity at operating pressure.
The technician aligns fittings, torques threaded joints to manufacturer specs, and verifies solvent or epoxy cures fully before pressurizing. For threads, appropriate sealant or tape is applied; for glued fittings, full cure times are observed.
Then a controlled pressure test reveals leaks and confirms compatibility.
- Inspect mating surfaces and remove debris
- Apply sealant evenly on threads or joint faces
- Tighten to specified torque, avoid over‑stress
- Allow complete cure before testing
- Perform gradual pressure ramp and monitor
Fixing Buried or Hard-to-Reach PVC Quickly
Accessing a buried or hard-to-reach PVC line requires quick assessment of location, depth, and surrounding utilities before any repair begins.
Professionals or experienced DIYers use a utility locator and small probe to pinpoint the break, then expose only the necessary section to minimize excavation.
Once exposed, shut off water, drain the line, and clean the damaged area.
For rapid repair, apply a repair coupling or slip-sleeve designed for buried PVC; secure with primer and solvent cement or stainless-steel clamps for temporary service.
Backfill carefully, tamping to prevent future settling, and restore surface materials to original condition.
Temporary vs. Permanent Fixes : Expected Lifespans
Temporary patches such as tape, epoxy putty, or rubber wraps typically restore function for weeks to months under low pressure.
Permanent repairs — replacement sections, solvent-weld joints, or properly fused couplings — are expected to last for many years when installed correctly.
Lifespan for either approach depends on pressure, temperature, UV exposure, soil movement, and quality of materials and workmanship.
Temporary Patch Lifespan
How long a temporary patch will hold depends on the method used, the pipe’s location and pressure, and environmental factors such as temperature and UV exposure.
Estimated lifespans vary widely; simple tape or glue fixes may last days to weeks, while wrap-and-epoxy combos can endure months under low pressure. Regular inspection is advised.
Temporary solutions reduce damage risk but are not substitutes for full repairs.
- Duct or silicone tape: days–weeks, surface-dependent
- Rubber patch with clamp: weeks–months under low pressure
- Epoxy putty: weeks–several months if applied correctly
- Hose clamp plus rubber sleeve: weeks
- Heat-shrink wraps: months in sheltered locations
Permanent Repair Durability
Although temporary patches can buy time, permanent repairs determine long-term durability and system reliability.
Properly executed permanent fixes—replacement sections, solvent-weld joints, or professionally fused fittings—restore structural integrity and resist pressure cycles, UV, and chemical exposure better than tapes or clamps.
Expected lifespans for permanent repairs commonly match or exceed the remaining life of the existing piping, often measured in decades under normal conditions.
Longevity assumes correct material matching, clean preparation, and adherence to installation standards.
When evaluated against temporary measures, permanent repairs minimize recurrent leaks, reduce maintenance frequency, and provide predictable service life for plumbing systems.
Factors Affecting Longevity
When evaluating repair options, the expected lifespan hinges on material compatibility, installation quality, and exposure conditions. Temporary patches typically offer weeks to months of service, while properly executed permanent repairs often endure for decades.
The distinction depends on factors that influence stress, degradation, and sealing integrity. Careful assessment determines whether a stopgap or full replacement is appropriate.
Key considerations include:
- UV exposure and temperature fluctuations accelerating brittleness and joint failure
- Chemical contact that can weaken PVC or adhesives
- Mechanical stress from pressure cycles or external loads
- Quality of adhesive, primer, and fitting alignment
- Accessibility for inspection and maintenance
Common Mistakes That Cause Failures
Frepetitive errors in repair and installation account for the majority of PVC pipe failures; improper joint preparation, using the wrong adhesive or fittings, and inadequate support are the most frequent culprits.
Common mistakes include failing to clean and bevel pipe ends, skipping primer, and applying cement unevenly, all of which prevent proper solvent welding. Using incompatible adhesives or non-PVC fittings causes weak seals.
Overreliance on tape or temporary clamps leaves repairs vulnerable. Poorly aligned joints and insufficient hangers allow stress and sagging that produce cracks.
Ignoring manufacturer specifications and local codes often leads to premature failure and liability.
Test Your Repair: Leak and Pressure Checks
Begin by visually inspecting the repaired area, then perform controlled leak and pressure checks to confirm integrity before returning the system to normal service.
The technician slowly reintroduces water, watching for drips and seepage around joints and the repair patch. Next, a low-pressure test identifies small failures without risking the new bond. If no leaks appear, pressure is raised to operating levels for a short duration while monitoring.
Finally, the system is gradually returned to full service.
Checklist for testing steps:
- Isolate the section
- Restore minimal flow
- Observe for visible leaks
- Conduct pressure hold test
- Reassess fittings and repeat if needed
Tools and Materials Checklist for a Fast Kit
After confirming the repair holds under pressure, attention shifts to assembling a compact fast kit for future quick fixes.
Recommended items:
- PVC cutter or hacksaw for clean cuts;
- medium and fine sandpaper for beveling and smoothing;
- PVC cleaner/primer and PVC cement (appropriate for pressure pipe);
- rubber repair tape and self-fusing silicone tape for temporary seals;
- assorted slip couplings, sleeve repair kits, and a spare length of matching PVC;
- stainless hose clamps;
- utility gloves and safety glasses;
- clean rags and a marker;
- a small flashlight and inspection mirror;
- crescent wrench and adjustable pliers.
Store in a waterproof bag labeled with pipe size and adhesive expiry dates.
Cost and Time Comparison of Top Repair Options
How much will a typical PVC pipe repair really cost, and how long will each option take? A concise comparison helps choose between quick fixes and longer-lasting repairs. Estimates assume small household sections and basic tools.
- Epoxy putty: $5–$20, cures in 15–60 minutes, temporary to moderate durability.
- Rubber sleeve/clamp: $10–$40, install in 10–30 minutes, reliable for moderate pressure.
- PVC patch and solvent weld: $5–$25, 30–60 minutes plus cure, durable when done correctly.
- Slip coupler replacement: $3–$15 for part, 20–45 minutes, permanent if welded.
- Replacing pipe section: $10–$50, 30–90 minutes, most durable.
When to Call a Plumber Instead of DIY
Comparing costs and time for DIY fixes helps decide whether a quick patch or a full replacement makes sense, but certain situations make professional help the better option.
A plumber should be called when leaks are large, pressurized, hidden within walls or ceilings, or repeatedly recur after attempted repairs.
Complex junctions, sewer-line involvement, gas-adjacent piping, or visible structural damage require licensed assessment.
If local codes or warranties demand certified work, or if the homeowner lacks tools and confidence, a pro guarantees compliance and durable results.
Emergencies outside normal hours, significant water flow, or mold growth also justify immediate professional intervention.
Preventive Steps to Avoid Future PVC Cracks
To reduce the risk of future PVC fractures, homeowners should focus on proper installation, routine inspection, and environmental protection.
Regular maintenance preserves pipe integrity and prevents costly leaks. Key preventive steps include:
- Use correct pipe sizing and pressure-rated PVC for the application.
- Verify solvent-welded joints are properly cleaned, primed, and cured.
- Protect exposed piping from UV light with paint or insulation.
- Avoid mechanical stress: secure pipes with appropriate clamps and allow thermal expansion.
- Monitor for early signs of wear, discoloration, or hairline cracks and address issues promptly.
Consistent attention prolongs service life and reduces emergency repairs.
Conclusion
When water is stopped and a cracked pipe is bandaged with tape or a clamp, the leak becomes a small, tamed storm in a teacup. The homeowner walks away with tools like a gardener prunes a bruised branch: careful trims, temporary wraps, and plans for stronger grafts later. This makeshift healing buys time and wisdom—until professional hands can replace the broken limb and restore steady flow, leaving household calm as a mended vase.