How to Find Pipes in the Wall: Easy DIY Detection Tips
How to Find Pipes in the Wall: Key Steps for Easy Detection
To locate pipes in your walls effectively, follow these essential steps:
- Preparation: Before you begin, ensure the water supply is shut off, and take note of any nearby sinks or toilets.
- Visual Inspection: Look for stains, vents, or unusual trim that could indicate the path of the pipes.
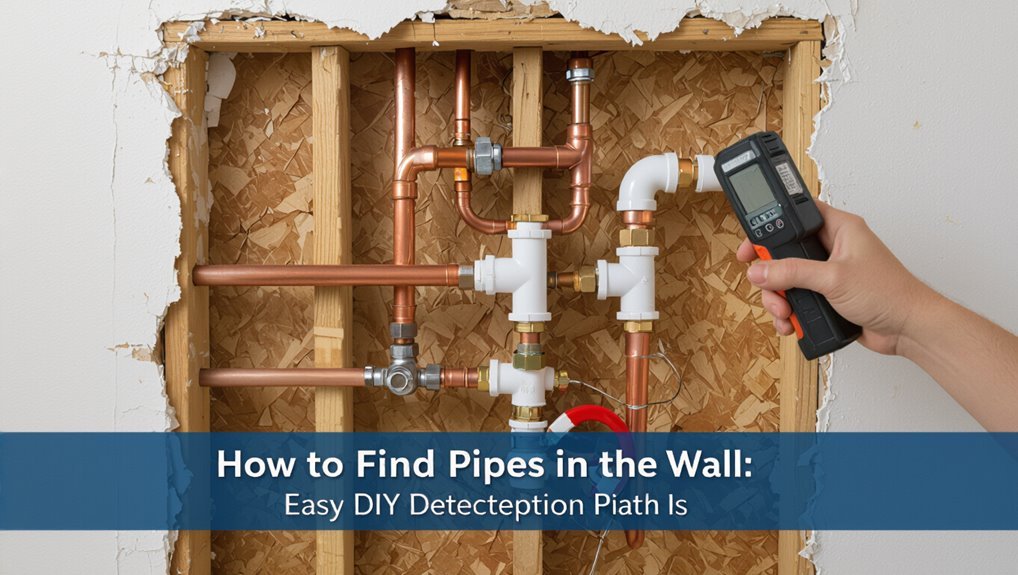
- Use Tools: Utilize a stud finder and a live-wire detector to identify the locations of pipes. A budget pipe locator can also be helpful.
- Sound Detection: Employ a stethoscope app to listen for water flow within the walls.
- Temperature Check: Test the wall temperature near hot fixtures to help locate hot water pipes.
- Inspection Holes: Open small inspection holes only when necessary to minimize damage.
- Mapping: Follow the alignment of fixtures and vents to create a map of the pipe layout in your walls.
By following these steps, you can accurately detect pipes, ensuring a smoother repair process.
Quick Checklist: Are Pipes Behind This Wall?
Before cutting or opening any wall, a quick visual and tactile survey can reveal whether plumbing runs are likely present.
The reader is advised to note fixture locations, follow vertical alignments from sinks, tubs, and toilets, and map adjacent rooms for shared supply or waste lines.
Check for access panels, baseboard gaps, and plumbing-related odors or stains.
Listen for water sounds when taps run and test wall temperature differences near hot fixtures.
Consider building age and material: older homes often use predictable runs.
When uncertain, pause and consult a plumber or use noninvasive detection tools.
Visual Clues That Reveal Likely Plumbing Routes
Scan walls for patterns that betray plumbing: visible supply valves, shutoffs, small access panels, or patched openings often align with hidden runs.
Discoloration, repeating screw or nail lines, and oddly placed baseboard seams can signal access chases or past repairs.
Floor and ceiling shifts frequently mark vertical stacks; widened trim or crown molding gaps may hide horizontal routes.
Look for vented grilles, condensate lines, or thermostat-style covers that conceal junctions.
Exterior walls with sill plate gaps or utility penetrations suggest supply entries.
Document findings with photos and notes to guide noninvasive probing and safe cutting locations.
Follow Fixtures and Vents to Map Pipes in Walls
The writer recommends following visible fixture lines to predict where supply and drain pipes run behind walls.
Attention to vent stacks and roof penetrations helps locate vertical chases and branch connections.
Combining fixture trace lines with vent positions creates a practical map of likely pipe routes.
Follow Fixture Lines
Tracing the path of fixture lines gives a practical roadmap for locating concealed pipes: by following visible fixtures and vents—sinks, toilets, showers, and roof vents—one can infer the most likely routes of supply and drain lines within walls and between floors. The method prioritizes observation and simple measurements. Note alignments, heights, and shared walls; water supply typically runs vertically or directly between nearby fixtures while drains slope toward main stacks. Use small probes or inspection holes sparingly to confirm. Record findings on a sketch to minimize guesswork and avoid unnecessary demolition.
| Fixture | Likely Run |
|---|---|
| Sink | Vertical/behind vanity |
| Toilet | Floor-to-stack |
| Shower | Wall cavity |
| Adjacent rooms | Shared lines |
Trace Vent Locations
By following roof vents and nearby fixtures, one can pinpoint where vent stacks penetrate ceilings and run down inside walls to join drain lines.
Observers note vent caps on the roof and trace their vertical alignment to bathrooms, kitchens, and laundry areas below.
Walls directly under vent caps likely conceal vertical vent runs; studs, attic access, or closet interiors offer inspection points.
Exterior vent locations also hint at interior routing.
Combining visual roof-to-fixture alignment with sound (air movement) or minimal probing reveals probable vent cavities without major demolition.
Mapping these lines refines expectations for pipe placement during repairs or retrofits.
Use a Stud Finder and Live‑Wire Detector Before Opening Walls
Professionals routinely scan walls with a stud finder and a live‑wire detector before cutting or drilling to locate framing and energized conductors accurately. The combination reveals studs, joists, and hidden wires so users can plan safe openings. A stud finder detects wood or metal framing; a live‑wire detector warns of voltage without contact.
Move devices slowly in overlapping passes, mark edges and centers, and verify readings from multiple angles. Calibrate per manufacturer instructions and replace batteries regularly. Even small anomalies merit caution; when detectors indicate wiring near the planned cut, postpone work and consult a qualified electrician to avoid shock or damage.
Scan Walls With a Budget Pipe Locator
After checking for studs and live wiring, the next step is to sweep the area with an affordable pipe locator to map hidden plumbing before cutting.
The detached observer moves the handheld unit slowly across drywall, following manufacturer guidance for sensitivity and probe orientation.
Models using magnetic, metal-detection, or sonar principles can indicate pipe position and depth; repeated passes at perpendicular angles improve confidence.
Mark detected lines with pencil or low-tack tape and verify against visible fixtures and shutoff locations.
Budget locators have limits—small plastic lines or deeply set pipes may be missed—so treat results as a guide, not absolute.
Listen and Knock to Detect Hidden Pipes
Listen for subtle differences in sound and tap systematically to reveal where pipes run behind drywall. One person uses a knuckle or small mallet to make short, evenly spaced taps while another listens closely or uses a stethoscope or a cheap mechanic’s stethoscope app.
Solid backing and pipes yield a dull, higher-pitched response; hollow cavities produce a flatter, lower tone. Mark changes in timbre and repeat along vertical and horizontal lines to map probable runs.
Confirm suspected locations by comparing wet and dry plumbing areas; muted or metallic echoes often indicate metal pipes, while plastic yields softer responses.
How Drywall, Plaster, and Masonry Affect Pipe Detection
Moving from auditory tapping methods to material-specific considerations reveals how wall composition changes detection outcomes.
Drywall usually transmits sound and vibrational cues, making knocking and stud-finder signals clearer; seams, paper facing, and hollow cavities influence echo patterns.
Plaster, often backed by lath, dampens high frequencies and hides subtle taps; metal lathe can mimic pipe signatures.
Masonry walls massively attenuate sound and block common electronic detectors, requiring reliance on visible indicators, building plans, or specialized equipment.
Choice of detector and interpretation of signals must account for density, layers, and reinforcement to avoid mislocating pipes or misreading sensor feedback.
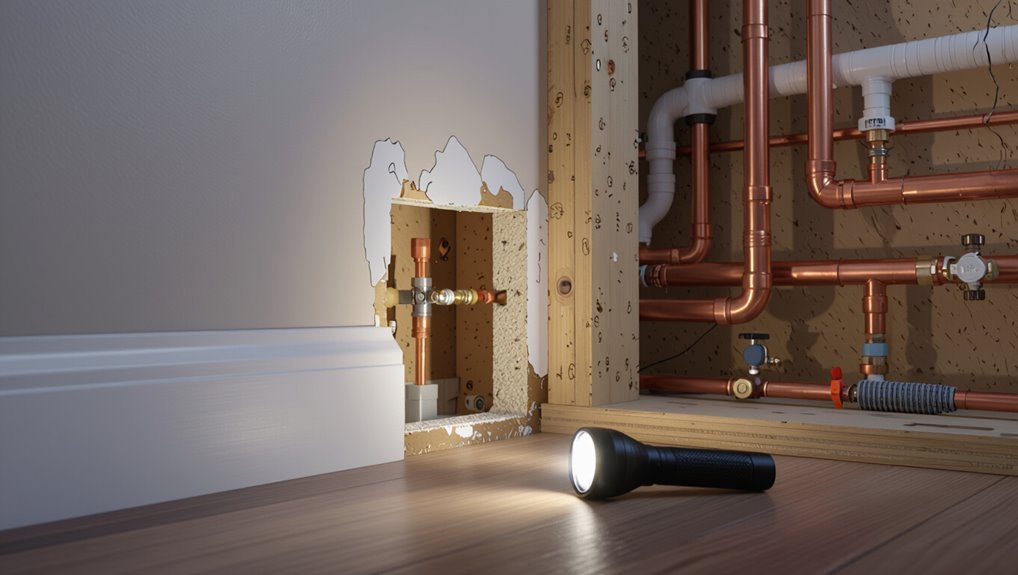
When to Cut a Small Inspection Hole (And How to Patch It)
When is a small inspection hole justified, and how should it be executed to minimize damage? A small inspection hole is justified when noninvasive detection (stud finder, thermal imaging, probing) fails and suspected pipe location must be verified before drilling or cutting larger openings.
Mark location carefully, confirm power/plumbing shutoffs, and cut a neat rectangular or circular access using a drywall saw or oscillating tool. Keep hole as small as necessary and inspect with a flashlight or inspection camera.
Afterward, patch with backing (wood or mesh), apply joint compound in thin coats, sand smooth, prime, and repaint to restore the finish.
Common Mistakes to Avoid When Hunting for Pipes
Overreliance on a single detection method often leads to mistakes: assuming stud finders, infrared cameras, or simple probing are infallible can result in misplaced cuts, punctured pipes, or unnecessary demolition.
Ignoring building plans and plumbing access points causes wasted effort; failing to verify pipe orientation and depth invites surprises.
Using excessive force when probing or cutting damages finishes and services.
Skipping utility locates risks hitting electrical or gas lines.
Misinterpreting signals from multi-layer walls and mixed materials creates false positives.
Neglecting to account for renovations, nonstandard runs, or concealed valves produces incorrect assumptions and costly corrective work.
If You Find a Pipe: Repair, Reroute, or Call a Pro
Faced with a discovered pipe inside a wall, the next decision should balance immediate safety, the pipe’s condition and material, and the project’s scope. The homeowner should assess leaks, corrosion, and accessibility. Minor leaks or damaged fittings may suit temporary patches or replacement sections with shutoff valves engaged.
Rerouting fits when planned renovations expose long runs or risk future damage; it requires framing, permits, and rerouting expertise. For galvanized, cast iron, or uncertain materials, and for complex junctions or structural concerns, a licensed plumber is recommended. When in doubt, prioritize shutting water, documenting the situation, and contacting a professional.
Conclusion
Finding pipes inside walls demands caution and methodical steps. Studies show that concealed plumbing failures cause roughly 36% of home insurance water-damage claims, underscoring how small detection efforts can prevent major losses. By using visual clues, following fixtures, employing detectors or affordable locators, and cutting tiny inspection holes only when necessary, homeowners reduce risk and repair costs. If uncertainty remains, calling a professional is the safest option to avoid costly mistakes.