How to Find a Leaking Water Pipe Underground: DIY Detection Tips
To effectively find a leaking water pipe underground, follow these key steps:
- Shut Off the Main Water Supply: Turn off the main water valve and check the meter for any continuous movement with all fixtures closed. This indicates a possible leak.
- Isolate Sections: Isolate different sections of your plumbing system and conduct a pressure test to confirm any loss of pressure, which suggests a leak.
- Visual Inspection: Scan your yard for signs of a leak, such as soggy soil, unusually green patches of grass, frost-free areas, or irregular thermal readings using an infrared camera.
- Use Acoustic Listening: Employ acoustic listening devices or tracer dye to help identify specific joints where the leak might be occurring.
- Excavation: Once located, carefully excavate the area by hand and provide shoring for safety.
- Documentation: Keep detailed records, including stakes, photos, and meter logs, which will be useful for repairs and any necessary permits.
By following these steps, you can accurately locate and address a leaking underground water pipe.
How to Stop Water Loss Immediately If You Suspect an Underground Leak
Immediately shut off the main water supply to prevent further loss and contain the affected area; this stops flow to underground lines and limits damage.
The person documents meter readings and notes audible signs, then isolates zones using nearest shutoffs to narrow the breach.
Electrical sources near standing water are de-energized.
Temporary drainage and sump pumping manage pooling while erosion is assessed.
Photographs and timestamps support insurance and repair coordination.
Contact with a licensed plumber and utility locator is initiated before excavation.
Soil is not disturbed unnecessarily to preserve evidence; only controlled exposure proceeds under professional guidance to confirm the leak location.
What to Expect When a Pipe Is Leaking Underground
After shutting off the main supply and documenting conditions, the homeowner should expect a sequence of observable signs and professional steps as the situation is assessed and resolved.
Initial indicators often include soggy or sinking ground, unexplained wet spots, unusually lush vegetation, or reduced water pressure. Meter readings may confirm continuous flow.
A technician will perform noninvasive diagnostics, isolate the affected zone, and recommend repair options—patch, section replacement, or reroute—based on pipe material, depth, and access.
Temporary containment or surface restoration plans are discussed. Timeline and cost estimates vary; permits or utility clearances may be required before excavation and permanent repair.
How to Confirm a Buried Leak Before You Dig
Before excavating, a technician verifies continuous water meter activity to determine if a leak is present.
They then perform pressure tests to localize the loss and apply nonstaining dye where fixtures or small sections are suspected.
These steps confirm a buried leak and reduce unnecessary digging.
Check Water Meter Activity
Check the water meter to determine whether water is flowing through the service line when no fixtures are in use; a moving dial, digital flow indicator, or nonzero reading after shutting off all water inside the building indicates continuous flow that could be caused by a buried leak. The inspector notes baseline readings, records meter behavior over 15–30 minutes, and verifies interior shutoff valves are closed. If the meter still registers flow, that points to a leak between the meter and the building or elsewhere on the service line. Use the table below to log quick observations.
| Item | Observation |
|---|---|
| Meter type | Digital/analog |
| Initial reading | |
| Reading after wait | |
| Interior valves closed? |
Use Pressure And Dye
If meter readings indicate continuous flow despite interior shutoffs, the next step is to verify a buried leak using pressure testing and dye tracing methods.
First, isolate the exterior supply and attach a pressure gauge; note baseline pressure, then close valves to watch for drop over 30 minutes. A steady decline implies a leak.
For dye tracing, introduce non-staining, biodegradable dye near suspected pipe joints or fittings, then inspect soil depressions, soggy spots, and nearby drains for colored seepage.
Combine both techniques to confirm location before digging; document readings and dye evidence to guide excavation and inform repairs or a plumber.
How to Check Your Water Meter for Hidden Leaks
A water meter can reveal small, otherwise invisible leaks by showing continuous flow when all fixtures are off. Inspect the meter lid and register for a small leak indicator (often a triangle or spinning dial).
Make sure no water is used inside or outside the property; then observe the indicator for steady motion. Note the meter’s sweep hand or digital flow icon for continuous movement that signals a leak.
Record the meter reading, wait thirty minutes without using water, and recheck the indicator rather than computing loss. If motion persists, isolate areas by shutting off zones or consult a plumber for further underground leak investigation.
How to Calculate Water Loss From Meter Readings
To calculate water loss from meter readings, compare two accurate register values taken at known times and convert their difference into volume per unit time; this yields the leak rate and total loss.
Record the first reading with date and time, then the second after a fixed interval (hours or days).
Subtract to get volume used, divide by elapsed hours to obtain flow (e.g., liters/hour or gallons/day).
Account for meter units and multiply or convert as needed.
Subtract known legitimate use if applicable.
Use longer observation for small leaks to reduce error and repeat readings to confirm consistent loss.
Quick Checklist: Find and Stop an Underground Leak
A quick checklist begins with shutting off the main valve to isolate the system and prevent further loss.
Next, observe the water meter for any continued activity while all fixtures are confirmed off.
These two steps indicate whether the leak is within the property plumbing or elsewhere and guide the next actions.
Turn Off Main Valve
Locate the property’s main shutoff valve immediately and close it firmly to stop water flow and limit further damage. The individual acts swiftly, feeling urgency and relief as pressure drops and visible pooling slows. After securing the valve, note its type and condition for repair crews. If the valve resists, apply steady force; avoid sudden jerks that could break corroded hardware. Record the time of shutoff and inform household members. Stay calm but decisive to protect landscaping and foundations until professionals arrive. Small, prompt action prevents escalation and conveys control in an otherwise stressful situation.
| Emotion | Response |
|---|---|
| Urgency | Act now |
| Relief | Pressure easing |
| Resolve | Plan next steps |
Check Meter Activity
One clear step is to watch the water meter for unexpected movement: with all indoor fixtures and irrigation off, the meter dial or digital flow indicator will betray even small leaks.
The observer notes baseline (no usage), records readings, and repeats after quiet intervals.
Persistent movement indicates a leak between the meter and fixtures or further underground.
Follow this concise three-point check:
- Verify all water sources are off and record the meter reading now.
- Wait 15–30 minutes without using water, then recheck the meter for any change.
- If the meter moved, isolate zones or call a professional for targeted excavation.
Visible Surface Signs That Indicate a Buried Leak
How can residents tell if a buried water pipe is leaking before calling a professional? Observers should scan the yard for unexpected wet patches, pooling near foundations, or persistently soggy grass despite no irrigation. Depressions, sinkage, or sudden soft spots in lawns suggest subsidence from escaping water. Unexplained pavement or driveway cracks and frost-free areas in winter also indicate heat retained by flowing water. Near fixtures, unusual algae or mineral stains on surfaces point to continuous moisture. Visual cues are preliminary; professional confirmation is recommended before digging.
| Wet patches | Depressions | Stains/algae |
|---|---|---|
| Pooling | Sinkage | Mineral buildup |
| Soft spots | Pavement cracks | Frost-free areas |
Soil Signs That Point to Leaks: Dampness, Turbidity, and Plant Stress
Damp patches or unexpected pooling on the ground often mark where water escapes from a buried pipe, creating softer, darker soil than surrounding areas.
Cloudy or turbid soil and sediment displaced to the surface can further indicate subsurface flow paths.
Stressed or unusually lush vegetation—showing patterns of wilting, yellowing, or unusually vigorous growth—often aligns with these wet zones and helps pinpoint the leak.
Damp Patches And Pooling
Frequently, saturated soil and unexpected puddles reveal the presence of an underground leak long before a pipe is found. Damp patches often appear in low spots or along linear paths following a buried line. Water pooling can be clear or turbid, indicating soil disturbance or mineral content. To assess these signs, note size, persistence, and proximity to plumbing.
- Observe: map recurring wet areas after dry weather to distinguish leaks from runoff.
- Inspect: probe soil consistency—spongy, cooler ground suggests active leakage.
- Measure: mark and monitor puddle growth; expanding pools indicate ongoing flow.
Vegetation Stress Patterns
Vegetation-stress patterns—patches of unusually lush growth, linear strips of overgrown grass, or clusters of wilting plants—often reveal concealed leaks by showing where excess moisture or altered soil chemistry affects root behavior.
Observers should compare plant vigor across the yard, noting abrupt shifts that trace pipe routes.
Lusher areas can indicate constant seepage; brown or stunted zones suggest acidic or anaerobic soils from prolonged saturation.
Seasonal context matters: abnormal growth during dry spells is especially telling.
Mapping stressed zones, photographing them, and correlating with utility plans guides targeted probing or excavation, reducing guesswork and repair scope.
Choosing Thermal vs Acoustic Methods for Buried Leaks
Choosing between thermal and acoustic methods for locating buried water leaks depends primarily on site conditions, leak characteristics, and the diagnostic goals. The decision balances sensitivity, depth, noise environment, and speed.
Thermal works best when temperature contrasts are present and access for surface scanning is feasible. Acoustic excels where pressure-driven noise transmits along pipes and in cooler, homogeneous soils.
Practical selection often pairs methods: use acoustic for pinpointing under noisy surfaces, thermal for broader surveys when contrasts exist. Consider equipment cost, operator skill, and urgency when choosing.
- Assess site noise and soil type
- Match method to leak signal
- Balance cost and speed
How Thermal Imaging Helps Find Buried Leaks
Using surface temperature differences detected by infrared cameras, thermal imaging reveals areas where buried water alters soil heat flow.
It detects cooler or warmer patches caused by leaked water changing thermal conductivity and evaporation rates.
Operators scan lawns, driveways, or foundation edges during thermal contrast periods—usually early morning or after sunset—to maximize visibility.
Images help prioritize excavation spots and reduce blind digging.
Limitations include depth, pipe material, soil moisture, and surface insulation like pavement or vegetation that mask signatures.
Thermal results work best combined with pressure tests or visual inspection to confirm leak presence before disruptive repairs.
How to Use a Listening Stick to Find Underground Leaks
A technician taps a metal listening stick into the ground and places the stethoscope end against the soil to amplify the subtle sound of pressurized water escaping a buried pipe. The method relies on steady pressure, slow probing, and comparison across nearby points to localize noise.
Recommended steps include initial dry-weather checks, moving along the suspected line, and marking strong signals for follow-up.
- Tap and listen: insert at intervals, pause, note intensity.
- Compare points: quieter spots narrow the leak zone.
- Mark and verify: flag highest sound, then recheck surrounding areas before excavation.
How to Use a Ground Microphone for Precise Detection
Often deployed after broad listening-stick surveys, a ground microphone provides precise acoustic localization by converting soil-borne leak noise into amplified, analyzable signals. The operator places the probe on compacted ground and adjusts sensitivity until distinct hissing or water flow tones emerge.
Systematically traverse parallel lines across the suspected area, pausing at intensity peaks and marking coordinates. Compare sounds at different depths by varying probe pressure and using accessory spikes for soft soil.
Note interference from traffic, wind, and machinery; repeat readings at quiet times if needed. Correlate strongest acoustic signatures with surface features before excavation or further electronic tracing.
Trace Buried Pipes With an Electronic Underground Locator
In conjunction with acoustic methods, an electronic underground locator provides a targeted way to map pipe routes and pinpoint joints or service connections by detecting applied or naturally occurring electromagnetic signals. The device is handheld, paired with a transmitter or passively sensing signals, and translates field strength and direction into a surface trace.
Operators interpret signal peaks to estimate depth and alignment, marking probable pipe lines. Limitations include nearby utilities causing interference and reduced accuracy over long distances or non-conductive materials.
- Prepare: survey utilities and choose appropriate frequency.
- Scan: sweep systematically along suspected corridor.
- Record: mark and document signal peaks for follow-up.
How to Trace Pipes Using an Electronic Locator
The author outlines practical guidance for tracing buried water lines with an electronic locator, starting with equipment selection tips to match transmitter and receiver types to pipe material and site conditions.
Signal tracing techniques are then described, including grounding methods, frequency choices, and movement patterns to follow the strongest signal.
Finally, interpreting locator readings is covered, showing how to distinguish true pipe signals from interference and how to confirm depth and direction before digging.
Equipment Selection Tips
When selecting an electronic pipe locator, prioritize signal type and depth capability to match the pipe material and burial depth encountered on site. The user should consider battery life, ease of use, and compatibility with transmitters and clamps. Durability for outdoor conditions and clear display/readouts reduce error. Calibration and available frequency ranges matter for different pipe compositions; choose models with adjustable sensitivity. Budget against needed features—higher cost often improves depth and discrimination. Rental options suit infrequent tasks.
- Battery life and portability
- Frequency range and compatibility
- Durability and display clarity
Signal Tracing Techniques
Having chosen an appropriate locator based on battery life, frequency range, and durability, operators begin signal tracing by establishing a clear conductive path onto the pipe using a transmitter or clamp.
They switch the transmitter to a suitable frequency to minimize interference and set the receiver sensitivity low initially to detect strong signals.
Walking along the expected route, technicians perform peak and null searches, maintaining consistent antenna orientation and pace.
When signals weaken or distort, they check for joints, valves, or parallel utilities.
Grounding and bonding improve coupling; when direct connection isn’t possible, indirect induction coupling is used to induce a traceable signal.
Interpreting Locator Readings
After coupling a signal to the utility, operators interpret locator readings by correlating audio pitch, meter needle movement, or numeric readouts with expected pipe depth, direction, and continuity.
Readings are sampled while walking the route; peaks indicate direct over-lays, stable tones suggest continuous conductive runs, and sudden drops suggest joints, insulation breaks, or route changes.
Calibration against known depths refines estimates.
Signal bleed and nearby utilities require pattern recognition to avoid misidentification.
Effective interpretation combines instrument feedback with visual markers and mapping records to confirm traces before excavation.
- Follow peaks for alignment.
- Note tone stability for continuity.
- Watch drops for anomalies.
How to Use Dyes and Food Coloring Safely to Trace Leaks
For tracing leaks in drains, fixtures, or suspected underground connections, dyes and food coloring offer a simple, noninvasive way to visualize water pathways if used carefully; selecting nonstaining, water-soluble colors, applying small controlled amounts, and avoiding concentrated dye near porous surfaces minimizes staining and environmental impact while still revealing flow.
A tester should introduce a few drops upstream, observe downstream locations, and allow time for movement. Use distinct colors for multiple tests, document placement, and rinse surfaces afterward.
Avoid oils or concentrated industrial dyes, check local regulations, and protect plants and wells by containing runoff and using minimal quantities.
How to Perform a Pressure Test on a Water Line
Before conducting a pressure test, the technician isolates the section of pipe to be tested by closing valves and capping fittings so only the target segment is pressurized.
A calibrated gauge or digital meter is connected and the line is brought up to the appropriate test pressure. The operator records the starting pressure and monitors any pressure drop over a set period to determine if a leak is present.
Isolate The Test Section
Begin by shutting off all valves and isolating the section of pipe to be tested so that only the target segment is subject to pressurization. The tester confirms boundaries, tags closed valves, and removes downstream fixtures or caps open ends. Steps focus on preventing flow from adjacent plumbing and protecting fixtures from pressure.
- Verify isolation points visually and by attempting to draw water from fixtures beyond the isolation; none should receive flow.
- Install temporary test plugs or valve seals rated for expected pressure, ensuring tight seating and leak-free connections.
- Attach gauge and pump only to the isolated segment for controlled pressurization.
Monitor Pressure Drop
With the isolated segment pressurized and gauges in place, the tester observes the pressure reading over a set interval to detect any drop that would indicate a leak or faulty seal.
Readings are recorded at start and at regular checkpoints—commonly 10, 30, and 60 minutes—depending on pipe length and local guidelines.
A stable gauge indicates integrity; any measurable decline suggests leakage or a failing valve.
If pressure falls, the tester confirms isolation, rechecks fittings, and may apply soapy solution to accessible joints or use an acoustic leak detector.
Results guide whether excavation or professional repair is warranted.
How to Use Wet-Dry Vacuums and Probes to Locate Leaks
A wet-dry vacuum and a probe form a practical, low-cost pair for pinpointing leaks in buried water lines: the vacuum clears soil and debris from suspected wet areas and exposes damp soil, while the probe detects moisture and saturated voids beyond visible wet spots.
The user first vacuums shallow soil to reveal pooling or soggy pockets, then inserts a moisture probe or metal rod systematically around the exposed area to map wetness gradients.
Work outward in concentric sweeps, note sound and resistance changes, and mark probable pipe locations.
Safety: avoid energized utilities and wear gloves and eye protection.
- Clear surface debris.
- Probe in grid.
- Mark findings.
How Deep Are Typical Buried Water Pipes?
Depths for buried water pipes vary by climate, local code, and purpose, but most residential service lines are typically installed between 12 and 48 inches below finished grade.
Shallow irrigation or temporary lines may sit closer to the surface, while mains and frost-protected services are placed deeper.
Urban areas often follow standardized depths; rural installations can differ by well or septic proximity.
Utility records, as-built drawings, and local permitting offices provide specific depths for a property.
When searching for leaks, initial efforts should focus within the typical range, expanding outward only after confirming anomalies or consulting utility maps.
How Pipe Material Affects Leak Detection Methods
Different pipe materials require distinct detection approaches because acoustic response, electrical conductivity, and susceptibility to corrosion influence which methods will be effective.
Plastic pipes (PVC, PE) transmit less sound and are nonconductive, so pressure testing and tracer gas are preferred.
Metal pipes (copper, steel) conduct sound and electricity, allowing acoustic listening, correlators, and pipe-locating rods with signal injectors to work well.
Clay, cast iron, or concrete are brittle and may hide hairline leaks; visual inspection of exposed joints, dye testing in accessible sections, and tracer gas combined with ground microphones are useful.
Choice of method depends on material, depth, and access limitations.
How Soil Changes and Weather Reveal Leak Locations
Changes in soil and weather often make underground leaks apparent through surface signs.
Persistent wet spots and unusually lush or stressed vegetation can indicate where water is reaching the surface.
Seasonal soil movement, such as frost heave or dry shrinkage, can expose pipe shifts or concentrate seepage in predictable locations.
Wet Spot Formation
Wet spots form where escaping water alters the soil’s moisture balance, creating visible cues such as darker color, softened texture, and increased vegetation vigor. Ground conditions change predictably as leaks feed shallow layers.
- Saturation pattern: pooled or consistently damp areas contrast with surrounding dry soil after irrigation cycles.
- Texture shift: compacted or muddy patches appear where fine sediments are mobilized by persistent seepage.
- Surface temperature: cool zones persist because evaporative cooling and conductive effects lower soil temperature near the leak.
Observers should note timing relative to rainfall and watering to distinguish leak-driven wet spots from normal moisture fluctuations.
Vegetation Response
Vegetation response offers a clear, living map of subsurface leaks: plants over a leaking pipe often grow taller, greener, or more vigorously than surrounding stands because the extra moisture alters root access and nutrient availability.
Observers note linear or circular patterns where grasses, shrubs, or tree foliage intensify.
Seasonal rainfall can mask differences, so look during dry periods when anomalous lushness stands out.
Conversely, some species tolerate saturation poorly and may yellow or wilt over saturated zones.
Compare with nearby healthy growth and check for sudden changes over weeks.
Use photos and simple markers to track patterns before further investigation.
Seasonal Soil Movement
Seasonally, soil around an underground leak shifts in predictable ways as moisture levels fluctuate: repeated wetting and drying causes shrink-swell cycles, frost heave, or softening that alters surface contours and can expose or settle ground above a breach.
Observers can use these patterns to pinpoint probable leak zones by noting subtle depressions, raised ridges, or persistently soggy patches after dry periods.
Practical signs include changed grading, pooled water in low spots, or cracked pavement tracing the leak path.
Typical seasonal indicators:
- Winter frost heave revealing raised seams.
- Spring soft spots and pooled water.
- Summer shrinkage forming cracks.
How to Mark Suspected Leak Zones With GPS and Stakes
When a probable leak area is identified, crews should establish clear GPS coordinates and place visible stakes to create a reliable, mapped reference for further inspection and repairs. Marking combines precise GPS waypoints with labeled stakes showing depth estimates, surface signs, and priority. Photographs tied to coordinates aid records. Stakes should be weather-resistant and numbered; note nearby utilities to avoid interference. Record datum and device accuracy. Maintain a simple map linking stake numbers to GPS points and observations for crews and inspectors, ensuring consistent handoffs and minimizing unnecessary excavation.
| Stake ID | GPS (Lat, Lon) | Note |
|---|---|---|
| 1 | ||
| 2 | ||
| 3 | ||
| 4 |
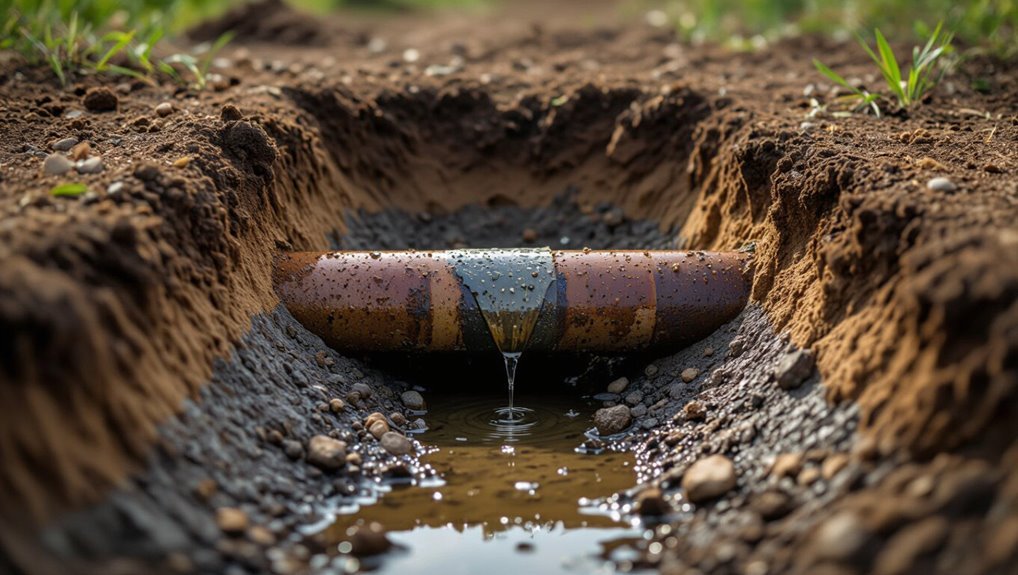
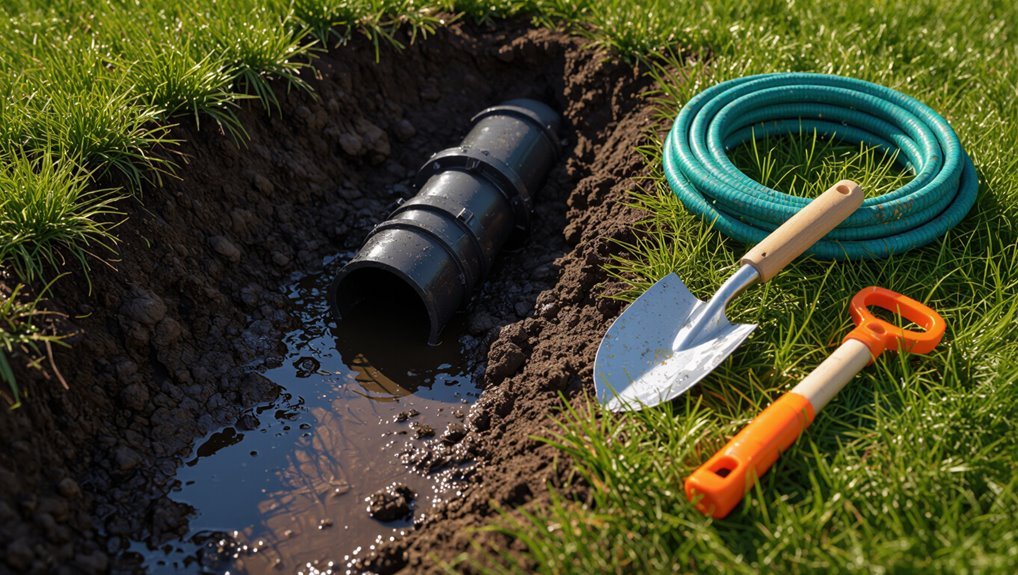
How to Dig Safely Around a Suspected Pipe
With GPS-marked stakes and photographs in place, crews should proceed to excavate carefully around the suspected pipe, following a planned sequence that preserves stake locations and documented observations.
Soil removal begins at a safe distance, working in layers to expose bedding without undermining the pipe.
Hand tools are preferred near utility lines; mechanical digging can resume once the pipe is visually clear.
Shoring and sloping prevent collapse in deeper trenches.
After exposure, crews clean the area, inspect for hairline cracks, and document findings before any repair.
- Excavate gradually and document.
- Use hand tools near pipe.
- Shore or slope trenches.
Avoiding Gas, Electric, and Telecom Lines When Digging for a Water Leak
Before any soil is moved, the area should be checked for utility markings to identify gas, electric, and telecom lines.
The responsible party is advised to call the local “call before you dig” number so buried services are located and marked by the utility operators.
When markings are unclear, non‑invasive detection methods such as ground‑penetrating radar or acoustic locators should be used to confirm pipe positions before hand digging.
Locate Utility Markings First
Prior to any digging, a professional must identify and mark underground utilities to prevent damaging gas, electric, or telecom lines.
Visual markings guide safe excavation and reduce risk of service disruption or injury.
The professional verifies maps, uses locator equipment, and places color-coded flags and spray paint at intervals.
The following checklist helps keep worksite safety-focused:
- Confirm visible markings and their colors correspond to utility types.
- Measure and note distances from markings to planned dig points.
- Maintain clear communication with the marking technician; update marks if the scope changes.
Respecting markings minimizes accidental strikes and assures an orderly repair process.
Call Before You Dig
When preparing to excavate for a suspected water leak, a call to the local utility notification center is essential to prevent accidental strikes on gas, electric, or telecom lines.
The center coordinates marking underground utilities so diggers know safe zones and required clearances.
After notification, wait the legally required period for professional locators to mark lines with standardized colors.
Respect marks and hand-excavate within the tolerance zones to avoid damage.
Keep clear records of the ticket number and marks in case issues arise.
If unmarked utilities remain suspected, hire a qualified professional rather than proceeding with powered excavation.
Use Non‑Invasive Detection
Using non-invasive detection methods preserves safety and minimizes the risk of striking gas, electric, or telecom lines while locating an underground water leak.
The person uses instruments and observation before any digging, relying on sound, surface wetness, and utility maps to narrow the search.
Recommended steps include:
- Use acoustic leak detectors and ground microphones to pinpoint sounds without excavation.
- Employ infrared or thermal cameras to spot cooler, damp soil or temperature anomalies above concealed leaks.
- Consult utility maps and use electromagnetic locators to verify pipe locations and avoid buried services before any ground penetration.
How to Make a Temporary Stop for a Small Leak
Begin by isolating the affected section of pipe: shut off the nearest valve and relieve pressure to reduce flow through the leak.
Once flow is minimized, dry the pipe surface and clear debris to improve adhesion.
For small pinhole leaks, apply a rubber patch (cut from a hose or inner tube) over the leak and secure tightly with hose clamps or stainless steel wire twisted firmly.
Alternatively, wrap specialized leak tape or a resin-impregnated repair wrap per product instructions, overlapping layers for strength.
Monitor the temporary repair closely and plan for a permanent fix; these measures are short-term and may fail under pressure.
How to Repair Common Buried Pipe Types Yourself
Assess the pipe material and joint type before digging: different buried pipes—copper, PVC/CPVC, polyethylene (PE), and galvanized steel—require specific tools, fittings, and techniques for safe, durable repairs.
The homeowner should expose the pipe carefully, shut water, and clean the damaged area.
Match repair method to material: solder or compression fittings for copper; solvent cement or threaded adapters for PVC/CPVC; electrofusion or barbed fittings with clamps for PE; and coupling or replacement for corroded galvanized sections.
Follow local codes and pressure-test after repair.
- Prepare: turn off water, excavate, clean.
- Repair: use material-appropriate fittings.
- Test: restore pressure, inspect for leaks.
When to Call a Professional Leak Detector
Call a professional leak detector when signs point beyond a straightforward, visible repair or when the homeowner lacks the tools, time, or confidence to locate and fix a buried leak safely.
Professionals are recommended if water appears under foundations, persistent unexplained pressure drops occur, multiple fixtures show loss, or repeated repairs fail.
Also hire one when excavation risks underground utilities, landscaping, or structural elements, or when access is limited by depth, frozen ground, or extensive saturation.
Certified detectors use specialized equipment and offer accurate pinpointing, damage minimization, and documented findings for insurance or contractor coordination, ensuring safe, efficient resolution.
How Much Underground Leak Detection Typically Costs
Typically, underground leak detection costs vary widely depending on factors such as property size, soil conditions, accessibility, and the diagnostic methods required. Costs are presented as ranges to reflect common scenarios and methods. Basic acoustic or tracer dye inspections often cost less than electromagnetic or thermal imaging; travel, local rates, and complexity raise prices. Homeowners should expect estimates before work begins and compare quotes.
- Basic acoustic/tracer: $100–$500
- Advanced electronic/thermal imaging: $300–$1,500
- Full-location plus excavation estimate: $500–$3,000
Documenting Leaks for Insurance and Permits
After locating a suspected underground leak and obtaining cost estimates, properly documenting the problem becomes necessary for insurance claims and permit applications. The homeowner should record date, time, location, visible damage, and water loss measurements.
Include clear photos and video showing surface indicators, excavation progress, pipe condition, and any marked utilities. Retain detection reports, contractor estimates, repair scope, and permits applied for or issued.
Note meter readings and attempts to isolate the leak. Use readable filenames and a single folder for all records. Submit organized documentation with claims or permit forms and keep copies until final inspection and claim closure.
How to Prevent Future Underground Leaks and Seasonal Maintenance
Regularly scheduled inspections and proactive maintenance substantially reduce the risk of future underground water pipe failures. The homeowner should adopt simple routines: monitor pressure, inspect visible fixtures, and record anomalies after storms or freezes. Seasonal tasks minimize stress on pipes and detect wear early.
- Winterize: drain exposed lines, insulate vulnerable sections, and maintain stable indoor temperatures.
- Spring check: examine for frost heave, restore soil grading, and verify valve operation.
- Annual service: schedule professional leak detection, replace aging pipe segments, and update documentation for warranties and insurance claims.
Conclusion
A homeowner once found water pooling over a yard where a single sprinkler head had burst—a small spill that hid a months-long drip beneath. Like that sprinkler, an underground leak can begin quietly yet double bills and rot foundations if ignored. Prompt checks, meter monitoring, and timely professional help act as early gardeners, stopping unseen damage before it spreads. Vigilance and swift action save money and preserve home integrity over the long term.