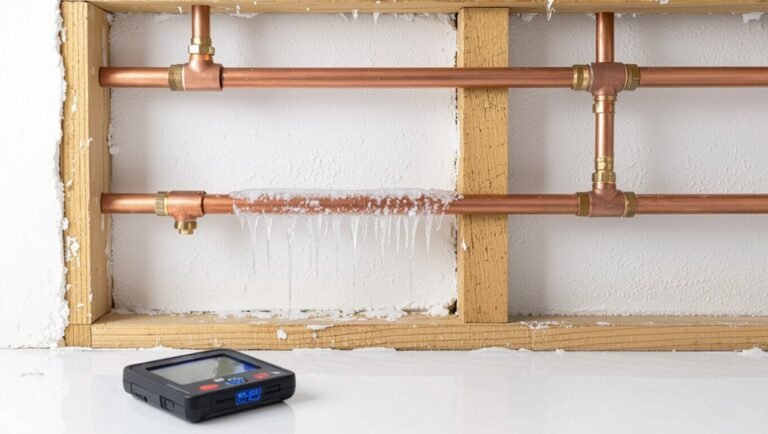
How to Find a Leak in Pipes: Quick DIY Detection Tips
To find a leak in your pipes quickly and effectively, follow these key steps:
- Initial Scan: Spend 30 seconds examining visible pipes, cabinets, floors, and ceilings for any signs of wetness or stains. Pay attention to musty odors as well.
- Water Meter Test: Turn off all water sources in your home and conduct a meter test to check for any hidden leaks.
- Inspect Key Areas: Closely examine joints, appliance lines, toilets, and hose bibs for any drips, mineral buildup, or loose fittings.
- Sound Detection: In a quiet room, use a stethoscope or a screwdriver to listen along the pipe runs for any unusual sounds that might indicate a leak.
- Check Surrounding Areas: Inspect your attic, crawlspace, and yard for damp soil or unusual water flow patterns.
By systematically following these steps, you can effectively detect leaks in your pipes and address them promptly.
Quick Checklist: 30‑Second Triage to Tell If You Have a Leak
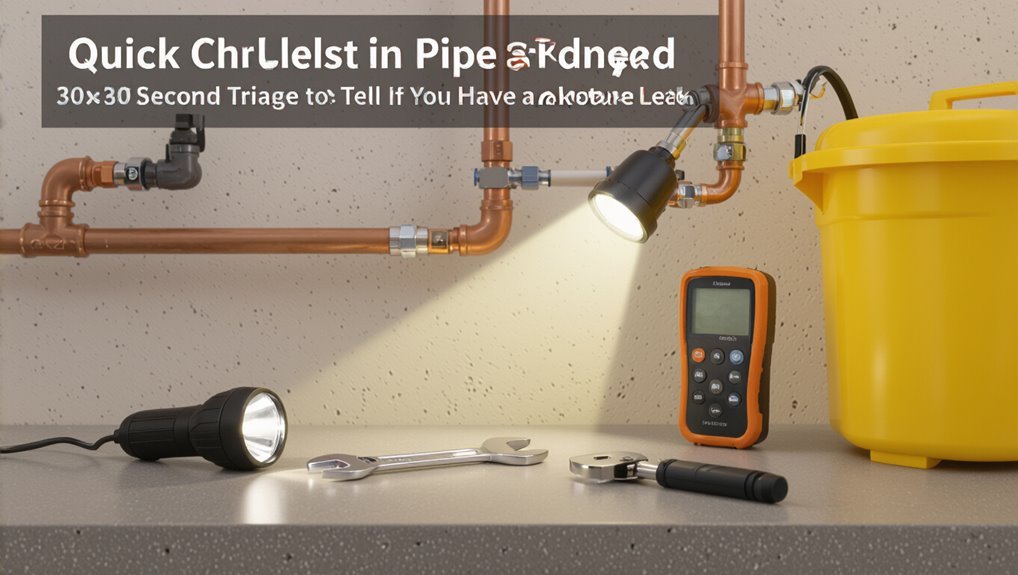
How can one tell, in half a minute, whether a plumbing leak is present? A person scans visible pipes, joints, and appliance connections for fresh drips or wetness, noting damp spots, mineral stains, or corrosion.
Floors and cabinets are checked for pooling or darkened areas; ceilings and walls for discoloration or soft spots. Faucets, toilets, and hose bibs are observed for running water or unusual sounds.
A quick sniff detects musty or moldy odors. Water bills and recent usage are mentally reviewed for unexpected rises. Any positive sign prompts immediate isolation of the affected valve and scheduling of a detailed inspection.
Confirm a Hidden Leak With the Water Meter Test
If the brief walkthrough points to possible hidden leakage but no obvious source appears, a water meter test provides a fast, objective way to confirm movement in the system.
Shut off all fixtures and appliances, note the meter reading, avoid water use for 1–2 hours, then recheck the meter.
A changing dial or digital count indicates flow and likely hidden leak; a steady reading suggests no active leak.
Repeat with household valves closed to isolate zones.
Record readings and times to show a professional if needed.
- Shut off everything first
- Record initial meter reading
- Wait undisturbed 1–2 hours
- Recheck for any movement
- Isolate zones if needed
Check Joints, Fittings & Appliance Supply Lines First
Many leaks originate at accessible connections, so begin by inspecting visible joints, fittings, and appliance supply lines before tearing into walls or floors.
Examine under sinks, behind toilets, around water heaters, and near washing machines; look for drips, mineral deposits, corrosion, or fresh moisture.
Gently run a paper towel along hose ends and threaded connections to reveal slow seepage.
Tighten loose compression nuts or replace worn washers and supply hoses when deterioration appears.
For braided stainless hoses, replace at first sign of bulging or rust.
Document findings and shut off localized valves before attempting repairs or calling a professional.
Test Toilets, Faucets & Shower Valves for Slow Leaks
After checking visible connections, attention should turn to fixtures that commonly leak slowly: toilets, faucets, and shower valves.
Inspect toilets by adding food dye to the tank and watching the bowl for color transfer after 10–15 minutes.
Examine faucet aerators and handles for drips when off; feel for moisture and check beneath sinks for dampness.
Run showers briefly and inspect valve trim and surrounding grout for weepage.
Record any slow loss on the water meter overnight with all fixtures off to confirm hidden leaks.
- Dye test toilet tanks
- Inspect faucet aerators
- Check under-sink P-traps
- Observe shower trim seams
- Monitor water meter overnight
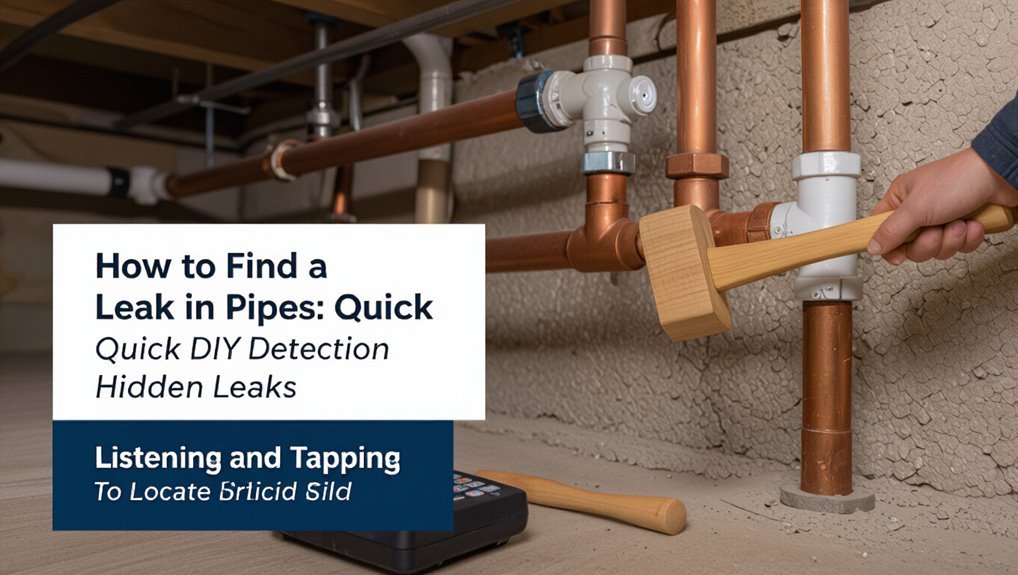
Listen for Leaks: How to Use a Quiet Room & a Stethoscope
A quiet room minimizes ambient noise so subtle water sounds become detectable.
A stethoscope should be placed against pipe fittings and moved methodically to amplify hissing or dripping.
Tracing the sound along the run of pipe helps pinpoint the leak’s location.
Choose A Quiet Room
In a quiet room, ambient noise is minimized so faint water sounds become distinguishable; this makes it possible to trace the sound of a leak along pipes using careful listening or a stethoscope. The person selecting the space should close windows, turn off appliances and silence HVAC systems. Choose a central room near suspected plumbing lines; hard surfaces reflect sound, aiding detection. Allow time for pipes to run briefly so leaks produce steady noise. Positioning oneself close to walls or crawlspace entrances improves acuity. Maintain silence and patience; brief noises may signal intermittent leaks.
- Close windows and doors
- Turn off appliances
- Pick a central room
- Use hard-surfaced areas
- Wait for steady flow
Use A Stethoscope Properly
Regularly, the inspector places the stethoscope’s chest piece against pipe fittings and runs while listening for distinct hissing or tapping that indicates escaping water. He steadies the probe, compares sounds to baseline silence, and adjusts pressure to avoid false noises from hand contact. Minimal movement and breath control improve detection. If unsure, he repeats checks after briefly turning the valve to create flow contrast. He notes location, sound type, and intensity for later repair assessment.
| Spot | Sound | Action |
|---|---|---|
| Joint | Hiss | Mark |
| Valve | Click | Recheck |
| Elbow | Tap | Log |
| Runout | Mute | Verify |
| Fixture | Rattle | Isolate |
Trace Sound Along Pipes
Using a quiet room as a controlled acoustic environment, the inspector methodically traces along each pipe with a stethoscope, moving slowly from fixtures toward the main line while listening for changes in tone or intensity.
He notes faint hissing, rhythmic drips, or metallic resonance differing from baseline pipe noise.
Hands steady, he pauses at junctions and fittings where leaks often amplify. Small increases in volume or a localized pitch shift indicate probable seepage.
Findings are marked, rechecked, and compared to pressure changes when valves are briefly opened or closed to confirm the leak location before repair.
- Hissing versus normal flow
- Junction checks
- Slow, steady movement
- Pause at fittings
- Confirm with valve changes
Trace Ceiling & Wall Leaks From Attic, Crawlspace & Below
From the attic, crawlspace, or rooms below, tracing a ceiling or wall leak begins by following the path of water rather than where damage first appears. The investigator inspects insulation, sheathing, joists and wall cavities for damp streaks, noting stains that slope toward a source.
Probing around pipe penetrations, vents and chimneys helps locate active drips. In crawlspaces, ceilings are examined from below for wet spots above utilities and seams. Temporary runs of paper towels reveal flow direction; moisture meters confirm spread.
Once the channel is identified, the exact fixture, joint or supply line within that route is isolated for repair.
Inspect Outdoor Supply Lines, Hose Bibs & Irrigation Zones
Next, the inspection moves outside to the supply lines and landscaping systems.
Hose bib connections are checked for drips and loose fittings, irrigation zone valves are observed for proper sealing and operation, and visible sections of underground supply lines are examined for signs of wet soil or surface pooling.
Any irregularities are noted for repair or further investigative testing.
Check Hose Bibs Connections
Inspect the exterior supply network by examining hose bibs, visible supply lines, and irrigation zone connections for signs of moisture, corrosion, or loose fittings. The observer checks each spigot for drips, feels for wetness around mounting plates, and inspects packing nuts and hose washers. Tightening connections, replacing worn washers, and applying plumber’s tape where threads leak are recommended immediate actions. Frozen or damaged spouts should be noted for repair. Record location and severity, then retest after adjustments. If leaks persist at the wall or stem, advise professional assessment to avoid hidden damage.
- Look for dripping or pooled water
- Feel for dampness at fittings
- Inspect corrosion and cracks
- Tighten or replace washers
- Note wall-penetration leaks
Inspect Irrigation Zone Valves
For outdoor irrigation systems, examine each zone valve assembly for visible leaks, soil saturation, or wet mulch that indicates a slow or intermittent failure.
Inspect solenoids, valve bodies, and nearby fittings for cracks, mineral buildup, or corrosion.
Manually activate zones to observe where water appears while valves cycle; note dripping after shutoff.
Tighten loose fittings and replace damaged washers or seals.
Check wiring connections to prevent electrical faults mimicking leaks.
Record problem zones and isolate them to confirm source.
If leaks persist at the valve inlet or outlet, prepare to replace the valve assembly or consult a professional for further diagnosis.
Examine Underground Supply Lines
After checking zone valves, attention should shift outward to the underground supply lines that feed hose bibs and irrigation zones.
The inspector notes damp soil, lush patches, or settling as signs of hidden leaks. Sounding the ground with a metal rod can reveal voids or soft spots.
Follow visible pipe runs from the main to fittings, listening for running water when systems are off. Expose suspicious areas carefully to avoid further damage.
If multiple zones show pressure loss, isolate sections to narrow the location. For uncertain cases, professional leak correlators or camera inspection are recommended.
- Look for wet or greener soil
- Probe for soft ground
- Trace visible pipe routes
- Isolate zones to test pressure
- Use professional detection if unsure
Make Quick Temporary Fixes: Clamps, Tape & Epoxy
When a small pipe leak must be stopped quickly to limit water damage, clamps, specialized repair tape, and epoxy putty provide effective short-term solutions that require minimal tools and skill. The user should isolate the line, drain or dry the area, and apply the chosen patch per instructions. Clamps compress, tape adheres and conforms, epoxy bonds and fills. These fixes stabilize until permanent repair is possible. Monitor for seepage and replace temporary materials as needed. Avoid extensive pressure testing. The following table summarizes typical uses and advantages.
| Method | Strengths |
|---|---|
| Clamp | Immediate compression |
| Repair tape | Conforms, easy |
| Epoxy putty | Fills gaps |
| Combination | Enhanced reliability |
When to Call a Plumber : What to Report and Photos to Take
How urgent is professional help needed and what specifics should be shared? A plumber should be called when leaks are large, persistent, hidden, affecting electrical systems, or causing structural damage. Report location, onset, water appearance, flow rate, and any smells or health concerns. Provide recent DIY steps taken and shutoff status. Photograph clear close-ups and wider context to show fittings, surrounding damage, and any visible corrosion. Time-stamped photos and short video of active dripping or pooling are helpful. Keep communication concise and factual to speed diagnosis and reduce onsite time.
- Exact leak location
- Start time and progression
- Close-up of fitting/joint
- Wider shot of area
- Video of active leak
Conclusion
Detecting and stopping a pipe leak early saves time, money and stress. By following the quick checklist, using the water‑meter test and checking joints, fixtures and outdoor lines, homeowners can often locate problems before they worsen. Temporary clamps, tape or epoxy buy time, but persistent or hard‑to‑find leaks merit a pro. When calling a plumber, be ready with photos and notes — remember, an ounce of prevention is worth a pound of cure.