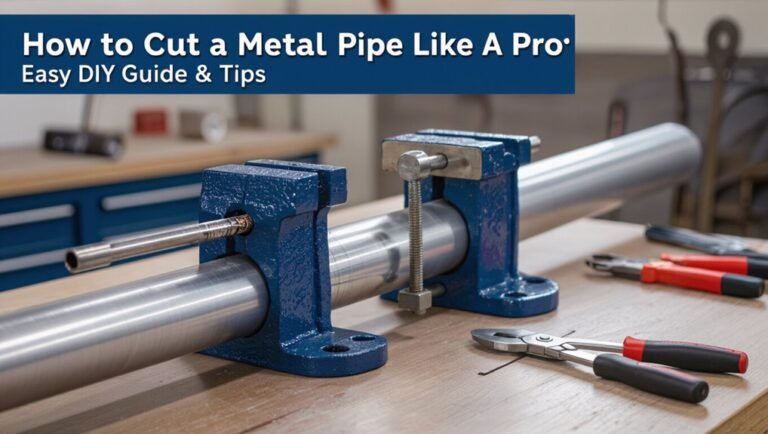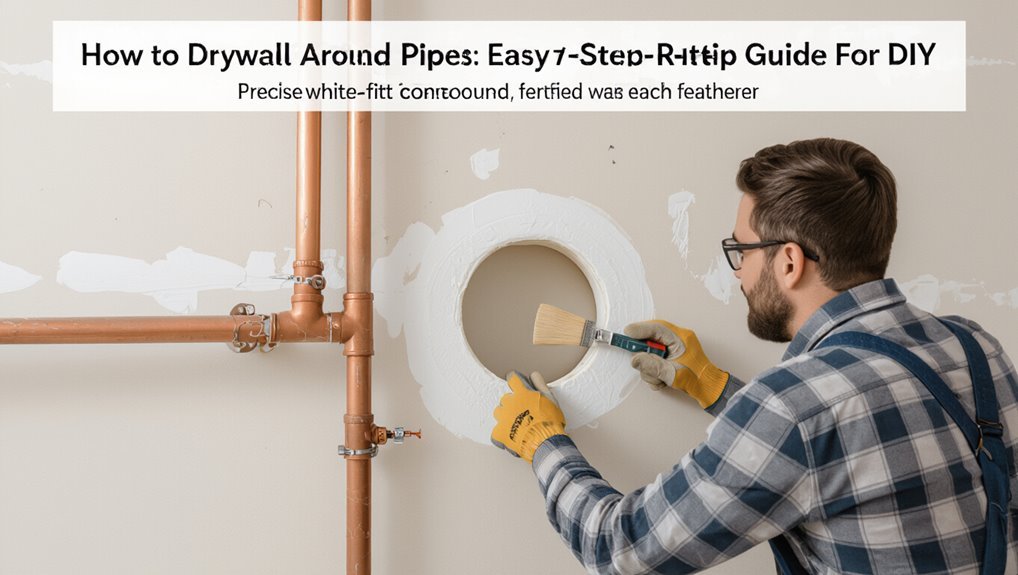
How to Drywall Around Pipes: Easy Step-by-Step Guide for DIY
Drywalling around pipes can be accomplished effectively with careful measuring, precise cutting, and proper finishing. Here’s a key takeaway to guide you:
- Measure Accurately: Identify the centerlines of the pipes from fixed references and mark them on the drywall panel.
- Cut with Precision: Create pilot holes and gradually enlarge them for a snug fit around the pipes, smoothing the edges to protect drywall tape.
- Add Support: Install blocking or foam backing to provide stability for the drywall around the pipes.
- Seal Gaps: Use escutcheons or caulk to manage movement and prevent moisture infiltration.
- Finish Neatly: Apply joint compound in thin, feathered coats for a smooth finish.
Always adhere to safety regulations and building codes to avoid potential leaks or fire hazards. For further techniques and tips, continue exploring the detailed steps.
What This Guide Solves: Drywalling Around Pipes Made Simple
For homeowners and contractors facing the common challenge of fitting drywall neatly around plumbing, this guide clarifies practical methods, necessary tools, and typical pitfalls to avoid.
It outlines when to use collars, escutcheons, or patch techniques and when to fur out studs or box pipes for flush surfaces.
The text distinguishes between new construction and retrofit repairs, highlights safe cutting practices to protect pipes, and recommends fasteners and sealants suited to wet areas.
It also notes aesthetic finishing options and when to call a plumber.
The aim is a reliable, efficient approach that minimizes rework and water-damage risk.
Quick 6-Step Workflow to Drywall Around Pipes
A concise six-step workflow guides the process from initial Measure and Mark through Cut Around Pipes and secure Tape placement.
The sequence continues with Mud application and shaping before the final Finish is applied for a smooth surface.
Each step is presented for straightforward execution and consistent results.
Measure And Mark
Before cutting or fastening, precise measurements and clear markings guarantee pipe penetrations fit without gaps or interference. The installer measures pipe diameters, flange thicknesses, and offsets from studs or corners, recording each value.
Using a centerline from adjacent framing, transfer pipe locations to the drywall panel, noting height and lateral position. Add cutline allowances for pipe insulation, sleeves, or escutcheons.
Mark fastener locations avoiding seams and services. Use a square and straightedge for accuracy; verify critical dimensions twice. Label each panel with orientation and room reference to maintain alignment during installation and final adjustments.
Cut Around Pipes
With panel measurements and pipe locations clearly marked, the installer proceeds to cut openings precisely to fit each pipe assembly. Using a drywall saw or rotary tool, holes are started slightly undersized, then enlarged to allow snug clearance for pipe insulation or escutcheons. Edges are smoothed with a rasp to prevent tearing joint tape or creating gaps.
Cutouts for multiple pipes are laid out to maintain required clearances from framing and between fittings. Small access notches are kept minimal to preserve panel strength and simplify sealing later.
- Drill pilot holes before sawing.
- Cut incrementally for fit.
- Smooth and deburr edges.
Tape, Mud, Finish
Begin the finishing sequence by applying drywall tape and joint compound in a focused, stepwise workflow that guarantees clean seals around pipes and preserves panel integrity.
First, bed paper or mesh tape over seams and any cut edges around pipe collars.
Second, apply a thin first coat of joint compound, feathering outward from the pipe to minimize buildup. Allow to dry fully, then sand lightly.
Third, apply a wider second coat, smooth and blend into surrounding wall.
Fourth, inspect, spot-prime as needed, and apply a final thin skim coat. Sand, clean dust, and prime before painting for a polished, durable finish.
Tools and Materials You Need for Drywalling Around Pipes
For drywalling around pipes, assembling the right tools and materials guarantees clean cuts, secure fittings, and durable finishes. The list below highlights essentials: drywall sheets sized to the project, a drywall saw or rotary tool for precise openings, and joint compound plus tape for sealing seams.
Additional useful items include a utility knife, measuring tools, a sanding block, and pipe collars or escutcheons for neat edges. Protective gear — gloves, eye protection, and a dust mask — assures safety. Fasteners and a cordless drill complete the kit, enabling efficient installation and a professional-looking result.
- Drywall sheets, saw/rotary tool, joint compound and tape
- Utility knife, measuring tools, sanding block, fasteners, drill
- Pipe collars/escutcheons, gloves, eye protection, dust mask
Drywall Backing and Blocking Options for Pipe Openings
When installing drywall around pipes, proper backing and blocking provide the support needed to secure edges, prevent sagging, and allow for neat finishing around penetrations.
Options include installing horizontal blocking between studs using treated wood or plywood to create a solid nailing surface around pipe locations. Backing panels or small plywood collars can be fastened to framing to reinforce cut edges. For retrofit work, metal backing plates or adjustable clip systems slip behind drywall to brace openings without large removals.
Moisture-resistant backer board is advisable near wet pipes.
All methods should align with local codes and allow access for future repairs.
Measure Pipe Locations Accurately on Drywall
The installer marks pipe centerlines on the drywall to establish exact cutting points.
Measurements are transferred from the framing or fixture using straightedges and calipers to maintain alignment between both sides of the wall. Pipe insulation thickness is added to measurements so openings accommodate the full external diameter.
Marking Pipe Centerlines
Accurately marking pipe centerlines on drywall starts with locating the pipes behind the surface and transferring those measurements to the sheet using a reliable reference point; this guarantees cutouts and fixtures align without gaps or offsets.
The installer measures horizontally and vertically from studs, corners, or a fixed benchmark, noting pipe diameters and clearances. Marks are made lightly with a pencil and double-checked against plumbing risers.
For multiple pipes, label each centerline and indicate depth if recessed. Use a small square or compass to establish perpendiculars for precise holes.
Final verification prevents re-cutting and misalignment.
- Use fixed reference (stud, corner)
- Mark center and diameter
- Double-check before cutting
Transferring Measurements Precisely
Having established pipe centerlines from fixed references, measurements must be transferred to the drywall with exacting methods to preserve those alignments.
The installer aligns a square or T-bevel to the reference lines, then marks horizontal and vertical offsets on the drywall face. Use a pencil for fine lines and a felt-tip for temporary visibility on textured surfaces.
Measure twice: verify distance from edges and between multiple pipes, noting elevations relative to the floor.
For round pipes, mark center then scribe the hole diameter. Label each mark with its corresponding fixture or wall stud location before cutting.
Accounting For Pipe Insulation
When pipes are insulated, installers must add the insulation thickness to all transferred centerlines and hole diameters so drywall openings align with the finished pipe profile.
The installer measures bare pipe, records insulation thickness, and computes adjusted centerlines and hole sizes.
Templates or adjustable hole saws help mirror the insulated diameter.
Markings should transfer to studs and drywall before cutting; recheck measurements at multiple points along runs to accommodate variances.
Use pencil, tape measure, and calipers for precision.
Sealant or escutcheons planned after drywall must match the final insulated dimension to assure fit and finish.
- Measure bare pipe + insulation
- Adjust hole diameter
- Transfer and recheck measurements
Transfer and Mark Pipe Positions on Drywall Sheets
Before cutting, the installer should transfer each pipe location from the wall to the drywall sheet using precise measurements and consistent marking methods; this includes measuring from two fixed references (floor and adjacent corner), noting pipe diameter and any required clearance, and marking the center point and cut outline with a pencil or carbide-tipped marker so the hole aligns exactly when the sheet is hung.
Measurements are recorded on the sheet edge, with diagonal checks for accuracy. For multiple pipes, label each mark to match wall positions. Verify marks by dry-fitting the sheet against studs and re-measuring before any holes are cut.
Sizing Holes for Pipe Fittings and Valves
For accurate openings, the installer sizes each drywall hole to accommodate the pipe fitting or valve plus required clearances: the hole must match the outside diameter of the fitting’s body or escutcheon, allow for any protective sleeve or insulation, and provide room for shims or adjustment without stressing the pipe.
Measurements are confirmed with calipers or a template; holes are marked slightly larger than the nominal fitting to permit trim and caulking. Avoid snug cuts that transfer vibration or compress seals. Countersinking the drywall edge can improve escutcheon fit and finishing.
- Measure outside diameter and add clearance
- Template and verify fit
- Countersink edges for trim
Cut Drywall for Irregular or Grouped Pipes
When pipes are irregularly shaped or clustered, accurate marking and measurement determine whether a single opening or multiple cuts are required.
The installer transfers measurements to the drywall, marking reference points and clearance lines before cutting.
Cuts for irregular openings are made slowly and precisely, trimming to fit rather than removing excess material at once.
Mark And Measure Precisely
Measure each pipe cluster carefully and transfer those dimensions to the drywall using a square and pencil, noting centers and edge distances for every opening.
The installer records diameter, offset from studs, and any angled runs, marking reference lines for cut locations and drywall orientation.
Templates from cardboard or scrap drywall help verify fit before cutting.
Verify clearances for insulation, valves, and trim; relabel marks if panels will be rotated.
Double-check measurements against the actual pipe layout to prevent rework.
Keep all marks light and precise to erase after finishing.
- Confirm centerlines and edge distances.
- Create and test a template.
- Recheck measurements before cutting.
Cut Irregular Openings Carefully
Begin cuts with slow, deliberate scoring to establish clean edges and prevent tearing when working around irregular or clustered pipes. The installer traces each pipe profile, makes pilot holes, and uses a keyhole or oscillating tool to follow curves. Small relief cuts allow slight panel flexing for a snug fit. Remove minimal material; test fit, then pare edges for tight clearances. Seal gaps with appropriate foam or caulk after fastening. Clean edges reduce patching and speed finishing.
| Step | Tool |
|---|---|
| Trace & score | Pencil, utility knife |
| Cut & refine | Oscillating tool, rasp |
| Fit & seal | Caulk, low-expansion foam |
Drill Bits, Hole Saws, and Drywall Keys: Choosing the Right Tool
Selecting the correct tool for cutting drywall around pipes hinges on the pipe size, location, and desired finish; drill bits, hole saws, and drywall keys each serve specific roles. The right choice reduces damage and speeds work.
Use smaller bits for pilot holes and tight clearance; hole saws for clean round openings on exposed runs; drywall keys (or jab saws) for irregular or flush cuts where pipe collars sit. Match tool diameter to pipe plus clearance, choose bi-metal or carbide for longevity, and prefer adjustable hole saws for variable sizes. Safety: secure drywall, wear eye protection, and control dust.
- Drill bits — pilot and clearance holes
- Hole saws — clean circular openings
- Drywall keys — adjustable/irregular cuts
Fit Drywall Around Copper, PVC, and Insulated Pipes
Fitting drywall around copper, PVC, and insulated pipes requires matching cutting technique and clearance to each pipe’s material and thermal or corrosion needs.
Copper demands slightly larger openings and non-reactive fittings; use a rasp or rotary tool to smooth metal edges and allow vibration-free movement.
For PVC, trim squarely, deburr, and leave minimal gap for sealant and expansion.
Insulated pipes need cuts accommodating insulation bulk without compressing it—trace outer insulation diameter, cut a larger hole, and avoid tearing the jacket.
In all cases, install escutcheons or foam gaskets where visible and fasten drywall without stressing pipe runs.
Protect Hot-Water and Steam Pipes During Installation
When installing drywall near hot-water or steam lines, installers should wrap exposed pipes with appropriate insulation to reduce heat transfer and prevent surface damage.
They must also maintain the required clearance between the pipes and drywall to allow for thermal expansion and code compliance.
Temporary heat shields or protective barriers can be secured during work to protect both the piping and the drywall until finishing is complete.
Wrap Pipes With Insulation
Wrapping hot-water and steam pipes with insulation during drywall installation preserves heat, reduces condensation, and minimizes the risk of burns or drywall damage from radiant heat.
The installer cuts closed-cell foam or fiberglass sleeves to length, slips them over exposed runs, and secures edges with aluminum foil tape or zip ties.
Joints receive overlap and tape to prevent gaps; valves and flanges get custom-cut pieces.
Insulation chosen matches pipe temperature and local code.
After insulating, the crew checks for sagging or compression before proceeding with drywall to guarantee continuous thermal protection and moisture control.
- Choose appropriate material and thickness
- Fit and seal all joints
- Inspect for coverage and integrity
Maintain Clearance From Drywall
After insulating exposed runs, installers must also maintain proper clearance between hot-water and steam pipes and the drywall to prevent heat transfer, moisture build-up, and fire hazards.
Maintain manufacturer-recommended standoff distances using non-combustible spacers or blocking, ensuring the drywall does not contact pipe insulation directly.
Leave small service gaps at pipe penetrations and use fire-rated caulk where required.
For steam lines, allow extra clearance for thermal expansion and periodic inspection.
Verify local code for minimum clearances around boilers and water heaters.
Document clearances on plans and mark framing to keep panels away from high-temperature surfaces during installation.
Secure Temporary Heat Shields
Install temporary heat shields to protect hot-water and steam pipes from damage and to prevent heat transfer to adjacent drywall and framing during construction. The shields should be rigid, noncombustible, and sized to maintain required clearance.
Attach shields with straps or clamps, avoiding direct contact that could vibrate or abrade pipe insulation. Verify local code for clearance and insulation requirements.
Remove shields only after joint compounds cure and finishes are complete, restoring permanent insulation afterward.
- Use metal or mineral-board shields sized to code.
- Secure with stainless straps or band clamps.
- Inspect shields before drywall finishing.
Install Drywall Panels Around a Wall-Mounted Pipe
When fitting drywall around a wall-mounted pipe, precise measuring and careful cutting are essential to achieve a clean, secure finish; the process begins by marking the drywall where the pipe will pass through, transferring measurements from the wall to the panel while accounting for flange or escutcheon clearance.
Cut a neat opening with a hole saw or keyhole saw, then dry-fit the panel to confirm alignment. Fasten the drywall to studs or backing with screws, keeping a small gap around the pipe for thermal movement and sealant. Trim edges as needed, reinstall escutcheon, and clean debris before finishing.
Secure and Finish Seams Near Pipes Without Cracking
Around pipes, seams require reinforcement and flexible finishing to prevent cracking from vibration, thermal movement, and minor building settling. The installer should cut drywall snugly, leaving minimal gaps, then back up with foam gasket or caulk where pipe meets board.
Use paper or fiberglass mesh tape over seams, embedding tape with a flexible joint compound formulated for movement. Apply thin, feathered coats, allowing full curing between layers, then sand lightly.
For recurring movement, add a thin bead of paintable silicone at the pipe edge after finishing. Final sanding and priming complete the resilient seam repair.
- Cut snugly and back with foam/caulk
- Tape and use flexible compound
- Add silicone at pipe edge
Apply Corner Bead and Reinforcement at Pipe Penetrations
At pipe penetrations, corner bead and reinforcement focus on protecting edges and maintaining crisp lines where drywall meets plumbing while accommodating movement.
Install metal or vinyl corner bead on exposed drywall edges around recessed pipe boxes and angled cuts, cutting to fit without forcing against pipe insulation. Use corrosion-resistant screws or adhesive to secure bead, keeping a small gap for sealant where pipes pass.
Apply self-adhesive fiberglass mesh or metal patch around service penetrations to distribute stress. Make sure reinforcement overlaps seams by at least two inches.
Allow movement joints near larger pipes, and choose flexible caulk for final gap sealing.
Sand and Feather Joint Compound Around Pipes
Starting with a clean, dry surface, the contractor sands the dried joint compound smooth and then feathers successive thin coats outward from pipe penetrations to blend the repair into surrounding drywall.
He uses fine-grit paper and light pressure to avoid gouging, removing dust between coats with a brush or vacuum.
Each coat overlaps the last slightly, thinned toward edges to create an invisible shift.
Final sanding refines contours and prepares for priming.
Attention to drying time and ambient humidity guarantees proper feathering without cracking.
Careful feathering minimizes visible ridges and reduces finishing time.
- Sand with fine-grit paper
- Apply thin overlapping coats
- Remove dust between coats
Use Escutcheons and Pipe Collars for a Clean Finish
For a neat passage between drywall and exposed piping, escutcheons and pipe collars provide a simple, durable trim that conceals rough cut edges and gaps.
Install metal or plastic escutcheons after drywall finishing: slide the collar over the pipe, seat it against the wall, and secure if required by the model.
Choose sizes matching pipe diameter and wall thickness for a flush look. Tight-fit collars hide imperfections without bulky caulk.
For irregular cuts, use adjustable or split-ring escutcheons that clamp around the pipe.
Match finish to fixtures for continuity and replace damaged collars during maintenance for sustained appearance.
Prevent Moisture Damage: Sealing, Vapor Barriers, and Drains
Attention to sealant, flashing, and proper vapor barrier placement prevents water intrusion where pipes penetrate drywall.
Careful application of sealant and flashing directs moisture away from joints and gaps.
Placing the vapor barrier on the warm side of the wall assembly and ensuring drains or weep paths are provided reduces condensation risks.
Sealant And Flashing
Sealant and flashing protect wall systems where drywall meets pipes by directing water away from vulnerable joints and creating continuous barriers against moisture migration.
Properly applied low-modulus silicone or polyurethane sealant fills gaps around escutcheons and pipe penetrations, remaining flexible with thermal movement.
Metal or PVC flashing channels incidental water toward drains or outside the wall cavity, preventing capillary wicking into gypsum.
Install flashing under the drywall edge and over pipe collars where feasible, sloping toward the moisture exit.
Regular inspection and resealing at deterioration intervals preserves performance.
Choose materials compatible with nearby finishes and local building codes.
- Select compatible sealant
- Install flashing overlap
- Inspect periodically
Vapor Barrier Placement
After flashing and sealant are addressed around pipe penetrations, attention shifts to vapor barrier placement to guarantee moisture migration through wall assemblies. The installer selects barrier type and location based on climate, interior humidity, and pipe temperature to prevent condensation and mold. Barrier continuity around boxes and pipes is essential; overlaps must be sealed with compatible tape and sealant. Where plumbing passes from conditioned to unconditioned spaces, create a thermal break and consider vapor-permeable membranes. Drainage provisions below wet areas and access panels ensure maintenance without breaching the barrier.
| Item | Action |
|---|---|
| Climate | Choose permeance |
| Penetrations | Seal overlaps |
| Thermal break | Insulate wrap |
| Access | Provide panels |
Firestopping and Code Rules for Pipe Penetrations
When pipes penetrate walls or floors, building codes require firestopping measures to restore the fire-resistance rating of the assembly and limit the passage of smoke and flames.
Contractors must identify the fire-resistance rating, use listed firestop systems, and follow manufacturer instructions.
Penetrations around combustible pipes need noncombustible collars or wraps; plastic pipes often require intumescent materials.
Inspections verify correct products and installation.
Documentation of tested assemblies and clearances is essential.
Maintain access where required by code for serviceable systems.
Improper firestopping can void inspections and compromise safety.
- Verify rated assembly and listed system
- Use intumescent collars/sealants as specified
- Inspect and document installations
Soundproofing Drywall Near Noisy Plumbing
In rooms adjacent to noisy plumbing, soundproofing drywall focuses on isolating airborne and impact noise by combining mass, decoupling, and airtight seals; effective strategies include using heavier or multiple layers of gypsum, resilient channels or isolation clips to break structural paths, and acoustic caulks at penetrations to prevent flanking.
Install staggered or double stud framing where feasible, add sound-damping insulation (mineral wool) in cavities, and seal all gaps around pipes with fire-rated acoustic sealant. Consider adding a second layer of drywall with damping compound (e.g., Green Glue) for increased STC. Test and adjust clamp points to minimize vibration transfer.
Repair Common Mistakes: Gaps, Uneven Cuts, and Cracks
Common repairs around pipes focus on closing gap seams and smoothing uneven cuts to prevent drafts and moisture intrusion.
The process typically involves backing gaps with foam or tape and applying joint compound in thin layers.
Proper sanding and precise trimming restore a clean, durable finish.
Fixing Gap Seams
Repairing gap seams around pipes requires precise trimming and consistent mud application to restore a smooth, durable finish.
The technician measures the gap, trims drywall edges for snug contact, and fits backing where needed.
Tape is embedded over seams, followed by thin coats of joint compound.
Each coat is feathered wider, sanded lightly between applications, and inspected for voids.
For circular pipe gaps, a foam backer or metal lath prevents mud sagging.
Final sanding removes ridges; a light primer seals the repair.
Proper sequence prevents cracking and guarantees longevity without overbuilding the joint.
- Measure and trim
- Apply tape and mud
- Sand and prime
Smoothing Uneven Cuts
When faced with uneven cuts around pipes, a technician assesses high and low points, marks corrective trim lines, and plans backing or shim placement to guarantee the drywall sits flush. They trim irregular edges with a rasp or keyhole saw, install thin shims where gaps persist, and fasten small backing strips to support patch pieces. Joint compound is applied in thin layers, feathered outward, then sanded smooth. Final touch-ups remove tool marks and guarantee a uniform plane ready for paint. The process restores integrity and appearance while preventing future cracking or moisture intrusion.
| Anxiety | Relief | Pride |
|---|---|---|
| Frustration | Methodical repair | Finished look |
| Doubt | Visible progress | Confidence |
When to Call a Pro: Signs You Shouldn’t DIY
How can a homeowner tell if a drywall problem around pipes has moved beyond a simple DIY fix? Signs include visible water damage, mold growth, or persistent leaks indicating plumbing issues rather than surface repairs.
Structural compromise—sagging ceilings, soft studs, or large affected areas—requires professional assessment.
Electrical proximity concerns around wet areas demand licensed electricians or contractors to guarantee safety and code compliance.
- Extensive water damage or active leaks
- Mold spreading beyond a small patch
- Structural instability or electrical hazards
Call a qualified contractor to diagnose plumbing, framing, or safety risks before proceeding.
Quick Checklist for Drywalling Around Pipes
Before cutting or fastening drywall, a concise checklist helps guarantee a clean, safe installation around pipes: confirm the pipes are dry and leak-free, turn off water at the supply if any work risks disturbance, locate and mark studs and nearby electrical lines, choose appropriate moisture- and fire-rated drywall where required, and gather proper tools and fittings such as pipe collars, escutcheons, sealant, and fasteners.
Inspect pipe insulation and clearances, measure and transfer hole locations to drywall, verify access for shutoffs and valves, plan for movement or thermal expansion, select appropriate fastener spacing, pre-cut relief notches when needed, and prepare joint compound and tape.
Conclusion
Drywalling around pipes needn’t be a nightmare — the right measurements, backing, and a steady hand make it straightforward. With the six-step workflow, basic tools, and soundproofing tips, even a cautious DIYer can achieve professional-looking results. Avoid common mistakes like ragged cuts or loose backing, and know when a pro is wiser. Follow the checklist, work patiently, and the finished wall will stand up to scrutiny like a fortress of calm.