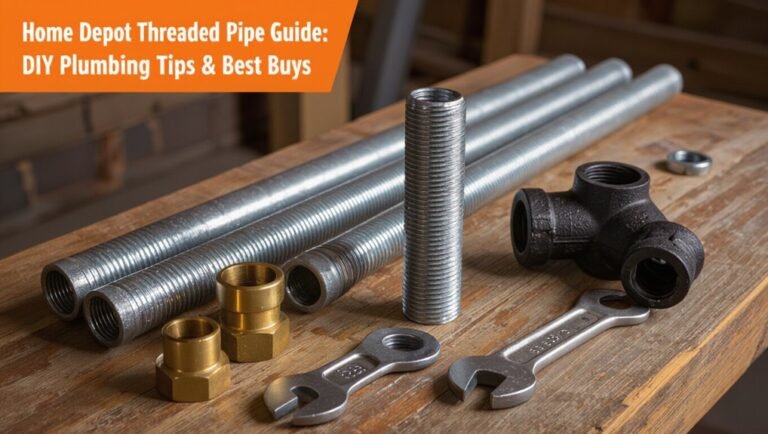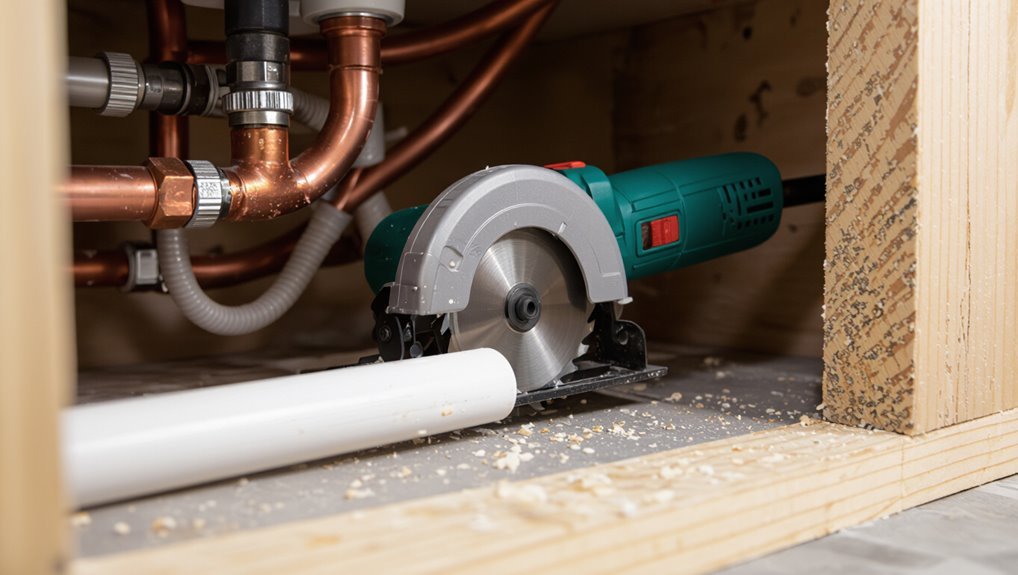
Cut PVC Pipe in Tight Space: Easy Tips & Tool Guide
Cutting PVC pipe in tight spaces requires specific tools and techniques to ensure precision and safety. Here are the key takeaways for effectively cutting PVC in confined areas:
- Use Compact Tools: Opt for a ratcheting PVC cutter, mini hacksaw, or a small oscillating tool with a fine blade for better maneuverability.
- Secure the Pipe: Stabilize the pipe using a wedged shim, block, or strap to prevent movement during cutting.
- Protect Surroundings: Use cloth or cardboard to shield surfaces from potential damage.
- Wear Safety Gear: Always use eye protection, respiratory gear, gloves, and hearing protection.
- Mark and Stabilize: Clearly mark your cut line twice and stabilize the pipe near the cut to avoid rotation while cutting.
- Finish with a Deburr File: After cutting, use a deburr file to ensure a snug fit of the pipes.
By following these tips, you can efficiently and safely cut PVC pipe in tight spaces. More tools and techniques are available for further assistance.
Quick: Safest Way to Cut PVC in a Tight Spot
When space is limited, the safest method to cut PVC is to use a compact tool that minimizes force and movement—such as a ratcheting PVC cutter or a small oscillating multi-tool with a fine-tooth blade—while securing the pipe with a block or strap to prevent rotation.
The operator aligns marks, stabilizes the pipe close to the cut, and uses short, controlled strokes to avoid binding.
Slow, steady pressure yields a cleaner cut and reduces vibration that can shift fittings.
Deburring with a round file or chamfering tool completes the job, ensuring proper fitment without distressing adjacent components.
Essential PPE for Cutting PVC in Cramped Areas
Always assess hazards before cutting PVC in a cramped area and select personal protective equipment that balances protection with mobility: safety glasses or a face shield to block fragments, a NIOSH-approved respirator or dust mask for PVC dust and solvent fumes, cut-resistant gloves for handling sharp edges and tools, and hearing protection if using power tools.
Footwear with firm soles and ankle support reduces slip and twist risk.
Long sleeves and pants of tightly woven fabric shield skin from chips.
Consider low-profile PPE to maintain reach and visibility.
Inspect and fit gear before work; replace damaged or ill-fitting items to preserve protection and maneuverability.
Prep Checklist: What to Clear and Protect First
Before cutting begins, clear and protect the immediate work area to prevent damage, contamination, and injury.
Remove loose items, tools not in use, and flammable materials from reach.
Cover nearby surfaces, fixtures, and flooring with drop cloths or cardboard to catch shavings and solvent.
Shield electronics and vents with plastic sheeting.
Secure adjacent piping and fittings to prevent stress when the pipe is cut.
Create a clear escape path for debris and a designated container for scrap and sharp offcuts.
Make sure adequate lighting and ventilation remain unobstructed.
Verify that bystanders and pets are kept well away from the workspace.
Measure and Mark PVC Accurately in Tight Spaces
A technician should adopt a “measure twice, mark once” mindset to avoid costly mistakes in confined areas.
A flexible tape measure helps reach and wrap around pipes where rigid tools cannot.
Marks should be made with a removable pen so placement can be adjusted without damaging the pipe.
Measure Twice Mark Once
How can accuracy be guaranteed when space is limited and cuts must be exact? The technician measures twice, checks reference points, and marks clearly before cutting. In tight quarters, confirming dimensions twice prevents rework and wasted fittings. A small, visible mark near the cut line and an auxiliary mark for alignment aid consistency. Lighting and stable positioning of the pipe are verified to avoid shifting. Practical checkpoints secure measurements remain reliable under constrained conditions.
| Step | Action |
|---|---|
| 1 | Measure initial length |
| 2 | Re-measure for confirmation |
| 3 | Mark cut and alignment points |
Use Flexible Tape Measure
Having confirmed measurements and alignment marks, the technician reaches for a flexible tape measure to accurately capture lengths in confined spaces.
The thin, pliable blade slips into narrow gaps and wraps around fittings, allowing precise readouts where rigid tapes cannot seat properly. A one-handed lock keeps the tape steady while the other hand steadies the pipe.
Metric and imperial scales enable quick conversion for fittings and couplings. The technician notes endpoints twice, checking for squareness at joints before cutting.
Durable coating resists abrasion from rough edges, ensuring repeatable measurements during iterative fits in cramped installations.
Mark With Removable Pen
Where should the mark go when the space barely admits a hand? A removable pen provides a precise, temporary reference.
The technician steadies the pipe, measures with a flexible tape, then applies a short, clear stroke where the cut will begin. Use a low-bleed, water-soluble marker to avoid permanent residue on fittings.
In cramped positions, a pen with a thin, angled tip reaches recessed surfaces. Verify alignment by sighting along the pipe before lifting.
After cutting, erase remaining marks with a damp cloth to guarantee clean joints. Removable pens reduce error and protect finished surfaces in confined workspaces.
Stabilize Pipe Without Clamps Nearby
When clamps are out of reach, the installer relies on nearby solid surfaces to brace the PVC pipe against movement.
Small wedges of scrap wood can be tapped between the pipe and surrounding structure to lock it in place.
This approach keeps the pipe steady for accurate cutting without additional hardware.
Use Nearby Solid Surfaces
In tight workspaces, nearby solid surfaces can serve as effective temporary anchors to steady a PVC pipe when clamps are unavailable. The installer positions the pipe against a wall, cabinet edge, or floor lip, distributing pressure to prevent rolling.
Small adjustments align the cut mark with the saw or cutter while the opposite hand holds the pipe lightly for control. Non-marring contact points — folded cloth, rubber mat, or tape — protect finishes and increase friction.
If vibration occurs, the worker shifts weight or repositions the tool rather than force the pipe. This method permits steady, controlled cuts without dedicated clamping gear.
Wedge With Scrap Wood
After using a nearby surface to hold the pipe steady, a simple wedge of scrap wood offers a direct way to lock the tube against movement without clamps.
Cut a thin triangular shim to match the gap between pipe and surface. Slide the wedge so its angled face presses the pipe toward the supporting surface; tap gently with a hammer until snug.
Use multiple wedges along the pipe for longer runs. Protect the pipe with a thin scrap strip to avoid marring.
Check alignment before final cuts. Remove wedges after finishing and inspect the pipe for compressive marks or distortion.
Choose the Right Tool by Available Clearance
Given the limited clearance around a pipe, the choice of cutting tool should be determined by the available working space and the pipe diameter.
Inspect the gap, noting how many inches of swing, grip, and blade travel exist.
For narrow gaps under an inch, compact rotary tools or mini hacksaws with short frames fit best; slightly larger clearances allow ratcheting PVC cutters or folding saws.
Consider access angles: straight-line tools need more room than pivoting cutters.
Also weigh control versus speed—precision options excel in tight spots.
Match tool profile to measured clearance and pipe size before cutting to avoid binding or damage.
Best Handheld Tools for Tight-Space PVC Cuts
The section compares compact ratchet cutters and mini hacksaw alternatives for cutting PVC in cramped locations. It highlights each tool’s size, cutting action, and typical clearance requirements.
Practical trade-offs between speed, control, and finish are summarized to guide selection.
Compact Ratchet Cutter
Compact ratchet cutters combine a short blade travel with gear-assisted leverage to make clean PVC cuts where a full-sized saw won’t fit.
Designed for cramped plumbing cavities, they use a multi-stage ratchet to multiply hand force, slicing through pipe walls with minimal hand strain.
Blades are hardened steel, replaceable, and shaped to cradle pipe for straight cuts.
Typical models are light, compact, and often feature slip-resistant grips and a latch for safe storage.
They perform best on small- to medium-diameter PVC; thicker or very rigid pipe may require powered tools or long-reach cutters for efficient, consistent results.
Mini Hacksaw Alternatives
When a mini hacksaw won’t fit or seems overkill, several compact handheld alternatives offer cleaner, quicker PVC cuts in confined spots; each trades different balances of leverage, blade action, and portability to suit specific pipe sizes and access constraints. Choices prioritize control, minimal vibration, and burr-free edges. Selection depends on wall thickness, pipe diameter, and reachable swing. Proper blade type and steady support reduce cracking and tearout. Often a simple change in tool yields faster, neater results than forcing a saw into a tight cavity.
- Ratcheting PVC cutter for quick, smooth slices on smaller diameters
- Jab saw for narrow, awkward access where plunge cuts are needed
- Compact tubing cutter with replaceable wheel for consistent square cuts
- Small oscillating multitool with fine blade for controlled finishes
Battery Mini Reciprocating Saw Tricks for Tight Cuts
Slip a battery mini reciprocating saw into confined spots and it becomes a precision tool for tight PVC cuts. The compact head and short stroke allow controlled entry where larger saws can’t reach.
Select a fine-tooth blade rated for plastics to minimize chipping and melt. Clamp or brace the pipe, mark the cut, and use light steady pressure; let the tool do the work.
Keep the battery charged for consistent speed and swap blades if performance drops. Debris should be cleared frequently to maintain visibility.
Protective gloves and eye protection are advised; work slowly to preserve nearby fittings and seals.
Use a Hacksaw to Cut PVC in Limited Clearance
A hacksaw can be maneuvered into narrow gaps to deliver a clean PVC cut when larger power tools won’t fit. The hand saw permits controlled, low-vibration cutting; teeth choice and blade tension affect speed and finish. Proper marking, clamping or bracing, and steady strokes maintain square edges. Work gloves and eye protection are recommended. For confined spots, shorten the stroke and rotate the pipe incrementally rather than overreaching.
- Use a fine-tooth blade for smoother results and fewer burrs.
- Stabilize the pipe with a block or strap to prevent twisting.
- Keep the blade perpendicular to the mark for a straight cut.
- Deburr with a utility knife or file for a snug fit.
Using a Tubing Saw in Confined Areas
Reach into the tight opening with a compact tubing saw to make fast, controlled PVC cuts where larger tools cannot fit.
The slim frame and short stroke blade allow precise scoring and through-cuts in cramped spaces. Secure the pipe with one hand or a small clamp, rotate the saw smoothly to avoid binding, and keep strokes steady to produce an even edge.
Choose a fine-tooth blade for cleaner cuts and minimal burrs. Periodically clear chips and check blade alignment. After cutting, deburr the inside and outside with a file or reamer to assure a proper fit and seal.
Using a PVC Ratcheting Cutter, Step-by-Step
Selecting a ratcheting cutter sized for the pipe diameter and material guarantees clean, efficient cuts.
The pipe should be held firmly or clamped to prevent twisting and to maintain alignment during the cut.
The user makes smooth, controlled squeeze-and-release strokes with the ratchet to advance the blade and finish a square, burr-free cut.
Choose The Right Cutter
For tight-space PVC cutting, a ratcheting cutter offers controlled, clean cuts with minimal effort and limited clearance requirements.
The right cutter balances blade quality, jaw capacity, handle length and weight. Hardened steel blades resist dulling; a smooth ratchet reduces hand strain.
Compact jaws fit confined spots; verify maximum pipe diameter. Short handles improve maneuverability in cramped areas while providing sufficient leverage. Lightweight models reduce fatigue during repeated cuts.
Consider replaceable blades and a safety lock. Choosing a tool with these features guarantees efficient, reliable performance when space restricts movement.
- Blade hardness and edge retention
- Jaw opening vs pipe size
- Handle length vs clearance
- Weight and ergonomic grip
Secure The Pipe Properly
After choosing a compact, sharp ratcheting cutter, the pipe must be firmly held before cutting to guarantee a square, safe slice.
The operator stabilizes the pipe using a small pipe vise, clamp, or a firm hand-wrap with a non-slip glove if clamps won’t fit.
Support the length on both sides of the planned cut to prevent movement and deformation.
Make sure the pipe rests on solid backing and clear surrounding obstructions.
Check alignment marks and re-tighten the clamp slightly; avoid crushing the tube.
Confirm the cutter can enter without obstruction, then proceed when the pipe is immobile and accessible.
Make Smooth, Controlled Cuts
Begin by positioning the ratcheting cutter squarely against the marked line, guaranteeing the blade meets the pipe at a right angle and the tool’s jaws fully encompass the circumference without pinching.
The operator squeezes the handles steadily, engaging the ratchet in repeated, controlled increments. After each squeeze, the cutter is allowed to reset fully before the next.
Maintain a firm but relaxed grip to avoid twisting the pipe.
Once cut through, inspect the edge and remove burrs with a deburring tool or fine file.
- Control prevents crushing and uneven cuts
- Small increments reduce blade binding
- Proper alignment guarantees square ends
- Deburring protects fittings and seals
PVC Pipe Cutter With Offset Jaws: When to Use It
Often reserved for cramped or offset installations, a PVC pipe cutter with offset jaws is designed to reach and slice pipes where straight-bodied cutters cannot align squarely. Its angled head lets the blade approach pipes near walls, studs, or adjacent fittings, maintaining a straight, controlled cut without repositioning surrounding components.
Best for single-hand operation in confined cavities and behind fixtures, it handles typical residential PVC diameters cleanly. It is not ideal for long, precise edge work or thick-schedule pipe requiring power tools.
Selection should consider jaw clearance, blade quality, and leverage to minimize crushing and guarantee a square, burr-free finish.
Oscillating Multitool Tips for Square PVC Cuts
An oscillating multitool can produce fast, square cuts in PVC when fitted with the right blade and technique: a fine-toothed bi-metal or carbide-grit plunge blade minimizes chipping, while a rigid backing and steady, short strokes help maintain a perpendicular edge.
The operator secures the pipe, marks a clear cut line, and uses a guide clamp or flat scrap to keep the tool aligned. Light pressure prevents melting; frequent pauses clear chips. Bevels are avoided by starting at the line and finishing with controlled depth passes.
Clean the edge with a deburring tool or sandpaper.
- Use closed-tooth blades for smoothness
- Clamp a square guide for accuracy
- Work in short passes to reduce heat
- Deburr immediately to make certain fit
Using a Rotary Tool (Dremel) for Cramped PVC Cuts
A rotary tool equipped with the correct wheel greatly reduces binding and melting when cutting PVC in confined spaces, so selecting a fine-toothed cutoff or reinforced abrasive wheel is essential.
Controlled, light passes and steady hand positioning minimize heat buildup and keep the cut square.
Small guide marks and a slow feed rate help maintain accuracy without forcing the tool.
Choosing The Right Wheel
When working in cramped spaces with a rotary tool, selecting the correct cutting wheel determines both cut quality and safety. Choices hinge on wheel type, diameter, grit and rpm limits. A thin reinforced cutoff wheel minimizes material removal and fits tight clearances. Diamond or carbide-grit wheels provide clean edges on thicker PVC; fiber-reinforced wheels resist shattering. Match wheel diameter to tool guard clearance and choose lower-speed-rated wheels if space limits cooling. Inspect for cracks and install according to manufacturer torque. Proper wheel choice reduces binding, heat, and kickback risk while improving control and edge finish.
- Thin reinforced cutoff wheel for narrow gaps
- Diamond or carbide grit for clean edges
- Check diameter and rpm compatibility
- Inspect wheels for damage before use
Cutting Technique Tips
Position the rotary tool with steady, controlled movement and engage the PVC using light, incremental passes rather than forcing a deep cut. The operator should secure the pipe, mark the cut line, and select a small-diameter bit for confined access. Maintain consistent speed and let the tool do the work to avoid melting or chipping.
Periodically pause to clear debris and cool the plastic with brief breaks or compressed air. Rotate the workpiece when possible to approach from multiple angles. Finish with a fine sanding drum to deburr and achieve a smooth edge. Eye and respiratory protection are recommended throughout.
Trim Saw Techniques When Space Is Limited
In cramped enclosures, using a compact trim saw requires deliberate adjustments to blade selection, stance, and cutting approach to prevent binding and guarantee a clean cut.
The operator should plan entry and exit paths, secure the pipe with one-handed clamps or straps, and favor shallow, steady passes to avoid melting or chip buildup.
Blade choice favors fine-tooth, carbide-tipped discs for smooth edges.
Maintain battery or power accessibility and clear debris frequently.
Work positioning minimizes wrist torque and keeps the shoe flat against adjacent surfaces to stabilize the tool and control vibration.
- Prefer shallow passes over aggressive cuts
- Use fine-tooth carbide blades
- Stabilize pipe with one-handed clamps
- Clear chips often
How to Cut Small-Diameter vs Large-Diameter PVC
The article compares techniques for cutting small-diameter PVC, which often require fine tools and one-handed control, with methods suited to large-diameter pipe that demand support and power.
It outlines tool choices, clamping and bracing strategies, and safety considerations specific to each size range.
Readers will be guided to match technique and equipment to pipe diameter for accurate, safe cuts in confined spaces.
Small-Diameter Techniques
Cutting small-diameter PVC calls for different tools and techniques than larger pipe because limited access, thinner walls, and the need for cleaner edges change the approach.
One-hand tools, careful clamping, and slow, controlled cuts reduce deformation. Deburring and light sanding prevent leaks and make certain proper fittings.
Work in stages: mark, score, cut, finish. Use minimal blade depth and watch heat buildup.
- Use compact cutters or a fine-toothed saw for precision and control
- Secure pipe with soft-jaw pliers or a strap clamp to avoid crushing
- Score before full cuts to guide the blade without splitting
- Deburr and chamfer for clean joints and reliable seals
Large-Diameter Methods
Large-diameter workpieces demand different tools and methods than small-diameter PVC because thicker walls, greater stiffness, and harder-to-reach sections change how control, support, and heat management are handled.
For large pipe, use a reciprocating saw with a fine-tooth blade or a powered rotary cutter with depth control; both deliver faster cuts and reduce binding. Stabilize the pipe with straps or a stand to prevent vibration. Mark and score before heavy cutting to guide the tool. Coolant or intermittent cutting prevents melting. Finish edges with a half-round file or deburring tool. Prioritize two-handed tool control and workpiece support for safety.
Handle Schedule 40 Vs Schedule 80 PVC Differences
When comparing Schedule 40 and Schedule 80 PVC, differences in wall thickness and pressure ratings determine appropriate use and cutting considerations. Schedule 80 has thicker walls, higher pressure capacity, and greater stiffness; Schedule 40 is lighter, easier to cut in tight spaces, and common for drainage and low-pressure water.
Thicker walls of Schedule 80 may require slower cutting, more blade engagement, and firmer clamping. Selection depends on pressure requirements, space constraints, and available cutting tools. Installers should plan cuts and tool approach based on wall thickness rather than color or labeling alone.
- Wall thickness affects cutting speed and effort
- Pressure rating guides material choice
- Fit and stiffness influence maneuvering in tight spaces
- Use proper clamp and blade for thicker walls
Cutting PVC Electrical Conduit Safely (Code & PPE)
In confined work areas, preparing to trim PVC electrical conduit requires attention to both electrical code and personal protective equipment to prevent hazards such as sharp edges, plastic shavings, and exposed conductors.
The worker verifies local code for required conduit length, bend radii, and box fill before cutting. Power to affected circuits is de-energized and tested. PPE includes safety glasses, a dust mask, gloves, and hearing protection when using powered tools.
Cuts are made square with conduit-specific cutters or fine-tooth saws; burrs and shavings are removed with a deburring tool or file. Exposed conductors are kept isolated until reconnection.
Cut Press-Fit or Slip Fittings in Place Safely
Fit press-fit or slip fittings in place carefully to maintain alignment and avoid stressing adjacent joints. The installer should make certain pipe ends are clean, square, and free of burrs before inserting fittings.
Use light, even pressure and support the run to prevent levered movement. Confirm proper depth with a marker or stop to prevent over-insertion.
- Inspect mating surfaces; remove debris and chamfer if needed.
- Hold both pipe and fitting steady; use a backing hand on the run.
- Use a socket or press tool sized for the fitting when space allows.
- Recheck alignment and test for leaks after installation.
Cutting Glued PVC in a Live Run (Avoid Demolition)
Cutting glued PVC in a live run requires careful planning to avoid shutting down the system or causing damage to adjacent lines.
The technician isolates the immediate area, shields nearby fittings, and uses minimal-contact methods: reciprocating saw with a fine-tooth blade, oscillating multi-tool, or tubing cutter designed for confined spaces.
Slow, controlled cuts reduce vibration that might crack joints.
Apply short bursts of cutting, support the pipe on both sides, and keep a vacuum or rag ready to capture debris and solvent residues.
After the cut, deburr edges and prepare surfaces for a repair coupling or temporary clamp without disturbing the live flow.
How to Remove a Stuck Segment After a Tight Cut
Retrieve the stuck PVC segment carefully to prevent further damage to the live run or adjacent joints. One-handed extraction with pliers can free short scraps; longer pieces may require internal pushing with a dowel or rod from the opposite end. Twisting while pulling reduces binding; apply penetrating lubricant sparingly if fittings allow.
When access is limited, cut relief slots into the stuck piece to collapse it inward for removal. Inspect the live run for burrs, ream edges, and test fit replacement sections before solvent welding or clamping.
- Use minimal force to avoid joint failure
- Protect surrounding pipes and insulation
- Clean and deburr contact surfaces
- Verify fit before final bonding
Cutting Curved or Angled PVC in a Tight Spot
When faced with a curved or angled PVC section in a confined space, plan the cut path and access points before making any saw strokes.
The operator should choose compact tools—compact hacksaw, ratcheting PVC cutter, oscillating multi-tool with a fine-tooth blade—or a tubing cutter with a rotated approach for small diameters.
Support the pipe to prevent binding and score a shallow guide line if possible.
Make incremental cuts, rotating the pipe or repositioning the tool to maintain control.
Remove chips frequently and check fitment often.
Work slowly to avoid overcutting; deburr edges after removal to guarantee proper seating and seal.
Mark and Transfer Angles Inside Confined Areas
When working in confined spaces, the installer measures inside tight corners with compact tools to capture exact offsets and clearances.
They then transfer those angles onto the pipe using scribes, angle finders, or improvised templates to guarantee cuts match the space.
Accurate measuring and precise transfer reduce fitting errors and rework.
Measuring Inside Tight Corners
In a cramped corner, accurate angle marking and transfer become the most critical steps for fitting PVC pipe.
Measurement proceeds methodically: the installer assesses contact points, notes wall and floor intersections, and selects reference lines that minimize error.
Small tools and steady positioning replace large jigs; repeating checks reduces rework.
Clear, concise marks guide cutting and fitting without relying on sightlines that the space obscures.
- Use a small combination square or angle finder for tight radii.
- Establish two fixed reference points before measuring.
- Measure twice along both pipe and surface planes.
- Record measurements immediately to avoid confusion.
Transferring Angles Accurately
Drawing the measured angle onto the pipe and adjoining surfaces requires a steady system for preserving orientation and reference points. The worker marks a datum line on pipe and nearby structure, aligning a small makeshift square or straightedge. A center-punch or scribe creates a tactile mark where sightlines are cramped.
For compound angles, transfer with a bevel gauge set to the measured angle, then lock and trace onto the pipe. When access limits movement, use a flexible curve or paper template wrapped and taped, then recheck against the datum. Confirm marks from multiple vantage points before cutting to prevent cumulative error.
Make Temporary Pipe Supports for One-Handed Cuts
Secure temporary supports to stabilize the PVC so a single hand can operate the saw or cutter without the pipe shifting.
The builder fashions simple supports from scrap wood blocks, foam wedges, or folded cloth to cradle the pipe at cut height. Supports rest close to the cut but leave clearance for the blade; they prevent roll and absorb vibration.
Placement aligns the pipe horizontally and vertically for an accurate one-handed stroke.
After cutting, supports are removed and surface checked for marks.
- Use soft contact points to avoid marring.
- Position supports within a few inches of the cut.
- Clamp blocks lightly if possible.
- Adjust wedges for level alignment.
Quick Release Hacks: Temporary Supports That Won’t Mar Pipe
When space is tight, quick-release supports that grip without leaving marks let a worker steady PVC for a single-handed cut and remove the support instantly afterward.
Small strips of rubber hose or inner-tube rubber clamped in spring clips cradle pipe without compression damage.
Velcro straps over foam blocks hold position and open quickly when released.
Portable C-clamps fitted with protective plastic pads and a thumb screw provide control without scarring.
Magnetic-backed foam pads suit metal surroundings for rapid placement.
All options prioritize nonmarring surfaces, easy one-handed release, and compact profiles that fit narrow access while keeping pipe stable during cutting.
How to Make a Clean End for Solvent Welding
After stabilizing the pipe with a nonmarring quick-release support, preparing the end for solvent welding requires a clean, square, and burr-free cut so the joint will seat fully and the cement can form an even bond.
The worker measures and marks the cut, uses the appropriate saw or tubing cutter, and checks squareness with a small square or guide.
Light sanding removes fine irregularities; wiping with a clean, lint-free cloth eliminates dust and oils.
Properly sized fittings are trial-fit before cementing to confirm alignment and depth.
- Measure twice, cut once
- Use the right tool for pipe diameter
- Verify squareness visually and with a square
- Clean debris and oils before fitting
Deburr and Chamfer Inside Confined Areas
In tight access areas, removing burrs and adding a small chamfer to the pipe end guarantees a smooth fit and prevents solvent-weld failures.
Use a round file, deburring tool, or a rotary bit with steady, light strokes to remove internal roughness without expanding the OD. Rotate the pipe when possible to reach the entire circumference.
Keep cuts shallow—about 15–30 degrees and 0.5–1.5 mm—to avoid weakening the socket fit.
Clear debris with compressed air or a brush. Inspect visually and by touch; no sharp edges should remain. Maintain steady control to prevent scoring adjacent surfaces.
How to Join Pieces After Cutting in Place
After cutting in place, the technician makes certain joint faces are square and properly aligned to prevent stress or leaks.
Next, the choice between solvent cement, primer-and-cement, or mechanical fittings is made based on pipe size, accessibility, and service conditions.
Clear staging and brief dry-fit checks reduce the risk of misalignment before final adhesion.
Aligning Joint Faces
With both cut ends cleaned and checked, the next step is to align the joint faces precisely before any solvent or primer is applied.
The installer inspects squareness, rotates parts to match markings, and dry-fits the assembly to confirm proper depth and orientation. In tight spaces this may require temporary supports, light clamping, or assistance to prevent shifting. Proper alignment prevents leaks, stress, and misrouting later.
- Verify end squareness with a small square or straightedge
- Match alignment marks or reference lines on each piece
- Use spacers or temporary clamps to hold position
- Re-check fit after any adjustment before bonding
Choosing Adhesive Method
When selecting an adhesive method for joining PVC cut in place, the installer evaluates joint type, accessibility, and service conditions to determine whether solvent cement, mechanical couplers, or specialty adhesives are appropriate.
Solvent cement offers rapid, chemically fused joints for smooth, accessible fittings but requires clean, slightly chamfered ends and adequate cure time.
Mechanical couplers, such as slip or repair couplings and compression fittings, suit constrained spaces or wet conditions where solvent use is impractical.
Specialty adhesives and epoxies address incompatible plastics, metal connections, or high-temperature service.
Selection balances joint strength, cure time, space constraints, and code or manufacturer requirements.
When to Use Couplers, Slip Joints, or Repair Sleeves
In cramped access areas, choosing between couplers, slip joints, and repair sleeves depends on the pipe condition, available working space, and whether a permanent or temporary fix is required.
The technician selects a coupler for clean cuts and aligned PVC runs where solvent-weld permanence is wanted.
Slip joints suit confined spots needing future disassembly or slight misalignment correction; they trade sealing security for serviceability.
Repair sleeves address localized damage without removing long sections, offering quick containment but sometimes requiring internal supports for pressure systems.
Material compatibility, pipe diameter, and pressure demands determine the appropriate choice.
- Coupler: permanent alignment for clean cuts
- Slip joint: serviceable, tolerates misalignments
- Repair sleeve: quick localized patch
- Consider pressure, diameter, access
How to Test for Leaks After Cutting and Joining
After joining the cut sections, a pressure test procedure is recommended to confirm system integrity by applying water or air at the working pressure and observing for drops.
A soap bubble check can quickly reveal small leaks at joints or fittings by producing visible bubbles where gas escapes.
Finally, long-term monitoring—periodic inspections and rechecking pressure over days—helps catch slow leaks that initial tests may miss.
Pressure Test Procedure
Following completion of cutting and joining, a systematic pressure test verifies the integrity of the PVC assembly and reveals any leaks or weak joints before the system is placed into service.
The procedure isolates the section, fills it with water to avoid compressible-air hazards, then pressurizes incrementally to the design or test pressure.
Hold pressure for a specified duration while monitoring gauges for drops.
Log readings and inspect fittings visually for seepage.
Depressurize slowly and repair any failures, then repeat testing until stable.
- Isolate and cap ends securely
- Use water fill to eliminate air pockets
- Increase pressure in controlled steps
- Record pressure and duration
Soap Bubble Check
Once the pressure test confirms system stability, a soap bubble check provides a quick, localized method to detect small leaks at fittings and joints. A mild soap solution is brushed or sprayed on suspect areas; forming bubbles indicate escaping air or water. Inspect threaded joints, solvent-weld seams, and repair patches. Note bubble size and location, mark for immediate correction, then depressurize before repair. The method is noninvasive, inexpensive, and effective for pinpointing microleaks missed by loudness or pressure drop alone.
| Area inspected | Action |
|---|---|
| Threads | Spray, watch bubbles |
| Seams | Brush solution, observe |
Long-Term Monitoring
Monitoring over time guarantees that cuts and joints remain watertight under real conditions. The technician schedules periodic inspections and simple tests to detect slow leaks after cutting and joining PVC. Pressure checks, visual exams, and moisture detection address small failures before damage spreads. Records of readings and any corrective actions inform future techniques and materials choices. Consistent monitoring preserves system reliability and prevents costly repairs.
- Conduct static pressure tests after curing to confirm seal integrity.
- Inspect joints visually for discoloration, cracks, or solvent residue.
- Use moisture meters or paper towels to reveal hidden drips.
- Log results and follow-up actions for trend analysis.
Protect Nearby Wiring and Plumbing While Cutting PVC
Near electrical cables or water lines, cutting PVC requires deliberate measures to prevent damage and hazards. The operator first de-energizes nearby circuits and shuts off water supply when possible.
Exposed wiring is temporarily covered with non-conductive sheathing; pipes are insulated with foam sleeves or cloth to guard against accidental blade contact. Use a compact tool with guarded blades and steady, shallow passes to minimize stray cuts.
Secure the PVC to prevent sudden movement that could reach adjacent systems. After cutting, inspect wiring and plumbing for nicks or leaks and restore power and water only when confirmed safe.
Working Around Insulation and Obstructions Safely
When cutting PVC in areas crowded with insulation or fixed obstructions, the operator should map clear access paths and mark cut locations to limit disturbance to surrounding materials.
Work proceeds with measured movements, avoiding compression of insulation or dislodging vapor barriers. Small hand tools and short-stroke saws reduce knockback; padding protects fragile surfaces.
If insulation must be temporarily moved, note orientation and restore it fully.
- Assess insulation type and fasteners before moving any material
- Use nonmetallic shims or soft pads to shield surfaces
- Keep cuts short and controlled to prevent contact with obstructions
- Re-seal disturbed insulation and barriers immediately
Dust and Shavings Control in Tight Spaces
Effective dust and shavings control begins by containing the work area with barriers or a makeshift funnel to prevent spread.
Using a vacuum attachment or a magnetic/brush tool captures chips at the cut while a damp cloth collects remaining debris.
Keeping tools sharp and cutting slowly minimizes airborne particles and reduces cleanup.
Contain The Dust
Containing dust and shavings in tight spaces requires deliberate containment and cleanup strategies to protect both the work area and indoor air quality.
A focused approach minimizes spread, prevents clogging of vents, and reduces respiratory exposure during and after cutting.
Barriers and temporary enclosures limit dispersion; targeted cleanup removes residue immediately.
Choosing collection points and staging cleanup tools beforehand keeps the task efficient.
Clear signals and brief pauses for removal maintain safety without disrupting workflow.
- Seal gaps with plastic sheeting or painter’s tape
- Use small portable containment boxes
- Keep a handheld vacuum nearby for immediate pickup
- Wipe surfaces with damp cloths after vacuuming
Capture The Shavings
Capturing shavings in tight spaces requires directing debris toward a single collection point and using tools sized to the work area to prevent scatter. The worker positions a small funnel or tapered chute against the cut, holds a portable shop vacuum nozzle near the exit, and uses short, controlled strokes so chips fall predictably. Magnetic trays are ineffective for PVC; instead, use sticky tape or a disposable cloth to gather remaining flakes. Periodic pauses and careful removal of the collection device prevent redistribution. Below is a quick reference for collection methods, tool choices, and cleanup steps.
| Method | Tool | Best Use |
|---|---|---|
| Funnel + Vacuum | Narrow nozzle | Direct cuts |
| Tape wrap | High-tack tape | Final pickup |
| Disposable cloth | Lint-free wipe | Surface wipe |
| Small brush | Hand brush | Crevice sweep |
Minimize Airborne Particles
Reducing airborne PVC dust and small shavings in confined spaces requires controlling the source and guiding particulates away from breathing zones.
The worker should employ targeted methods: gentle cutting speeds, local vacuuming, and containment to limit dispersion.
Respiratory protection and eye protection complement engineering controls but do not replace them.
Venting toward an exhaust point and using a shop-vac with a HEPA-rated filter reduces recirculation.
Regularly inspect filters and change collection bags to maintain efficiency.
- Cut slowly and use steady pressure to minimize fines
- Position a vacuum nozzle within inches of the cut
- Enclose the work area with plastic sheeting
- Wear NIOSH-rated respiratory protection
How to Cut PVC Under Sinks and in Cabinets
When working under sinks or inside cabinets, access and clearance dictate tool choice and cutting technique; careful measurement, marking, and support of the pipe are essential before any cut is made.
Small ratchet cutters or compact PVC saws work best where swing is limited; a mini hacksaw with a coarse blade offers control in narrow gaps. Stabilize the pipe with a clamp or gloved hand; protect surrounding fixtures with cardboard or cloth.
Make shallow guide cuts first, then complete the cut to avoid binding. Deburr and square the end with a file or deburring tool before dry-fitting or gluing.
Cutting PVC Behind Walls Without Full Demolition
Behind a finished wall, cutting PVC requires locating the pipe, creating a small access opening, and using tools that minimize drywall damage. The technician traces stud layout, scans for pipes, and marks a compact patchable hole.
Access tools—oscillating multitool, mini hacksaw, or internal pipe cutter—allow controlled cuts. Debris is contained and water is shut off before work begins.
After cutting and fitting repair couplings, glue or compression fittings are applied and the section is tested for leaks. The wall is then repaired with a backing strip and a skim coat for an inconspicuous finish.
- Precise locating prevents unnecessary openings
- Compact access eases repairs
- Low-damage tools preserve drywall
- Test before closing wall
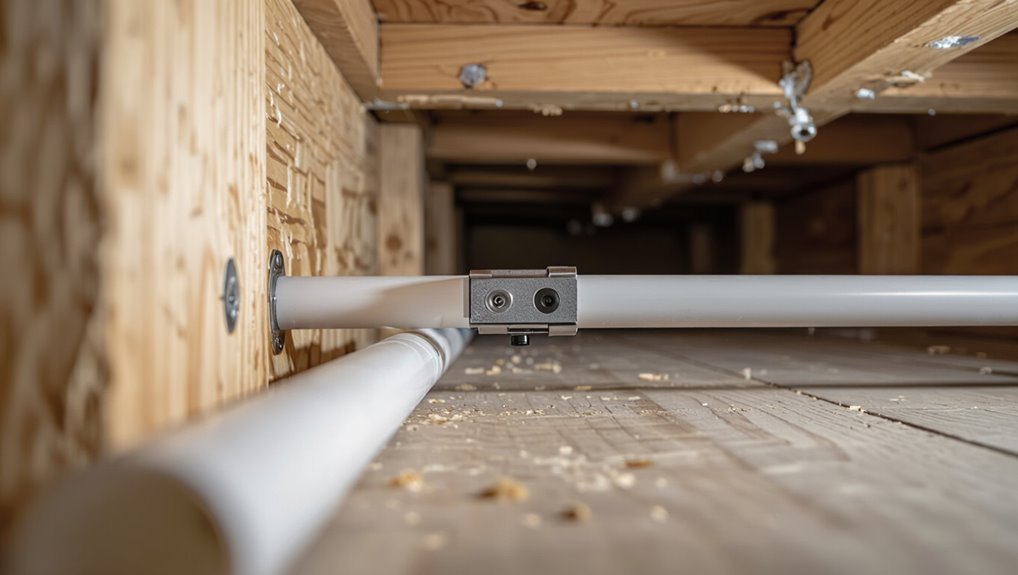
Cutting PVC in Crawl Spaces, Basements, and Joist Bays
Work in crawl spaces, basements, and joist bays shifts priorities from preserving finished surfaces to managing access, posture, and environmental hazards while still using compact tools and precise cuts.
Practitioners favor low-profile cutters: mini hacksaws, compact ratchet cutters, oscillating multi-tools with flush-cut blades. Proper lighting, knee pads or crawling boards, and a dust mask mitigate strain and air quality risks. Secure pipe and mark cuts clearly to avoid awkward repositions. Measure twice; cut once to limit repeat entries. Watch for wiring, insulation, and moisture; use a moisture meter if unsure. Keep spare fittings and a portable cleanup kit nearby.
Outdoor vs Indoor Tight-Space PVC Cutting Tips
The writer contrasts outdoor and indoor tight-space PVC cutting by highlighting different tool choices suited to exposure and maneuverability.
Attention is given to weather and workspace conditions that affect grip, visibility, and debris control.
Recommendations on mounting and pipe support stress stability and protection specific to each environment.
Tool Selection Differences
Choosing the right tool depends on the setting: outdoor tight-space cuts favor power tools with dust and chip clearance, while indoor jobs prioritize low-noise, low-spark options and controllable dust.
The writer compares saws, ratcheting cutters, rotary tools, and oscillating multi-tools by access, vibration, cutting speed, and debris management.
Selection hinges on clearance, material thickness, and proximity to finishes or occupants.
Safety and cleanup trade-offs guide choices: robust cutting outdoors versus finesse indoors. Proper blade type and guarding remain essential irrespective of location.
- Power saws for speed and clearance
- Ratchet cutters for confined precision
- Rotary tools for detailed trimming
- Oscillating tools for low-vibration control
Weather And Workspace
When cutting PVC in tight spaces, outdoor and indoor conditions impose distinct constraints that affect tool choice, safety measures, and cleanup routines.
Outdoors, wind, dust, and moisture demand weatherproof tools, clamped workpieces, and protective covers; power tool cords and battery life require planning.
Indoors, ventilation becomes critical to disperse PVC dust and fumes; contain debris with drop cloths and vacuum attachments to protect finished surfaces.
Lighting differs: portable, shadow-reducing lamps suit both settings.
Noise limits and proximity to occupants favor hand tools or quieter saws indoors.
In all cases, appropriate personal protective equipment and situational awareness minimize risk and simplify cleanup.
Mounting And Support
Following considerations about weather and workspace, proper mounting and support determine whether a neat, safe cut is possible in cramped outdoor or indoor settings. Attention to clamping, elevation, and access reduces movement and protects finishes.
Outdoors, corrosion‑resistant clamps and wedges stabilize pipes on uneven ground; indoors, padded supports prevent marring and limit vibration. Choice of vice or strap, temporary bracing, and quick‑release fixtures speeds work without compromising alignment. Secure mounting also aids accurate measurement and safe tool control when stroke length is limited by surrounding structures.
- Use non‑marring clamps to protect indoor surfaces
- Employ adjustable stands for uneven outdoor terrain
- Add temporary braces for short clearance cuts
- Prefer quick‑release straps where access is minimal
Speed vs Control: Choose Blades for Precise Cuts
For tight-space PVC cutting, balancing blade speed and user control determines cut quality and safety.
The writer recommends prioritizing control where access is constrained: slower, finer-toothed blades reduce chatter and tearout, producing cleaner edges and straighter lines. Faster blades remove material quickly but increase vibration and risk of jagged cuts or binding in confined angles.
Users should match blade aggressiveness to pipe diameter and wall thickness, favoring moderate feed rates and steady support. Proper blade condition and secure clamping complement choice.
Ultimately, deliberate pace and steady hands yield precise, safe cuts in cramped locations.
Blade Selection for Hacksaws and Oscillating Tools
Shifting focus from speed-versus-control considerations, blade choice for hacksaws and oscillating tools directly affects cut quality in confined PVC work. The correct blade reduces tearing, minimizes burrs, and preserves alignment when space limits tool movement.
Hard-point bi-metal hacksaw blades with fine teeth give controlled, straight cuts; narrow oscillating blades designed for plastics prevent chipping and fit tight angles. Tooth count, rake, and backing rigidity determine finish and vibration. Blade length and attachment type must match the tool and clearance. Regular inspection for dulling prevents binding and heat build-up that can distort PVC.
- Fine-tooth bi-metal for smooth hacksaw cuts
- Narrow oscillating blades for tight access
- Stiffer backing to reduce blade flex
- Match blade mount to tool clearance
When to Lubricate or Cool PVC During Cutting
The need for lubricant arises when friction from sawing or powered tools causes melting, binding, or rough edges on PVC.
Cooling—using water spray, a damp cloth, or intermittent cutting—reduces heat buildup during long cuts or when using high-speed tools.
Choosing lubrication versus cooling depends on tool type, cut duration, and whether the joint must remain solvent-weld-ready.
When To Use Lubricant
During longer cuts or when using power tools in confined spaces, lubrication or cooling can reduce heat buildup and prevent melting, scoring, or binding of PVC. It is appropriate when cutting thick-walled pipe, making continuous long cuts, or working in cramped areas where air circulation is limited.
Hand tools rarely require lubrication except for slow, repetitive work that generates friction. Lubricant also aids in controlled power-tool passes to protect blades and maintain cut quality.
Choose minimal, PVC-safe lubricants and apply sparingly to avoid mess and bonding issues later. Observe performance and reapply only when heat or binding appears.
- Thick-walled pipe cuts
- Continuous long passes
- Poor ventilation/confined spaces
- Signs of heat or binding
Cooling Methods For Cutting
When cutting PVC in confined or continuous operations, proactive cooling prevents heat-related deformation, melting, and blade glazing that compromise cut quality.
Operators should apply intermittent water spray or a light mist to dissipate heat during long cuts, avoiding saturation that can impede saw function. For powered tools, pause periodically to let the blade and workpiece cool; use compressed air bursts to clear chips and lower temperature when water isn’t practical.
For delicate fittings, a drip-feed of cutting oil compatible with PVC can reduce friction without chemical damage.
Always dry the pipe before bonding, and follow tool manufacturer cooling recommendations.
Avoid Cracking or Splitting PVC While Cutting
A steady, supported cut minimizes the risk of cracking or splitting PVC while working in confined spaces.
The pipe should be secured, the blade sharp, and force applied evenly. Avoid twisting, sudden pressure, or hammering near the cut line. Progressive scoring reduces stress concentrations; multiple light passes are safer than one heavy cut. Support both sides to prevent flexing.
- Secure the pipe close to the cut to eliminate movement.
- Use a fine-toothed saw or a sharp ratchet cutter for cleaner edges.
- Make shallow guide cuts before full-depth cutting.
- Clamp padding protects the pipe from crushing and shock.
Troubleshoot Uneven or Crooked Cuts
How did the cut go off-center? The craftsman inspects blade alignment, jig stability, and cutting angle.
Misaligned guides or a slipping clamp cause drift; worn or dull blades wander.
In tight spots, twisting the pipe or forcing the saw alters geometry.
Correct by reclamping with a parallel guide, replacing the blade, and marking a clear cutting line.
For hand tools, steady both hands and score progressively rather than trying one deep pass.
If internal obstructions deflect the tool, remove or reposition the pipe.
Reevaluate tool choice: a compact ratcheting cutter may yield straighter results in confined areas.
Remove Burrs, Dust, and Solvent Residue Safely
After correcting alignment and achieving a straight cut, attention shifts to cleaning the pipe ends so fittings will seat and solvents will bond properly.
The operator removes burrs with a deburring tool or utility knife, rotating gently to avoid over-trimming. Dust is brushed away with a clean, dry cloth or compressed air; a solvent-wiped surface must be free of particulates. Use PVC cleaner or isopropyl alcohol sparingly to remove grease and old cement, allowing full evaporation before priming. Work in a ventilated area and wear gloves and eye protection to prevent skin contact and inhalation of vapors.
- Deburr edges smoothly, avoid gouging
- Remove all loose dust before solvent
- Wipe with appropriate cleaner, let dry
- Use PPE and ventilate the workspace
Quick Repair Options After a Tight-Space Cut
When a cut in a tight space needs an immediate fix, one option is a temporary slip-cap that plugs the end until a permanent repair can be made.
For a longer-lasting solution, a solvent-weld repair bonds a replacement section or fitting to restore strength and seal.
Each approach has trade-offs in speed, durability, and required access.
Temporary Slip-Cap Fix
Slip-cap solutions provide a fast, secure temporary seal for PVC runs cut in cramped quarters, allowing service restoration without full replacement or extensive fittings.
A properly sized slip cap slides over the cut end; a bead of silicone or plumber’s tape improves sealing.
They suit urgent fixes, pressure testing, and short-term reroutes.
Removal is straightforward when permanent repairs follow.
- Choose caps matching inner diameter and pressure rating.
- Clean and dry pipe before installation for reliable contact.
- Use non-permanent sealants to avoid solvent-weld complications.
- Label temporary caps to indicate inspection or scheduled replacement.
Solvent-Weld Repair
Solvent-weld repair offers a permanent, compact solution for PVC runs cut in confined areas by chemically fusing the pipe and fitting rather than relying on mechanical clamps.
The process requires a proper-cut square end, light sanding, and matching-diameter fittings. Apply primer where required, then a uniform solvent cement coat to pipe and fitting; insert with a quarter-turn twist to distribute cement and align quickly.
Hold briefly to prevent push-out, wipe excess, and allow cure time per product instructions before pressure testing.
Ideal for inaccessible sections, solvent-weld joints restore full strength and leak resistance but are permanent and need cutting for future replacements.
Cost-Effective Tool Choices for Occasional DIYers
Although occasional DIYers rarely need a full professional kit, selecting a few affordable, versatile tools makes cutting PVC in tight spaces practical and reliable.
The focus should be on compact, multi-use items that minimize cost while maintaining safety and clean cuts. Prioritize tools that fit cramped access, require little setup, and pair with basic finishing tools.
Avoid specialized, high-end equipment aimed at heavy contractors; instead build a lightweight, portable kit for occasional repairs.
- Compact ratcheting PVC cutter for small diameters and one-handed use
- Mini hacksaw with replaceable blades
- Tubing cutter with low-profile jaw for confined spots
- Deburring file or round rasp for smooth joints
Pro-Grade Tools Worth Investing in for Frequent Jobs
For professionals who cut PVC regularly, investing in heavier-duty, precision tools pays off with speed and repeatable results.
Recommended equipment includes ratcheting PVC pipe cutters with hardened blades for clean, burr-free cuts; compact cordless multi-tools with metal-cutting blades for confined access; portable band saws with adjustable guides for consistent straight cuts; and adjustable pipe vises or trap-jaw clamps to secure work without distortion.
Electric rotary saws with depth stops and dust extraction improve productivity.
Durability, replaceable consumables, and ergonomic grips reduce fatigue.
Selecting compatible blade types and right-sized tools for common diameters maximizes efficiency on frequent jobs.
How to Maintain and Sharpen Blades Used in Tight Cuts
Maintain sharp, properly aligned blades to guarantee clean cuts in confined spaces and to prolong tool life.
Routine inspection removes burrs, checks alignment, and identifies chips.
Use a fine file or sharpening stone with light, consistent strokes following the bevel angle; for serrated blades, a triangular file restores teeth.
Clean blades after sharpening to remove filings and apply a light lubricant to prevent corrosion.
Store blades safely to avoid nicks.
- Inspect before each job for damage and alignment
- Sharpen with tools matching the original edge geometry
- Deburr and clean thoroughly after sharpening
- Lubricate and store in protective sleeves
Replacement Parts and Consumables to Stock
A small, well-chosen inventory of replacement parts and consumables prevents work stoppages when cutting PVC in tight spaces.
Essential spare blades for saws and ratcheting cutters, extra sanding sleeves, and replacement abrasive disks allow immediate swaps.
Keep a few quick-connect fittings, PVC couplings, and solvent-weld primer and cement for repairs.
Stock spare batteries and a compact charger for cordless tools, plus replacement blades for oscillating multi-tools.
Include gloves, lint-free rags, masking tape, and a small tube of lubricant.
Store items in a labeled, portable case so technicians can quickly retrieve parts and resume confined-space cutting tasks.
Plan Cuts to Minimize Future Access Issues
When preparing cuts in confined spaces, technicians should think beyond the immediate repair and position each cut to preserve future access and serviceability; this means choosing locations that leave enough stub length for couplers, aligning joints so fasteners or inspection points remain reachable, and avoiding cuts that trap sections behind structural obstacles.
Planning includes mapping the run, visualizing replacement steps, and selecting cut faces that allow tool clearance.
Thoughtful placement reduces rework and preserves options for isolation, inspection, and component swaps.
- Leave enough pipe stub for standard couplers and slip fittings
- Orient joints to keep fasteners and test ports accessible
- Avoid cutting where panels or framing will obstruct removal
- Prefer cuts that allow one-piece section extraction without enlarging openings
Time-Saving Workflows for Multiple Tight-Space PVC Cuts
In tight spaces, batching similar cuts, staging tools and spare fittings, and sequencing work to minimize repositioning markedly reduces elapsed time.
Workers list required lengths, group identical cuts, and mark tubes before entering confined areas. A compact kit—mini hacksaw, ratcheting cutter, deburring tool, marker, and spare couplings—remains within reach.
Execute all identical operations on adjacent runs to avoid repeated setups. Verify measurements once, cut sequentially, deburr, and temporarily cap or clamp each piece to preserve space and alignment.
Finally, inspect connections and tidy tools to prevent backtracking and maintain an efficient, repeatable workflow.
Conclusion
Cutting PVC in tight spaces requires planning, the right tools, and safety gear to avoid damage or injury. Studies show 68% of plumbing repairs involve constrained access, underscoring how common cramped cuts are and why stabilization, accurate marking, and blade care matter. By prepping the area, protecting nearby surfaces, and using compact saws or ratchet cutters, technicians reduce rework and speed jobs—turning difficult access into predictable, repeatable outcomes with minimal disruption.