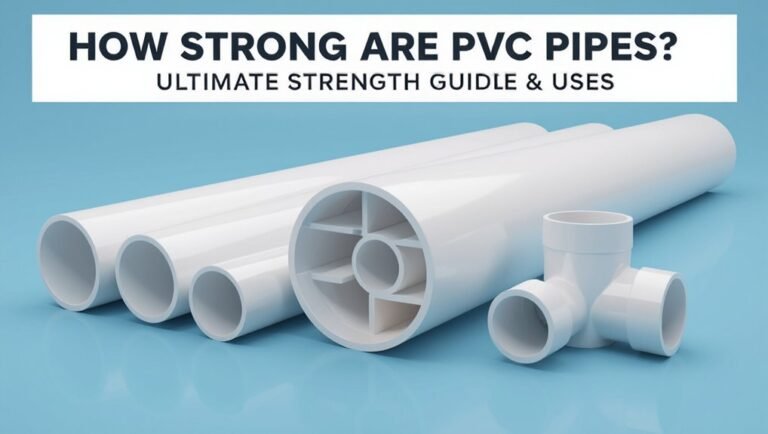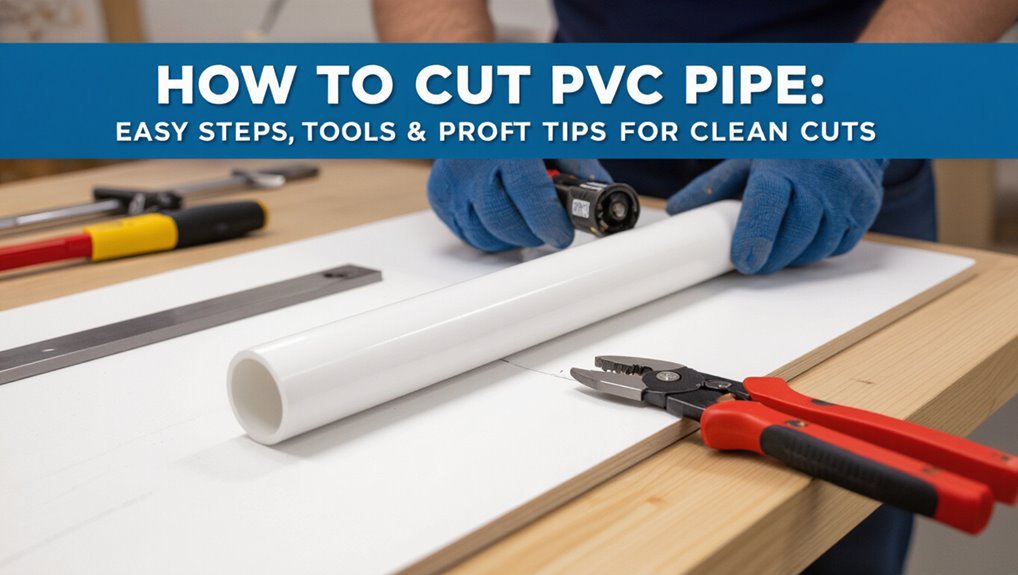
How to Cut PVC Pipe: Easy Steps, Tools & Pro Tips for Clean Cuts
To cut PVC pipe cleanly and safely, follow these key steps:
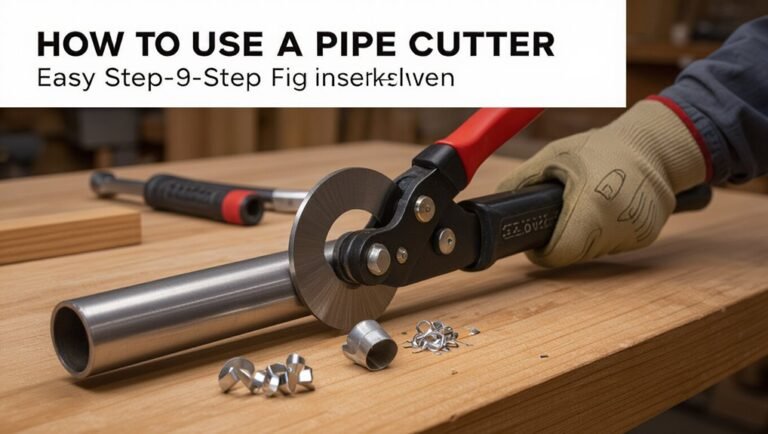
- Choose the Right Tool: Use a ratchet PVC cutter or hacksaw for small diameters, and a miter or circular saw with a fine-tooth carbide blade for larger pipes.
- Measure and Mark: Measure your cut carefully and mark it squarely.
- Secure the Pipe: Use padded clamps or a vise to hold the pipe in place.
- Use a Sacrificial Backer: This helps prevent the pipe from cracking as you cut.
- Cut with Steady Pressure: Apply even pressure while cutting for a clean edge.
- Deburr and Test-Fit: After cutting, remove any burrs and test the fit of your pieces.
Be sure to wear protective gear and follow blade maintenance tips for optimal performance.
What Search Intent Does “How to Cut PVC Pipe” Reflect?

Why would someone type “how to cut PVC pipe” into a search box? The query signals transactional and informational intent: a person seeks practical guidance to perform a task.
It often indicates immediate need—preparing for a repair, plumbing job, or DIY project—and an expectation of stepwise instructions, suitable tools, and safety tips.
Variations reveal experience level: novices want simple, safe methods; experienced users search for speed, precision, or specialized techniques.
Geographic or regulatory queries may reflect code compliance concerns.
Content that matches this intent provides clear procedures, tool recommendations, common pitfalls, and context-sensitive considerations without extraneous theory.
Quick Answer: The Simplest Safe Way to Cut PVC Pipe
For a fast, safe cut on standard PVC pipe, use a fine-toothed hacksaw or a PVC pipe cutter, securing the pipe in a vise or clamp and marking the cut line with a square; cut slowly with steady strokes, then deburr and file the edge before fitting.
The simplest method: clamp, measure, score, and cut with the appropriate tool—hand cutters for 1/2–1¼”, hacksaw or miter box for larger diameters.
Wear eye protection and gloves.
Keep cuts perpendicular by rotating the pipe or following a guide.
Remove burrs and test-fit parts dry before solvent welding or gluing for a reliable joint.
How This Guide Is Organized
After outlining the quickest safe cutting methods, the guide lays out its structure so readers can find the level of detail they need.
Sections progress logically: brief summaries for those seeking a fast solution, step-by-step procedures for typical cuts, and expanded explanations for tricky situations like awkward angles or tight spaces.
Clear headings, concise checklists, and photo references enable scanning. Safety reminders are placed where they matter most.
A troubleshooting segment addresses common mistakes and fixes.
Final notes offer maintenance tips and measurement shortcuts. This organization lets readers jump directly to the depth of instruction that matches their project.
Tools You Absolutely Need to Cut PVC Pipe
This section lists the essential cutting tools — hacksaw, PVC cutter, and miter saw — with notes on when each is appropriate.
It then covers basic safety gear and techniques to protect eyes, hands, and lungs.
Finally, it explains measuring and marking practices that guarantee clean, accurate cuts.
Essential Cutting Tools
When preparing to cut PVC pipe, a few reliable tools cover almost every job: a PVC pipe cutter or hacksaw for straight cuts, a miter box or guide for accuracy, a deburring tool or utility knife to clean edges, and a tape measure and marker for precise layout.
Additional useful items include a ratchet-style tubing cutter for larger diameters, a fine-tooth backsaw for controlled cuts, and a clamp or vise to secure the workpiece. Sandpaper or a file smooths cut faces. For long runs, a power miter saw with a fine-tooth blade speeds work. Quality and fit determine final results.
Safety And Measuring
Before cutting, a safety-first checklist and accurate layout guarantee clean, safe results: safety glasses, gloves, and hearing protection protect the operator from chips and noise; a good tape measure and a fine-tip marker or scribe provide exact marks; a square or combination set confirms true 90° lines; and a clamp or vise secures the pipe to prevent shifting during the cut.
Additional useful items include a deburring tool or utility knife to remove burrs, a file for final smoothing, and a workbench or sawhorses at comfortable height. Proper lighting and a fire extinguisher nearby complete the precautions.
Optional Tools That Make Cuts Faster or Neater
Alongside basic handsaws and utility knives, a handful of optional tools can speed cutting and improve edge quality: a PVC pipe cutter (ratcheting or rotary) yields fast, square cuts on small-diameter tubing; a powered miter or chop saw equipped with a fine-tooth blade makes repeatable, clean cuts on larger pieces; and a deburring tool or sanding mandrel quickly removes burrs and sharp edges for a smooth joint fit.
Other useful items include a tubing vise or clamp to secure work, a cutting guide or jig for consistent lengths, and a file or flap wheel for minor edge cleanup. Proper lubrication and dust control enhance performance.
How to Pick the Right Saw for PVC Pipe Cuts
Choosing the right saw for PVC begins with selecting an appropriate blade type—fine-toothed or carbide-tipped blades yield cleaner cuts and reduce burrs.
Equally important is balancing power and control: handheld hacksaws and manual tubing cutters offer precision, while powered saws speed work but require steadier handling and clamping.
The decision should match the pipe diameter, cut frequency, and the user’s comfort with the tool.
Blade Type Matters
What kind of blade is needed depends on the saw and the PVC size: a fine-tooth blade minimizes chipping and melt on thin-walled conduit, while a coarser blade cuts faster through thick-schedule pipe but risks rougher edges.
- Use carbide-tipped fine blades (60–80 TPI equivalent) for clean cuts on thin or decorative PVC.
- Choose 40–60-tooth blades for general-purpose circular saw cutting of standard schedule pipe.
- Select coarse-tooth or demolition blades for very thick sections where speed outweighs finish; plan to deburr.
- For hand saws, prefer fine-tooth hacksaw blades or PVC-specific blades to prevent melting and splintering.
Power Versus Control
When cutting PVC, the decision between a high-power saw and a lower-power tool hinges on the tradeoff between speed and control: powerful circular saws and miter saws remove material quickly and work well on large-diameter or thick-walled pipe, while compact saws, jigsaws, and fine-tooth reciprocating saws offer more precise, cleaner cuts and safer handling on thin-walled or decorative pieces.
Choose based on pipe size, wall thickness, and finish requirement. Consider blade RPM and tooth count for heat and burr reduction. Use clamps, guides, and steady feeds to prevent binding. Prioritize control for accuracy and safety over raw speed.
When to Use a PVC Pipe Cutter
For straightforward runs of schedule‑40 or thin‑wall PVC up to about 2 inches in diameter, a ratcheting PVC pipe cutter is the fastest, cleanest option.
It suits repetitive cuts, tight spaces, and jobs demanding square ends with minimal deburring.
Consider these use cases:
- Short, straight sections where speed matters.
- Confined areas where a saw can’t fit.
- Multiple identical cuts on the same diameter.
- Situations requiring reduced dust and quieter operation.
For larger diameters, heavily reinforced pipe, or when beveled ends are needed, alternate tools outperform cutters.
Proper blade maintenance preserves clean performance and extends tool life.
Which Hacksaw Blade Works Best for PVC?
Several types of hacksaw blades will cut PVC effectively, but a medium‑tooth blade—typically 18 to 24 TPI (teeth per inch)—offers the best balance of speed and a smooth edge for schedule‑40 and thin‑wall pipe. A bi‑metal blade resists dulling and tolerates moderate bending; carbon blades are cheaper but wear faster. Use steady, even strokes without excessive downward pressure to avoid chipping. For larger diameters, a coarser blade speeds cutting; for thin or brittle PVC, finer teeth reduce splintering. Deburring with a file or sandpaper finishes the edge for gluing or fitting.
| Blade Type | TPI Range | Best Use |
|---|---|---|
| Carbon | 18–24 | Budget cuts |
| Bi‑metal | 18–24 | Durable, general |
| Fine‑tooth | 24–32 | Thin or brittle PVC |
Cut PVC With a Power Saw : Jigsaw, Circular, and Miter Tips
When using a jigsaw, circular saw, or miter saw on PVC, selecting a fine-tooth carbide or plywood blade minimizes chipping and melting.
The pipe must be firmly clamped and supported to prevent vibration and bind-up during the cut.
Cutting slowly and steadily with light, consistent pressure produces the cleanest edge and reduces heat buildup.
Choose The Right Blade
Select a blade that matches the PVC type and the saw being used: fine-tooth carbide-tipped blades work best for circular and miter saws, while a fine-tooth wood or carbide jigsaw blade produces clean curves; avoid coarse demolition blades that cause chipping and melting.
Careful selection reduces heat, burrs, and tearout. Consider blade pitch, material, and RPM compatibility. Replace dull blades promptly.
- Tooth count: higher teeth per inch = smoother cuts.
- Tooth geometry: alternating or triple-chip grind minimizes melting.
- Material: carbide stays sharp longer than high-speed steel.
- Size/aria: match arbor and RPM ratings to the saw.
Secure And Support Pipe
Before cutting, clamp the PVC firmly to prevent movement and vibration that cause jagged edges or kickback.
Support long runs with rollers or sawhorses placed close to the cutting zone to prevent sagging and binding.
Use sacrificial backers—scrap wood or scrap PVC—behind the cut to reduce tearout and keep the blade tracking true.
For miters, secure fixtures or angle clamps maintain consistent alignment.
Make certain the workpiece end is free to move away from the blade after the cut to avoid pinching.
Verify clamps do not deform the pipe; use padded jaws or rubber to distribute pressure evenly for clean, safe cuts.
Slow, Steady Cutting
Although power saws can speed PVC cutting, steady feed rates and controlled motion are essential to prevent melting, chipping, and binding. Operators should maintain consistent pressure, let the blade do the work, and avoid forcing the cut. Blade selection and RPM match material thickness; slower speeds reduce heat buildup.
Secure the pipe and use short, deliberate passes on jigsaws, circular saws, or miters. Deburr and inspect the edge between passes to make certain a clean finish.
- Use blades rated for plastic.
- Control feed—no sudden pushes.
- Pause to clear chips and cool.
- Check alignment frequently.
Safety Gear Every Cutter Should Wear
Experienced cutters always prioritize appropriate personal protective equipment because even short PVC cuts can produce sharp edges, flying debris, and dust.
Safety glasses with side protection shield eyes; a face shield adds barrier protection for saw or rotary-tool use.
Cut-resistant gloves protect against burrs and slips while still allowing dexterity.
A dust mask or N95 respirator prevents inhalation of fine PVC particles, especially when sawing.
Long sleeves and closed-toe shoes reduce skin exposure to scraps.
Hearing protection is recommended when using power saws.
All gear should fit properly and be inspected before work to assure reliable protection.
How to Set Up Your Workspace for Stable, Accurate Cuts
With a solid work surface and proper supports, cutters minimize wobble and guarantee straight, repeatable PVC cuts.
The workspace must be stable, well-lit, and free of clutter so tooling aligns consistently.
Pipe supports and clamps secure the piece without crushing it.
A clear layout keeps tools within reach and reduces movement during cutting.
- Use a sturdy bench or sawhorses rated for the pipe length.
- Position padded clamps or V-blocks to hold the pipe level.
- Keep a dedicated ruler, marker, and deburring tool nearby.
- Make certain overhead and task lighting eliminate shadows on the cut line.
How to Measure and Mark PVC Pipe Precisely
Accurate measurements and clear marks are the foundation of clean PVC cuts, so the pipe should be measured twice and marked once using reliable tools and consistent methods.
Use a steel tape or ruler for length; record measurements from a fixed pipe end or reference point.
Mark with a fine-tip permanent marker or pencil for visibility.
Note wall thickness and any insertion depth needed for fittings, then add any necessary allowance.
When transferring measurements to multiple pipes, use a wooden or metal stop block clamped to a workbench for repeatability.
Recheck marks before cutting to avoid mistakes.
How to Squarely Mark a Round Pipe for a Straight Cut
To make certain a straight cut on a round PVC pipe, the layout line must be transferred evenly around the circumference so the saw or cutter follows a true square plane; this is best done by wrapping a paper or tape guide, using a marking wheel, or rotating the pipe against a stationary straightedge while keeping the marker perpendicular to the axis.
The technician then confirms alignment visually and by feel before cutting.
- Position guide or tape snugly and mark along its edge.
- Rotate pipe and redraw to close gaps.
- Use a square to verify ends align with pipe axis.
- Darken the final line for visibility.
When to Use a Guide or Clamp to Prevent Wandering Cuts
Having established a true layout line around the pipe, the next concern is keeping the cutting tool from wandering off that line; a guide or clamp should be used whenever the saw or cutter cannot be held rigidly by hand or when the tool’s blade tends to deflect, such as with fine-toothed saws, reciprocating saws, or powered wheel cutters.
A simple V-block, adjustable pipe cradle, or fence provides consistent lateral support. Clamps immobilize the pipe to prevent rotation and vibration. For long runs or large-diameter pipe, use multiple supports. Properly aligned guides reduce rework, improve safety, and deliver cleaner, square cuts.
How to Score and Snap Thin‑Walled PVC Pipe Quickly
When speed and a clean edge are priorities, thin‑walled PVC is best cut by scoring and snapping rather than sawing.
The method is efficient: mark, score, flex and finish.
A sharp utility knife or scoring tool makes a shallow groove around the circumference; several passes deepen the score without crushing the pipe.
Once scored, apply controlled bending force until the pipe snaps cleanly along the groove.
Light sanding removes burrs.
This technique works on conduit and irrigation tubing; it minimizes debris and speeds repetitive cuts.
Safety glasses and gloves are recommended to prevent cuts from shards and tool slips.
- Mark circumference
- Score evenly
- Snap with steady force
- Deburr and inspect
Step‑By‑Step: Cutting PVC Pipe With a Ratchet Pipe Cutter
The section outlines how to select an appropriate ratchet pipe cutter for PVC by matching cutter capacity and blade condition to pipe diameter.
It then covers preparing the pipe—measuring, marking squarely, and securing the workpiece—to guarantee alignment and safety.
Finally, it explains the ratcheting cut technique and finishing steps to produce a smooth, burr‑free edge.
Choosing The Right Cutter
Several factors determine which cutter is best for cutting PVC pipe: pipe diameter, wall thickness, access space, and the desired cut speed and finish. The choice focuses on effectiveness, control, and minimizing burrs. Consider tool ergonomics for repeated cuts and compatibility with pipe sizes.
- Ratchet pipe cutter — ideal for small to medium diameters; provides clean, controlled cuts with minimal effort.
- Hacksaw — versatile for large pipes or tight budgets; requires deburring afterward.
- Rotary pipe cutter — fast for straight, larger-diameter cuts; needs steady alignment.
- Power saw with fine blade — fastest for many cuts; risk of rough edges if not guided.
Proper Pipe Preparation
Before cutting, make sure the work area and pipe are prepared to produce a straight, clean cut with minimal burrs.
The pipe is measured and marked with a fine-tip marker, using a square or template to make certain a perpendicular line.
Debris and oil are wiped away; the pipe is dry to prevent slipping.
The pipe is supported close to the cut with a stable clamp or vise padded to avoid crushing.
For long runs, the pipe is secured at two points to prevent bending.
End caps or plugs are removed, and the cutter is checked for sharpness and proper ratchet function.
Making A Smooth Cut
With the pipe secured and the cutting line clearly marked, the operator positions the ratchet cutter perpendicular to the mark and closes the blades in controlled clicks, advancing the ratchet until the blade bites evenly into the PVC.
The cut proceeds steadily; pressure is increased only after each ratchet cycle, avoiding sudden force that can deform the tube.
Once severed, the edges are inspected for burrs and unevenness.
The operator then cleans and deburrs the rim with a file or deburring tool, ensuring a square end for gluing or fitting.
- Align
- Click
- Inspect
- Deburr
Step‑By‑Step: Cutting PVC Pipe With a Hacksaw for Beginners
When cutting PVC pipe with a hacksaw, a clear, steady technique guarantees a straight, clean cut and reduces the risk of splitting or jagged edges.
Begin by measuring and marking the cut line with a fine marker. Secure the pipe in a vise or clamp with padding to prevent crushing. Use a sharp, fine-tooth hacksaw blade and position it square to the mark. Start with light forward strokes to create a kerf, then maintain even pressure and long strokes, keeping the blade perpendicular.
After cutting, deburr the edge with a utility knife or file and inspect for uniformity and fit.
Step‑By‑Step: Cutting PVC Pipe With a Miter Saw or Circular Saw
This section explains choosing and setting up a miter saw or circular saw for clean, controlled PVC cuts, including blade selection, secure clamping, and recommended speed settings.
It then outlines the cutting technique—marking, steady feed, and proper blade alignment—to produce square, burr-free ends.
Finally, it covers essential safety measures such as eye and hearing protection, dust control, and keeping hands clear of the blade.
Tool Selection And Setup
Before cutting begins, select the saw best suited to the pipe diameter, wall thickness, and workspace constraints: a miter saw delivers fast, repeatable square cuts for larger-diameter PVC, while a circular saw with a fine-tooth blade offers portability and control for smaller pieces or tight areas. Tool setup focuses on stability, blade choice, and measurement.
- Verify blade type: carbide-tipped, fine-tooth for clean cuts and minimal melting.
- Secure the saw to a stable surface and confirm guard function.
- Use a dedicated clamp or vise to immobilize the pipe, avoiding deformation.
- Set depth and fence for consistent cut length and squareness.
Cutting Technique And Safety
Begin cutting with deliberate, measured movements to maintain control and accuracy while prioritizing safety. The operator secures the pipe, confirms blade choice, and aligns the mark. Support both ends, maintain a steady feed, and avoid forcing the cut. Pause if binding occurs; restart after clearing debris. Keep fingers away from the blade, wear eye and hearing protection, and use a dust mask. Inspect the cut for burrs and deburr with a file or sandpaper.
| Action | Reason |
|---|---|
| Secure pipe | Prevents kickback |
| Steady feed | Ensures straight cut |
| PPE and inspection | Protects operator and finish |
Cutting Long Runs of PVC: Batching Tips to Save Time
When faced with long runs of PVC, cutting in batches streamlines the process and reduces setup time. The approach emphasizes preparation, consistency, and safe handling to maintain speed without sacrificing quality.
- Measure and mark all pieces before cutting, using a stop block to guarantee uniform lengths.
- Choose a stable work surface and secure pipe with clamps or a bench vise to prevent movement.
- Use the same cutting tool for the batch to keep blade alignment and reduce variation; pause to clear debris.
- Deburr and label pieces immediately to avoid rework and speed assembly later.
How to Cut Intricate or Angled PVC Joints Cleanly
For intricate or angled PVC joints, precise marking and careful measuring set the foundation for a clean fit.
A miter jig or adjustable guide guarantees consistent, accurate cuts at the required angles.
Final finishing—filing, sanding, and deburring—removes burrs and guarantees smooth mating surfaces for solvent welding or mechanical connections.
Marking and Measuring Precisely
Measure twice, mark once: precise measurements and clear, well-placed layout lines are essential for cutting intricate or angled PVC joints cleanly.
A steady, repeatable workflow reduces errors when transferring angles and offsets to pipe.
Use reliable tools and verify angles against fittings before cutting.
Light, visible lines and reference marks aid alignment during sawing or cutting.
- Confirm length and angle with a combination square and protractor.
- Transfer centerlines and angle bisectors using a marker and scribe.
- Mark cut start/stop points and reference notches for orientation.
- Recheck every mark before proceeding to cut.
Using A Miter Jig
With a miter jig, angled and compound PVC cuts become repeatable, accurate, and much faster than hand-guided sawing. The jig secures pipe, sets precise angles, and guides the saw for clean joints. Use appropriate clamps, choose a fine-tooth blade, and test on scrap before cutting final pieces. Align marks with the jig’s fence and verify angle stops for consistency. For odd offsets, adjust support blocks to maintain square alignment. Keep the jig steady and feed the blade smoothly to avoid chipping.
| Feature | Benefit |
|---|---|
| Clamping | Prevents movement |
| Angle stops | Repeatable cuts |
| Fine blade | Smooth edges |
| Support blocks | Maintains alignment |
| Quick setup | Saves time |
Finishing And Deburring Edges
Smooth, clean edges are essential for reliable sealing and neat assembly when finishing intricate or angled PVC joints. Attention to deburring prevents leaks and guarantees snug fits. Recommended technique follows:
- Score and trim excess with a utility knife to remove thin flash.
- Use a round file or deburring tool to chamfer inner and outer edges evenly.
- Sand with medium then fine sandpaper to smooth angled cuts and remove tool marks.
- Clean with a rag and solvent to remove dust and test-fit parts before cementing.
Consistent, light passes avoid material removal that alters angles or joint alignment.
How to Cut Large‑Diameter PVC Safely and Accurately
When working with large‑diameter PVC, careful setup and the right tools make accurate, safe cuts possible; the installer should secure the pipe, mark cut lines clearly, and choose a cutting method suited to the diameter and wall thickness.
Clamp pipe on saw horses or in a pipe vise to prevent roll. Use a sharp saw: reciprocating, circular with fine blade, or a powered pipe cutter rated for large sizes. Cut slowly to avoid binding, periodically clear chips, and support the free end to prevent sag.
After cutting, deburr and inspect the edge for straightness before assembly. Always wear eye and hand protection.
How Wall Thickness Affects Cutting Method and Tool Choice
Wall thickness determines how much effort and what kind of blade or saw is appropriate, with thin-walled schedules cutting easily and thick-walled or pressure-rated pipe requiring sturdier tools.
A concise tool selection guide follows, matching hand saws and PVC cutters to light-duty work and powered saws or abrasive wheels to heavy sections. Cutting techniques must adjust for thickness by using slower feeds, secure clamping, and deburring to guarantee clean, square ends.
Wall Thickness Impact
Recognizing that PVC pipe comes in a range of wall thicknesses—from thin-schedule tubing to heavy-schedule and pressure-rated pipe—guides the choice of cutting method and tool.
Thinner walls cut quickly with lighter blades; thicker walls demand slower feeds and sturdier cutters to avoid crushing or melting.
Cutting technique must adjust for wall thickness to maintain square ends and prevent burrs.
- Thin walls: fast cuts, minimal support, low torque.
- Medium walls: steady pressure, cooling pauses, deburring.
- Thick walls: robust blades, clamp support, slower speed.
- Pressure-rated: precise square cuts, inspect for delamination.
Tool Selection Guide
Why choose one cutter over another depends largely on pipe wall thickness and the demands of the job.
Thin-walled Schedule 40 or conduit-grade PVC can be handled with basic tools: PVC cutters, fine-toothed saws, or rotary tools provide quick, clean cuts.
Medium-thick walls benefit from reinforced ratchet cutters or a miter saw with appropriate blades to reduce deformation and brittleness.
Thick-walled pressure or sewer pipe requires robust solutions: band saws, power reciprocating saws, or a table saw with carbide blades guarantee straight, efficient cuts.
Tool selection balances control, force, blade durability, and minimizing cracking or ovalization.
Cutting Technique Adjustments
Having chosen an appropriate cutter based on pipe type and job demands, adjustments in cutting technique must follow as wall thickness changes. Thicker walls require slower, steady pressure and often a power saw; thin-walled pipe benefits from handheld cutters and lighter strokes. Consider support, blade type, and clamping to prevent deformation.
- Thick (schedule 40/80): use power tools, slower feed, frequent blade checks.
- Medium: prefer ratchet pipe cutters or fine-tooth saws, moderate pressure.
- Thin (conduit): handheld PVC cutters, light smooth cuts to avoid crushing.
- Multiwall/composite: score first, then finish with saw or file for accuracy.
How Temperature and Weather Change Cutting Behavior
In cold conditions, PVC becomes stiffer and more brittle, increasing the risk of cracking or splintering during sawing or scoring. Work slowly, support the pipe firmly, and use fine-toothed blades to reduce impact stresses.
Heat softens PVC, making cuts cleaner but prone to deformation; employ steady, moderate feed and consider temporary clamps to maintain roundness.
Humidity and direct sunlight can slightly change dimensions and surface tackiness, affecting marker visibility and glue handling later, so protect cut areas.
Allow temperature acclimation before cutting when possible, and adjust cutting speed, blade choice, and support to match ambient conditions.
How to Deburr and Chamfer PVC Pipe Ends for Better Joints
When preparing PVC pipe ends for assembly, removing burrs and adding a slight chamfer guarantees snug, leak-free joints and eases insertion into fittings. The process improves alignment and prevents seal damage from rough edges.
Follow simple steps and use purpose tools to achieve consistent results.
- Inspect the cut end for flash, burrs, and unevenness.
- Remove burrs with a deburring tool or sharp utility knife, working clockwise to avoid jagged edges.
- Lightly chamfer the outer edge (about 15–30 degrees) to guide the pipe into the socket.
- Clean the end, removing dust and shavings before dry-fitting or gluing.
Best Sanding and Filing Techniques for Smooth Pipe Ends
The section outlines how to choose sandpaper grits for progressively finer finishes and when to switch to a file for shaping.
It explains filing strokes that follow the pipe’s circumference to maintain roundness and prevent flat spots.
It also ties sanding and filing back to proper deburring and chamfering so joints seat cleanly.
Sandpaper Grit Selection
Frequently, selecting the correct sandpaper grit determines how quickly and cleanly PVC pipe ends can be smoothed: coarse grits (80–120) remove material and burrs fast but leave scratches, medium grits (180–220) refine the surface, and fine grits (320–400) produce a smooth finish suitable for solvent welding or painting.
- Begin with 120 grit to knock down saw marks on thicker walls.
- Use 180–220 grit to even edges and blend shifts without aggressive removal.
- Finish with 320–400 grit for a satin surface that promotes adhesion and leak-free joints.
- Replace worn paper to maintain consistent cutting action and avoid glazing.
Filing Directional Technique
With deliberate strokes along the pipe’s axis, the filing directional technique minimizes burrs and maintains roundness for predictable joints. The practitioner secures the cut piece, aligns a fine-toothed file, and advances only outward toward the pipe edge to remove raised material.
Consistent light passes preserve diameter and prevent flat spots; rotating the pipe between strokes guarantees even removal. Cross-grain or sawing motions are avoided to reduce ragged fibers.
Periodically inspecting the edge under light reveals high spots needing attention. Final wiping removes dust prior to fitting. The method complements prior sanding choices without duplicating deburring procedures.
Deburring And Chamfering
Begin by removing sharp edges and burrs immediately after cutting to guarantee clean, safe, and properly fitting PVC joints. The practitioner uses light filing and sanding to smooth the ID and OD, preventing leaks and ensuring snug fittings. Attention to grain and motion avoids gouges. Final chamfers ease insertion and protect seals.
Recommended steps:
- File exterior with a fine bastard file, stroke away from the cut edge.
- Deburr interior with a round file or reamer, maintaining concentricity.
- Sand with 120–220 grit wrapped on a dowel for uniformity.
- Inspect, test-fit, and repeat light passes until flush.
How to Measure and Trim for Solvent‑Welded Fittings
Before solvent-welding PVC, the pipe must be measured and cut so the joint fits squarely and the insertion depth matches the fitting’s socket.
The technician measures from the end of the pipe to the mark that equals the socket depth plus any required allowance for insertion and solvent.
A square, true cut is essential; re-measure after cutting.
Lightly chamfer the outside edge to ease insertion without affecting fit.
Test-fit the pipe into the socket to confirm alignment and depth; mark witness lines across pipe and fitting to maintain orientation during final assembly.
Final cleaning precedes solvent application.
How to Prepare Cut Ends for Threaded Fittings or Inserts
After measuring and cutting for solvent-welded joints, attention shifts to preparing pipe ends designed for threaded fittings or inserts, which requires different finishing steps. Clean, deburr, and square the end to guarantee full engagement and seal. Threads need intact faces; inserts require a smooth, chamfered entry.
Follow these steps:
- Remove burrs with a deburring tool or file, rotating evenly around the ID and OD.
- Lightly chamfer the OD to guide inserts; no deep beveling that reduces engagement.
- Test-fit threads or insert; confirm alignment and torque without forcing.
- Clean with a dry cloth; apply compatible sealant or tape as specified.
Cutting PVC Conduit Versus Plumbing PVC: Key Differences
Cutting PVC conduit and cutting plumbing PVC demand different techniques because the two materials differ in wall thickness, flexibility, markings, and purposeful use; conduit typically has thicker walls and a firmer, often UV-stabilized formulation to protect electrical conductors, while plumbing PVC is formulated for fluid pressure and may be thinner or softer depending on schedule and pipe type.
The installer should note color coding and printed specifications, select blades or cutters appropriate for wall thickness, and account for conduit’s tendency to spring back when released. Clean, square cuts matter for both, but adhesion, fitting types, and heat sensitivity differ between electrical and plumbing applications.
Avoiding Common Mistakes That Ruin PVC Cuts
Common errors that spoil PVC cuts include using the wrong blade or tool, making inaccurate measurement marks, and skipping deburring and chamfering steps.
Each mistake affects fit, seal, or appearance in different ways. The following section explains how to avoid these specific problems.
Wrong Blade Or Tool
Choosing the wrong blade or tool can quickly turn a clean PVC cut into a ragged, melted, or cracked mess. Observations emphasize matching tool to pipe size and material.
Using dull blades, inappropriate saw types, or excessive speed causes heat, burrs, and splits. Proper selection preserves roundness and fit.
- Use a fine-toothed blade for hacksaws or a blade rated for plastics on power saws.
- Avoid metal-cutting blades with aggressive gullets that tear PVC.
- Prefer ratchet cutters for small diameters and miter saws with plastic blades for larger pipes.
- Replace worn blades promptly to make certain clean cuts.
Improper Measurement Marks
Marking errors—offset lines, ambiguous reference points, and inconsistent units—are a frequent source of misfit joints and wasted pipe. Measurements made from the wrong face, marks smeared by handling, or lines drawn without accounting for blade kerf lead to parts that don’t align.
Using fine-tip markers on rounded surfaces can produce misleading thin strokes; thick markers obscure exact cut locations. Consistently measure from the same reference, clearly label cut lengths and orientation, and account for tool loss. Verify marks with a square or template before cutting. Clear, repeatable marking practices prevent rework and conserve material.
Skipping Deburring And Chamfering
Failing to deburr and chamfer PVC ends leaves rough burrs and sharp edges that interfere with proper socket fit, create weak joints, and can cut sealing rings during assembly. The installer who skips finishing risks leaks, binding during insertion, and premature adhesive failure. Simple tools and consistent technique eliminate these issues quickly.
- Use a deburring tool or file to remove inner and outer burs smoothly.
- Lightly chamfer the outer edge at 15–30° to guide sockets without over-thinning.
- Clean the surface of dust and shavings before dry-fitting.
- Inspect each end for uniformity; repeat until edges are even and smooth.
What to Do When a Cut Is Crooked or Too Short
When a PVC cut comes out crooked or ends up too short, the repair approach depends on how much material is off and where the error sits in the assembly.
For minor crookedness, re-square the end with a file or sanding block, checking fit against mating parts and ensuring a flat, chamfered edge for solvent welding. If the miscut prevents proper socket engagement but the length remains usable, consider rotating the pipe in the joint or using a coupling placed where wall thickness permits.
For visible or structural mistakes, replace the piece; compromised alignment or seating risks leaks and weakened joints.
How to Lengthen a Pipe After Overcutting (Repair Options)
In the event a PVC pipe has been cut too short, several practical repair options can restore length or salvage the assembly without replacing the entire run. Options depend on access, pressure, and joint type.
- Insert a short repair nipple plus two couplings to bridge the gap; verify proper solvent welding and adequate socket depth.
- Use a slip coupling designed for repair to regain a few inches when alignment allows.
- Add a threaded adapter and nipple if threaded fittings are acceptable and pressure-rated.
- Rework surrounding fittings—move a fixture or trim backstop—to gain usable length without altering the main run.
How to Join Imperfect Cut Ends With Couplings and Sleeves
When a cut end is irregular or slightly undersized, a sleeve coupling provides a straightforward mechanical join that restores length and alignment.
The damaged ends should be trimmed square and chamfered to remove burrs and make certain the coupling seats fully.
Properly fitted sleeves minimize leaks and permit a clean, strong repair without replacing long pipe sections.
Use Sleeve Couplings
For imperfectly cut PVC ends, sleeve couplings provide a forgiving and secure connection by slipping over both pipe ends to bridge gaps and misalignment. They accommodate slight length variation and angular error without immediate trimming.
The procedure emphasizes fit, cleanliness, and appropriate adhesive.
- Measure engagement depth, choose a coupling with adequate overlap.
- Clean and dry both pipe ends; remove burrs only if necessary.
- Apply primer and solvent cement per manufacturer directions to inside coupling and pipe ends.
- Insert pipes fully, align quickly, and hold until set to make certain a leak-free joint.
Trim And Chamfer Ends
Trim and chamfer the pipe ends to guarantee a reliable fit with couplings and sleeves.
Remove burrs and uneven edges with a deburring tool or fine file, then bevel the outer and inner edges at a shallow 15–30° angle.
Clean the surfaces of dust, grease, and shavings before test-fitting.
For slightly oversized cuts, trim incremental amounts and re-check until the pipe fully seats in the coupling without forcing.
Apply primer and solvent cement only when alignment is correct.
When gaps remain, use a sleeve coupling sized for repair or a short insert to bridge and restore a secure, leak-free joint.
How to Cut PVC Without Producing Plastic Dust in Enclosed Spaces
In confined areas where ventilation is limited, cutting PVC without creating airborne plastic dust requires planning, the right tools, and containment measures to protect occupants and equipment. Use wet or low-dust methods and isolate the work zone to minimize particle spread.
- Choose wet cutting (water-cooled saw) or a fine-toothed hand saw to reduce dust generation.
- Enclose the area with plastic sheeting and create a negative-pressure exhaust if possible.
- Wear a respirator rated for particulates and impermeable eye protection; keep others out.
- Immediately capture and wipe up debris with a HEPA vacuum and damp cloth; dispose sealed.
How to Cut PVC Near Finished Surfaces Without Causing Damage
When cutting PVC close to finished surfaces, the installer first protects adjacent areas with drop cloths, painter’s tape, or cardboard shields to prevent scratches and debris.
Cutters are advised to use clamps, guide blocks, or a steady hand and a fine-toothed blade to maintain control and avoid slips. Small, deliberate cutting strokes and occasional pauses to clear chips help minimize the risk of damage.
Protect Adjacent Surfaces
Near finished walls, flooring, or cabinetry, cutting PVC demands careful planning to prevent scratches, gouges, or accidental cuts to surrounding surfaces. Protective measures minimize risk and keep edges intact.
- Lay down thick drop cloths or cardboard to shield floors and catch debris.
- Apply painter’s tape over adjacent surfaces and along the pipe line to prevent marking and guide placement.
- Use scrap wood blocks or a rubber pad between clamps and finished surfaces to distribute pressure and avoid indentations.
- Keep a vacuum or brush nearby to remove shavings immediately, preventing scratches from abrasive debris.
Use Controlled Cutting
Clamp the pipe securely and cut with steady, measured strokes to prevent slips and sudden movement that could nick surrounding finishes.
The worker positions a sacrificial barrier—cardboard, painter’s tape, or thin scrap wood—between the blade and nearby trim.
A small handsaw or ratcheting PVC cutter minimizes overreach; for powered tools, a narrow blade and slow feed reduce vibration.
Support both pipe ends to avoid binding, and pause to clear shavings and reassess alignment.
Finish edges with a deburring tool or fine file, keeping filings contained.
Controlled, deliberate motions protect adjacent surfaces and guarantee a precise, clean cut.
How to Cut Pressurized PVC Safely (Shutoff and Drain)
Before cutting pressurized PVC, the water supply must be fully shut off and the line drained to prevent sudden sprays or injury.
The operator confirms shutoff at the main valve, opens a downstream faucet to relieve pressure, and vents trapped air before cutting.
Recommended steps:
- Locate and close the correct shutoff valve; tag it if needed.
- Open high and low fixtures to drain remaining water.
- Bleed pressure using a test port or faucet; verify with a pressure gauge.
- Cap or plug adjacent fittings temporarily to control residual leakage.
Proceed only when the pipe is visibly empty and pressure reads zero.
Cut Buried or Recessed PVC : Safety and Permit Checks
After shutting off and draining pressurized lines, attention turns to buried or recessed PVC where additional hazards and regulatory requirements apply.
Workers must locate utilities using detection services and site plans, marking safe excavation zones. Permits and local codes should be verified before digging; failure to comply can incur fines and safety risks.
Use hand tools near identified conduits, expose pipe gradually, and brace surrounding soil to prevent collapse.
If line serves sewer, gas, or electrical infrastructure, notify authorities and arrange qualified supervision.
Document permits and inspections, and proceed only when clearance and safe conditions are confirmed.
How to Recycle or Dispose of PVC Offcuts Responsibly
Considering environmental impact and local regulations, PVC offcuts should be sorted and handled according to material type and condition. Small clean offcuts can be collected for recycling where facilities accept rigid PVC; contaminated, painted, or glued pieces require different handling.
Disposal options depend on local waste programs and hazardous-material rules. Suggested steps:
- Separate clean, uncoated PVC from contaminated or composite pieces.
- Contact local recycling centers or building-material reclaimers for acceptance criteria.
- Bundle unusable offcuts and label them if required by disposal services.
- Use licensed waste disposal for treated or chemically contaminated PVC to prevent environmental harm.
How to Choose Replacement Fittings After Modifying Pipe Lengths
With offcuts sorted and disposed of appropriately, attention shifts to selecting replacement fittings to match the changed pipe lengths and maintain system integrity.
Choice depends on pipe schedule, diameter, and application (pressure, waste, irrigation). Confirm material compatibility—PVC types and solvent-weld, compression, or threaded connections—and match socket or slip dimensions.
Account for wall thickness (SCH 40 vs SCH 80) and verify pressure ratings meet system demands. Prefer brass or plastic adapters where transitions occur.
Measure twice and bring a short sample to the supplier. Test-fit dry before solvent welding or gluing, and label fittings for future maintenance.
How Often to Replace Blades and Cutters When Working PVC
Regularly monitoring blade and cutter condition is essential because dull tools increase cutting effort, create rough edges, and raise the risk of cracking or melting PVC.
Replacement frequency depends on use, material thickness, and tool type; routine inspection prevents problems. Follow measurable cues for replacement:
- Visible nicks, chips, or rounded edges on blades.
- Increased force required, inconsistent cuts, or smoke during cutting.
- Burnish or fraying on ratchet cutter blades after repeated cycles.
- Manufacturer-recommended hours or cut counts exceeded for carbide or steel blades.
Replacing promptly preserves cut quality, reduces scrap, and maintains safety during PVC cutting projects.
Pro Tips for Consistently Square and Repeatable Cuts
After confirming blades and cutters are sharp and properly maintained, achieving square, repeatable PVC cuts relies on consistent setup and technique.
Mark measurements with a fine-tip marker and scribe a light line around the pipe to guide alignment.
Use a firm, square clamping method that prevents rotation but avoids deformation.
Position the cutter or saw perpendicular to the scribed line and verify with a small try square before cutting.
Advance blades steadily without forcing; let the tool do the work.
Deburr ends lightly and recheck squareness.
Record setups for repeat jobs to minimize adjustment and maintain uniform results.
Simple Jigs and Shop‑Made Guides to Speed PVC Cuts
Using simple jigs and shop-made guides can turn repetitive PVC cutting into a fast, consistent process.
A basic stop block, miter box, clamping cradle, or fence transforms measurements into repeatable cuts while reducing setup time.
The following suggestions focus on practicality and safety:
- Build a fixed stop block from scrap wood to set cut length quickly.
- Use a shop-made miter box for square or angled handsaw cuts.
- Clamp a cradle or saddle to prevent pipe roll during sawing.
- Attach a fence with a vise mount to guide power-tool cuts.
Simple, durable jigs save time and improve accuracy for small shop runs.
When to Call a Pro Instead of DIY Cutting
When a project involves unfamiliar materials, complex fittings, or work behind walls and under slabs, hiring a professional is the safer choice.
A pro is advised when local codes, permits, or inspections apply, or when cutting affects pressure systems, gas lines, or sewer stacks.
Choose a licensed plumber for structural or health‑critical runs, and an experienced contractor for embedded plumbing or confined spaces.
Call a pro if accurate alignment, solvent‑weld integrity, or leak‑testing exceeds personal skill or available tools.
Hiring avoids costly mistakes, hidden damage, and warranty voids, and makes certain work meets safety and code requirements.
Cost Checklist: Tools and Supplies for One PVC Cutting Job
A straightforward checklist helps estimate the total cost for a single PVC cutting job by listing required tools, consumables, and optional items that improve speed or safety.
The list separates essentials from extras so budgeting is clear.
- Handsaw or PVC cutter (purchase or rental cost), tape measure, marker.
- Deburring tool or file, sandpaper, cleaning cloths, primer/cement for final joining.
- Safety gear: gloves, eye protection, dust mask—small but necessary expense.
- Optional: miter box, clamp, cordless saw rental, replacement blades; reduces time, raises cost.
Totals depend on reuse, local prices, and project scale.
Troubleshooting Quick Reference: Cutting Problems and Fixes
Often a few common mistakes cause cuts that are rough, uneven, or out of square; this quick reference lists the typical problems, their likely causes, and straightforward fixes.
Blade chatter: dull blade or wrong saw—replace blade, use fine-tooth or PVC blade, reduce feed pressure.
Oval or crushed pipe: too much clamp force—use padded clamps, support with a block.
Out-of-square ends: misaligned guide or poor marking—re-mark with square, use guide or jig.
Melting or burrs: too fast blade speed—slow cut, cool with pauses, deburr with file or deburring tool.
Binding: unsecured pipe—secure both ends, use steady feed.
Conclusion
Cutting PVC pipe is straightforward with the right tools, basic safety, and a little practice. Whether using a handsaw, miter box, tubing cutter, or power tool, careful measuring, secure clamping, and deburring produce reliable joints and clean finishes. For complex or high‑pressure systems, professionals may be wise. Ready to make a perfect cut on your next project? Keep a simple kit and these tips on hand, and PVC cutting becomes fast, safe, and repeatable.