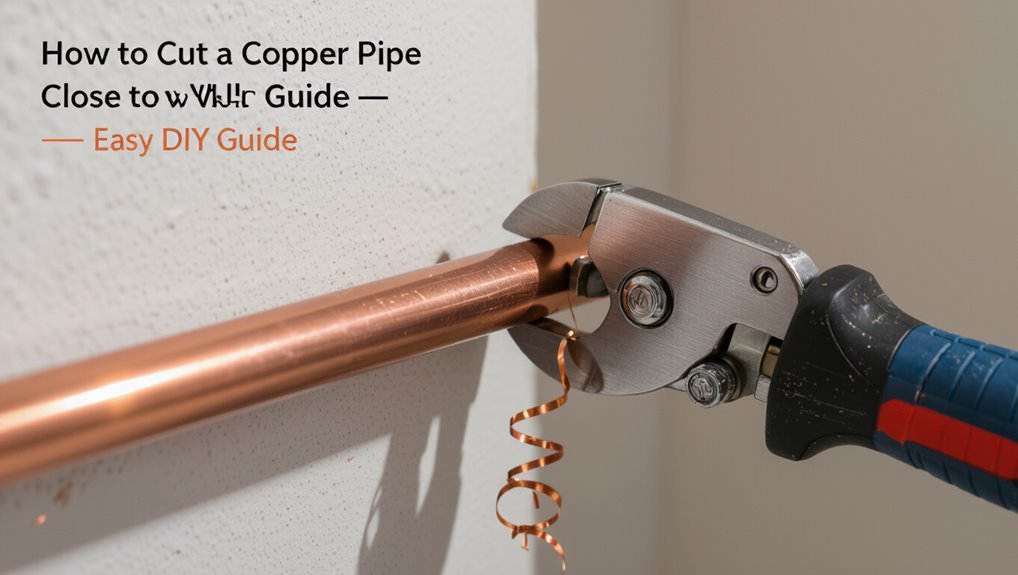
How to Cut a Copper Pipe Close to a Wall €” Easy DIY Guide
To cut a copper pipe close to a wall, follow these straightforward steps:
- Shut Off Water: First, turn off the water supply and relieve pressure in the line.
- Protect Surroundings: Use tape to cover surrounding surfaces, and place a heat shield and wet towels to prevent any damage.
- Mark the Cut: Accurately mark the cut point from a fixed reference to ensure precision.
- Support the Pipe: Brace the copper pipe using padded supports or soft-jaw clamps to keep it stable during cutting.
- Choose Cutting Tool: Use a low-profile ratcheting cutter, a mini rotary tool with a thin cutoff wheel, or a compact hacksaw, advancing in small increments.
- Deburr and Test: After cutting, deburr the edge with a short reamer, test the fitting, and perform a pressure test on the joint.
By following these steps, you can effectively cut a copper pipe close to a wall while minimizing risks and ensuring a clean finish.
Quick Step‑By‑Step: Cut Copper Pipe Flush to a Wall
When working close to a wall, preparing the area and choosing the right tools are essential to a clean, flush cut. The technician marks the cut line, measures twice, and protects the wall with tape or a thin shim.
A compact tubing cutter or mini hacksaw fits tight spaces; the cutter wheel is positioned squarely. Rotate consistently or saw with steady strokes, keeping the blade perpendicular.
Deburr the inner and outer edges with a reamer or fine file, then test fit the fitting. Clean the pipe end and nearby surfaces to remove filings before proceeding to the next step.
Shut Off the Water and Drain the Pipe Safely
Before cutting, the homeowner locates the main shutoff valve to stop water supply to the affected line.
They then depressurize and drain the pipe by opening nearby faucets and a draincock to remove standing water.
Finally, they isolate the section and verify no flow remains before proceeding.
Locate Main Shutoff Valve
Starting at the home’s water entry point, locate the main shutoff valve to stop flow to the copper pipe that will be cut.
The primary valve is usually near the water meter, basement, crawlspace, or where service enters the house.
Identify valve type—gate, ball, or stop—and confirm orientation: turn clockwise for gate/stop, rotate ball handle perpendicular to close.
If unclear, trace supply lines visually or consult building plans.
Make sure access is clear and unobstructed.
If the valve is corroded or stuck, consider shutting off at the municipal meter or calling a professional to avoid damage or incomplete isolation.
Depressurize And Drain Line
Turn off the identified main valve and relieve residual pressure by opening a nearby faucet or hose bib downstream of the shutoff; this allows trapped water and air to escape and prevents spray when the pipe is cut.
After pressure is relieved, open the highest and lowest fixtures on the affected branch to drain standing water.
For concealed runs, remove accessible fittings or caps to let the line gravity-drain.
Absorb remaining drips with a towel or small container at the cut point.
Wait until flow ceases and the pipe feels empty to the touch before proceeding.
Dispose of collected water and dry the work area.
Isolate And Verify No Flow
With the main valve closed and visible fixtures opened, confirm the affected section is isolated by operating a nearby downstream faucet or hose bib to assure no flow and by checking any local shutoffs feeding the branch.
Next, open a high and low point on the isolated run to drain remaining water; catch residual drips with a bucket or towel.
Inspect adjacent fixtures for unintended discharge and re-close only those opened for draining.
Use a pressure gauge or simple hand test at the cut location to verify zero pressure.
Only proceed to cut once isolation and no-flow are unequivocally confirmed.
Safety Gear You Must Wear When Cutting Copper Pipe
Before cutting, appropriate personal protective equipment is required to guard against flying metal shards and sharp edges.
Safety goggles or a face shield protect the eyes and face from debris, while cut-resistant gloves shield hands during cutting and deburring.
These basic precautions reduce the risk of injury and should be worn for every cut.
Eye And Face Protection
Eye and face protection are essential when cutting copper pipe to guard against flying metal shards, hot burrs, and chemical splashes from flux or cleaning agents.
Safety goggles with side shields provide a sealed barrier against debris; impact-rated spectacles or safety glasses meet ANSI Z87.1 standards.
For additional coverage, a full-face shield worn over goggles prevents facial cuts and minimizes exposure to soldering splatter.
Make sure eyewear fits snugly, is free of scratches, and is cleaned after use.
Replace damaged lenses immediately.
When working in confined spaces near walls, maintain clear sightlines and avoid leaning into the cutting path.
Cut-Resistant Gloves
Offering essential protection against sharp edges and burrs, cut-resistant gloves reduce the risk of lacerations and punctures when handling and cutting copper pipe. The guidance emphasizes selecting gloves rated for cut resistance (e.g., ANSI/EN levels), ensuring fit and dexterity to manipulate tools in tight spaces, and choosing materials like HPPE or Kevlar for durability. Gloves should be inspected before use and replaced if compromised. Proper gloves complement other PPE and improve confidence when working near walls or fixtures. Quick reference:
| Feature | Recommendation |
|---|---|
| Rating | ANSI A4–A6 or EN 388 level 4 |
| Material | HPPE, Kevlar |
| Fit | Snug, tactile |
| Care | Inspect, replace when worn |
Mark the Exact Cut Point in a Cramped Area
When working in a tight space, the technician uses a thin, bright marker and a small mirror or inspection camera to pinpoint the cut location without shifting the pipe. Measurement is taken from a fixed reference—elbow, fitting face, or wall—and transferred with a thin line around the circumference.
A depth or alignment notch is added opposite the visible mark for milling consistency. If sight is limited, a flexible pick-up mirror or borescope confirms alignment. Marks are kept minimal to avoid obscuring seals or flux. Final verification is done visually and by feel before any cutting tool is introduced.
Clamp and Brace the Pipe in Tight Spaces
With the pipe secured against movement, the technician selects clamping and bracing methods that fit the confined geometry and protect the tube’s finish and fittings. Soft-jawed clamps, foam pads, and scrap copper strips prevent marring while holding the tube steady.
Strategic bracing to nearby studs or framing transfers forces away from fittings. Lightweight, adjustable supports enable one-handed manipulation in narrow gaps. Temporary straps maintain alignment without crushing the pipe.
- Use soft-jawed pipe clamps to avoid surface damage
- Pad metal jaws with cloth or foam
- Brace to framing members, not drywall
- Employ adjustable straps for tight clearances
- Check fittings remain undisturbed before cutting
Tools to Cut Copper Pipe Near a Wall
Against a wall, choosing the right cutting tools determines the quality, speed, and safety of the job.
Compact tubing cutters, ratcheting mini-cutters, and swivel-head models suit tight clearances; their low profile and controlled rotation minimize movement.
Rotary cable cutters and compact power nibblers remove material where access is limited, but require steady support.
Deburring tools and small files finish edges and prevent leaks.
Magnetic or clamp-mounted guides help align cuts when hands cannot.
Protective gear—gloves and eye protection—remains essential.
Tool selection balances available clearance, desired finish, and operator steadiness to achieve a clean, reliable cut near a wall.
Hacksaw: Pros and Cons for Near‑Wall Cuts
Hand tools like tubing cutters and mini-cutters often outperform a hacksaw in confined spots, but the hacksaw still appears in many toolkits for near-wall pipe work. It offers wide availability and low cost, yet blade length, clearance and control limit its usefulness close to a wall.
Cutting with a hacksaw risks uneven cuts, burrs and added effort when access is tight. Proper technique and the right blade reduce problems, but space constraints often negate advantages. Consider whether the brief savings outweigh reduced speed and finish quality before choosing a hacksaw for near-wall copper cuts.
- Affordable and common
- Requires clearance behind blade
- Can produce uneven cuts
- Leaves burrs needing filing
- Low tool control in tight spots
Tubing Cutter Options for Confined Spaces
The article notes that compact mini tubing cutters are designed for tight spots, offering a small profile that fits between a pipe and a wall.
It observes that ratcheting head designs allow incremental cuts with limited swing, reducing effort in confined areas.
Consideration of cutter size and head mechanism helps determine the best tool for near‑wall copper work.
Compact Mini Tubing Cutters
Reach into tight corners with a compact mini tubing cutter designed specifically for confined spaces; its shortened body and low-profile cutting wheel allow precise, full-circle cuts where standard cutters cannot fit.
Compact models favor direct control, quick setup, and minimal clearance requirements, making them ideal for wall-adjacent plumbing.
Durable construction and replaceable wheels prolong service life.
Users should match cutter size to pipe diameter and inspect blades before cutting.
While not suited for heavy industrial use, they excel in residential repairs and retrofit work where access is limited.
- Shortened frame for narrow gaps
- Low-profile cutting wheel
- Replaceable blade cartridges
- Lightweight, ergonomic grip
- Fits small-diameter copper tubing
Ratcheting Head Designs
Employing a ratcheting head allows users to make continuous, controlled rotations in tight spots without needing full 360° clearance.
Ratcheting tubing cutters advance the cutting wheel incrementally each squeeze, reducing hand repositioning and minimizing wobble against the pipe.
Compact ratchet models fit close to walls and inside cabinets, offering predictable depth control and smoother scoring action than fixed-body alternatives.
Users benefit from faster cuts, reduced burrs, and less risk of crushing softer copper.
Maintenance is straightforward: keep the mechanism clean and lubricated, replace worn wheels, and choose a model sized appropriately for the pipe diameter and available clearance.
Using a Mini Rotary Tool (Dremel) for Flush Cuts
Using a mini rotary tool fitted with a cutoff wheel allows precise, flush cuts when space prevents a pipe cutter or hacksaw from reaching the joint.
The tool permits controlled scoring and incremental removal of copper, minimizing vibration and heat transfer when used briefly and with light pressure.
Protective gear, flood cooling or intermittent pauses, and steady hands reduce burrs and distortion.
A backing shim protects the wall and supports the pipe.
Final debur and inspection make certain a clean joint for soldering or compression fittings.
- Select a thin cutoff wheel
- Secure the workpiece
- Use short, gentle passes
- Cool frequently
- Deburr and inspect
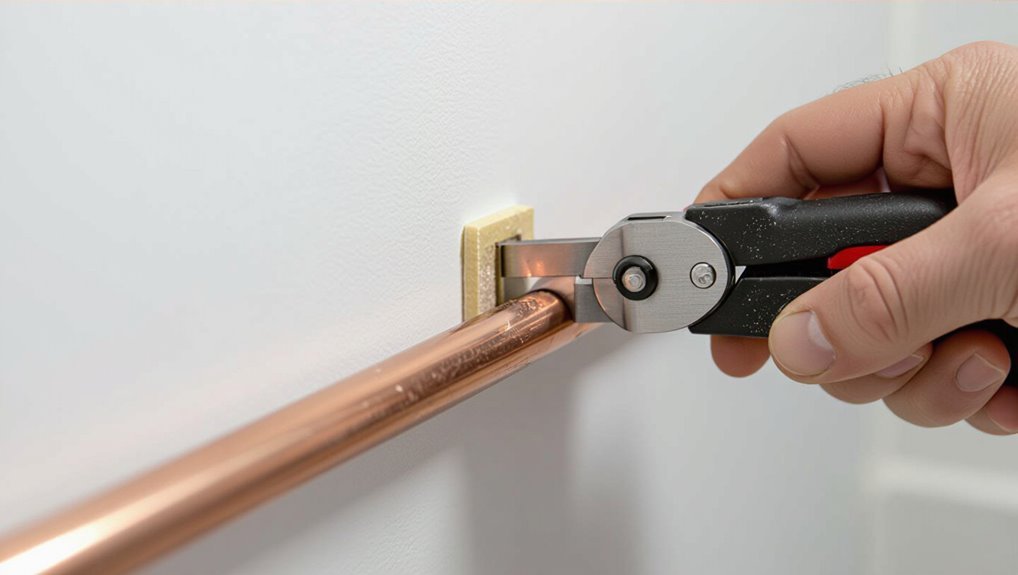
How a Ratcheting Pipe Cutter Works Behind a Wall
A ratcheting pipe cutter operates by advancing a compact cutting wheel incrementally around the pipe with a spring-loaded jaw and a ratchet mechanism, allowing tight, behind-the-wall access without a full rotation clearance.
The tool clamps in place; each squeeze turns the wheel slightly, scoring and penetrating the copper progressively.
Its low profile and short stroke let the operator work from an access panel or small opening.
Consistent pressure and repeated ratcheting produce a clean, square cut without metal shaving scatter.
Blade replacements are simple; maintenance involves cleaning and occasional lubrication to preserve the ratchet action and cutting edge.
Score, Snap, and Break Method for Flush Cuts
Several quick, shallow scores made around the circumference will weaken the copper enough for a clean snap and break flush with the wall. The technique relies on controlled scoring, steady pressure, and a levering action to separate the tube without crushing or deforming it. Suitable for accessible short stubs, it minimizes tool bulk and preserves nearby fittings.
- Use a sharp utility knife or scoring wheel for consistent grooves.
- Rotate the pipe while scoring to maintain even depth.
- Score until a visible groove but avoid full cuts.
- Apply firm, even bending force at the score line.
- Deburr the edge after snapping.
Bolo and Plumber’s Tong Tricks for Hidden Cuts
For tight, hidden stubs where conventional cutters can’t reach, the bolo and plumber’s tong methods offer compact, leverage-based alternatives that let a technician sever copper with minimal access and distortion.
The bolo uses a short, sharp blade mounted between jaws; the technician positions it against the pipe and squeezes to score repeatedly, then twists to break the section. Plumber’s tongs grip and rotate a scored line, concentrating force to shear the metal.
Both require steady support, progressive scoring, and deburring afterward. They work best on uninsulated, clean copper; avoid excessive crushing and ream the bore before fitting.
Cutting Insulated or Coated Copper Pipe Near a Wall
When cutting insulated or coated copper pipe close to a wall, the installer first measures and marks the cut line precisely to preserve fit and insulation length.
Care is taken to protect the insulation or coating with tape or padding so the exterior remains intact during cutting.
A suitable cutting tool—such as a fine-tooth hacksaw, tube cutter designed for coated pipe, or oscillating multi-tool with a metal blade—is chosen to make a clean cut without crushing or fraying the covering.
Measure And Mark Precisely
During preparation, the installer measures the exposed copper and insulation to determine the exact cut location that will leave enough bare pipe for a fitting while preserving insulation against heat loss or condensation.
The installer marks the pipe and jacket, accounting for fitting depth, wall clearance, and any compression rings; measurements are double-checked with calipers or a tape.
Marks are made with a fine-tip marker or scribe to avoid widening the cut line.
Visual inspection confirms alignment with adjacent runs and supports.
A clear, recorded measurement prevents rework and preserves insulation integrity during cutting.
- Confirm fitting insertion depth
- Account for wall clearance
- Double-check measurements
- Use fine-tip marking
- Inspect alignment and supports
Protect Insulation And Coating
To prevent damage to insulation and external coatings while cutting copper pipe close to a wall, the installer isolates the work area with protective barriers and secures the jacket away from the cut line; foam pads, thin plywood shields, or folded cloth placed between the tool and insulation keep blades and wheels from abrading the jacket.
The installer temporarily peels or splits removable insulation back a short distance, fastening it with tape or clamps to expose only the bare pipe at the cut. After scoring, a gentle support under the pipe prevents crushing.
Once cut, burrs are removed and the insulation is realigned and sealed to restore thermal integrity.
Use Right Cutting Tool
Select a cutting tool matched to pipe diameter, wall thickness, and the presence of insulation or coatings to guarantee a clean cut without damaging surrounding materials.
The writer recommends evaluating access and finish requirements, then choosing a tool that minimizes vibration and heat transfer.
For painted or insulated sections, non-abrasive cutters preserve coverings.
Compact tools suit tight clearances; larger saws fit exposed runs.
Proper tooling reduces burrs, deformation, and rework, improving joint integrity and safety near walls.
- Tubing cutter for small diameters
- Mini hacksaw for confined gaps
- Reciprocating saw with fine blade
- Rotary cutter for coated pipe
- Angle grinder with guard
How to Avoid Nicking or Flattening the Pipe
Carefully preventing nicks or flattening requires steady support and the right cutting path; a pipe should be secured without crushing and cut with consistent, light pressure to avoid deforming the tubing. The writer recommends using a padded clamp or a jaw protector, rotating the cutter evenly, and avoiding excessive torque. Support close to the cut point prevents pinching. Inspect the blade and replace dull wheels. If access is tight, use a compact tubing cutter or a thin hacksaw blade guided by a protective sleeve. Final light sanding corrects minor marks without changing shape.
| Tip | Tool | Action |
|---|---|---|
| Support | Padded clamp | Stabilize near cut |
| Protect | Jaw protector | Prevent crush |
| Pressure | Light, even | Rotate cutter |
| Blade | Sharp wheel | Replace when dull |
| Tight space | Slim cutter | Use sleeve guide |
Cutting Technique for Clean, Burr‑Free Edges
When aiming for a clean, burr-free edge on copper tubing, the cutter should be advanced in small, consistent increments while the workpiece is rotated steadily to keep the wheel tracking true; this minimizes deformation and prevents the wheel from digging in. The operator uses steady pressure, checks alignment frequently, and avoids over-tightening. A final gentle scoring pass guarantees a uniform kerf before separation.
Attention to tool condition and stable support reduces irregularities.
- Maintain steady, light pressure
- Rotate pipe evenly each increment
- Inspect cutter wheel for wear
- Support pipe close to the cut
- Use consistent cutting rhythm
Deburring and Reaming When Space Is Limited
When access is constrained by a nearby wall, choosing compact deburring tools becomes essential to remove sharp edges without damaging the surrounding surface.
Short‑reach reamers and angled deburring files enable consistent chamfers inside the pipe mouth where a full‑length tool will not fit.
The following section compares common limited‑space tools and offers technique tips for clean, safe reaming in tight quarters.
Limited-Space Deburring Tools
In tight quarters where a standard deburring tool cannot fit, specialized limited-space deburring tools provide compact blades, offset heads, or right-angle profiles to remove burrs and ream pipe ends without damaging nearby surfaces.
These tools prioritize access and control: low-profile cutters, pivoting deburrers, and mini reamers shorten reach while preserving cut quality. Materials and blade geometry resist clogging and guarantee smooth edges.
Proper selection reduces risk of scratching walls or fittings. Maintenance and careful rotation yield consistent results.
When space is constrained, choosing the right limited-space tool simplifies finishing and prepares joints for reliable connections.
- Low-profile rotary deburrers
- Right-angle blade heads
- Pivoting micro-reamers
- Replaceable compact blades
- Non-marring protective collars
Short-Reach Reaming Techniques
Often overlooked, short-reach reaming techniques enable clean, burr-free copper pipe ends where tools must operate inches from a wall or fitting. The approach uses compact reamers, stubby deburring bits, or modified files to remove inner and outer burrs without rotating large handles.
Tips include supporting the pipe to prevent distortion, using light, controlled strokes, and rotating the tool in both directions to clear swarf. For powered options, employ right-angle adapters and low-speed settings.
Inspect with a flashlight and flexible mirror. Proper flare and chamfer prevent leaks and guarantee reliable solder or compression connections in confined spaces.
Choosing a Fitting for a Near‑Wall Repair
For a near‑wall copper repair, selecting the right fitting centers on space constraints, joint type, and long‑term access; choices that minimize protrusion and permit reliable sealing are prioritized.
The installer evaluates available clearance, whether a soldered, brazed, or compression joint is feasible, and future serviceability.
Low‑profile elbows, slim couplings, and offset fittings reduce wall interference.
Material compatibility and corrosion resistance guide selection.
Ease of alignment and ability to achieve a clean joint without damaging surrounding finishes are considered.
Proper measurement and trial fit prevent rework and guarantee a durable, leak‑free repair.
- Low‑profile elbows
- Slim couplings
- Offset fittings
- Corrosion‑resistant materials
- Serviceability considerations
Push‑Fit Fittings When Soldering Isn’t Possible
When access or fire‑safety limits prevent soldering, push‑fit fittings provide a reliable, low‑skill alternative that seals quickly without heat or special tools.
They slip onto cleaned, deburred copper and lock via internal O‑rings and stainless steel teeth, creating an immediate watertight joint.
Installation requires measuring, square cutting, and fully inserting the pipe to the fitting’s depth mark.
Push‑fit fittings are reversible—many allow removal with a sleeve tool—so adjustments are straightforward in confined spaces.
They suit repairs where flame is prohibited or access limits the use of torches, offering speed and safety while meeting most residential plumbing codes.
Crimp vs. Compression Fittings in Tight Locations
The comparison between crimp and compression fittings focuses on practicality in confined spaces.
Crimp fittings are praised for their low profile and quick, reliable installation with a crimp tool. Compression fittings can be bulkier and require more clearance and torque, which often complicates use close to a wall.
Crimp Fitting Advantages
Offering a smaller footprint and faster installation, crimp fittings frequently outperform compression fittings in confined spaces where access and clearance are limited. The crimp method requires less rotation and minimal hand clearance, enabling quicker joins near walls or in cabinets. Reliability stems from uniform crimps created by calibrated tools, reducing leak risk when executed correctly. Durability is enhanced by corrosion-resistant rings and consistent compression. For retrofit or tight new installations, crimp systems reduce job time and tool maneuvering while maintaining professional performance.
- Compact hardware profile
- Faster single-step joining
- Consistent, tool-controlled seals
- Lower torque and clearance needs
- Good long-term corrosion resistance
Compression Fit Challenges
Navigate tight spaces with care: compression fittings demand different considerations than crimp systems, especially near walls or inside cabinets.
A compression nut and ferrule require room to access and tighten; limited clearance can prevent proper seating, risking leaks.
Crimp rings need a crimping tool that also demands clearance, but often less rotational space than a wrench.
In tight locations, measuring for added straight length and choosing low-profile nuts helps.
Cutting squarely and deburring remain critical for both.
When access is minimal, consider alternative joints or repositioning the pipe rather than forcing fittings that cannot be reliably tightened.
Install a Repair Coupling In Place (Step‑By‑Step)
Before fitting the coupling, confirm the pipe ends are clean, square, and free of burrs so the repair will seal properly. The technician measures insertion depth, marks both pipes, and slides coupling halves into position. Compression nuts or crimp sleeves are aligned; components are tightened evenly to manufacturer torque. After seating, the assembly is inspected for alignment and clearance from the wall. Pressure testing follows per local code before restoring finishes.
- Verify parts match pipe diameter and material
- Deburr with a proper tool for smooth edges
- Align so flow remains unobstructed
- Tighten incrementally and evenly
- Test for leaks under pressure
How to Solder a Connection Flush to the Wall
When soldering a copper connection flush to a wall, the technician prioritizes access, heat control, and contamination prevention to guarantee a reliable joint without damaging surrounding materials. He prepares by cleaning with emery cloth, applying flux sparingly, and using a heat sink or wet rag between the joint and the wall. A compact torch and steady motion make certain even solder flow. After cooling, excess flux is wiped away to prevent corrosion. Final inspection checks for full capillary fill and leak-free pressure testing. Risky drywall or wiring concerns are deferred to the next subtopic.
| Tool | Purpose |
|---|---|
| Emery cloth | Clean pipe |
| Flux | Promote solder flow |
| Torch | Heat source |
Prevent Heat Damage to Drywall and Nearby Wiring
Protecting drywall and nearby wiring requires minimizing heat transfer and isolating combustible materials; the technician uses heat shields, fire-rated blankets, and wet towels to block radiant and conductive heat while keeping a safe working distance from electrical runs. The approach emphasizes planning: identify cable routes, clear insulation, and cover surfaces before applying a torch or heat tool. Monitor temperatures with an infrared thermometer and cool areas progressively. Maintain ventilation to disperse heat and fumes. After work, inspect wiring and wall finishes for scorching or melting and document any repairs needed.
- Use a metal heat shield between torch and wall
- Drape fire-rated blanket over nearby surfaces
- Wet towels on exposed drywall edges
- Keep 6–12 inches clearance from wiring bundles
- Monitor surface temperature with IR gun
Temporary Fixes to Stop Leaks While You Prepare
Before cutting, the homeowner should stop active leaks with a temporary clamp or an epoxy putty patch to prevent water damage.
A pipe clamp provides an immediate mechanical seal, while epoxy putty can form a watertight bond on clean, dry metal.
Both fixes are short-term measures meant only to buy time until the pipe can be properly cut and repaired.
Temporary Pipe Clamps
Clamp a leaking copper joint temporarily to halt water flow while preparations for a proper repair proceed. A temporary pipe clamp provides immediate containment, using a rubber gasket and metal band to compress the leak point. It should be sized correctly, tightened evenly, and checked for continued seepage. Clamps are a stopgap; they permit safe cutting, drying, and soldering later. Remove corrosion before fitting and avoid over-tightening that can damage the pipe. Monitor the clamp and replace with a permanent soldered coupling or compression fitting as soon as practical.
- rubber gasket seats the leak
- correct clamp sizing
- even tightening torque
- inspect for seepage
- remove before permanent repair
Epoxy Putty Patches
When applied directly to a cleaned, dry section of copper pipe, epoxy putty creates an immediate, hand-moldable patch that can stop small leaks long enough to arrange a permanent repair.
The putty bonds to metal, cures to a firm, water-resistant mass, and resists pressure typical in domestic supply lines for short durations.
Preparation matters: remove corrosion and oil, roughen the surface, and follow manufacturer mix and cure times.
Epoxy patches are temporary; monitor the repair and depressurize the system before cutting or replacing the pipe.
For larger breaches or constant high pressure, use a proper clamp or replace the fitting.
How to Test Your Connection for Leaks Afterward
After reassembling the fitting and restoring water pressure, the installer should carefully inspect the joint for signs of leakage by observing for steady drips, wetness, or corrosion over several minutes and then again after an hour under normal load.
The procedure includes visual checks, tactile assessment, and pressure observation to confirm integrity.
Any dampness, staining, or sound of escaping water indicates attention is needed.
For systematic verification, perform the following:
- Visually scan the joint and surrounding fittings.
- Feel for moisture with a dry paper towel.
- Monitor pressure gauge for drops.
- Recheck after temperature changes.
- Inspect again the next day for slow leaks.
Rescue Tips for a Botched Cut or Crushed Pipe
When a cut goes wrong or a section of copper is crushed, the first priority is to assess the damage quickly to determine whether the pipe can be salvaged.
Small nicks or pinholes may be repaired with solder, a compression sleeve, or a repair coupling, while severe cracks or flattened sections typically require cutting out and replacing the damaged length.
The decision to repair or replace should weigh the extent of deformation, accessibility, and the long-term reliability of the fix.
Assess Damage Quickly
How can one quickly determine whether a botched cut or crushed copper pipe requires a minor patch or a full section replacement? A rapid, focused assessment saves time and prevents escalation.
Visual inspection, tactile evaluation, and pressure checks reveal severity: small pinches or shallow kinks may be contained; splits, deep gouges, or leaks under pressure signal extensive compromise.
Consider nearby fittings, accessibility, and corrosion that worsen outcomes.
Document findings and isolate water before proceeding. Use measured judgment to plan intervention, avoiding assumptions about integrity.
- Inspect for visible cracks or metal deformation
- Feel for soft spots or sharp edges
- Test under low pressure briefly
- Check proximity to joints and fittings
- Note any corrosion or discoloration
Repair Or Replace
Having assessed the damage, the decision to patch or replace a damaged copper pipe hinges on the extent of metal deformation, location relative to fittings, and access for repair.
Minor nicks or hairline cracks away from joints suit soldered or compression sleeve repairs; clean, flux, and braze or fit a properly sized compression coupling.
For crushed sections, consider cutting back to sound copper and installing a slip coupling or replacing the section with new pipe.
When access is limited, use push-fit fittings or remove a section of wall.
If corrosion, multiple dents, or compromised fittings exist, full replacement prevents recurring leaks.
When to Remove Drywall Instead of Cutting Blind
In tight-access plumbing, removing drywall is the better choice when visibility, alignment, or tool access cannot be achieved by cutting blind. The practitioner evaluates risk to surrounding finishes, the likelihood of a clean joint, and whether repeated attempts would cause greater damage than a controlled opening.
Removing drywall permits inspection, precise cutting, proper deburring, and easier soldering or fitting. It also reduces the chance of damaging insulation or nearby services. Reopening a small, planned hole often simplifies the repair and shortens overall labor.
- Secures clear sightlines for accurate cuts
- Allows full tool maneuverability
- Reduces accidental damage risk
- Facilitates quality joints
- Simplifies inspection and prep
Dealing With Pipe Clips, Hangers, and Nearby Studs
When working close to a wall, pipe clips and hangers dictate access and movement more than the pipe itself; their removal or temporary loosening is often required to gain the clearance needed for a clean cut and proper fitting.
Inspect clip type—screw, spring, or cushioned saddle—and note fastener locations. Support the pipe before loosening to prevent sag or joint stress.
Remove nearby screws or pry off clips gently; retain hardware for reinstallation or replace with low-profile clips if space is tight. Avoid cutting where clips secure structural attachment; instead, shift the pipe slightly and re-seat hangers to maintain alignment and pitch.
How to Cut Behind a Stud Bay Without Access Panels
Cutting copper behind a stud bay without access panels requires careful planning to avoid unnecessary wall damage and preserve pipe alignment. The technician locates pipe position with studs and fixtures, marks minimal openings, and chooses tools—rotary cutter with narrow blade or long-reach tubing cutter—that fit through small gaps.
Temporary supports prevent sagging while cutting. After the cut, burrs are removed and the joint area is inspected for leaks and alignment before sealing the wall. If access remains inadequate, selective plasterboard removal at stud edges allows controlled repair.
- Use a stud finder and small inspection mirror
- Choose low-profile cutting tools
- Support pipe during work
- Deburr and inspect immediately
- Cut minimal drywall for repairability
Measuring and Leaving Room for Solder or Fittings
Measure twice and account for fittings: leave enough straight pipe beyond the wall or obstruction to accommodate the coupling, solder ring, or compression fitting plus any pipe reaming and beveling.
The writer stresses precise measurement from the finished fitting end, not the pipe face, and recommends marking with a pencil or tape.
Include allowance for overlap depth specified by the fitting manufacturer and add 1–3 mm for reaming and chamfering.
When using elbows or escutcheons, factor their thickness.
If cutting for a stub-out, verify final fixture position before final trim.
Remeasure after any bending or adjustment to guarantee correct fit.
How to Secure Fittings If Space Prevents a Torch
Work around tight clearances by using mechanical and solvent-based alternatives to open-flame soldering.
Install compression fittings, push-fit connectors, or crimp rings to join cut copper where a torch cannot reach.
Clean pipe ends, deburr, and measure insertion depth; make certain fittings match pipe type and pressure rating.
Use flux-free push-to-connect for quick repairs, or compression nuts tightened with two wrenches to avoid twisting.
For permanent joins, consider copper-to-PEX adapters and use PEX crimp or clamp systems in the confined area.
- Push-fit (no heat) connectors
- Compression fittings with ferrules
- Crimp/clamp PEX adapters
- Press-fit copper fittings
- Threaded adapters with sealant
Common Mistakes People Make Cutting Near Walls
Often, homeowners and DIYers underestimate how little clearance is required, leading to common errors when cutting copper near a wall.
Typical mistakes include using the wrong saw or blade, causing crushed or uneven cuts; failing to properly measure or mark depth and angle; neglecting to support the pipe, which permits twisting; and omitting deburring, resulting in rough edges that hinder fittings.
Others damage surrounding surfaces by forcing tools into tight spaces or by not protecting drywall.
Rushing the job, skipping alignment checks, and ignoring inspection for hidden obstructions also create avoidable leaks and costly rework.
Cost Estimate: Tools, Fittings, and Wall Repair
In budgeting a near-wall copper pipe cut, the primary cost categories are tools, fittings, and potential wall repair; each varies with pipe size, access difficulty, and chosen method.
A basic toolset (pipe cutter, deburring tool, flux/torch or PEX crimper) can be modest; specialty offset cutters or access panels raise costs.
Fittings (couplings, elbows, solder/Sweat or push-fit connectors) depend on repair type.
Wall repair expenses hinge on drywall patching, paint, and possibly trim replacement.
Consider rental versus purchase, and whether professional labor is needed for code compliance.
- Basic tools: $15–$80
- Specialty tools: $30–$150
- Fittings: $5–$30 each
- Wall patch materials: $10–$60
- Professional services: variable, typically higher
Time Estimate for a Typical Near‑Wall Repair
For a typical near-wall copper pipe cut and repair, the total time usually ranges from 45 minutes to 3 hours depending on access, method, and whether fittings or wall patching are required. The task time breaks into discrete steps: isolate water, cut and clean, fit or braze, test, and restore wall finish. Easier access and push-fit fittings shorten duration; confined spaces, soldering, or multiple joints extend it. Allow contingency for drying or curing when adhesives or joint compounds are used. The following quick reference estimates typical durations by step.
| Task | Typical time |
|---|---|
| Shutoff & prep | 5–15 min |
| Cutting & cleaning | 10–30 min |
| Fitting/joining | 15–60 min |
| Test & restore | 15–45 min |
Tool and Material Shopping List for This Job
The next section lists the essential tools and the recommended materials and accessories for cutting a copper pipe close to a wall. It identifies must-have items like a compact pipe cutter, tubing cutter wheel, or oscillating tool, plus safety gear and flux, solder or compression fittings as options.
Quantities and brief notes on fit or size requirements will follow to help readers shop efficiently.
Essential Tools Needed
Which tools are truly necessary depends on the pipe location and cut method chosen; a concise shopping list should include a quality tubing cutter or mini-saw for tight spaces, a deburring tool or round file, a measuring tape and marker, safety glasses and gloves, and flux, solder, and a torch or press fittings if joining is required.
Essential tools focus on access, control, and safety: a compact cutter or oscillating tool for confined areas, a reamer for clean edges, accurate measuring instruments, and PPE.
Choosing durable, ergonomic tools reduces time and risk.
Typical items to acquire:
- Tubing cutter or mini-saw
- Deburring tool/round file
- Measuring tape and marker
- Safety glasses and gloves
- Reamer or round file
Materials And Accessories
When preparing to cut a copper pipe close to a wall, assemble a lean kit of materials and accessories tailored to the location and chosen cutting method: a compact tubing cutter or mini-oscillating saw, replacement blades or cutter wheels, a deburring tool or round file, a reamer, measuring tape and fine-tip marker, masking tape for wall protection, a small pry tool or basin wrench for access, safety glasses and gloves, and consumables such as flux, solder (or appropriate press fittings) and cleaning brushes if a joint will be made afterward.
Also include a flashlight or inspection mirror, rags, plastic sheeting for debris, a magnet for shavings, and a small container to catch filings.
Quick Checklist for a Safe, Successful Cut
Before cutting, confirm the workspace is clear, water supply is shut off and drained, and electricity is isolated if near wiring.
The checklist guarantees safety, precision, and readiness: inspection, correct tools, and proper supports minimize mistakes and leaks. Follow each item deliberately and verify conditions before committing to the cut.
- Verify valve isolation and relieve residual pressure.
- Choose a pipe cutter or hacksaw sized for copper.
- Protect surrounding surfaces with painter’s tape or thin guards.
- Use a flashlight and mirror for tight spaces; guarantee steady hand positioning.
- Wear gloves and eye protection; have a bucket and rags ready.
How to Restore Drywall After a Pipe Repair
After completing the pipe repair, attention turns to restoring the drywall to its original condition.
The process begins with properly patching the hole, followed by matching texture and finishing with paint to blend the repair into the surrounding wall.
Proper sanding, priming, and color-matching guarantee a seamless result.
Patch The Drywall
Once the repaired copper pipe is secure and leak-free, attention turns to restoring the drywall that was opened for access.
The opening is trimmed to neat edges, a backing or drywall patch is fitted, and joints are secured with drywall tape and joint compound.
After drying, compound is sanded smooth and a final skim coats imperfections.
Care is taken to avoid overworking corners or embedding tape.
Clean-up removes dust and loose debris before proceeding to finish work.
- Measure and cut an accurately sized patch
- Install backing for support
- Apply drywall tape neatly
- Spread thin, even joint compound
- Sand when fully dry
Texture And Paint
A consistent texture and a well-matched paint finish restore both appearance and durability to repaired drywall; achieving that requires choosing a texture that matches the surrounding surface and preparing the patched area for seamless blending. The patch is sanded feather-thin, primer applied, and texture matched—skip heavy layers. Use stipple, knockdown, or smooth finish tools to mirror existing patterns. After texture cures, apply two thin coats of matched paint, feathering edges to avoid lap marks. Allow full drying between coats and remove tape before final set to reveal a uniform repair.
| Texture Type | Application Image |
|---|---|
| Smooth | flat, seamless |
| Stipple | tiny raised dots |
| Knockdown | flattened peaks |
| Sanded | subtle grit effect |
Maintenance Tips to Avoid Future Near‑Wall Work
Regularly inspecting exposed copper lines near walls prevents many emergency near‑wall cuts later on. A brief, scheduled check identifies drips, corrosion, loose fittings, and insulation gaps before repair becomes invasive. Routine maintenance preserves access and reduces the need to cut close to finishes.
- Clean pipes and joints to reveal early leaks or pitting
- Tighten or replace marginal fittings to stop gradual failures
- Reapply or install proper insulation to prevent condensation damage
- Clear nearby debris and vegetation that can abrade or stress pipes
- Document conditions and repairs to guide future preventive actions
Variations: Pipe Sizes and How They Change Your Approach
Different pipe diameters and wall thicknesses alter tool choice, cutting technique, and clearance requirements.
Thinner-walled small-diameter tubing (¼–½ inch) allows compact cutters or precision hacksaws; care focuses on burr removal and avoiding crush.
Medium sizes (¾–1 inch) may require a ratchet-style cutter or small reciprocating saw with fine blades; support and steady rotation matter.
Large-diameter or thick-walled copper demands robust cutting wheels, mini-grinders, or tubing cutters with higher capacity; heat from sawing must be managed.
Compression fittings and soldering clearances change with size, so measurement, deburring, and fitting selection are adjusted to maintain seal integrity.
Conclusion
To summarize, the guide shows how to cut copper pipe close to a wall safely and efficiently. The reader is advised to shut off and drain water, wear proper protective gear, mark the cut precisely, and brace the pipe in tight spaces before cutting. Follow the quick checklist and drywall restoration steps to leave the area neat. With routine maintenance and the right tools, near-wall work becomes second nature — don’t throw the baby out with the bathwater.