How to Cut a Metal Pipe Like a Pro: Easy DIY Guide & Tips
To cut a metal pipe like a pro, follow these key steps:
- Choose the Right Tool: Match your cutting tool to the material, diameter, and wall thickness of the pipe. Use tubing cutters or fine-tooth saws for thin copper or PVC, abrasive wheels or bi-metal blades for thicker steel, and stainless-specific discs for stainless steel to prevent work-hardening.
- Secure the Pipe: Properly secure and support the pipe to ensure stability during cutting.
- Mark Your Cut: Clearly mark a 90° line where you intend to cut.
- Score the Pipe: Create a shallow groove along the marked line to guide your cut.
- Cut with Care: Execute the cut with a steady feed. Remember to cool the pipe if necessary and wear appropriate personal protective equipment (PPE).
- Finish the Edges: Deburr the cut edges and check the fit for any further work like welding, threading, or soldering.
By following these steps, you can achieve professional-level cuts on metal pipes with ease.
Best Cutting Method : Quick Matrix by Material & Size
Select the cutting method based on pipe material and diameter to balance speed, precision, and safety. The guide recommends: for thin-walled copper or PVC under 1″ use a tubing cutter for clean, burr-free cuts; for steel or cast iron under 1″ use a hacksaw with a fine-tooth blade or a cutoff wheel for faster work; for thicker-walled or larger-diameter steel use an angle grinder with appropriate disc, or a reciprocating saw with metal blade for confined spaces; for stainless or alloyed metals prefer abrasive cutoff wheels or band saws to reduce work hardening.
Always secure the pipe and wear appropriate PPE.
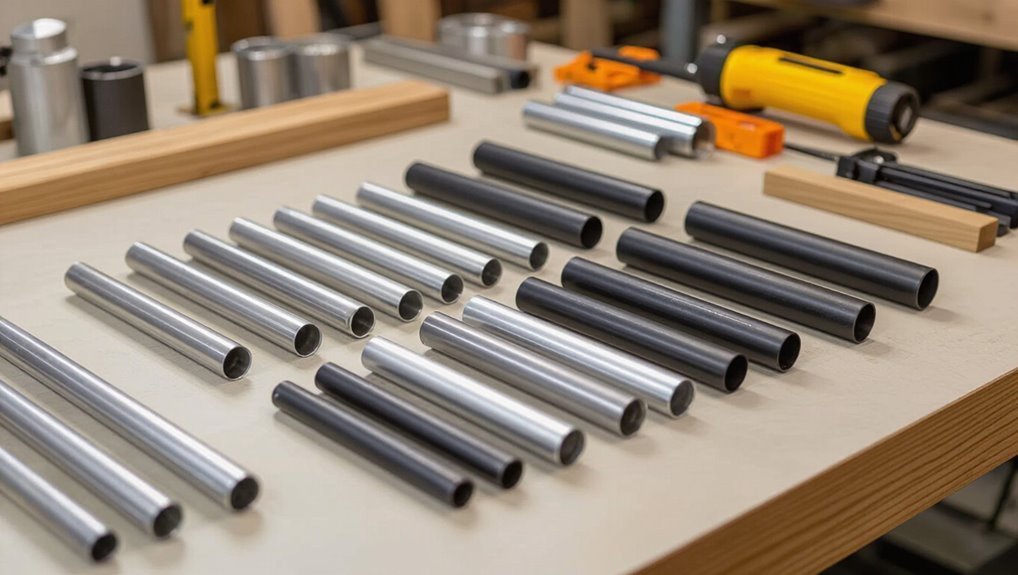
Which Pipe Materials Change Your Cutting Approach?
Different metals require different cutting strategies: carbon steel and stainless steel demand rigid blades and slower feeds, copper and brass cut cleaner with fine-toothed tools, and aluminum and thin-walled tubing call for prevention of burring and collapse.
Choice of blade material, tooth geometry, and feed rate should reflect each metal’s hardness and ductility. Safety gear and chip control practices also vary with the material to guarantee consistent, controlled cuts.
Steel Versus Stainless
Why does the choice between carbon steel and stainless steel matter when cutting pipe? Carbon steel is softer and more forgiving, allowing faster cuts with standard abrasive wheels or saw blades; sparks and heat are manageable.
Stainless steel is harder, work-hardens quickly, and demands specialized blades or abrasive discs rated for stainless, slower feed rates, and coolant or cutting oil to prevent overheating and discoloration.
Clamping must be firm for both; deburring and passivation may be needed for stainless to restore corrosion resistance.
Tool wear is higher with stainless, so expect more frequent blade changes and lower cutting speeds.
Copper And Brass
Copper and brass pipes require a gentler cutting approach than steel because their softness and ductility affect tool choice, heat management, and finish. The materials deform, gall, and clog blades if cut too aggressively; heat can soften joints and cause discoloration.
Recommended practices focus on sharp, fine-toothed blades or tubing cutters, light feed pressure, steady rotation where applicable, and periodic cooling. Deburring and polishing are vital to prevent leaks and guarantee fit. Protect plating or patina when present.
- Use fine-toothed saws or dedicated tube cutters.
- Minimize cutting speed and pressure.
- Flush or cool to control heat.
- Deburr and polish edges carefully.
Aluminum And Thin-Wall
Handle aluminum and thin‑wall pipe with lighter force and sharper blades because their low strength and thin walls increase the risk of crushing, burrs, and tear‑out.
The cutter selection favors fine-toothed saws, carbide or high-speed steel blades, and razor‑thin wheel types.
Support the workpiece close to the cut, clamp gently, and score before cutting when possible.
Use slow, steady feeds to prevent deformation; back up the cut to reduce ragged edges.
Deburr carefully with a round file or deburring tool.
For very thin sections, consider tubing cutters or slitters designed to compress minimally and produce a clean edge.
Pipe Diameter & Wall Thickness: Choosing the Right Tool
When selecting a cutting method, pipe diameter and wall thickness determine the tool’s suitability and the cut quality achievable. The writer notes that large diameters need stable supports; thicker walls require more cutting power and slower feeds to avoid burrs or heat distortion. Tool choice balances blade type, motor torque, and clamping.
Consider material hardness and access space. Proper tooling preserves roundness and guarantees square ends for joints.
- Small diameter, thin wall: tubing cutter or fine-tooth saw.
- Small diameter, thick wall: abrasive wheel or bi-metal blade.
- Large diameter, thin wall: band saw with proper fixtures.
- Large diameter, thick wall: abrasive cutoff or plasma with cooling.
Manual vs. Power Cutting: How to Decide
Choosing between manual and power cutting follows naturally from evaluating diameter, wall thickness, and material: those factors not only dictate tool capability but also influence speed, control, and safety needs.
Manual methods suit thin-walled, small-diameter pipes and tight spaces, offering greater tactile feedback and lower setup time.
Power cutting excels with large diameters, thick walls, or hard alloys, delivering faster, more consistent cuts but requiring rigid fixturing, appropriate blades, and attention to sparks and heat.
Consider operator skill, noise limits, available power, and proximity to flammable materials.
Match method to pipe characteristics and site constraints to optimize efficiency and minimize risk.
Essential Tools Pros Use to Cut Metal Pipe
A concise selection of cutting tools—from tube cutters and hacksaws to reciprocating and circular saws—frames the pro’s approach to metal pipe work.
Precise measuring and clear marking are presented as prerequisites for accurate cuts.
Appropriate safety gear, including gloves, eye protection, and hearing protection, is emphasized to prevent common jobsite injuries.
Cutting Tools Overview
Among professional metalworkers, the choice of cutting tool is dictated by pipe material, wall thickness, job speed, and required finish. The overview summarizes common tools, their strengths, and typical applications. Cutters vary from manual to powered; selection balances control, speed, and burr control. Safety and blade selection are integral. Brief comparisons help match tool to task.
- Hacksaw — low cost, precise for thin-walled pipe, slow.
- Tubing cutter — quick, clean for copper/soft alloys, limited diameter range.
- Angle grinder — fast, versatile, needs skill to minimize heat and burrs.
- Chop saw/mitre saw — efficient for repetitive cuts in ferrous metals.
Measuring And Marking
For accurate, repeatable pipe cuts, professionals rely on precise measuring and clear marking before any tool touches the metal. They use tape measures, calipers, and combination squares to record lengths, accounting for couplings and bend allowances. A scribe or fine-tip permanent marker marks cut lines; a center punch or metal awl creates starter dimples for saw blades and hole saws.
For round pipes, a strip of paper or a pipe-marking tool wraps to transfer circumference measurements and mark straight cut lines. Double-checking dimensions and clamp positions prevents costly mistakes and safeguards cuts fit assemblies without rework.
Safety Gear Essentials
Professionals always prioritize personal protective equipment when cutting metal pipe, because even controlled jobs create sparks, sharp edges, and metal shavings that can injure eyes, skin, lungs, and hearing.
Essential safety gear includes impact-rated safety glasses or a full face shield, heavy-duty cut-resistant gloves, hearing protection (earmuffs or plugs), and a respirator with appropriate particulate filters.
Proper footwear and flame-resistant clothing further reduce risk. Equipment should fit, be inspected, and be used consistently.
Workspace ventilation and a fire extinguisher complement personal gear. Following these precautions minimizes injury and maintains professional standards during metal pipe cutting.
- Safety glasses/face shield
- Cut-resistant gloves
- Hearing protection
- Respirator
Hacksaw vs. Reciprocating Saw: When to Use Each
When choosing between a hacksaw and a reciprocating saw, consider the workpiece, access, and desired finish: a hacksaw suits thin-walled pipe, tight spaces, and precise, burr-free cuts, while a reciprocating saw excels at thick-walled pipe, demolition, and fast rough cuts where speed matters more than finesse. Selection hinges on control, blade type, and noise. A hacksaw offers low vibration and fine control; a reciprocating saw provides power and versatility with proper bi-metal blades. Match tool to task: finish-sensitive plumbing uses a hacksaw; structural or retrofit cuts favor a reciprocating saw.
| Tool | Best Use | Advantage |
|---|---|---|
| Hacksaw | Thin pipe | Precise |
| Reciprocating | Thick pipe | Fast |
| Both | Tight access | Blade choice |
Using a Pipe Cutter on Steel and Copper
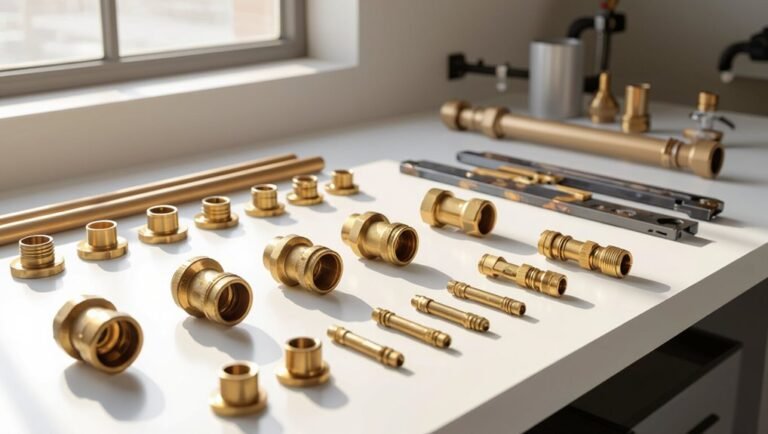
Using a pipe cutter on steel or copper requires matching the cutter type and blade to the material’s hardness and wall thickness: wheel-style tubing cutters work well for copper and thin-walled steel, while rotary or ratcheting cutters with hardened wheels are better for thicker or harder steel.
Proper technique includes securing the pipe, rotating the cutter evenly, and advancing the blade incrementally to avoid deformation.
Lubrication reduces heat and blade wear on steel.
Deburring the edge after cutting guarantees fit and sealing.
Safety goggles and gloves protect against sharp edges and chips.
- Choose cutter by material and wall thickness
- Clamp pipe securely
- Rotate and tighten gradually
- Deburr and lubricate
Angle‑Grinder Cuts: Technique and Wheel Selection
When using an angle grinder on a metal pipe, the article outlines how to choose the correct wheel type—cutting discs for quick cuts, abrasive wheels for general steel, and diamond or thin‑cut wheels for precision.
It then explains proper cutting technique, including secure clamping, correct wheel angle, controlled feed, and minimizing heat build‑up.
Finally, a concise safety gear checklist covers eye and ear protection, gloves, a face shield, flame‑resistant clothing, and a clear work area.
Wheel Type Selection
Which cutting wheel suits a given metal pipe depends on the pipe’s material, wall thickness, and the desired finish. The writer recommends matching wheel type to metal: thin abrasive discs for mild steel, reinforced cutting wheels for thicker sections, stainless‑specific wheels to reduce contamination and grinding wheels when minor shaping follows cutting.
Consider wheel diameter and RPM rating; larger wheels cut faster but demand appropriate guard and tool power. Use proper bond hardness for heat control. Inspect wheels for damage and select coated or bonded types based on finish needs.
- Material compatibility
- Thickness rating
- RPM and size
- Surface finish
Proper Cutting Technique
Begin cuts with a steady, controlled stance and a clear plan for the cut line to guarantee consistent contact and avoid wandering. The grinder should be held with both hands, maintaining a firm but not rigid grip. Start the wheel at low speed against the pipe to create a shallow groove, then increase pressure evenly until the cut progresses.
Keep the wheel perpendicular to the pipe for a straight cut or at the planned bevel angle for chamfers. Use smooth, continuous motions; avoid forcing the tool. Pause periodically to let the wheel cool and inspect the cut for alignment and wheel wear.
Safety Gear Checklist
A concise safety-gear checklist for angle-grinder cuts guarantees that the operator is protected from flying sparks, abrasive dust, and accidental contact with the wheel.
The operator should select PPE matching the task and wheel type, inspect gear before use, and maintain clear workspace boundaries.
Proper fit and condition reduce injury risk and improve control during technique-sensitive cuts.
- Safety glasses with side shields plus full-face shield for high spark exposure.
- NIOSH-rated respirator or P100 filter for metal dust and fumes.
- Cut-resistant gloves and leather apron to guard against sparks and burrs.
- Hearing protection and sturdy closed-toe footwear.
Bandsaw & Chop Saw: Safe, Accurate Shop Cuts
For precise, repeatable metal pipe cuts in a controlled shop environment, bandsaws and chop saws provide the best combination of accuracy and safety when set up correctly.
Operators should secure pipe with appropriate vise or clamping fixtures, use blade types rated for metal, and confirm blade speed and coolant where applicable. Mark cuts and support long stock to prevent binding.
For chop saws, employ a cutoff wheel guard and avoid side pressure; for bandsaws, feed steadily and clear chips.
Inspect blades for wear, wear eye and hearing protection, and follow machine lockout and maintenance procedures to reduce kickback and fire risk.
Plasma Cutting Basics for Thin and Thick Pipe
When cutting metal pipe, plasma torches offer a fast, versatile method suitable for thin wall tubing and thicker sections when set up correctly. Operators should select amperage and nozzle size to match material thickness, maintain correct torch height, and use proper shielding to control dross.
Edge quality improves with steady travel speed and perpendicular torch angle; thicker pipe may require beveling passes. Safety gear — eye protection, gloves, and grounded work clamps — is essential. Ventilation prevents fume buildup. Consumable condition and clean surfaces affect arc stability and cut consistency.
- Match amperage to thickness
- Maintain correct torch height
- Use steady travel speed
- Assure proper safety and ventilation
Tubing Cutters for Small‑Diameter Pipe
For small‑diameter pipe, selecting a tubing cutter matched to the material and wall thickness guarantees clean, square cuts without crushing the tube.
Proper technique—secure clamping, incremental tightening, and smooth rotation—minimizes burrs and distortion.
Regular blade inspection and lubrication prolong tool life and maintain cut quality.
Choosing The Right Cutter
Which cutter best suits small‑diameter metal pipe depends on tube material, wall thickness, and finish requirements. Selection favors compact tubing cutters with hardened wheels for copper and brass, ratcheting cutters for stainless or thicker walls, and mini rotary cutters for tight spaces. Consider cutting wheel replacement, grip ergonomics, and burr control. Portable power tools may be excessive for delicate jobs. Match cutter capacity to outer diameter and verify adjustment range. Maintenance and blade quality determine repeatability and edge quality.
- Material compatibility
- Wall thickness range
- Wheel replaceability
- Tool ergonomics
Cutting Technique And Care
Centered on control and consistency, proper cutting technique with tubing cutters for small‑diameter metal pipe minimizes burrs, ovalization, and miscuts by combining correct tool setup, steady rotational motion, and incremental wheel pressure.
The cutter must be aligned square to the pipe, wheel centered on the targeted mark. Rotate the tool smoothly, advancing the wheel a small quarter‑turn after several revolutions to avoid gouging.
Maintain even clamping force; excessive tightening deforms the tube. After the cut, deburr the ID and OD with a reamer or file to guarantee a clean fit.
Inspect for roundness and adjust technique if distortion appears.
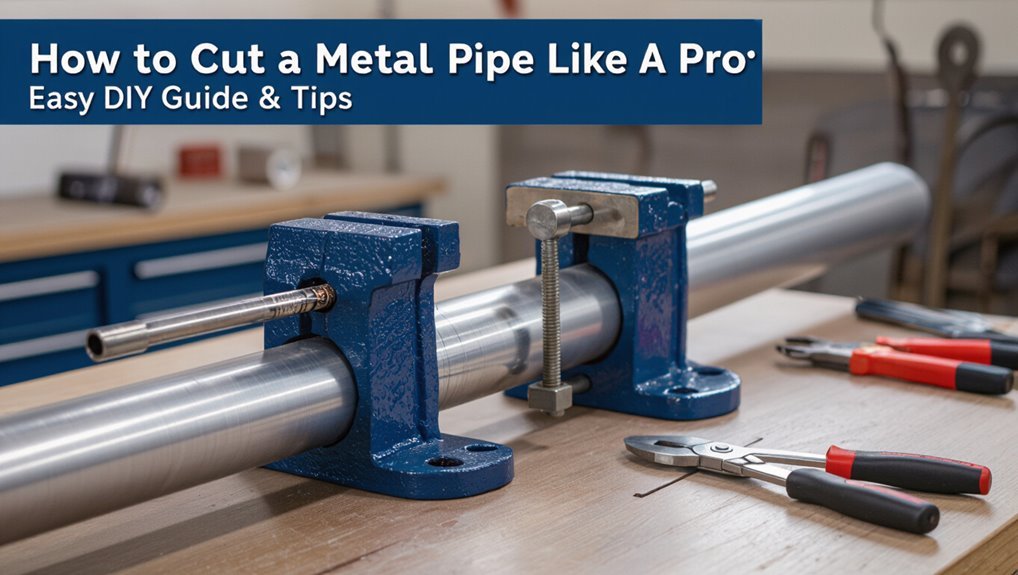
Clamping and Supporting Pipe to Prevent Movement
When cutting a metal pipe, securing it firmly is essential to prevent rotation, vibration, or sudden movement that can cause uneven cuts or injury. The pipe should be supported near the cut and at both ends when long; use a vise with padded jaws or adjustable pipe clamps to avoid marring.
For round or irregular shapes, use V-blocks, sacrificial timber, or strap clamps to distribute pressure evenly. Guarantee clamps do not obstruct the cutting path. Check stability after each tool pass and re-tighten as metal warms. Use additional supports for heavier sections to maintain alignment and safety.
- Choose appropriate clamp type
- Pad contact points
- Support both sides of cut
- Re-check tightness
Marking and Measuring for Straight, Square Cuts
Before cutting, the pipe should be measured carefully to follow the “measure twice, cut once” rule.
A pipe square is used to transfer a true 90° line around the circumference.
Final marks are scored with a scribe to create a clear cutting guide.
Measure Twice, Cut Once
Accurate measuring and careful marking are the foundations of a clean metal pipe cut, since even small errors translate into poor fit or wasted material. The craftsman verifies measurements twice, aligns reference points, and marks with a fine-tip marker or scribe. Compensation for saw blade kerf or burr removal is noted. Clamps stabilize the pipe to prevent movement during cutting. Visual checks guarantee marks are straight around the circumference.
- Measure length, record it, re-measure from the same reference.
- Mark clearly at multiple points around the pipe.
- Account for blade kerf before final mark.
- Clamp and re-check alignment.
Use A Pipe Square
A pipe square provides a quick, reliable reference for transferring a perpendicular line around the circumference, ensuring cuts land square to the pipe axis.
The tool seats against the pipe’s edge; its blade traces a consistent ninety-degree mark while rotating the pipe.
For accuracy select a square sized for the pipe diameter or use adjustable models that clamp. Confirm alignment visually and with calipers if tight tolerances matter. Light pencil or marker strokes suffice; avoid deep gouges that affect fit.
Stabilize the pipe and recheck the line before cutting. Proper squaring reduces filing, improves joint contact, and speeds finishing.
Mark With Scribe Lines
After transferring a ninety-degree reference with the pipe square, the next step is to scribe clear layout lines that will guide the cut.
The handler secures the pipe, aligns a fine-tip scribe or sharp metal marker at the square’s edge, and rotates the pipe slowly to score a continuous ring.
Consistent pressure guarantees one visible groove, preventing drift when cutting.
Check the line for accuracy with the square before proceeding.
Lightly deburr the scribed edge so the saw or wheel seats properly.
Follow these priorities:
- Secure pipe firmly.
- Use a fine, sharp scribe.
- Rotate evenly for a continuous line.
- Verify squareness before cutting.
Making Precise Mitered and Curved Pipe Cuts
When joining pipes at angles or around contours, achieving clean mitered and curved cuts is essential for fit, strength, and appearance; this requires careful layout, correct tooling, and steady control during cutting.
Layout begins with accurate templates or bevel gauges to transfer compound angles. For mitered joints, mark relief cuts and use a mitre saw or angle grinder with a thin abrasive wheel for controlled removal; finish with a file to square edges.
For curved or saddle cuts, employ a pipe notcher, rotary tool with cutting disc, or careful coping with a hacksaw, followed by deburring and test fitting before final assembly.
Cutting Threaded Pipe Without Damaging Threads
When cutting threaded pipe, care must be taken to protect existing threads from burrs and deformation.
A threaded pipe vise or soft-jaw clamps hold the pipe securely without crushing the threads, and protective caps or tape can shield exposed ends.
After cutting, threads should be cleaned and, if necessary, recut with a die to restore a proper fit.
Protecting Existing Threads
A pipe’s existing threads must be preserved to guarantee a proper seal and avoid costly repairs; protecting them while cutting requires simple precautions and the right tools. Caps, tape, and guards shield threads from blade nicks, deformation, and metal shavings.
Measure and mark the cut line away from threaded ends; clamp gently to avoid crushing. After cutting, deburr the cut end without contacting threads. Inspect threads visually and with a thread gauge; replace only if damaged beyond repair.
- Use protective caps or PTFE-covered plugs
- Wrap threads with high-density tape
- Mark clear cut line away from threads
- Deburr carefully without touching threads
Using Threaded Pipe Vise
After protecting the threads with caps or tape, using a threaded pipe vise holds the workpiece securely while preventing damage to the male or female ends.
The vise seats the thread profile into matching jaws or a split collet, distributing clamping force across threads instead of crushing them.
Align the cut mark between jaws, tighten gradually, and check for rotation or slippage.
Use short, controlled cuts and support the pipe to reduce vibration.
Periodically back off the cutter to clear chips.
When finished, loosen the vise evenly to avoid binding.
Proper vise use preserves thread integrity for immediate assembly.
Finishing And Recutting Threads
Having completed the cut, the technician inspects and restores the thread profile with a die and file, taking care to remove burrs without altering pitch or chamfer.
The pipe end is cleaned, deburred internally and externally, and checked against a mating fitting. Light lubrication prevents galling during recutting; the die is aligned squarely and advanced with steady turns, reversing periodically to clear chips.
Final filing corrects minor nicks while preserving thread depth. A thread gauge verifies fit; excessive damage prompts replacement or a repair sleeve. Proper technique guarantees leak-free joints and extends pipe service life.
- Clean and deburr
- Lubricate die
- Align and cut square
- Verify with gauge
Deburring and Finishing Edges for Leak‑Free Joints
Typically, clean, properly finished pipe edges are essential for reliable, leak-free joints. Burrs and sharp edges prevent seals seating and can gouge fittings. Remove internal and external burrs with a deburring tool, file, or rotary stone, then inspect for nicks. Lightly chamfer the OD and ID to ease insertion and avoid over‑removal that shortens engagement. Clean filings and oil before assembly and test-fit components. For consistent results, follow these quick checks:
| Task | Purpose |
|---|---|
| Deburr ID/OD | Secure seal integrity |
| Chamfer edges | Ease assembly |
| Clean surface | Secure proper sealing |
Protecting Adjacent Surfaces and Coated Pipes
When cutting a metal pipe, care must be taken to protect nearby surfaces from scratches, sparks, and debris by using barriers or masking.
The installer should also preserve any factory coatings or paint by using non-abrasive supports and minimizing heat buildup during cutting.
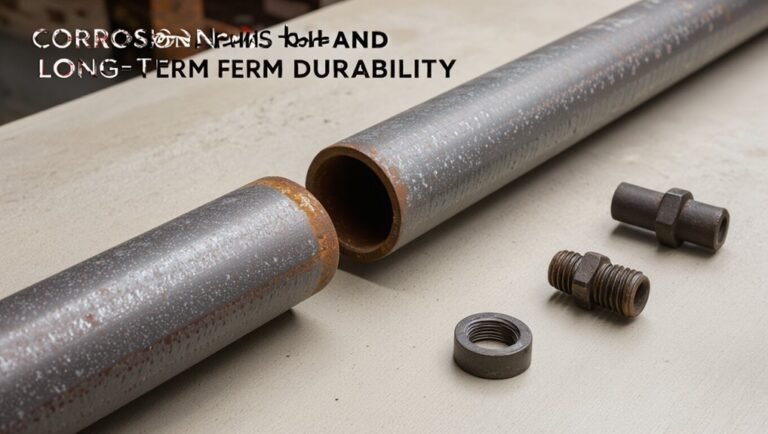
Proper preparation and gentle handling reduce the need for touch-up and prevent corrosion at the cut edge.
Protecting Nearby Surfaces
To prevent scratches, paint damage, or unintended cuts to nearby finishes, workers should isolate the work area and protect adjacent surfaces before cutting begins.
Use temporary barriers, remove fragile items, and plan tool access to minimize contact.
Consider surface coverings that resist sparks and debris.
Keep a tidy perimeter and communicate with others present.
- Lay down flame‑resistant drop cloths or cardboard.
- Apply painter’s tape to edges near cuts.
- Erect plywood or plastic shields for nearby walls and fixtures.
- Maintain a cleared, well‑lit work zone and inspect protections periodically.
Preserving Pipe Coatings
Protecting adjacent surfaces naturally extends to the pipe itself: preserving factory coatings, paint, or insulation prevents corrosion, maintains warranties, and reduces post‑cut repairs.
Before cutting, mark cut zones and remove only necessary coating with a utility knife to avoid jagged edges. Mask adjacent areas with high‑temperature tape or silicone protectors.
When heat from a torch or grinder is used, shield surrounding coatings with wet rags or heat blankets.
After cutting, smooth burrs and touch up exposed metal with primer and compatible coating or rust inhibitor. Document warranty requirements and follow manufacturer curing times for restored protection.
Required PPE for Metal Pipe Cutting
Adequate personal protective equipment (PPE) is essential for anyone cutting metal pipe, because sparks, sharp edges, flying fragments, and loud noise present immediate hazards. The writer recommends selecting gear rated for metalwork: impact-resistant safety glasses or a full face shield, cut-resistant gloves, hearing protection, and flame-resistant clothing.
Respiratory protection should match the task—dust masks for grinding, respirators for fume-producing processes. Footwear must be steel-toed and non-slip. Inspect PPE before use, replace damaged items, and guarantee proper fit. Proper PPE complements safe techniques and reduces injury risk during cutting operations.
- Safety glasses/face shield
- Cut-resistant gloves
- Hearing protection
- Respirator or dust mask
Reducing Heat and Warping During High‑Speed Cuts
When cutting metal at high speed, heat concentrates quickly at the kerf and can cause localized softening, scale, and dimensional change; minimizing thermal input and removing heat during the cut are consequently essential to prevent warping.
Operators should select appropriate blade or wheel types and feed rates to reduce frictional heating.
Use intermittent cutting, pecking motions, or slower passes on thick sections.
Apply coolant or cutting fluid directed at the cut zone, or employ wet cutting methods when compatible.
Clamp workpieces to dissipate heat and maintain alignment.
Allow parts to cool between passes and inspect for distortion before proceeding.
Cutting in Tight or Overhead Spaces Safely
In confined or overhead locations, cutting metal introduces unique hazards—limited access reduces control over tools, increases the risk of falling debris, and can expose workers to sparks, fumes, and awkward body positions. Work planning should minimize time overhead, use right‑angle or compact tools, and prioritize secure footing or scaffolding.
Ventilation and respiratory protection reduce fume exposure; eye and face protection guard against sparks. Clamp the pipe firmly and provide tag lines for dropped pieces. Use slow, controlled cuts and keep bystanders clear.
- Assess access and stabilize platform
- Choose compact, low‑kickback tools
- Use ventilation and PPE
- Secure work and control debris
Cutting Long Runs of Pipe Efficiently
For long runs of metal pipe, efficient cutting depends on planning, consistent measuring, and using tools and workflows that minimize repositioning and waste.
Workers should lay out full lengths, mark all cut points with repeatable templates, and sequence cuts to reduce stock handling.
Use a cutoff saw or miter saw with an appropriate blade for repetitive, fast cuts; portable band saws with roller supports work where fixed machines aren’t feasible.
Employ rollers, stands, or clamps to stabilize pipe and prevent movement.
Batch cuts to the same length, inspect blade wear periodically, and collect scrap for accurate material accounting and minimal rework.
Best Practices for Cutting Galvanized or Coated Pipe
Treat galvanized and coated pipe with care to preserve the protective finish and prevent hazardous dust or fumes during cutting. The operator should minimize heat and abrasion, use proper PPE (respirator, gloves, eye protection), and work in a ventilated area or outdoors.
Clamp securely to avoid crushing the coating. Deburr gently and touch up exposed metal with appropriate primer or cold galvanizing compound to prevent corrosion. When possible, choose cutting methods that generate less airborne particles.
- Use a fine-tooth blade or abrasive wheel rated for coated metal
- Cut slowly to reduce heat
- Ventilate and wear a respirator
- Apply corrosive-resistant touch-up
Common Mistakes That Ruin Cuts : And How to Avoid Them
Overheating, misalignment, dull blades, and inadequate clamping are frequent causes of poor cuts in metal piping; each error produces distinct problems—warping, uneven ends, ragged burrs, or crushed coatings—and can compound when combined.
Operators should match blade type and speed to material to prevent heat buildup. Verify alignment with a square and scribe clear cut lines. Replace or sharpen tools at the first sign of glazing. Secure pipe with proper clamps or a vise padded to protect finishes. Avoid excessive feed pressure and sudden movements. Wear PPE and inspect cut edges, addressing minor burrs with a file or deburring tool promptly.
Troubleshooting Crooked, Oversized, or Rough Cuts
Diagnose crooked, oversized, or rough cuts by systematically isolating likely causes—alignment errors, incorrect blade selection or speed, inadequate clamping, worn tooling, or improper feed technique—and inspect each element before recutting.
The operator checks fixturing first: loose clamps or misaligned guides cause wandering cuts.
Verify tool condition; dull blades and wobbling arbors produce rough edges and oversize kerfs.
Confirm machine speed and feed rate match pipe diameter and material; adjust to reduce heat and vibration.
Recut with steady, consistent feed and proper support.
Deburr and measure; if issues persist, replace consumables and re-evaluate setup.
- Secure and align workpiece
- Inspect tooling condition
- Match speed/feed to pipe
- Recut, measure, deburr
Choosing Abrasive Discs and Blades by Metal Type
When selecting abrasive discs and blades for cutting metal pipe, match the abrasive type, grit, bond, and blade tooth geometry to the specific alloy and wall thickness. The guide recommends harder abrasives and finer grits for stainless and tempered steels, coarser, tougher bonds for mild steel, and softer, non-ferrous-safe abrasives for aluminum and copper alloys. Blade speed and tooth count influence heat and burrs; choose carbide-tipped teeth for repeated cuts in thick sections. Use the table for quick reference and balance cutting speed with finish and tool life.
| Metal | Abrasive Type | Typical Grit/Bond |
|---|---|---|
| Mild steel | Zirconia/aluminum oxide | 36–60 / tough bond |
| Stainless steel | Ceramic/aluminum oxide | 60–120 / hard bond |
| Aluminum | Non-ferrous/soft abrasive | 80–180 / soft bond |
| Copper/brass | Non-ferrous/grit-focused | 80–150 / medium bond |
Preparing Cut Pipe for Welding, Soldering, or Threading
Prepare the cut pipe by removing burrs, scale, and contaminants to guarantee proper fit-up and reliable joints for welding, soldering, or threading.
Edges should be deburred with a file or flap wheel; internal burrs need reaming or a round file.
Clean surfaces with solvent and a wire brush to remove oil, rust, and cutting residue.
For welding, assure correct bevel angle and consistent root gap.
For threading, verify straightness and square cut.
For soldering, apply flux only to clean metal.
- Deburr inside and outside
- Clean and degrease
- Shape bevels/gaps
- Inspect fit-up
Simple Jigs and DIY Guides to Improve Repeatability
After proper deburring, cleaning, and beveling, repeatable cuts and joints are best achieved with simple jigs and guides that locate the pipe and constrain the cutting tool.
A clamped base with V-groove supports pipe alignment; adjustable stops set length consistently. A removable collar or guide wheel stabilizes a grinder or saw, preventing drift. For bevels, an angled template and locator block guarantee uniform angle and setback.
Fixtures may be built from hardwood, aluminum plate, or welded steel, using bolts for adjustability. Marking scales and quick-release clamps speed setup.
Regular inspection and tight fasteners maintain accuracy over multiple cuts.
When to Hire a Pro: Safety, Code, and Complex Work
Why choose a professional for certain pipe-cutting jobs? A professional offers experience with safety protocols, regulatory compliance, and complex systems.
They assess structural risks, manage pressurized or gas lines, and guarantee proper fittings and leak-free joints.
For projects involving concealed plumbing, load-bearing components, or hazardous materials, trained technicians reduce liability and prevent costly mistakes.
- Pressurized or gas lines requiring certified handling.
- Work governed by local building codes or permits.
- Structural or concealed piping where failure risks property damage.
- Corroded, contaminated, or alloyed pipes needing specialized tools.
Hiring guarantees code compliance, safety, and reliable results.
Quick Checklist: Cut Metal Pipe Like a Pro
When planning a metal pipe cut, a concise checklist keeps the job safe, accurate, and efficient: identify pipe material and diameter, verify system is depressurized and isolated, select the correct cutting tool and blade, mark the cut line and clamp securely, wear appropriate PPE, and have corrosion treatment or deburring tools ready for finishing.
Next, confirm access and work clearance, measure twice and allow for fittings or weld prep, secure proper lighting, and make certain fire prevention measures if sparks may occur.
Prepare a waste containment plan, inspect tools for damage, set a controlled cutting speed, and verify final dimensions before reinstalling.
Conclusion
To summarize, the guide equips readers with clear choices—like selecting the right tool, preparing cuts for welding or threading, and using simple jigs—so each pipe is handled safely and accurately. The DIYer who follows these tips gains confidence and repeatability, while recognizing when to call a pro for complex or code-bound jobs. Precision and safety are paired like a steady compass guiding a traveler, keeping work true and dependable.