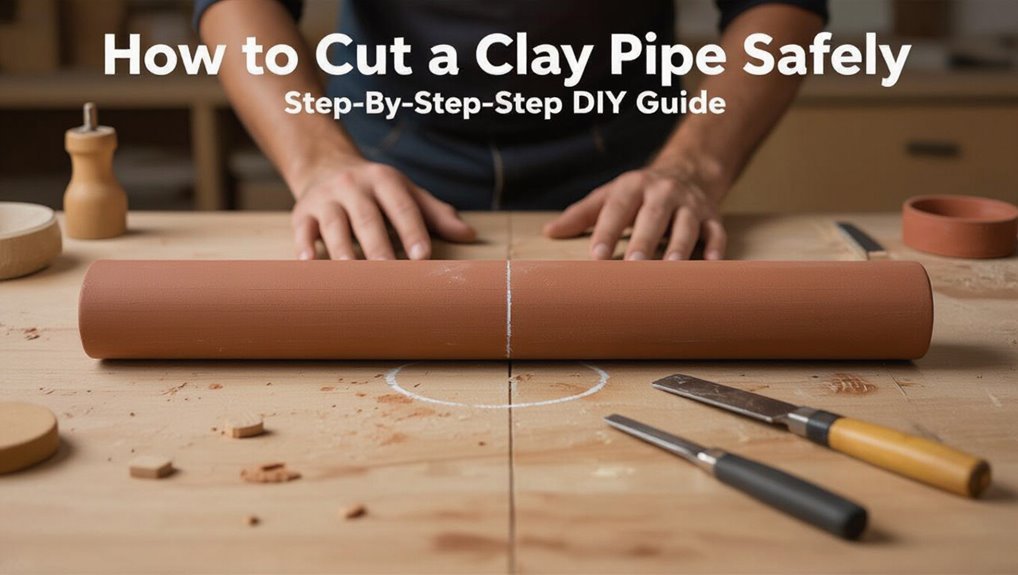
How to Cut a Clay Pipe Safely: Step-by-Step DIY Guide
Key Takeaway: Cutting a clay pipe safely involves inspecting the pipe, wearing proper personal protective equipment (PPE), and following a step-by-step process to ensure precision and safety.
To cut a clay pipe safely, start by inspecting the pipe and its surroundings for any cracks, joints, utilities, or loose bedding. It’s essential to wear the appropriate PPE, which includes a fitted respirator, safety glasses, a face shield, gloves, and hearing protection.
Next, measure twice and mark a continuous cut line on the pipe. Score the line shallowly around the pipe to guide your cut. Stabilize the pipe on padded supports, then use a chisel and mallet to split the pipe with controlled taps. After cutting, deburr and smooth the edges. Finally, dry-fit the joint and clean any dust using HEPA methods.
Following these steps ensures a safe and effective cutting process for your clay pipe.
Quick Steps: Cut a Clay Pipe Safely
Before beginning any work, gather the proper tools and safety gear — gloves, eye protection, a masonry saw or angle grinder with a diamond blade, and a dust mask — and inspect the clay pipe for cracks or nearby utilities.
Position supports to stabilize the pipe and mark the cut line with a pencil or chalk.
Score the line lightly to guide the blade.
Make slow, steady passes with the saw, allowing the tool to do the work and cooling the blade if needed.
Remove cut sections carefully, deburr the edge with a rasp or file, clean the area, and dispose of debris safely.
Tools and PPE Checklist for Clay‑Pipe Cutting
The article lists the essential cutting tools—hand saws, angle grinders with diamond blades, and pipe cutters—needed for precise clay‑pipe work.
It also outlines required personal protective equipment such as respirators, eye and ear protection, and cut‑resistant gloves.
Finally, it recommends dust control accessories including wet‑cutting attachments, HEPA vacuums, and containment sheeting.
Essential Cutting Tools
Gathering the correct tools and personal protective equipment is the first practical step in cutting clay pipe safely. Essential cutting tools include a masonry or diamond-blade angle grinder for clean, controlled cuts; a wet tile saw where available to reduce dust; a carbide-grit wheel or masonry blade for stubborn sections; a manual glass-cutting wheel for scoring small runs; a heavy-duty hacksaw with a diamond blade for tight spaces; pipe supports and adjustable clamps to secure work; a breaker chisel and cold chisel for splitting remaining sections; and a tape measure, marker, and small wire brush for pre-cut layout and cleaning.
Personal Protective Equipment
Frequently, workers prioritize tools over protection, but proper personal protective equipment (PPE) is equally essential when cutting clay pipe to guard against silica dust, flying fragments, and vibration.
The guide recommends fitted N95 or P100 respirators, impact-rated safety goggles, full-face shields for grinding, cut-resistant gloves with vibration damping, and sturdy hearing protection.
Each item reduces specific risks: inhalation, eye trauma, facial lacerations, hand injury, and noise-induced hearing loss.
Inspect gear before use, replace damaged items, and make certain correct fit.
PPE complements technique and tools, creating a defensive system that preserves health and prevents acute injuries during clay‑pipe work.
- Fear eased by clear protection
- Confidence before each cut
- Relief in reliable gear
- Calm during noisy tasks
- Assurance after inspection
Dust Control Accessories
Alongside properly fitted PPE, a set of dust control accessories completes the protective system for cutting clay pipe by actively reducing airborne silica and trapping particulate at the source.
Recommended items include a wet-cutting attachment or water-feed for saws, a vacuum with a HEPA-rated filter and a tool-mounted shroud, and disposable or washable drop sheets to contain debris.
Use clamps and local containment to limit spread.
Maintain and inspect filters and hoses; replace HEPA cartridges per manufacturer guidance.
Include replacement respirator filters in the kit.
Store accessories in a sealed container to prevent cross-contamination between jobs.
When to Cut a Clay Pipe and What Risks to Watch
When should a clay pipe be cut, and what hazards demand attention before any work begins? A professional or homeowner should cut only when repair, reroute, or removal is necessary and after confirming no active sewage flow.
Risks include brittle fractures, flying shards, dust containing silica or biocontaminants, nearby utilities, and unstable bedding. Mitigation requires scheduling, containment, PPE, and utility checks.
Emotional resonance can underscore caution and responsibility:
- The sudden snap that shatters confidence
- The choking dust that steals calm
- The worry over hidden pipes and wires
- The guilt of disrupting a home’s systems
- The relief when precautions hold
Inspect the Clay Pipe Before You Cut
Before making any cuts, the clay pipe should be inspected for surface and hairline cracks that could widen during cutting.
The inspector should note the locations of pipe joints to avoid weakening connections or cutting through seals.
Surrounding materials—soil, bedding, or nearby utilities—must be assessed to prevent collateral damage.
Check For Cracks
A thorough visual and tactile inspection identifies existing cracks or hairline fractures that can compromise the pipe during cutting. The inspector notes discoloration, runs glancing a flashlight along the surface and feeling for rough or flexible sections. Any freeze damage, previous repairs, or spidering should be recorded; fragile areas require different cutting methods or replacement. Small chips near the planned cut increase collapse risk and demand support or abandonment of the cut. Decisions balance safety, effort, and future integrity, avoiding surprises when sawing or scoring.
- Anxiety at seeing a hairline fracture
- Relief when the pipe is solid
- Frustration over hidden damage
- Caution prompted by surface flaws
- Confidence after a clean inspection
Locate Pipe Joints
Having confirmed the pipe’s soundness, the inspector next locates joints to determine safe cutting zones and avoid disturbing connections.
Visual and tactile inspection follows: clean the pipe surface, trace socket-and-spigot seams, and feel for mortar, rubber gaskets, or uneven collars.
Measure from fixtures and note orientation; mark joints clearly with a pencil or tape. Prefer cutting at least one pipe diameter away from a joint unless replacing the joint itself.
Photograph and record joint locations for reference. Identifying joints prevents loosening adjacent fittings, reduces leak risk, and guides selection of cutting method and required replacement parts.
Assess Surrounding Materials
Why is the immediate environment around a clay pipe as important as the pipe itself? A careful inspection identifies nearby materials that affect cutting safety: fragile masonry, electrical conduits, insulation, vegetation roots, and buried utilities. Noting these reduces collapse, shock, fire, or equipment damage. Assess distances, stability, and containment of dust or debris. Plan shielding, support, and alternative cutting points when hazards exist. Document findings and mark unsafe zones. Communicate risks to helpers. Proceed only when protective measures are in place and local codes are satisfied.
- Fear of collapse
- Anxiety over hidden wires
- Frustration with unexpected damage
- Relief when hazards are controlled
- Confidence to proceed
Measure and Mark the Cut Line
Before cutting, the pipe should be measured and the cut line clearly marked to guarantee a straight, snug fit. Measurements are taken twice: distance from joint and allowance for couplings. A pencil or grease marker creates a visible line; a template or square makes certain perpendicularity. The operator notes orientation and any internal obstructions before marking. Clean the surface so marks adhere. Verify with measuring tape and a spirit level if aligning to grade. Record the final measurement. Use gentle, short strokes to avoid surface chips.
| Tool | Purpose |
|---|---|
| Tape measure | Distance |
| Square | Perpendicular |
Support and Secure the Pipe to Prevent Cracking
After the cut line is scribed and confirmed, the pipe must be firmly supported to prevent movement and cracking during cutting.
The pipe rests on padded blocks or a V-block to distribute pressure; clamps secure it without concentrating stress at the cut.
Support near both sides of the cut limits vibration and prevents bowing.
Soft padding—rubber or cloth—cushions the brittle surface.
Check alignment and stability before applying cutting force; adjust supports if any shift is detected.
Careful support reduces the chance of unexpected fractures and assures a clean, controllable cut.
- Relief at steady hands
- Confidence in quiet control
- Calm despite brittle material
- Trust in careful preparation
- Satisfaction at intact edges
Score the Clay Pipe to Control the Break
The worker first marks the cut line clearly around the pipe to guide the break.
A suitable scoring tool, such as a carbide wheel or masonry blade, is used to run a single continuous score along that line.
Even, consistent pressure is maintained while scoring to promote a controlled, clean break.
Mark The Cut Line
Measure and mark a clear cut line around the clay pipe using a thin pencil or wax crayon, keeping the line level and continuous to guide the score.
The installer aligns the mark with the planned break, confirming measurements from reference points and checking rotation to maintain a straight cut.
Visibility matters—choose contrasting marks and wipe dust away so the score follows the line.
Consistent, light pressure prevents slipping while rechecking both ends ensures symmetry.
A clear guide reduces chipping and surprises during the break.
- Anxiety eased by a precise line
- Confidence in each measured turn
- Relief from unexpected fractures
- Satisfaction at a clean guide
- Calm through controlled preparation
Use A Scoring Tool
When ready, the installer uses a scoring tool to create a shallow, continuous groove along the marked line, which directs where the clay will break and reduces uncontrolled fractures. The scorer is held steady, matching the pipe’s circumference; multiple light passes are preferable to one heavy cut. Scoring depth stays shallow—just enough to weaken the surface without cracking beyond the line. Clean the groove of debris between passes. Proper scoring improves predictability and minimizes waste. Choose a carbide or diamond scoring wheel suited to clay. Inspect the groove for uniformity before proceeding to the next step.
| Tool Type | Advantage | Note |
|---|---|---|
| Carbide scorer | Durable | Good for rough clay |
| Diamond wheel | Precise | Cleaner groove |
| Manual scorer | Portable | Requires steady hands |
Apply Even Pressure
After scoring a uniform groove, pressure must be applied evenly along the line to guide a clean break; uneven force risks jagged fractures or splintering beyond the score.
The cutter stabilizes the pipe, aligns hands opposite the groove, and increases force slowly until the clay parts. Consistent, moderate pressure avoids sudden shifts that cause shards. If the pipe resists, re-score lightly rather than forcing. After separation, inspect edges and sand or file minor irregularities. Proper technique reduces waste, limits injury, and preserves fitting surfaces, yielding a predictable, smooth result ready for joining or finishing.
- Relief at a clean split
- Confidence in control
- Respect for material
- Calm patience during work
- Satisfaction in a safe finish
Cut Clay Pipe With a Hacksaw or Diamond Blade
Using either a fine-toothed hacksaw or a diamond blade grinder, the cut must be deliberate and steady to avoid chipping the brittle clay.
The pipe should be firmly supported on a padded surface and marked clearly.
For a hacksaw, score shallowly along the mark, then use smooth, even strokes without applying excessive force.
For a diamond blade, run the grinder at consistent speed, letting the abrasive do the work and keeping the cut shallow on the first pass.
Pause to remove dust and check alignment.
Finish with light sanding of the edge to remove micro-fractures and make certain a clean mating surface.
Split Clay Pipe With Chisel and Mallet (Step‑By‑Step)
With the pipe supported on a padded, stable surface and the cut line clearly marked, the craftsman prepares to split the clay using a cold chisel and mallet.
He places the chisel on the line, holds it at a shallow angle, and taps gently to score. Progressive strikes deepen the fracture; steady rhythm prevents shattering. Once the crack follows the line, controlled blows split the section cleanly.
He inspects the break for completeness and repeats as needed, avoiding excessive force. Safety glasses and gloves remain in place throughout, and debris is cleared promptly to maintain a safe workspace.
- Tension easing as the crack forms
- Focus sharpening with each tap
- Relief when the piece separates
- Pride in a clean split
- Caution sustaining confidence
Smooth and Deburr Clay‑Pipe Edges Safely
When handling freshly split clay pipe, the craftsman inspects the cut edges for jagged fragments and loose particles before proceeding to smooth them. Using a file, rasp, or diamond pad, abrasive motion removes sharp chips; work proceeds from coarse to fine grit. A stiff brush clears dust; compressed air or a damp cloth removes residue. Protective gloves and eye protection remain worn; respirator use is recommended for dust. Finish by checking fit and ensuring no hairline fractures developed. The table below summarizes tools, purpose, and caution.
| Tool | Purpose | Caution |
|---|---|---|
| File | Remove large burrs | Avoid deep gouges |
| Rasp | Shape edge | Use controlled strokes |
| Diamond pad | Smooth finish | Wear dust protection |
Join and Seal Cut Clay‑Pipe Connections (Dry‑Fit)
Before applying any sealant, the fitter assembles the cut clay sections dry to verify alignment, socket engagement, and gap size. The fitter confirms millimeter-accurate fit, checks that spigots seat fully, and notes any uneven faces. Clean contact surfaces with a brush and wipe; remove dust and loose grit. Measure final gap and select appropriate gasket or mortar. Temporarily clamp if needed to maintain alignment during sealant curing. Test the dry-fit assembly visually and by gentle pressure to guarantee joints sit true before permanent sealing.
- Relief at a secure fit
- Confidence in a clean join
- Calm from careful checks
- Satisfaction in precise alignment
- Certainty before sealing
Dispose of Fragments and Troubleshoot Common Problems
After cutting, the fitter collects all clay fragments and dust into a rigid container lined with a disposable bag, sweeping the immediate work area and wiping tools to prevent abrasive grit from contaminating adjacent joints or surfaces.
Fragments are sealed and labeled for proper disposal per local regulations; large pieces may require transport to construction waste facilities while fines go to designated landfill or hazardous-waste streams if contaminated.
The fitter inspects cut ends for chips or hairline cracks, re-trims or smooths edges if needed, and tests fitment. If leaks, misalignment, or binding occur, the fitter checks for debris, remeasures, and adjusts coupling or bedding until secure.
Conclusion
Cutting a clay pipe requires patience, proper protection, and the right tools to avoid damage and injury. After inspection, measuring, splitting with a chisel and mallet, and smoothing edges, the piece is dry‑fitted and sealed before final installation. Was every step followed carefully to prevent cracks or misalignment? Proper cleanup and safe disposal of fragments complete the job, and addressing common issues promptly guarantees a durable, watertight repair.